
Introduction
A concrete vapor barrier under slabs is essential when moisture migration can affect floor finishes or indoor air quality. The guide walks you through when it matters, how to select the right barrier, and practical steps for taping seams to create a continuous, effective moisture barrier.
Key takeaways
- Understand difference between vapor barrier (full membrane) and vapor retarder.
- Moisture control protects subgrade, concrete integrity, flooring adhesion, and indoor air quality.
- Follow code, standards, and best practices for under-slab installations.
- Assess site moisture with tests before selecting a barrier system.
- Know membrane types and specs: sheet, liquid, and hybrid options.
- Plan layout and laps to minimize seams and ensure continuity.
- Master seam-taping techniques: clean surfaces, press, overlap, and test seals.
Table of Contents
- Introduction
- Key takeaways
- What is a vapor barrier vs. a vapor retarder
- Why moisture control under slabs matters
- Code, standards, and best-practice requirements
- How to assess slab and site moisture before choosing a system
- Types of under-slab membranes and material specs
- Tools and materials checklist
- Planning and scheduling the under-slab install
- Site preparation before laying membrane
- Layout best practices for sheets and laps
- Correct seam-taping techniques — step-by-step
- Best tapes and adhesives for under-slab membranes
- Handling penetrations: pipes, conduits, and sleeves
- Edge terminations at footings, walls, and slab perimeter
- Inspection, QA, and pre-pour checklists
- How to repair seams or patches discovered during inspection
- Safety and jobsite logistics
- Cost considerations and estimating materials/labor
- Common installation mistakes and how to avoid them
- Performance expectations and post-install verification
- Maintenance, warranties, and owner handover
- Quick reference: do/don’t cheat sheet
- Practical next steps and trusted sources
- Conclusion
- FAQ
What is a vapor barrier vs. a vapor retarder
A vapor barrier is a material that blocks most moisture, while a vapor retarder significantly slows moisture but doesn’t stop it entirely. In simple terms, barrier products aim for near-zero permeability (about 0.0–0.1 perms), and retarders fall in a low-to-moderate range (roughly 0.1–1.0 perms). These permeability ratings help you choose the right under-slab product, and they highlight why precise terminology matters for specifying materials in codes, installation expectations, and moisture management outcomes rather than relying on vague labels.
For a DIY or jobsite reader, this matters because picking the wrong type can lead to ineffective moisture control or unnecessary cost. Use a barrier in areas with high moisture or drainage concerns, and a retarder where soils are drier or drainage is adequate, keeping in mind that some laminates or thicknesses improve performance but won’t fully compensate for poor site conditions. Watch for myths—not all plastics are barriers, site conditions and drainage sources matter, and mismatching a barrier with a vapor source can undermine the project’s long-term durability.
Permeance and ASTM definitions
Permeance is the rate water vapor passes through a material, measured in perms. One perm means one grain of water vapor per square foot per hour can pass with a one-inch mercury vapor pressure difference. That number tells you how tight the layer is, plain and simple.
ASTM standards give the test methods and thresholds. The common references are ASTM E96 for lab measurement and product classification, and various codes use that result to call something a “barrier” or a “retarder.” Practically, products testing at ≤0.1 perms are treated as barriers; 0.1–1.0 perms are retarders. Manufacturers often list the ASTM test and perm value on product data sheets—use that, not marketing terms.
When to choose barrier vs. retarder
Pick a barrier (≤0.1 perms) when the slab sits over wet soil, a high water table, or when flooring is very moisture-sensitive (engineered wood, adhesives). A barrier is the conservative choice for basements, slab-on-grade in rainy climates, or where HVAC will not quickly dry the slab.
Choose a retarder (about 0.1–1.0 perms) on well-drained sites with low seasonal moisture and where the building has robust HVAC to control humidity. Retarders can be fine under unglued tile, concrete toppings, or in dry climates; they slow moisture without the extra cost or installation care a true barrier needs.
Also factor thickness and laminates: more layers or a foil facing can lower perm rating. Match the material to soil conditions, HVAC plan, and flooring tolerance—don’t assume all plastics are equal.

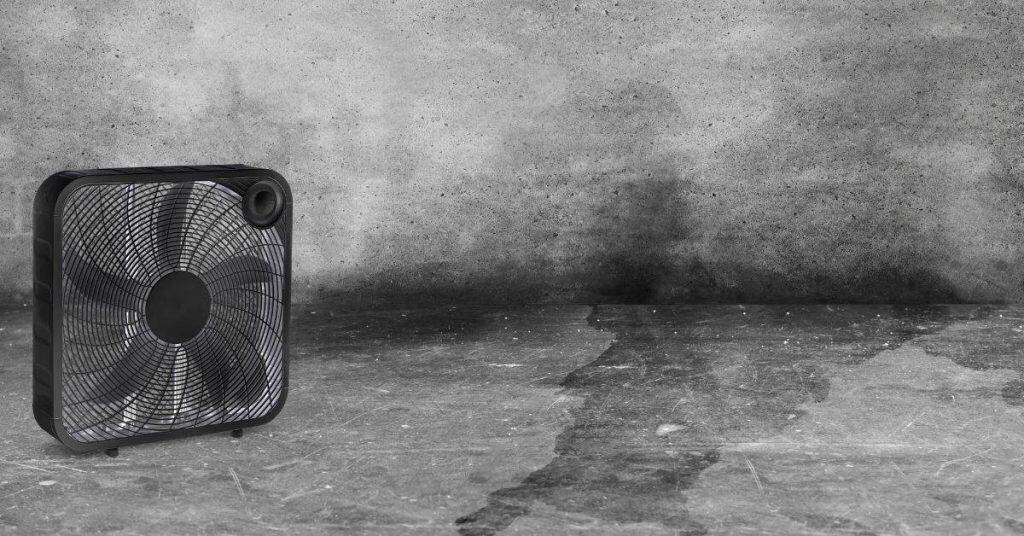
Why moisture control under slabs matters
Moisture under slabs moves primarily through capillary rise from the ground, vapor diffusion from damp soils, and pockets of trapped moisture within the concrete itself, and the rate of transfer is driven by concrete porosity and micro-cracks. Relative humidity measures ambient moisture in the air, while moisture vapor emission rate describes how quickly water vapor leaves the slab; both concepts matter because they determine how much moisture can reach the surface and interact with flooring materials and adhesives. This movement can cause adhesive bond failures, concrete staining, warping, tile lippage, mold growth, and long-term durability issues, making proper vapor control a foundational step before any flooring installation.
Understanding these mechanisms helps you choose appropriate vapor barriers, surface treatments, and installation procedures that maintain indoor air quality and reduce health risks associated with mold and allergens. It also highlights common missteps on the jobsite—gaps, improper seaming, premature protection removal—that undermine the barrier and allow moisture to migrate, while referencing typical RH and MVTR ranges guides you to practical thresholds for common flooring types. Knowing these thresholds helps you set expectations for tape seams and detailing, ensuring a continuous moisture barrier before finishing work and avoiding costly callbacks.
Long-term consequences for flooring systems
Hidden moisture under a slab attacks flooring from below. Solid wood and engineered planks cup, warp, and separate as they take on and lose moisture. Repeated cycles shorten service life and make costly repairs inevitable.
Vinyl and resilient floors rely on a stable substrate and adhesives. Elevated moisture causes bond failure, bubbling, and edge lift. Tile installations suffer too: moisture softens thinset, promotes tile delamination, and creates lippage as isolated tiles move independently.
Resinous and epoxy coatings can blister or blush when water vapor pushes up during cure or over time. Alkali and salt bloom from wet concrete stain finishes and degrade adhesives and coatings.
Moisture and HVAC/energy impacts
Moist slabs add latent load to the indoor environment. The HVAC system must remove extra moisture, not just heat, so runtime and energy use climb. Homes feel clammy even at normal temperatures.
Higher indoor humidity also raises the risk of condensation on cold surfaces and within assemblies. That pulls the system toward continuous dehumidification—expensive and hard on equipment.
Using a proper vapor barrier reduces the building’s latent load and can lower dehumidification needs. Better moisture control equals lower operating costs and a more comfortable, healthier interior.
Code, standards, and best-practice requirements
This section explains when vapor barriers are required under slabs by widely used codes and standards, and what to look for in materials and installation. It covers the IBC/IRC basics, including differences for residential versus commercial projects and how climate and occupancy affect barrier requirements. It also references ASTM E1745 for measuring permeance and typical installation rules, plus how ACI guidance supports moisture control and suggests compatible barrier materials and minimum thicknesses.
Local rules often trigger barriers where moisture risk is high, with variances and amendments varying by jurisdiction, so always check permit conditions and site-specific notes. For DIY or jobsite work, focus on clean edges, appropriate sheet thickness, proper edge and seam detailing, and approved tapes, to minimize gaps and bridges that can bypass the barrier. Document material type, installation method, and any local requirements to aid inspections and code compliance.
Climate- and application-based recommendations
For slab-on-grade in cold or mixed climates, use a high-performance vapor barrier with low permeance and robust seam tape. That stops soil moisture and reduces freeze-thaw and frost-susceptible slab issues. In warm, dry climates you can often get by with a lower-spec retarder, but check local code.
Basements and below-grade slabs need continuous membranes that extend up the foundation wall or pair with a drainage plane. Crawlspaces usually require encapsulation — a floor covering plus sealed seams — to control humidity and reduce HVAC load. Keep the membrane intact at walls and penetrations.
Radiant-heated slabs demand careful placement: the barrier should be directly under the slab so tubing sits on the vapor control layer, minimizing trapped moisture under the mat. Thicker or reinforced sheets are wise where heavy construction traffic or equipment could damage the membrane.
Documentation & inspection requirements
Submit product data showing compliance with ASTM E1745 (or code-specified standard), declared permeance, thickness, and manufacturer seam/tape systems. Include a layout drawing that shows laps, perimeter turns, penetration details, and sequencing for concrete placement and protection.
Inspectors will check membrane continuity, lap widths, taped seams, and termination at footings or walls. They also look for voids, gaps around penetrations, and whether the sheet is overlapped or sealed per the manufacturer. Photos and a simple QC checklist help speed approval.
Keep manufacturer installation instructions, installer name, and any field test records on site. If your jurisdiction requires a special inspection or variance, verify that at permit review to avoid rework.
How to assess slab and site moisture before choosing a system
Assess slab and site moisture by identifying common drivers—soil moisture, vapor transmission, rain infiltration, and subgrade drainage—and explain how each factor steers barrier decisions, including when a barrier is warranted versus pursuing alternative remediation. Include valid tests with clear purpose and thresholds: in-situ relative humidity (ASTM F2170) for slabs, calcium chloride (ASTM F1869) for moisture emission, concrete moisture–content probes, and on-site qualitative methods like moisture meters and surface dampness as initial screening; specify test timing from pre-pour assessments for retrofits to post-pour measurements on new slabs, and note how wet or dry seasons shift readings and barrier selection.
Results guide who should interpret them, when to consider alternative moisture-control strategies (soil remediation, improved drainage, or crawl-space encapsulation), and how to document findings for code compliance and contractor handoffs. This context helps DIY and jobsite readers plan sequencing, validate that chosen systems will tape seams correctly, and ensure long-term moisture control through proper sample sizes, reporting formats, and clear responsibilities without relying on external resources.
Step-by-Step Process
This sequence gets you from prep to final checks so you can decide if an under-slab barrier is needed.
- Clear and safety-check the site. Remove debris and note drainage; safe access and dry footing mean accurate tests.
- Do a quick visual sweep. Look for ponding, wet soils, or efflorescence; these flag higher moisture drivers.
- Run surface screening tests. Use moisture meters and surface damp checks to decide which lab tests to run next.
- Perform MVER (calcium chloride) where slabs exist and ASTM F2170 RH probes for new or thick slabs; these give emission and in-slab humidity data.
- Record seasonal context and repeat tests if readings border thresholds; moisture varies with recent rain and season.
- Review results against thresholds and system options; choose barrier, retarder, or site remediation based on readings and site drivers.
- Document all test reports, locations, and dates; this helps code compliance and contractor handoffs.
Calcium chloride tests (MVER)
Calcium chloride measures moisture vapor emission rate from cured concrete. You expose a known mass of salt under a sealed dish on the slab for 60–72 hours, then weigh the gain and calculate lb/1,000 ft2/24 hr.
It’s simple and widely accepted for flooring specs but only measures surface emission, not in-slab RH. Limitations: results vary with surface finish, temperature, and short exposure time, so use it as part of a broader assessment.
Use MVER when you need a quick emission number for existing slabs. If results approach spec limits, follow up with in-slab RH probes before installing sensitive flooring.
In-slab relative humidity probes
Drill holes to 40% of slab depth and place probes per ASTM F2170. That depth represents the moisture profile that affects flooring adhesives and finishes.
After sealing sleeves, condition the holes and allow equilibration—typically 72 hours to several days depending on slab thickness and ambient conditions. Why: these readings show internal moisture, not just surface conditions, and better predict long-term behavior.
Use RH probes for new pours before finishing floors and for ambiguous MVER results. Have results interpreted by the flooring specifier or a testing lab.
Visual and site indicators
Look for efflorescence, staining, or paint blistering on foundations and existing slabs—these indicate ongoing vapor movement. Check soil: saturated, silty soils and high water tables raise risk.
Note recent rainfall, grading, and site drainage. Downspouts, clogged swales, or perched water suggest remediation instead of or in addition to a barrier. Quick check: standing water within 24–48 hours after rain signals poor drainage that can overwhelm an under-slab system if not fixed first.
Use these observations to prioritize tests and to decide if soil improvement or drainage fixes are required before installing a vapor barrier.
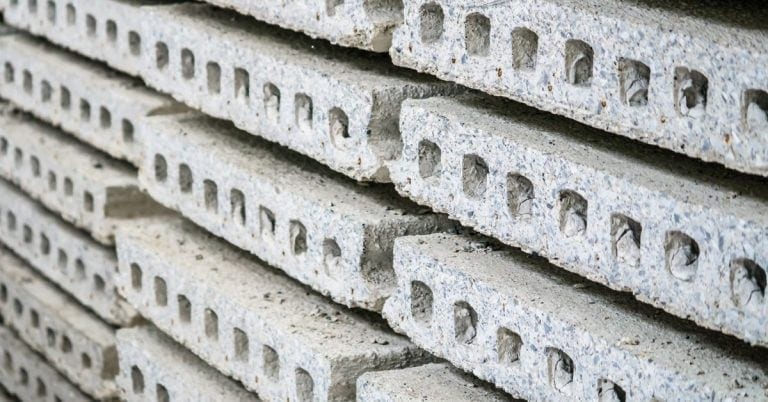
Types of under-slab membranes and material specs
Three main under-slab moisture barriers dominate residential work: polyethylene film (mono- and multi-layer), reinforced composite membranes, and proprietary sheet systems. Each category has distinct thickness ranges, tear and puncture resistance, and permeability characteristics that influence where it performs best. Typical film runs roughly 4–20 mils, reinforced membranes commonly 8–60 mils with added fabric or scrim for strength, and proprietary sheets vary in thickness with engineered laminates to balance durability and ease of installation.
From a DIY perspective, understanding material specs helps you pair the right barrier with slab goals, since crawl spaces may favor higher puncture resistance and lower permeability, while slabs benefit from predictable MVER targets and reliable seam sealing. This matters for meeting code expectations and best‑practice guidelines, because installation details determine moisture control longevity as much as material choice. Expect compatibility considerations with adhesives, top coverings, and how membrane type affects slab prep, moisture tests, roughness, and chamfers before placement.
Polyethylene thickness and expected performance
Polyethylene comes in common mil ratings: 6, 10, 15 and 20 mil. Thinner sheets (6–10 mil) are cheap and easy to handle, but they rip and puncture more readily during placement and concrete pouring. Thicker sheets (15–20 mil) resist jobsite abuse and are a better choice under heavy pours or when deliveries and foot traffic are expected.
Expect tradeoffs: cost rises with thickness, and seaming gets heavier to tape. For most residential slabs I recommend at least 10–15 mil for DIY installs; 6 mil only for protected, low-risk situations.
Reinforced and multi-layer membranes
Reinforced membranes combine woven scrims, laminated films or textured top layers. They’re built to resist puncture, tear and point loads from aggregate or rebar. That makes them a good choice on rough subgrades or when heavy equipment will be on site.
Multi-layer composites often include a low-perm core and wear layer, improving long-term durability and reducing the need for extreme overlap widths. For DIYers, they cost more but reduce risk of damage during placement and make seam integrity easier to maintain.
Manufacturer classifications (ASTM E1745 classes)
ASTM E1745 classifies polyethylene sheets as Class A, B or C based on puncture/physical properties and intended use. Class A is the heaviest duty and suitable for use under slabs with vehicular or heavy traffic; Class B is mid-range for general slab applications; Class C is lighter duty, often for vapor retarders in protected installations.
Match the class to your job conditions and local codes. If code or expected traffic isn’t clear, choose a higher class for margin. Labels and data sheets will state the class and key test results—use those when comparing products.
Tools and materials checklist
Plan ahead with a practical on-site checklist that covers all the tools and materials you’ll need for installing and sealing seams. For accuracy and budgeting, use the following minimum specifications as a baseline (adjust for project type and local codes): vapor barrier film at least 6 mil (0.006 in) thickness for residential projects; 8–10 mil for damp or high-traffic slab areas; standard widths 6–12 ft rolls.
Seam tape should be compatible with the chosen membrane and come in 2 in (50 mm) or 4 in (100 mm) widths with a pressure-sensitive adhesive backed by a compatible primer if required. Roller frames, full-width adhesive/paint rollers, seam rollers, utility knives, straight edges, a chalk line for alignment, and a full set of handheld cutters and replacement blades are essential. Include PPE such as safety glasses, gloves, knee pads, dust masks/respirators as needed, and proper ventilation for primer or solvent use. For primers and tapes, carry at least one solvent-based primer and one water-based primer to cover different membrane chemistries, plus a compatible tape adhesive if the tape is not pre-primed.
Beyond listing items, the section emphasizes proper preparation, storage, and on-site workflow to keep the job moving smoothly. It highlights surface cleaning tools (broom, stiff-bristle brush), degreasers, and concrete etching or priming requirements. Use a compatible bonding primer specified for the concrete and the membrane/tape system (see manufacturer’s data).
Prepare a test patch to confirm bond strength before laying full seams. For on-site handling, keep surface mats or drop cloths, spare blades, spare rolls stored upright away from moisture, and a simple inventory count at the start and end of each shift. Estimate rolls per area using the formula: area (m²) ÷ (roll width × roll length) with an extra 10–15% for cuts and waste. Store all rolls in a dry, heated area above ground level, away from direct sunlight and moisture. Dispose of waste materials following local regulations, and maintain PPE and adequate ventilation when applying primers or tapes.
Tape and primer compatibility
Match tape chemistry to the membrane. Polyethylene, HDPE, TPO and PVC all behave differently. Use tapes specified by the membrane manufacturer whenever possible. Ensure you have these minimums on hand:
- Membrane compatibility: confirm the tape is rated for the exact membrane material (PE, HDPE, TPO, PVC, or other) and for the substrate (concrete).
- Tape widths: keep at least 2 in (50 mm) and 4 in (100 mm) seam tapes to cover small and large seam widths.
- Adhesive type: acrylic tape for laminated acrylic membranes; solvent-based tapes for solvent-resistant membranes; butyl or hybrid tapes for porous or dusty surfaces after proper priming.
- Primer: carry at least one solvent-based primer for solvent-tolerant tapes and one water-based primer for acrylic tapes; verify tack time and drying time per the manufacturer.
- Thickness considerations: ensure barrier film is within the specified thickness (minimum 6 mil, with recommended 8–10 mil for harsher environments) and that tape backings are appropriate for the membrane’s thickness.
- Storage and handling: primers and tapes must be stored in sealed containers between 60–85°F (15–29°C) and 40–60% RH; protect from moisture and extreme heat prior to use.
- Testing: perform a short lap test with the exact tape and primer combination on a sample area before full seam installation.
Quick rules: use solvent-based primers with solvent-compatible tapes and water-based primers with acrylic tapes. When in doubt, test a short lap before laying full seams.
Equipment for QA and testing
Bring basic and optional test gear to confirm seam integrity and slab conditions. Many items are rentable and range widely in price.
- Moisture meters — Spot-check moisture in the slab and membrane. Look for a concrete-capable scale; expect hand-held units to be $100–$500. Keep batteries charged and calibrate per manufacturer.
- Relative humidity kits — For in-slab RH verification when required. Use ASTM-compliant kits or probes. Allow time for equilibration and protect probe holes from contamination.
- Calcium chloride kits — Simple MVER check for baseline moisture. Cheap and disposable; follow exposure times exactly. Use as a quick cross-check, not a final spec if probes are required.
- Smoke pen — Detects air leaks at seams and edges. Inexpensive and immediate. Use in calm air and hold smoke close to laps to pinpoint leaks.
- Infrared camera — Finds temperature differentials from air or moisture intrusion. Mid-price to high-end rental option. Understand thermal limitations and avoid direct sun.
- Pressure tester — Tests seam airtightness on taped areas. Useful for critical installations; often rentable and needs a trained operator. Follow test pressure and duration per spec.
- Adhesion pull tester — Measures tape bond strength on representative samples. Hand-held models give quick PSI readings. Use before full production to confirm materials and primer choices.
Planning and scheduling the under-slab install
Coordinating the under-slab install starts with mapping plumbing rough-ins, penetrations, sleeves, and fixtures that will pass beneath the slab, then aligning slope, venting, and future moisture barriers with the concrete crew’s schedule. Define the under-slab material and subgrade prep sequence by selecting a vapor-permeable aggregate that is compatible with drainage, assessing soil moisture, and planning targeted compaction and drainage so the liner can go in without damage. Establish the ideal sequencing for barrier installation, reinforcing, formwork, and dowels, and plan for limited traffic over exposed seams while designating a dedicated barrier crew.
Clarify barrier seam strategy and milestone timing, including sheet placement over treated soil, seam staggering, and tape or sealant methods to protect waterproof integrity around pipes, penetrations, and other openings. Coordinate with plumbing and utility work on trenching, backfill, and penetrations to avoid rework, and set clear handoffs between installation teams and the concrete pour crew with contingency buffers for delays. A pre-pour quality-check and sign-off—with a quick checklist, moisture tests, permit and locate verification, and documented photos—helps prevent problems during the pour and supports a smooth, durable slab.
Timing relative to plumbing and formwork
Put plumbing rough-ins and sleeves in place first. Map and pin every pipe and sleeve so the membrane can be cut and sealed neatly around penetrations. Verify slopes and venting before the liner goes down; you don’t want to lift the barrier after a leak or mis-routed line is found.
Install the vapor barrier after final subgrade prep and before most reinforcing is set. Place rebar chairs and light reinforcing on blockouts or stools so workers don’t walk directly on taped seams. Limit site traffic over the membrane and assign one crew to handle layout and taping to avoid tears.
When formwork and dowels are added, protect edges with sacrificial boards and mark penetrations clearly for the concrete crew. Schedule a short buffer between final tape sign-off and the pour to allow a quick re-check.
Weather and temperature considerations
Cold temperatures can ruin adhesion. Use tape and primers rated for the forecasted lows and plan installs during warmer parts of the day when possible. If it’s below the product’s minimum, heat the membrane or keep materials in a warm truck until application.
Keep the membrane out of prolonged sunlight; UV degrades polyethylene and adhesive. If sheets must wait, cover them with tarps and flip them daily. In wet conditions, prevent puddles on the subgrade and dry seams before taping.
If rain or thaw is likely during the pour, build contingency time into the schedule. Protect taped seams with temporary boards or lightweight geotextile until concrete covers them.
Site preparation before laying membrane
The site preparation step creates a flat, stable, and puncture-resistant subgrade to support the vapor barrier and the concrete slab. It covers grading to achieve evenness, proper slope, and water shedding, along with controlled compaction, a sand blinding layer to protect the membrane, and thorough cleaning to remove debris and contaminants. Together these practices minimize puncture risk and improve the surface flatness before membrane installation.
For DIY and jobsite success, follow clear tolerances and repeatable checks: specify compaction methods and target densities, verify a clean abrasive surface with the sand layer, and perform flatness checks to catch low/high spots before laying the membrane. A practical approach includes a simple QA mindset—document measurements, tests, and sign-offs, and avoid common mistakes such as skipping debris removal, failing to control oils, or neglecting dust suppression that can compromise adhesion and long-term performance.
Subgrade smoothing and blinding layer
Lay a thin bedding layer to create a uniform, abrasion-free surface under the membrane. Use clean, well-graded sand or fine granular material to fill small voids and break down sharp edges left by compaction equipment.
Target a finished blinding thickness of about 25–75 mm, with 50 mm as a practical aim on most jobs. Place the sand in even lifts, screed to line and level, then lightly compact or broom to a smooth finish so the membrane sits flat and contact is consistent.
Check for soft spots and reprofile high/low areas before final blinding. Keep the blinding dry and free of migration from heavy equipment; a disturbed or rutted sand layer loses its protective quality and invites punctures.
Handling sharp objects and debris
Walk the whole pad and remove anything that can puncture the membrane: rocks, broken concrete, roots, broken wire, nails and stray rebar ties. Use rakes, shovels and magnets to catch small metal bits, and hand-pick larger items to avoid dragging them around.
Trim or pull stumps and protruding roots flush with the subgrade rather than burning them. Cut exposed rebar down or bend it away from the slab footprint. Keep stockpiles off the prepared surface and sweep the area again after compaction.
Finish with a visual inspection and a magnet sweep. If you see repeated puncture points during trial runs, stop and re-clean the surface before laying the membrane—prevention here saves repair time later.
Layout best practices for sheets and laps
Start by choosing a primary lay direction that follows slab features such as joints and texture, and that minimizes wrinkles when rolling out sheets across large areas. Plan seam placement ahead of time, deciding whether seams run parallel to walls or across open zones, and keep them away from heavy equipment, high-traffic paths, or control lines. Use a typical lap width of about 6 inches (150 mm) and size sheets to reduce the total number of seams, while noting any product-specific recommendations that affect layout or overlap.
Before unrolling, prep a clean, dry surface and designate a staging area for rolled sheets, then unroll with a steady, controlled method to prevent tearing and wrinkling during placement. Choose a consistent seam pattern, such as long edges parallel, and use compatible seam tape with any primer requirements, while applying proper pressing or rolling to achieve a full bond and to avoid gaps. Following these steps reduces rework, speeds installation, and helps long-term performance by keeping seams aligned, well sealed, and free from blemishes that could affect backfilling or final finish.
Staggering seams and end laps
Don’t line up seams in a straight run across the slab. Stagger the end laps so no two sheet ends meet within the same bay. A typical pattern is to offset end laps by at least one full sheet width or a minimum of 3–6 ft (1–2 m) depending on sheet size.
Keep end-lap lengths generous. Aim for a minimum 6 in (150 mm) overlap for polyethylene products; increase to 8–12 in where traffic or loads will concentrate. Long end laps give you room to peel back, inspect, and tape cleanly without exposed edges.
Mark lap locations as you roll out so installers can maintain the pattern. Staggering reduces leak paths and makes taping faster and more reliable on the jobsite.
Laps at joints and construction joints
Avoid running seams directly over control or construction joints whenever possible. If a seam must cross a joint, lap the membrane a minimum of 12 in (300 mm) on each side of the joint and use a flexible seal or bandage tape that accommodates movement.
For formed construction joints, bring the sheet up and over the joint and secure it to sound, flat concrete on both faces. On saw-cut control joints, tuck the membrane into the joint and cover with a backer or soft seal before taping to prevent tearing from differential movement.
Always clean and dry the overlap area, apply primer if the tape manufacturer requires it, and roll the tape firmly to achieve a continuous, durable seal across joints.
Correct seam-taping techniques — step-by-step
Begin with a precise, repeatable sequence: confirm slab dryness and flatness, ambient temperature, and humidity limits, and verify no sharp protrusions or damage at the substrate. Decide if priming is required by the tape manufacturer and select compatible vapor barrier tape and seam materials, then lay out a practical seam plan and pattern to minimize waste. Prepare the surface by cleaning and drying, removing dust, oil, and curing compounds, and repair any cracks or irregularities before establishing an access plan for ongoing prep between steps.
Specifically, choose the correct tape width, thickness, and backing for the barrier type, then measure, cut, and align edges with precision to avoid wrinkles, bubbles, and edge lifting. Apply the tape in a controlled, center-to-edge fashion, bridging seams and smoothing while maintaining even pressure, then roll with the recommended tool and number of passes to ensure uniform adhesion and air-tightness. Finalize by sealing overlaps and performing a quick inspection, with attention to tack test and ventilation or safety considerations, so the jobsite outcome is durable and ready for subsequent work.
Step-by-Step Process
A straightforward sequence to prepare, tape seams, and verify a continuous vapor barrier under a slab.
- Inspect slab and environment. Confirm surface is dry, flat, and free of sharp protrusions; correct any issues before starting. A clean, defect-free substrate prevents punctures and poor adhesion.
- Lay out sheet pattern and mark seams. Plan laps to minimize waste and avoid long runs across seams. Check alignment visually and with a chalk line.
- Clean seam areas again and apply primer if required. Use a thin, even coat and allow tack time per manufacturer instructions. Test a small patch to ensure adhesion before proceeding.
- Measure and cut tape to length, allowing for at least 75–150 mm (3–6 in) overlap. Keep edges straight and avoid stretching the tape; cut with a sharp knife for clean edges.
- Apply tape centered over the seam, press by hand, then smooth from center outward. This seats the tape and expels air pockets; feel for uniform contact along the edges.
- Roll the seam with a weighted roller using steady pressure. Make 2–3 passes perpendicular and parallel to the seam to ensure full contact. A properly rolled seam makes a thin, even bond with no lifting.
- Seal end laps and terminations as the last step. Reinforce corners and penetrations with extra tape or patching. Inspect all seams and do a pull test or visual check before covering.
Surface prep and primer application
Prepare the seam path by removing dust, oil, curing compounds, and loose material. Use a broom and solvent-wipe if needed; the surface must feel clean and dry to the touch.
Only use primer when the tape manufacturer specifies it or when the substrate is porous or contaminated. Apply a thin, even coat with a low-lint cloth or brush and respect the recommended dry time; over-application can prevent adhesion.
Ventilate the area while the primer dries and check the ambient temperature and humidity limits on the product data sheet. Do a small tack test: press a tape scrap to the primed area and wait the stated dwell time to confirm immediate grab.
Tape placement, overlap, and pressure rolling
Align tape so it centers over the seam with a recommended minimum overlap of 75–150 mm (3–6 in). Keep edges parallel and butt or stagger end laps to avoid straight continuous joints that can unwrap.
Apply firm, even pressure when placing the tape. Start at the center of the tape and smooth outward to remove bubbles. Use a weighted roller—10–30 kg per meter width on most jobs—and make multiple passes until the tape fully adheres with no edge lift.
Check for wrinkles, trapped debris, or low spots immediately; lift and re-seat small errors or replace the tape if adhesion fails. Proper rolling makes a thin, uniform bond and a crisp sealed edge.
Sealing end laps and termination points
Finish sheet ends, folds, and penetration areas to maintain continuity of the vapor barrier. Fold back membranes at slab edges and secure with a termination strip or extra tape to prevent lifting during concrete placement.
Overlap end laps by the same minimum as seams and add a second strip across the joint for high-traffic or exposed edges. For pipes and penetrations, cut a snug hole, apply patch pieces with full contact around the penetration, and seal with tape or mastic as recommended.
Final inspection should confirm continuous contact around all terminations, no gaps, and durable edge adhesion before pouring. Reinforce any suspect spot and re-roll to ensure a watertight seal.
Best tapes and adhesives for under-slab membranes
Under-slab membranes rely on tapes and adhesives chosen for moisture resistance and long-term seal. The quick taxonomy covers butyl, acrylic, rubber-based, and modified bitumen products, each with distinct characteristics, strengths, and typical uses with membranes. Choose based on slab conditions, including moisture level, substrate roughness, ambient temperature, and subgrade compatibility, then match the tape to the membrane type.
For a DIY or jobsite reader, understanding how to apply them matters as much as knowing which to use. Essential installation steps include surface prep, priming if required, seam preparation, and mastering tape application techniques—stretching, pressing, and lapping—followed by proper curing or activation recommendations. Also consider adhesive compatibility, when to pair tape with liquid adhesives, the role of primers, and how to seal seams where different materials meet, while avoiding common pitfalls like edge gaps, misalignment, and temperature or moisture constraints that can compromise a durable vapor barrier.
Quick compatibility chart
Pick the tape family to match the membrane material and the slab conditions. Butyl tapes stick best to polyethylene and most reinforced sheets. They stay tacky and tolerate slight movement—good over plastic and smooth films.
Acrylic tapes are best on clean, non-porous substrates and reinforced membranes where long-term UV resistance and a firmer bond matter. They cure harder than butyl and resist edge creep.
Rubber-based tapes bond quickly to rougher surfaces and porous concrete, but they age faster and aren’t ideal for long UV exposure. Modified-bitumen tapes pair well with similar bituminous membranes and detail work where heat activation or torching is used.
When in doubt, match chemistry: rubber to bitumen/rubber compounds, acrylic to plastics and coated sheets, butyl for flexible PE films. Test a small patch if the substrate or membrane is unfamiliar.
Longevity and cure considerations
Tape service life varies by chemistry. Acrylic systems often outlast rubber-based and butyl tapes in years of dry service. Butyl stays flexible longer under movement. Modified-bitumen is durable where heat and heavy loading occur. Expect 10–30+ years for quality acrylics and modified systems; rubber and butyl typically less in harsh UV or chemical conditions.
Cure and activation need attention. Some tapes require pressure-only bonding, others benefit from heat or primers. Follow manufacturer temperature windows—many tapes won’t form a full bond below 40°F (5°C) or when substrate is wet. Store rolls flat, dry, and at moderate temperatures to preserve tack.
On the job, avoid cold application and don’t stretch tapes beyond recommended limits. If exposed before pour, protect seams from sunlight and wind; prolonged UV can degrade rubber and butyl. Do a quick adhesion check after 24–48 hours to confirm a reliable seal.
Handling penetrations: pipes, conduits, and sleeves
Penetrations from pipes, electrical conduits, mechanical sleeves, and future access points disrupt vapor barrier continuity and must be sealed with purpose-built methods. Begin with a clean, dry substrate, inspect edges, and plan the sealing approach before pours or tape is applied so the chosen solution fits the penetration material and the project site. Use a combination of pre-formed collars or sleeves, foam backer rods, sealants, and vapor-barrier-compatible tapes to create a continuous, gap-free boundary around every intrusion, selecting options designed for PVC, metal, or composite components and for complex configurations and critical joints.
Why this matters to a DIY or jobsite reader is simple: a well-sealed penetration preserves the vapor barrier, reduces moisture migration, and helps meet performance goals without rework or leaks after concrete placement. The guidance covers securing around irregular penetrations, multiple conduits, protrusions, or recessed sleeves with appropriate gasketing, closures, or caulk that bridge inevitable gaps without compromising barrier integrity. After sealing, perform a visual gap check, gentle flex tests, and re-verification after concrete pour and curing to ensure the barrier remains continuous and the assembly stays protected.
Sleeves, boots, and preformed collars
Use preformed boots or collars where possible. They come sized for PVC, metal and insulated pipes. A molded boot gives a reliable mechanical fit and reduces field cutting. Select products rated for below-slab use and compatible with your vapor barrier material.
Prepare the membrane by cleaning and drying the area around the penetration. Slide the boot over the pipe or place the collar over the sleeve flange. Prime the membrane if the manufacturer requires it, then firmly press the boot flange to the sheet, using a compatible sealant between the flange and membrane edge to bridge minor unevenness.
For larger gaps or non-cylindrical sleeves, use a mechanical clamp or stainless-steel band over the boot collar and add a bead of polyurethane sealant. A properly installed preformed collar keeps the vapor barrier continuous and speeds inspection on the slab pour day. Don’t rely on tape alone where movement or settling is expected.
Field-fabricated collars and patching
Cut a patch from the same membrane material that extends at least 6 inches beyond the penetration on all sides. Make a radial slit toward the hole, then form a cone or stepped skirt to fit tightly around the pipe or irregular shape. Dry-fit before any adhesive.
Brush-clean and prime both the sheet and the patch contact area. Apply a continuous bead of vapor-barrier-compatible sealant around the penetration, press the patch into place and smooth the edges. Use peel-and-stick flashing or compatible tape to secure the seam perimeter, overlapping at least 3 inches.
For complex clusters, build concentric layers: inner collar for immediate fill, outer patch to tie into main membrane. Finish with a pressure roll or hand tamp to ensure full adhesion and leave a visible sealant bead. Inspect by flexing the patch gently to catch gaps before pour. Keep repair pieces labeled so they’re checked again after concrete placement.
Edge terminations at footings, walls, and slab perimeter
Edge terminations for vapor barrier and waterproofing should establish clear termination heights at footings, wall bases, and the slab perimeter, with the membrane extending up the wall and a few inches above grade to maintain continuous protection across transitions. Specify acceptable fasteners, spacing, driving depth, and corrosion resistance so the membrane is secured without compromising waterproofing or structural integrity, and detail overlaps, primer compatibility, and sealing approaches where membranes meet coated or sprayed barriers.
Describe edge detailing at vertical transitions—wall intersections, footing edges, and corner abutments—covering tape or seam strategies, mechanical fasteners versus adhesive bonding, and reinforcement options for irregular corners or step-downs. Provide guidance on sealants, tapes, and joint treatments for perimeter gaps and penetrations to maintain continuity and prevent moisture migration. Include inspection and QC checks such as height verifications, continuous perimeter membrane, proper seams and tapes, avoidance of lapping failures, and coordination with future slab finishes and interior layouts.
Tie-in to vertical waterproofing
Terminate the vapor barrier up the wall at least 6–12 inches above the finished slab elevation or to the top of the footing where shown. Fasten the membrane to the wall with corrosion-resistant fasteners or termination bars set at the recommended spacing, taking care not to overtighten and buckle the sheet.
Where the foundation has a sprayed or trowel-applied waterproofing, clean and prime both surfaces and overlap the vapor barrier by 2–4 inches. Use a compatible adhesive or manufacturer-approved tape and pressure-roll the lap for a watertight seal. Match materials — avoid sticking dissimilar chemistries without a compatibility check.
At corners and step-downs, form a tight mechanical hold with a short termination strip or fastened bar, then seal with a compatible sealant or tape. Inspect for continuous contact and no gaps before backfilling or pouring concrete.
Curing and protection of exposed edges
Protect exposed membrane edges from foot traffic, trades, and UV while curing and before the slab pour. Install temporary rigid protection (plywood or plastic board) secured clear of the termination line to prevent tears and displacement.
Keep the membrane clean and free of concrete splatter by using drop boards or shrouds during formwork and pouring. If the edge is damaged, cut back to sound material and reseal with an approved patch and tape before concrete placement.
Document protection in the QC check: verify termination height, continuous coverage, and intact seals. Note any repairs and re-inspect after pouring but before finish trades proceed.
Inspection, QA, and pre-pour checklists
A thorough pre-pour inspection verifies site readiness, correct vapor barrier placement, and all formwork and subgrade conditions align with project specs before any concrete is poured. It also confirms that the slab area is clear of debris, grading directs runoff away, vapor barrier footprints match dimensions, overlaps are adequate, and moisture barriers or insulation meet required tolerances. Additionally, material verification, seaming QA, and pre-pour moisture and temperature checks are documented, and a concise safety and sign-off process ensures foremen and inspectors record names, dates, weather notes, and any non-conformances with corrective actions and timelines.
Why this matters for DIY crews is simple: a disciplined pre-pour checklist reduces later remedial work, prevents moisture-related defects, and supports consistent concrete performance through accurate moisture, temperature, and sealant control. By following the sign-off workflow and keeping a clear record, you gain accountability, facilitate safety compliance, and set the project up for a smoother pour with fewer delays caused by missing materials or poor tape seams. Treat the checklist as a practical roadmap on site, not a paperwork burden, so every hand-off to the pour crew reflects verified readiness and your team nails the pour first time.
Common visual checkpoints
Walk the slab perimeter and across field laps. Look for continuous overlaps of the vapor barrier at seams and terminations. Check that overlaps are the correct width and lie flat with no tenting or folds. Inspect tape runs for full contact; there should be no wrinkles, fish-mouthing, or skipped sections.
Scan the sheet for punctures, cuts, or abrasion marks and mark any defects for immediate patching. Verify all pipe and conduit boots are seated and sealed. Confirm the membrane ends are properly turned up or trimmed at forms and that sand or aggregate isn’t lodged under the film.
Note the inspector and foreman initials, weather, and any remedial actions on the pre-pour form before you pour.
Simple nondestructive tests (smoke, tape pull)
Do a smoke test on suspect seams by gently introducing a handheld smoke source under the overlap while an assistant watches the outside edge for leakage. Even a small visible puff shows a discontinuity that needs re-taping or sealing. Keep the test brief and safe—no open flames on the membrane.
For adhesion checks, perform a quick tape-pull sample: press a 6–12 inch strip of approved tape on the seam, wait a minute, then peel at 90 degrees with steady force. It should pull cleanly without lifting the film or leaving gaps. If adhesion fails, remove and reapply with proper primer or replace the tape per specs.
Record test locations and results on the QA checklist so fixes are tracked before pour.
How to repair seams or patches discovered during inspection
During inspection, diagnose the extent of seam damage to decide between minor lifting, open gaps, or punctures, and to assess current moisture conditions for urgency. Apply immediate field repair methods for on-site patching, such as temporary resealing with compatible seam tape or patch material, and consider acceptable temporary covers when a full repair must wait. Clear criteria determine whether to re-tape or proceed to full replacement, including repeated lift beyond a few inches, large gaps, punctures, tears, or moisture readings outside acceptable ranges.
Surface preparation and patching steps involve cleaning, drying, abrading, proper seam overlap, and applying repair tape or patch with correct pressure and curing time to create seamless edges against moisture intrusion. Choose under-slab rated tapes and patches that tolerate temperature and moisture, and ensure compatibility with the vapor barrier and concrete primer while observing ventilation and safety for solvent-based adhesives. Document the damage with photos, record dates and moisture readings, and schedule re-inspection to determine if the situation warrants re-taping or a full replacement per inspections or code requirements, which helps prevent future leaks, reduces downtime, and supports compliance with local codes.
Step-by-Step Repair Process
Follow this sequence to make a reliable field repair and leave the membrane ready for inspection or a pour.
- Clear and mark the area. Remove debris and note moisture readings so you know if urgency is high; a dry surface is required for good adhesion.
- Ventilate and don PPE. Solvent-based products need fresh air and gloves; safety keeps the job moving and inspectors happy.
- Prepare the surface. Wipe, dry, and lightly abrade the membrane; roughening improves tape bond and you should see a uniform matte finish.
- Cut patch/tape to size. Ensure minimum overlap per product spec—bigger is safer; check that the patch sits flat before adhesion.
- Apply adhesive or tape carefully. Press from center out to expel air; a roller or hand pressure ensures a continuous seal and no bubbles.
- Cure and protect. Keep traffic off and allow full cure per label; re-check adhesion and moisture after cure to confirm success.
- Document the repair. Photograph, log readings and materials used so the owner or inspector has a clear record.
Small puncture patch procedure
For holes under 2 inches, a local patch is fast and effective when done right. Work only on a clean, dry surface and keep tools nearby.
Trim ragged edges and clean with a compatible cleaner. Cut a patch at least 3″ larger than the hole, center it over the damage, then apply primer or adhesive if the tape system requires it.
Apply the patch and roll firm pressure from center outward to remove air. Let the repair cure fully; check adhesion and re-test with a light nondestructive method before covering.
Large repair or rework guidance
If seams lift repeatedly, tears exceed a few inches, or moisture readings are high, plan a section replacement rather than spot patches. Cut back to undamaged membrane and replace with a full sheet overlap per the manufacturer—typically 6″ or more.
Use approved welding, taping, or adhesive methods and ensure continuous laps with no voids. Document the area removed, materials installed, moisture readings before and after, and photos for the owner and inspector to approve the rework.
Safety and jobsite logistics
Safety and jobsite logistics focus on keeping walkways clear, preventing slip and trip hazards from clutter or dropped materials, and establishing dedicated staging areas for rolls and tools. It also covers grounding to minimize static buildup with polyethylene, proper PPE, and planning access routes, delivery zones, and workflow.
Applying these practices reduces injuries, protects equipment, and improves coordination among trades on a DIY project. Use proper lifting techniques, dollies or carts for heavy rolls, team lifts for awkward loads, and clear stacking limits to prevent tip-overs. Know where to place materials, how to ground static-sensitive items, and how to inspect PPE to stay effective on the job.
Traffic control and temporary protection
Keep people and equipment off the laid vapor barrier until protection is in place. Mark clear walkways with cones, temporary rails, or high-visibility tape. For short-term access, lay 3/4″ plywood sheets or OSB over a slip-resistant underlayment so trades can move without dragging or puncturing the membrane.
Stage rolling loads on skid boards or a tracked platform and limit forklift or heavy traffic to designated lanes. If trades must cross the membrane frequently, install sacrificial walkway panels and remove them before final inspection. Do not let dropped tools, buckets, or debris accumulate on the sheet — collect them immediately to avoid tear risks and trip hazards.
Keep a small repair kit and a short-section of membrane nearby so any damage is patched quickly. Communicate the protection plan at toolbox talks and post simple signage at site access points.
Handling volatile primers and VOC considerations
Work with solvent-based primers and VOC-emitting tapes only with adequate ventilation. Open doors, run exhaust fans, or use forced-air ventilation to move fumes away from workers. If ventilation is limited, schedule primer work during low-occupancy periods and keep ignition sources well away from the area.
Wear the right PPE: chemical-resistant gloves, safety glasses, and a respirator rated for organic vapors when exposures could exceed limits. Keep a local SDS for each product on site and follow the manufacturer’s exposure controls. Store primers in labeled, sealed containers and limit quantities on the slab to what you’ll use that shift.
Use grounding or anti-static procedures when transferring flammable solvents and keep hot equipment and open flames out of the vicinity. Report strong odors or dizziness immediately and stop work until the area is made safe.
Cost considerations and estimating materials/labor
Cost considerations for 1,000 ft2 mix a few membrane options with clear price ranges: standard polyethylene in the roughly $40–$80 range, reinforced textured varieties typically $70–$120, plus tape and sealants at roughly $10–$25 for butyl tape and $20–$40 per 1,000 ft2 for long-term seam tapes. Labor hours track a typical workflow: surface prep, barrier placement, seam taping, edging, and final inspection, totaling about 6–11 hours for a small crew, with costs varying by slab condition and penetrations. Key cost drivers include slab condition, barrier thickness, the number and handling of penetrations, waste, drainage considerations, disposal fees, and permits if applicable.
Contextualizing these figures helps you budget accurately and spot savings opportunities on real jobs. For DIY-leaning readers, it highlights where bulk purchases, choosing appropriate membranes, and scheduling to optimize crew time can cut costs without sacrificing performance.
Low-cost vs. high-performance tradeoffs
Cheap polyethylene (4–6 mil) will keep dirt and bulk moisture down. It costs the least per 1,000 ft2 and is fine for short-term, traffic-free pours. But it rips easily, has low puncture resistance, and ages poorly under UV or rough subgrades.
Upgrading to reinforced or textured membranes and premium seam tape raises material cost but cuts risk. Spending on a 10–20 mil reinforced sheet and factory-rated seam tape reduces tears, patch work, and risk of floor-covering failure later. For slabs with heavy trades, poor base compaction, or many penetrations, the extra cost often saves more in avoided rework and warranty claims than it adds up front.
Cost of rework and failure examples
A failed vapor barrier under a finished floor can be expensive. Typical repairs for a 1,000 ft2 area range from $2,500 to $8,000 for demo, moisture remediation, new underlayment, and reinstallation of flooring. Labor for cutting and patching concrete slabs or removing flooring drives most of the cost.
Common on-site examples: a taped seam that wasn’t primed leads to adhesive failure and replacement of flooring—expect 20–40 labor hours and material costs equal to 30–60% of the original install. Plan a contingency of 10–20% of total estimated materials and labor to cover unexpected penetrations, waste, or repairs. Small DIY fixes save money, but major slab rework almost always requires pros and multiplies cost several times over.
Common installation mistakes and how to avoid them
The top installation mistakes when taping a vapor barrier under slabs are insufficient sheet overlap, inadequate surface preparation, rushed or improper tape application, poor seam detailing at edges and openings, and failure to address penetrations or changes in slab grade. Prevent these by pre-cleaning and profiling the surface, following a specified minimum overlap direction, choosing tape and sealants compatible with the barrier, and applying with adequate time and pressure to ensure airtight, continuous seams. Also include checks for moisture, curing residues, laitance, paint or sealers, and temperature conditions, using a simple touch-and-stick or water bead test as a quick pre-install assessment and a clear edge-to-interior seam workflow.
This matters on the jobsite because a small lapse can equal big leaks or compromised insulation, and a field-tested workflow helps DIYers stay consistent from layout to final seam inspection with a flashlight or mirror. Knowing how to re-tape a loose seam, when to replace a damaged sheet, and how to document the installation supports code compliance and smoother inspections. The practical steps—dry-fit seams, broom-clean, tack if required, continuous seaming with proper overlap, and a thorough seam check—build confidence and save time by reducing callbacks and rework.
Real-world examples and consequences
I once saw a job where the crew skipped surface prep and ran tape onto dusty concrete. Within months the seams failed, moisture migrated up through the slab, and the owner discovered swollen subflooring and mold in a finished area. Fixing it required cutting into the slab edge, removing the finished floor, and a costly re-pour detail at the perimeter — weeks of downtime and a six-figure bill on a mid-size project.
Another typical case: crews used general-purpose tape that wasn’t compatible with the membrane. Wind and foot traffic peeled seams during the pour. The contractor had to stop work, replace entire sheets, and re-inspect every seam. That delay triggered liquidated damages and angry inspectors. Small savings on tape turned into large losses.
Finally, improper detailing at penetrations led to water tracking along a conduit and corrosion of embedded steel. The repair involved epoxy injections and localized slab patching. The takeaways: use the right materials, clean and test surfaces, and don’t rush seams. A few extra minutes per seam prevents expensive repairs, mold remediation, and failed inspections — and keeps your schedule intact.
Performance expectations and post-install verification
Realistic life expectancy depends on soil moisture swings, temperature, slab curing, punctures or damage to the barrier, and long-term tape seam durability, so set expectations accordingly. After pour, target clear performance criteria: continuous barrier, proper thickness, low vapor permeability per manufacturer specs, and alignment with local codes and project requirements. Verification should follow a timeline that starts with an initial visual inspection, then moisture testing at defined intervals using MVER or RH methods, and confirmation that seams and penetrations remain intact.
To verify tape seams and overlaps, perform adhesion checks, pull tests, and adhesive integrity checks, ensuring no gaps at corners, edges, or penetrations with re-taping as needed. Document and maintain a plan with as-built photos, recorded test results, warranty considerations, and recommended re-check intervals after high-moisture events or long delays before finishing. Common failure modes include punctures or openings, mis-taped seams, puncture repairs, resealing seams after trades, and when to replace sections, with quick action rules for temporary mitigation, rework scope, and when to involve a moisture-control specialist or manufacturer.
Long-term monitoring and sampling
After the pour, set a baseline RH or MVER reading within 7–14 days once the slab is cured enough for testing. Record location, depth (for RH probes) or concrete age (for MVER), ambient conditions, and the instrument serial number. Take at least two readings in representative areas—center and near edges or known moisture sources.
For sensitive installations (wood, adhesives, resinous floors) schedule repeat tests at 30, 90, and 180 days, then annually for the first two years. Keep test logs and time-stamped photos. If readings drift toward the manufacturer’s limit, mark the area and flag for follow-up.
Document everything: probe depths, weather during pour, and any trade activity that could breach the membrane. Good records make warranty claims and targeted remediation faster and cheaper.
Signs of failure after pour and remediation options
Watch finished floors for blistering, adhesive bond loss, efflorescence, or persistent damp spots. These are common indicators the vapor control did not perform. Start with non-destructive checks: visual inspection of joints, edges, and penetrations and spot RH or surface moisture readings.
If failures are local, use targeted remediation: remove finish in the affected area, verify slab moisture, and repair or re-tape the vapor barrier and reseal penetrations before reinstalling floor finish. For widespread or borderline readings, consider surface-applied moisture mitigation systems or a full rework of the membrane.
Decision rule: if RH or MVER exceeds spec by more than a small margin across multiple spots, stop work and involve the membrane manufacturer or a moisture-control specialist to scope repairs and protect your warranty.
Maintenance, warranties, and owner handover
This section outlines what to include at turnover and handover and what to verify after installation, covering turnover documentation, a thorough maintenance checklist, typical warranty language to request, post‑installation testing and commissioning, and the handover to facilities management and ongoing owner education. Expect the turnover package to specify warranty certificates, product data sheets, installation photos, seaming tape specifications, as‑built drawings, R‑value and moisture specifications, and testing reports, along with a practical routine maintenance schedule that includes inspection intervals, visual checks for tears or gaps in the vapor barrier, tape seam integrity, drainage and grading checks, sump pump and dewatering system status, and moisture monitoring protocols.
It also answers who is responsible for what under warranty terms, what constitutes a valid claim, and what documentation must be kept on file, plus clear post‑installation testing and commissioning criteria, moisture and vapor tests, calibration of moisture meters, AHJ or consultant sign‑off, and how results are recorded. Finally, it describes owner education and handover materials—operating manuals, service contact information, recommended maintenance cadence, and a simple repair protocol for small leaks or seam issues—and the handover to facilities management with a concise staff checklist and a long‑term care plan.
Why this matters to a DIY or jobsite reader: it translates complex requirements into a practical, negotiable package that defines responsibilities, keeps barriers performing as designed, and reduces surprises when maintenance or a claim is needed. The emphasis on documented proof, routine checks, and clear handover reduces downtime, supports compliant commissioning, and provides a reliable roadmap for ongoing care and sourcing, ensuring the installation remains durable and serviceable over time.
As-built records and photos
Take clear, dated photos of the vapor barrier before the slab pour, during seaming, and immediately after final taping. Photograph any repairs, overlaps, penetrations, and the location of floor drains and sumps. Include a seam map that shows tape type, width, and seam locations relative to gridlines or permanent reference points.
Store electronic files and a printed copy in the O&M manual. Add test reports and meter calibration records next to the photos so anyone can see the condition at handover. Mark areas tested for moisture and note the methods used.
Keep a simple index so facilities staff can find photos, seam specs, and test results fast. Label images with project name, location, and contractor contact info.
Manufacturer warranty and installer warranties
Get both manufacturer and installer warranties in writing. The manufacturer covers material defects; the installer covers workmanship and seam application. Verify the duration and start date for each and note any actions that void coverage, like improper site drainage or unauthorized repairs.
Check that adhesives and tapes used are listed in the manufacturer warranty. Ask for explicit language on what is excluded—UV damage, substrate movement, or damage from subsequent trades are common exclusions.
Document claim steps: who to call, required photos, test results, and time limits for filing. Keep contact info for both the manufacturer and installer in the handover folder.
Quick reference: do/don’t cheat sheet
This quick reference distills the top 10 must-dos and must-don’ts for contractors installing under-slab vapor barriers, emphasizing substrate checks, appropriate moisture testing, material choice, seam layout with solid overlap, and careful handling through pour and cure. It highlights practical actions like preparing a clean, dry slab, selecting a low-permeance barrier that meets code, and ensuring penetrations are properly sealed. It also cautions against common mistakes such as stretching the barrier, relying solely on tape for seams, and skipping edge detailing.
For a DIY or jobsite reader, following these steps helps minimize vapor leakage paths, protect the concrete from moisture-related defects, and keep the project compliant with inspections. The guidance also stresses documenting installation with photos and keeping records, so future checks and maintenance are smoother and less fraught with questions about how the barrier was installed. Overall, the checklist translates best practices into clear, actionable tasks that improve long-term performance and reduce call-backs.
Emergency fixes in the field
When you find a tear or hole right before the pour, keep fixes simple and reliable. Clean loose dust and water from around the breach. Cut a patch of the same or thicker polyethylene at least 6 inches larger than the damage. Lay the patch flat with no wrinkles and press firmly.
For immediate sealing use an approved vapor-barrier seam tape or a heavy-duty foil/poly tape rated for concrete work. Run tape at least 3 inches beyond the patch edge all around; press with a roller or hand to ensure full contact. If tape is unavailable, clean polyethylene can be temporarily overlapped and held with wide construction tape and then covered with a thin bead of compatible sealant as a stopgap.
Protect the repair during the pour with plywood or rigid insulation to prevent punctures. Photograph the repair and note it in your records for permanent follow-up. These are temporary measures — arrange for a proper, manufacturer’s-approved repair as soon as site conditions allow. Do not stretch the membrane to make a patch fit; that creates future failure points.
Practical next steps and trusted sources
After pouring, follow a practical, step-by-step workflow: verify slab flatness, clean and dry the surface, perform soil moisture tests, and plan seam layout before laying barrier material. For long-term bonding and performance, contact membrane and tape manufacturers for primers, compatibility charts, and detailed installation drawings.
Ensure correct seam alignment, folding techniques, and perimeter taping around walls, corners, and penetrations to keep seams wrinkle-free and watertight. Consider applicable building codes and moisture-control standards to choose compatible barrier and tape products, and collect manufacturer data sheets, MSDS, and installation manuals for future reference. Understanding common issues like poor surface prep, incompatible primers, or improper seam tension helps prevent costly failures and is easier with expert input.
What information to have when you call tech support
Have the basics ready before you dial. Read off the membrane product name, roll lot or batch number, tape SKU, and primer used. Include the installer name and any job-specific drawings or seam-layout sketches so the rep can match recommended procedures to your installation.
Describe site conditions in short facts: slab age, last pour date, surface flatness notes, substrate temperature, recent weather, and the latest moisture readings (RH or calcium chloride results). If you ran adhesion or mock-up tests, say the method and numbers. These data points let tech support advise on primers, dwell times, or whether a different tape is needed.
Send clear photos and a short video. One wide shot of the slab, close-ups of seams, edge conditions, and any penetrations. Attach MSDS and the membrane technical data sheet if you have them. State your question up front—bond failure, wrinkle control, or primer compatibility—and the rep will give targeted steps you can follow on-site.

Conclusion
Protecting moisture under a slab isn’t optional work; it’s a first-line defense against cracks, mold, and costly repairs. Get this right now and you’ll see steadier floors, fewer callbacks, and better long-term performance.
Follow this practical sequence: verify the moisture risk for your site, choose the right under-slab membrane, lay and align sheets with minimal laps, tape all seams and penetrations properly, seal edges at footings and walls, perform a quick pre-pour inspection, and document what you did for owner handover. Start with a small test area if you’re unsure, then scale up once you’re confident the tape, seams, and terminations behave as expected. Keep the job moving in a logical order to avoid backtracking, and double-check that all tools and materials are ready before you pull the first sheet.
Common mistakes to avoid: skimping on edge terminations where the slab meets footings or walls, using the wrong tape or adhesive for your membrane type, and skipping the pre-pour QA or not testing seams in daylight before concrete goes in. Safety rules are simple: never pull or stretch membrane under load, keep penetrations sealed and sleeved, and wear eye protection and gloves when cutting or taping. Do a small-field test of tape adhesion and lay flat sheets to prevent creases that create hidden voids.
If the site feels beyond your comfort or you’re hitting complex penetrations, calling a pro is the smart move. A quick consult can save wasted material, avoid leaks, and keep your schedule on track. You’ve got this—plan, execute, verify, and hand it over with confidence.
FAQ
When should I use a vapor barrier under a concrete slab?
Put one down whenever ground moisture can rise into the slab or flooring. Basements, garages, and areas with high water tables need it. If in doubt, treat it like a must-have.
What types of vapor barriers work best for slabs?
Polyethylene plastic is the standard—6 mil is okay for light use, thicker (10–20 mil) for damp soils or bigger slabs. Go thicker if the soil is stubborn or if the concrete is heavy. Follow local codes and supplier recommendations.
How do I tape the seams correctly to seal the barrier?
Overlap seams by about 6 inches and seal them with tape designed for vapor barriers. Tape all edges and around penetrations as you go. Don’t leave gaps or loose edges behind the formwork.
What are common mistakes to avoid when installing a vapor barrier?
Don’t skip the barrier under any portion of the slab. Don’t tape poorly or leave openings—moisture will find them. Make a clean, continuous job from start to finish.