
Introduction
Tile over radiant heat mats means installing tile on top of an electric floor heating mat with a careful layout plan. This introduction covers how to plan tile layout, where to place sensors, and how to account for depth as you build up. It’s a hands-on DIY approach, not a product pitch, so check your mat and sensor instructions and local rules.
For thickness buildup, prep the substrate, decide on bedding and thinset, and verify the mat is protected and functional before tiling. Place temperature sensors and any controls according to the system instructions, and use recommended spacings or borders to avoid interference. Keep a simple list of tools and materials, and consult manufacturer guidance and local codes to stay safe and compliant.
Key takeaways
- Assess system compatibility and mat type before tiling over radiant heat mats.
- Plan layout with mat placement, sensor routing, and tile layout to minimize cuts.
- Choose uncoupling membranes and thinset products compatible with electric mats.
- Account for thickness buildup in sequence to maintain floor height and clearance.
- Place temperature sensors and thermostats according to manufacturer guidance and zoning.
- Verify safety: follow electrical codes, keep mats dry, and test heat path.
Table of Contents
- Introduction
- Key takeaways
- When to Tile over Radiant Heat Mats and System Compatibility
- Layout Planning and Mat Placement Best Practices
- Uncoupling Membranes and Underlayment Selection
- Thickness Buildup: Layer Sequence and Safe Ranges
- Sensor and Thermostat Placement Best Practices
- Step-by-Step Installation Sequence
- Safety, Codes, Common Mistakes, and Troubleshooting
- Cost Considerations, Brand Compatibility, and Choosing Products
- Conclusion
- FAQ
When to Tile over Radiant Heat Mats and System Compatibility
Decide if electric radiant mats are the right choice for your room and substrate, then check the mat and tile manufacturers’ compatibility notes. Inspect the substrate for dryness, flatness, and structural soundness before you commit.
Choosing the wrong combo risks tile cracks, slow heat response, or a voided warranty. Ask about bathroom moisture protections, mat placement limits under cabinets, and required controls to avoid surprises later.
Electric mats vs hydronic systems
When choosing between electric radiant heat mats and hydronic systems for tiling, consider these differences:
Installation Method: Electric mats are simpler to install. They’re laid out like a carpet, with no need for pipes or manifolds. Hydronics requires more planning and labor.
Substrate Needs: Both systems need solid, level substrates. But electric mats can be installed on existing floors, while hydronics often needs new concrete slabs.
Tile Compatibility: Electric mats work with most tiles. Hydronics is compatible too, but you might need to adjust tile layout around manifolds and pipes.
Flooring and room compatibility checklist
Before tiling over electric radiant heat mats, use this checklist to ensure a successful installation:
- Tile type: Porcelain, ceramic, and natural stone tiles work best. Avoid vinyl or laminate.
- Room function: Suitable for kitchens, bathrooms, living spaces. Avoid areas with heavy foot traffic or furniture movement.
- Substrate: Dry, clean, structurally sound. No major cracks or voids.
- Mat type: Compatible with chosen tile and substrate. Check manufacturer’s guidelines.
- Heating zones: Mats should cover entire room for even heat distribution.
- Moisture risk: Low in living spaces, high in bathrooms. Consider moisture barriers or uncoupling membranes.
- GFCI/branch circuit: Required for bathroom installations to prevent electrical shock.
- Warranty and code compliance: Check manufacturer’s warranty covers tile over mats. Ensure installation meets local building codes.
Quick rule: If in doubt, consult the mat manufacturer or a professional installer.
Layout Planning and Mat Placement Best Practices
Map heating zones on paper, mark fixed fixtures, and plan mat coverage so heat reaches usable floor while avoiding toilets, cabinets, and heat-free strips. Lay out sensor locations and mat seams on your drawing before you cut or stick anything down.
Good layout prevents cold spots and wasted material and makes thermostat control predictable. Poor planning creates hot corners, difficult repairs, and wiring headaches you don’t want mid-job.
Room mapping and heating zone strategy
Start by sketching your room layout. Prioritize walking paths, open floor areas, and high-traffic zones for heat.
Divide the room into heating zones based on size and shape. Keep zones simple to avoid complex mat layouts and thermostat management.
Consider future expansions when defining zone boundaries. Leave some flexibility for adding mats later.
Clearances and obstacles (fixtures, cabinets, drains)
Measure and mark clearances around fixed fixtures like toilets, vanities, and radiant barriers. Mats should not be installed underneath these.
Leave a 2-inch clearance from plumbing lines and thick cabinet bases to prevent heat buildup and damage.
Avoid placing mats directly above drains or other plumbing fixtures that could cause cold spots or condensation.
Mat overlap, spacing, and cutting rules
Overlap mats by at least 4 inches to ensure even heat distribution. Stagger seams like bricklaying for better coverage.
Maintain a uniform 6-inch spacing between mats in serpentine or grid layouts. This promotes consistent heating and prevents hot spots.
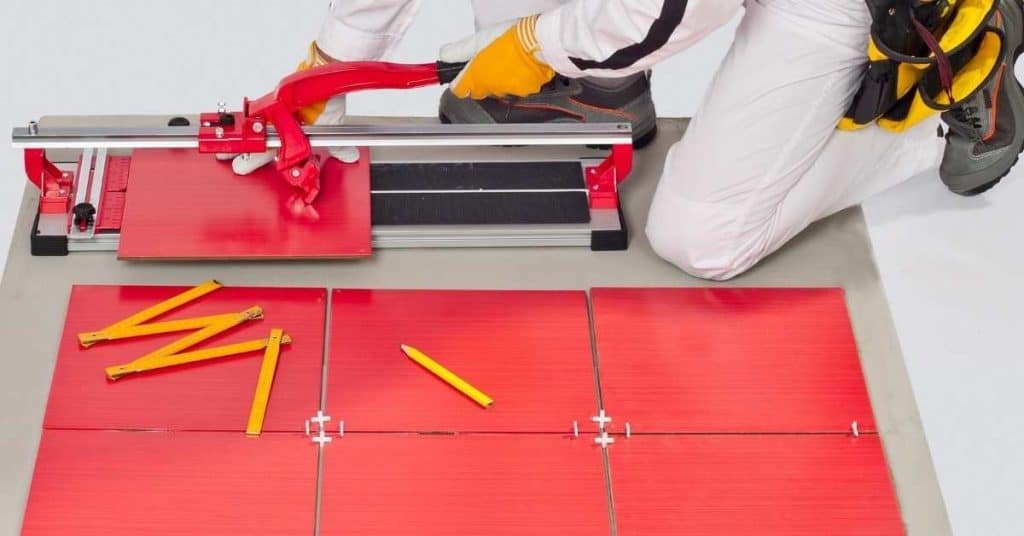
When cutting mats, use a utility knife with a sharp blade. Make sure to cut through the entire mat, including any backing material.
Uncoupling Membranes and Underlayment Selection
Choose an uncoupling membrane or underlayment that the mat manufacturer approves and that matches your substrate and tile choice; verify limits on temperature and thinset compatibility. Prepare the substrate to the membrane maker’s directions and plan how the membrane affects total build-up height.
The right membrane reduces tile cracking and tolerates substrate movement under heat. Use the wrong product and you’ll see debonding, reduced heat transfer, or warranty problems; when unsure, check the product data sheet.
Why use an uncoupling membrane with radiant mats
Uncoupling membranes, like DITRA, play a crucial role when tiling over radiant heat mats. They prevent tile cracking and improve adhesion by accommodating substrate movement under the heat of the mats.
Moisture management: Membranes also control moisture from the slab or subfloor, preventing it from reaching your tiles and causing issues like efflorescence or delamination.
Thinset bedding: These membranes allow for a thin, even layer of thinset mortar to be applied over them, providing a solid base for your tile installation while still allowing movement.
Choosing the right underlayment for height and tile type
Selecting the correct underlayment is key to achieving your desired finished floor height. Here’s how:
Membranes: Uncoupling membranes like DITRA are thin, typically around 2mm, making them ideal for maintaining a low profile.
Backer boards: These can range from 1/4″ to 3/4″. Choose based on your desired height and tile type. For large format tiles or natural stone, consider thicker boards for added stability.
Self-levelers: These can be poured to varying depths, allowing you to create a smooth, level surface at your desired height. Always check product PDS for compatibility with your chosen tile and adhesive.
Bonding methods between mat, membrane, and tile
Proper bedding strategies are vital to ensure a strong bond between your radiant heat mats, uncoupling membrane, and tiles.
Thinset mortar: Use a thin-set mortar specifically designed for use with uncoupling membranes. This provides a solid base while still allowing movement.
Mortar recommendations: Always follow the manufacturer’s adhesive instructions. Some may recommend using a sanded or unsanded mortar based on your tile type and size.
Embedding the mat in thinset: Ensure the mat is fully embedded in the thinset, following the manufacturer’s guidelines for coverage and depth. This provides a solid bond and ensures proper heat transfer.
Thickness Buildup: Layer Sequence and Safe Ranges
Follow the layer order substrate → membrane/underlayment → heating mat → thinset/mortar → tile, and tally each layer’s thickness against door thresholds and transitions. Measure and document each layer so you can adjust the substrate or tile thickness before installation.
Accurate height budgeting avoids sticking doors, uneven thresholds, and trim rework. Overbuild the floor and you’ll need extra edging, undercut doors, or costly rework—so verify component thicknesses from manufacturers.
Layer-by-layer sequence and purpose
The success of your concrete pour depends on the right layering. Here’s what you need to know:
Base Preparation: Start with a solid, well-compacted base. Check it with a screed or level to ensure no low spots that could trap water.
Vapor Barrier (optional): If your subgrade is prone to moisture, consider a vapor barrier. It prevents moisture from wicking up into the concrete, which can cause cracking. Check local codes and manufacturer instructions for suitable materials.
Subbase: A layer of clean, angular aggregate (like crushed stone) provides drainage and stability. The size depends on your load requirements – check with a structural engineer if unsure. Compact it well before laying the next layer.
Safe thickness considerations and how to check specs
When it comes to concrete thickness, there’s no one-size-fits-all. You’ve got to consider what’s under your slab and what’s on top of it.
Check base compaction. Before you pour, make sure your base is well-compacted. Aim for at least 95% compaction. Less than that, and your slab might crack over time.
Now, let’s talk thickness. For a typical residential slab, you’re looking at 4 to 6 inches thick. But it depends:
- Light-duty slabs, like driveways or patios, can be as thin as 3.5 inches.
- Heavy-duty slabs, like garage floors or industrial buildings, might need 6 to 8 inches.
And remember, thinner isn’t always better. Too thin, and your slab could crack under pressure. So, check those product data sheets and local codes before you decide.
Visual and metric checkpoints for matching adjacent floors
Use this checklist before laying your final tile layer to ensure a smooth transition with adjoining flooring. It’s crucial to prevent tripping hazards and maintain the aesthetic appeal of your space.
- Check threshold height: Measure the height of any door thresholds or transitions using a reliable digital caliper or a simple ruler. Ensure they match the finished floor height you’re aiming for.
- Verify subfloor level: Before laying your final layer, ensure your subfloor is level and consistent with adjacent areas. Use a long straight edge and feeler gauges to check for variations.
- Confirm tile thickness: Double-check the thickness of your chosen tiles. This should match or be slightly thinner than the maximum allowed buildup you’ve calculated earlier.
- Check adhesive thickness: Ensure your tile adhesive is applied at a consistent, even layer. Use notched trowels to maintain a uniform thickness and prevent lumps that could cause height variations.
- Inspect grout joints: After applying and curing the grout, measure the joint depth to ensure it’s within acceptable ranges (typically 1/8″ to 3/16″). Too deep or too shallow can affect the final floor height.
- Check for lippage: Inspect your tiles for any signs of lippage – where one tile is higher than its neighbor. Tap down any high spots with a rubber mallet and fine-tune your adhesive application to prevent this.
- Transition strips or ramps: If there’s a significant height difference, install transition strips or ramps to create a smooth transition between floors. Measure and cut these to match the required buildup.
- Final check with a straight edge: Before sealing your floor, lay a long straight edge across multiple tiles to ensure they’re level and aligned with adjacent areas. This helps catch any missed issues.
Quick rule: Always aim for a maximum buildup of no more than 1″ (25mm) over the existing subfloor. If you need to exceed this, consider undercutting doors or installing ramps to maintain a safe and comfortable transition.
Sensor and Thermostat Placement Best Practices
Place the floor sensor where it represents the typical walking surface—between mat runs and away from walls, cabinets, or direct fixtures—and route the lead so it won’t be pinched. Pick a thermostat location that’s accessible and not exposed to drafts or direct sunlight.
Correct placement gives steady, accurate control and avoids cycling or hot spots. A misplaced sensor causes short cycling or overheating and may mask real problems with the mat or adhesive.
Optimal floor sensor location and mounting tips
Place your floor temperature sensors where they’ll get a fair reading, away from edges and direct sunlight. That’s typically in the middle of the room, not under cabinets or near walls.
Route sensor wires through conduit for protection. Keep them off the floor to avoid damage during tile installation.
Mount sensors using the hardware provided, ensuring they’re level and secure. Don’t let them move around when you start grouting.
Remember, sensors measure floor temperature, not ambient air. So, keep them close to the floor – about 1-2 inches away.
Thermostat placement and wiring considerations
Mount your thermostat on an interior wall, away from direct heat sources or drafts. About 4-6 feet off the ground is a good height for accessibility.
Coordinate sensor and mat wiring runs to reach the thermostat location. Keep wires neat and organized in the walls or ceiling.
Use GFCI-protected circuits if your bathroom or kitchen has a shower or sink nearby. Follow electrical codes for proper circuit sizing.
Test your thermostat after installation to ensure it’s reading temperatures accurately and controlling heat effectively.
What to do if you forgot the sensor or need to relocate it
If you’ve already tiled over your radiant heat mats and forgot to install a floor sensor, don’t panic. You can still add one.
Carefully cut out a small section of tile where you want to place the sensor. Route the wire through conduit or chase it through the wall. Secure the sensor and replace the tile.
If your existing sensor needs relocating, follow the same process. Just make sure you don’t damage any mats in the process.
If you’re unsure about any part of this process, consult a professional. Damaging mats can void warranties and cause bigger problems down the line.
Step-by-Step Installation Sequence
Work in a clear sequence: prepare and test the substrate and mats, install membrane/underlayment if used, set mats and sensors, embed with thinset, then tile and grout—testing electrical continuity at key checkpoints. Keep a log of tests and photos as you go for future reference.
Following a strict order reduces callbacks and keeps electrical and tile work separate and testable. Skipping checks or rushing steps risks damaged mats, hidden failures, and a repair that requires pulling tile later.
Step-by-Step Installation Process
The following is a clear, numbered sequence of practical steps to help you install your radiant heat mats and tile successfully.
- Preparation: Verify all materials are on-site. Check safety equipment like gloves, goggles, and knee pads.
- Safety Checks: Turn off power at the main panel. Test GFCI/B breakers and ensure thermostat compatibility.
- Main Work: Install mat, membrane, thinset, and tile as per manufacturer’s guidelines. Keep bed thickness consistent to avoid lippage.
- Edge Protection: Protect cables at transitions using edge protection strips or metal edging.
- Cleanup & Final Checks: Inspect your work for any issues before commissioning the system.
Pre-install checks and substrate preparation
Before you start, ensure your substrate is ready to receive the radiant heat mats and tile. Moisture testing is crucial. Use a moisture meter to check for excess moisture.
Inspect the substrate’s flatness. High spots can telegraph through the tile. Low spots may cause mat failure. Use a level or straight edge to check.
Repair any debonds, delaminations, or cracks in the substrate. Ensure electrical circuits and plans are ready. Verify power is off at the main panel.
Installing the mat, membrane, and tile
Start by securing the radiant heat mats to the substrate using the manufacturer’s recommended method. Ensure they’re properly spaced.
If using an uncoupling membrane or thinset-compatible substrate, install it according to the manufacturer’s instructions. Ensure full coverage under heated zones.
Mix and apply thinset/mortar as directed. Allow it to set slightly before embedding the mat and tile. Use a notched trowel for proper coverage and adhesion. Set tiles using spacers for consistent grout lines.
Electrical hookup, resistance testing, and commissioning
Before installing the mat, perform an ohm/resistance test on each mat. Document readings for future reference.
Hook up electrical leads to the mat and thermostat according to wiring diagrams. Ensure all connections are tight and secure.
After grouting and curing, perform a step-by-step commissioning test of the electrical components and heating sensor. Turn on power at the main panel and verify the system functions as expected.
Safety, Codes, Common Mistakes, and Troubleshooting
Confirm electrical requirements, GFCI protection, and any permit or inspection rules before work starts, and always test mat continuity and insulation resistance at the jobsite. Secure wiring, keep the circuit off while embedding, and document tests for the inspector or warranty claim.
Safety and code compliance protect you and keep the system serviceable. Common DIY errors—poor coverage, bad sensor location, or insufficient thinset—lead to uneven heat or failures; if you see odd readings, re-test continuity and check sensor placement first.
Electrical Safety and Code Compliance
Safety first: Always involve a licensed electrician for final wiring. They’ll ensure your radiant heat mat installation is up to code.
GFCI Protection: Use GFCI outlets or required protection to prevent shock hazards in wet areas like bathrooms and kitchens.
Permits and Documentation: Check local, IEC, or NEC requirements. Pull permits when needed. Keep records for future reference and warranty purposes.
Common Installation Mistakes and How to Avoid Them
Knowing these common errors can save you time, money, and potential damage:
- Improper Sensor Placement: Follow the manufacturer’s guidelines. Place sensors where they’ll get accurate readings.
- Inadequate Thinset: Use enough thinset or uncoupling membrane for proper coverage and support.
- Cutting Mats Improperly: Measure twice, cut once. Follow mat size guidelines to avoid overlaps or gaps.
- Exposure to Moisture: Protect mats from moisture during installation. Use drop cloths or plastic sheeting.
Avoid these mistakes and your tile over radiant heat mat job will last for years.
Troubleshooting and Maintenance Tips
If you’re having issues, follow this diagnostic flow:
Cold Spots: Check mat placement. Ensure mats are evenly spaced and cover the entire area.
Thermostat Faults: Verify wiring connections. Clean contacts if necessary. Replace thermostat if needed.
Resistance Changes: Test resistance with a multimeter. Contact manufacturer or pro if readings are off.
Regularly check your system for any issues. Document changes and service calls for future reference.
Cost Considerations, Brand Compatibility, and Choosing Products
List the cost drivers: mats, membrane/underlayment, thinset, thermostat, and any prep work, then compare compatibility notes between brands for voltage, sensor type, and warranty terms. Factor in waste, odd room shapes, and whether a pro is needed for the electrical hookup.
Matching products correctly prevents warranty problems and rework. If you’re unsure about specs, check product labels and tech sheets and avoid mixing systems that don’t explicitly list one another as compatible.
Budget breakdown: materials, labor, and hidden costs
The quality of your radiant heat mat installation depends heavily on the materials you choose. Here’s a breakdown to help you estimate costs.
- Heating Mats: Consider coverage area, mat type (standard vs. membrane), and any required accessories like sensors or thermostats. Look for mats with even heat distribution and good warranty coverage. Avoid cheap mats that may not last or perform poorly.
- Membranes & Adhesives: Choose compatible membranes to protect your subfloor and prevent moisture issues. Opt for quality thinset mortar for a strong tile bond. Look for products with good reviews and proven performance.
- Substrate Prep Materials: Include costs for leveling compounds, primers, and any necessary repairs or underlayments. Skimping on prep can lead to cracking tiles and poor heat transfer.
- Floor Heating Control & Sensors: Consider the type of thermostat (programmable, smart), sensor placement, and any required wiring. Ensure sensors are compatible with your chosen mat brand to avoid voiding warranties.
- Edge-to-Edge Coverage & Waste: Estimate material waste for cutting and irregular room shapes. Order extra materials to account for overage and prevent mid-project delays.
- Labor Costs (if hiring): Get quotes from licensed professionals. Consider their experience, references, and whether they include cleanup in their estimate.
- Hidden Costs: Don’t forget about tools you may need to purchase or rent, disposal fees for old materials, or any required permits. Overlooking these can bust your budget.
Comparing brands and compatibility checklist
Before purchasing, use this checklist to ensure products are compatible and meet your needs.
- Voltage: Check if the mat’s voltage matches your home’s electrical system (120V vs 240V). Incorrect voltage can damage mats and void warranties.
- Mat Construction: Consider mat thickness, spacing between wires, and heat output per square foot. Thinner mats may require additional insulation for optimal performance.
- Sensor Type/Placement: Ensure sensors are compatible with your chosen thermostat and can be placed according to manufacturer guidelines. Incorrect sensor placement can lead to poor temperature control.
- Thermostat Integration: Verify the thermostat is compatible with your chosen mat brand and offers features you need (programmable, smart, etc.).
- Membrane Compatibility: Check if the membrane is designed to work with your chosen mat. Using incompatible membranes can cause moisture issues and void warranties.
- Adhesive Compatibility: Ensure the thinset mortar you choose is compatible with both your tile and radiant heat mats. Incompatible adhesives can lead to weak bonds and tile failure.
- Warranty Requirements: Follow manufacturer guidelines for installation, maintenance, and testing to keep warranties valid. Neglecting these requirements can void warranties.
- Local Codes & GFCI Requirements: Ensure chosen products meet local electrical codes and require any necessary GFCI protection.
- Test Reports & Customer Support: Look for test reports demonstrating product performance. Check if the manufacturer offers good customer support in case of issues.
Quick rule: Always compare products using their datasheets and consult with manufacturers when unsure about compatibility.
When to hire a pro vs DIY
While many homeowners can install radiant heat mats themselves, there are times when hiring a professional is best. Here’s how to decide.
DIY: If you’re comfortable with electrical work and have experience installing flooring, you may be able to tackle this project yourself. Start by ensuring your subfloor is level, dry, and structurally sound. Follow manufacturer guidelines for installation, testing, and commissioning. Always prioritize safety.
Hire a Pro: Consider hiring a licensed installer or electrician if you’re unsure about any aspect of the project, especially electrical work. Professionals can ensure your system is installed safely, correctly, and up to code. They also typically offer warranties on their labor.
Additionally, consider hiring help if your project involves complex layouts, multiple zones, or requires extensive substrate preparation. If you’re unsure about your abilities or the scope of the project, it’s always better to err on the side of caution and hire a professional.
Conclusion
Tile over radiant heat mats is doable if you stay disciplined about planning, thickness, and sensor placement. When you finish, the floor should be smooth, durable, and safe to use, with heat responding predictably and tiles staying put.
First, verify system compatibility, pick an appropriate uncoupling membrane or underlayment, lay out the mats with rough measurements, check the total thickness against the tile and thinset you’ll use, position any sensors and the thermostat where heat spreads evenly, test the mat with power off the area, dry-fit the tiles, mix and apply thinset to spec, and allow full cure before grouting. Keep the sequence tight and don’t skip steps that affect movement, bonding, or heat control.
Common mistakes to avoid are skipping the uncoupling layer or using the wrong thickness buildup, placing sensors or thermostats in hot spots or shadows, and not testing the mats before tiling. Also avoid overloading joints with too much mortar, ignoring manufacturer guidance on products and timing, or rushing the curing period. Always stop if you notice unusual heat, scorching, or cracking edges, and use proper personal safety gear.
When in doubt about electrical connections, complex layouts, or unusual floor structures, call a licensed professional. Otherwise, take it step by step, respect the safe ranges, and you’ll end up with a reliable, long-lasting surface you can trust. You’ve got this—plan, verify, and proceed with confidence.
FAQ
What are radiant heat mats like DITRA-HEAT and how do they work with tiles?
These mats embed electric heating tubes or cables that heat the floor surface. They are designed to be embedded under a tile setting bed, not under wood or carpet. Always check the manufacturer instructions and label for compatibility with tile adhesives and maximum mat coverage.
What are the main benefits of using radiant heating with a tile floor, and what should I expect during installation?
Tiles feel warmer underfoot and heat losses are reduced if you keep the heat low and steady. The install adds steps to your tiling project, so plan your sequence and allow for proper curing times. Follow product guidelines for thinset, grout, and mat placement to avoid hot spots.
How do you install electric floor heating cables or mats under tile, and where should the temperature sensors go?
Lay the mat or braid the cables as per the directions, then cover with a compatible uncoupling/membrane if required. Sensor placement is typically in a protected spot where it reads representative floor temps, not near heat sources or walls. Do not exceed the installation clearances shown on the product label or datasheet.
What basic electrical specs should I confirm before starting (voltage, wattage, compatibility), and what should I check on product labels or instructions?
Check the label or manual for the intended voltage, total wattage, and mat size that matches your room. Verify that your thermostat and control system will work with the mat type you’re using. If in doubt, read manufacturer instructions and local guidance before buying or wiring.