
Introduction
Prepare the subfloor properly before tile to prevent cracks and failures. You’ll learn how to identify common problems, perform practical tests, and apply fixes that set a solid base for tile installation. The guide walks through actionable steps, sensible rules of thumb, and real-world tips you can use on a project.
Key takeaways
- Inspect moisture sources, uneven framing, and damaged subfloor sheathing before work.
- Verify floor flatness within 1/8 inch every 6 feet using straightedge.
- Reinforce joists or create blocking where structural movement is detected.
- Use uncoupling membrane to reduce crack transfer and accommodate substrate movement.
- Aim for full bond by cleaning, priming, and applying recommended thinset per spec.
- Address lippage risks with edge-to-edge tile placement and controlled adhesive.
Table of Contents
- Introduction
- Key takeaways
- Initial inspection: what to look for before you start
- Tests to verify subfloor readiness
- Structural repairs and reinforcement
- Leveling, flattening, and addressing lippage risks
- Underlayment, membranes, and installation systems
- Surface preparation: cleaning, priming, and adhesion prep
- Common problems during and after tile installation and how to fix them
- Tools, materials checklist and safety considerations
- Conclusion
- FAQ
Initial inspection: what to look for before you start
Begin with a systematic visual survey of all subfloor types, including wood, concrete, and any existing finishes. Look for stains, squeaks, flex, gaps, and signs of movement, plus any prior repairs or patches. Note any unusual conditions that could affect tile installation.
Document dimensional checks and flatness with a straightedge or 4-foot level, identifying high and low spots. Plan grinding, underlayment, or patching steps based on what the manufacturers allow. Reference the tolerances specified by tile and underlayment makers and note any deviations for later review.
Structural condition and flatness checks
Before you start tiling, ensure your subfloor is structurally sound and flat. Use this checklist to inspect.
- Joist spacing: Verify joists are evenly spaced (e.g., 16″ or 24″) and match the span rating for your floor load.
- Deflection test: Gently bounce on the floor. If it deflects more than L/360 (where L is the span between joists), consult specs or a pro.
- Subfloor thickness: Measure to ensure it meets tile and underlayment manufacturer requirements.
- High spots: Use a straightedge or 4-foot level to find high spots. Grind or sand these down if they exceed acceptable tolerances (e.g., 1/8″ in 10 feet).
- Low spots: Identify low spots and plan for underlayment or patching to bring them up to level.
- Gaps between joists: Check for wide gaps that could cause tiles to crack. Fill with appropriate material if necessary.
- Squeaks: Locate squeaks by walking on the floor. Tighten or sister joists as needed.
- Warping or twisting: Check for warped or twisted subfloor sections. If found, consult specs or a pro before proceeding.
Quick rule: Always follow tile and underlayment manufacturer guidelines for acceptable flatness ranges (e.g., 1/8″ in 10 feet).
Signs of moisture and contaminants
Check for moisture and contaminants before tiling to prevent issues later on.
- Stains: Look for water stains, mold, or mildew. These indicate potential moisture problems.
- Efflorescence: Check for white, powdery deposits on concrete slabs. This indicates excess moisture.
- Mold: Inspect for visible mold growth, which can cause health issues and bonding problems.
- Previous coatings or adhesives: Identify any old coatings or adhesives that could interfere with new tile adhesion.
- Wood moisture content (WMC): For wood subfloors, measure WMC. Aim for 6-8% for best results.
- Concrete slab moisture: Test concrete slabs with a calcium chloride test or relative humidity (RH) meter. Follow tile manufacturer guidelines for acceptable levels.
- Relative humidity (RH): Measure RH in the room where you’ll be tiling. Ideal range is 35-60% RH.
Quick rule: If moisture tests exceed manufacturer guidelines, address the issue before proceeding with tiling.
Mechanical and transition constraints
Ensure your transitions and finished floor height meet requirements before tiling.
- Door clearances: Check door swing clearance. Tiles may add thickness, so you might need to adjust doors or frames.
- Threshold heights: Ensure thresholds are level with the finished floor height. Adjust if necessary.
- HVAC vents: Locate and mark HVAC vents on your subfloor plan. Cut tiles around them as needed.
- Substrate thickness: Measure substrate thickness to ensure it meets tile manufacturer requirements for finished floor height.
- Flooring transitions: Plan for transitions between different flooring types (e.g., tile to carpet).
- Risers and treads: For stairs, check riser heights and tread depths. Tiles may affect these measurements.
- Radiant heating systems: If present, ensure they’re compatible with your chosen tiles and adhesive.
Quick rule: Always consider finished floor height when planning transitions and door clearances.

Tests to verify subfloor readiness
Define each test type and how it ties to subfloor readiness, including how results influence the next steps. Focus on moisture, pH, adhesion, and dry-times, and ensure tests align with manufacturer expectations. Keep the purpose clear for on-site decisions.
Provide brief, repeatable procedures for sampling, equipment, and simple pass/fail criteria. Document methods, thresholds, and any deviations, and plan when to re-test. Create a concise test log with dates, locations, readings, and photos for traceability.
Moisture testing for concrete and wood
Before tiling, test your subfloor for moisture. Excess moisture can cause tiles to lift or crack.
Concrete: Use a calcium chloride test kit or a relative humidity (RH) meter. Apply the calcium chloride disc according to manufacturer’s instructions. If it gains more than 1 lb in 24 hours, your slab is too wet. For RH meters, readings above 75% indicate high moisture.
Wood: Use a wood moisture meter. Readings over 12-13% suggest excessive moisture. Always check with tile and mortar manufacturers for acceptable thresholds.
pH and salt (efflorescence) testing
High pH or soluble salts can hinder tile adhesion. Test your subfloor before tiling.
pH: Use a pH test kit. Apply the solution to the surface. Results above 10-12 may indicate high pH, which could affect mortar bond.
Salts (efflorescence): Look for white deposits or use an efflorescence meter. If present, consider dehumidification and proper cleaning before tiling to prevent salt migration into your tile installation.
Adhesion and surface bond tests
Ensure your subfloor accepts mortar by performing small-area pull-off or bond tests. This is crucial for existing coatings and primers.
Use a pull-off adhesion tester. Apply the device to the surface, following manufacturer’s instructions. If it fails to adhere properly, consider using a compatible primer or patch material before tiling.
Always test in inconspicuous areas first. Document results and any remedial actions taken.
Structural repairs and reinforcement
Differentiate between wood and concrete subfloors by noting typical failure modes like soft spots, rot, loose planks, or cracks. Explain how each condition affects tile prep and what must be corrected first. Use this as a guide for decisions about repair or replacement.
Outline criteria for replacing panels or joists versus repair, and describe reinforcement options such as sistering or injections for cracks. Include fastening patterns and subfloor thickness considerations to help plan the work. Consider consulting a structural professional for persistent issues.
Fixing squeaks, loose panels, and gaps
Squeaky subfloors and loose panels can cause tile failure. Here’s how to fix them:
Fasteners: Tighten or replace loose screws/nails. Use 2-1/4″ or 2-1/2″ screws for 3/4″ plywood/OSB, spaced 6″ on center.
Adhesive: Apply construction adhesive between panels to prevent movement. Use a bead about 8″ from edges and 16″ apart.
Panel replacement: If a panel is severely damaged or rotten, replace it. Ensure new panels match existing thickness and species.
Repairing cracks and spalls in concrete
Cracks and spalls in concrete subfloors can affect tile installation. Here’s how to repair them:
Epoxy injection: For hairline cracks (less than 1/8″), use epoxy resin injection. Drill holes, insert ports, inject epoxy, then remove ports.
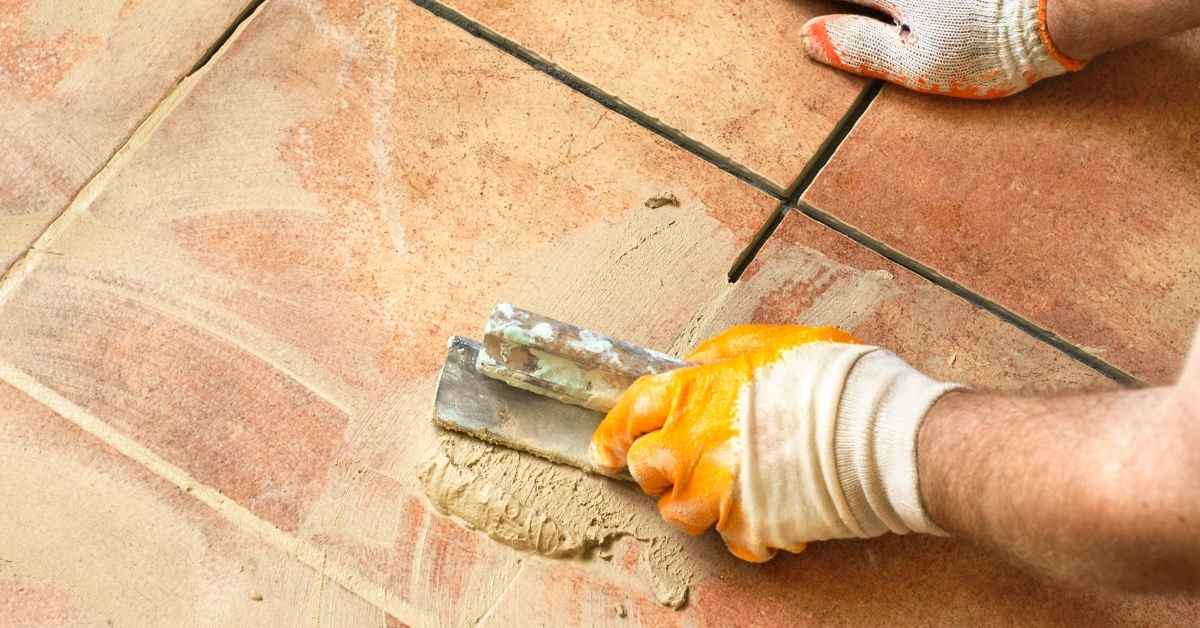
Patch mortars: For wider cracks or spalls, use a concrete patch mortar. Clean the area, apply primer, trowel in mortar, and smooth with a float.
Tile installation restrictions: Allow repaired areas to cure fully before tiling. Avoid installing tiles directly over repairs; offset them to distribute weight evenly.
Reinforcement and deflection control
Controlling deflection is crucial for successful tile installation. Here’s how:
Adding blocking: Install 2×4 or 2×6 blocking between joists to reduce deflection. Space blocks 16″-24″ on center, securing with screws.
Sistering joists: If joists are sagging, sister them by adding a new joist alongside the existing one. Secure with screws or toenailing.
Backer board system: For concrete slabs, use an appropriate backer board system to control deflection and provide a stable base for tiling.
Leveling, flattening, and addressing lippage risks
Clarify target flatness and lippage tolerance for common tile sizes and perform quick checks with a straightedge, feeler gauges, or other simple tests. Use the results to choose between feather coating, self-leveling underlayments, patching, or screeds. Keep the approach practical and tile-specific.
Compare correction options by depth and material, from micro-high spots to larger flatness challenges. Outline step-by-step prep and application requirements, including priming and curing notes to minimize lippage. Use a flow of checks to prevent repeat issues later in the job.
Choosing the right product for depth and load
When it comes to leveling your subfloor, choosing the right product is crucial. It’s all about balancing the required build-up with the traffic loads your floor will bear.
Self-leveling underlayments (SLU) are great for larger flatness challenges. They can handle up to 1/4″ in depth and spread evenly across the surface. But remember, they’re not designed for heavy traffic areas or deep repairs.
On the other hand, Portland cement-based patching compounds are perfect for localized repairs and can handle depths up to 2″. They’re also great for filling cracks and spalls in concrete. But they don’t spread as easily as SLUs, so you’ll need to apply them carefully.
Always check the manufacturer’s guidelines for traffic loads and compatibility with your chosen tile type.
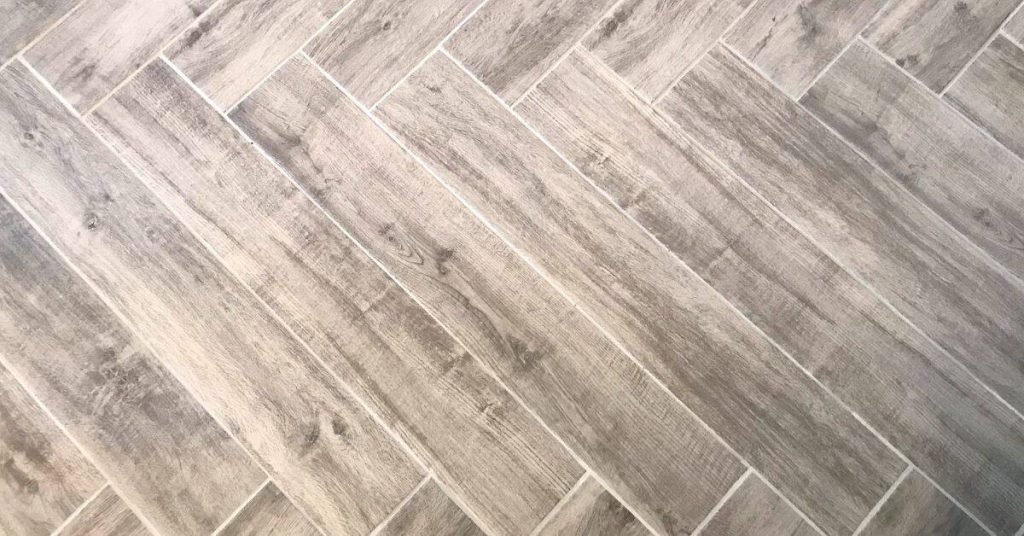
Techniques for large-format tile and grout joint control
Large-format tiles demand stricter flatness tolerances. Lippage, where one tile is higher than another, becomes more noticeable with larger tiles.
To prevent lippage, ensure your subfloor is as flat as possible before tiling. Use a straightedge to check for high spots and low spots. For micro-high spots, use a feathercoat or SLU. For deeper divots, consider using a screed or more patching compound.
As for grout joints, wider joints can help hide minor subfloor imperfections but can also make lippage more noticeable. For large-format tiles, stick to joint widths of 1/8″ to 3/16″. This helps maintain a consistent look across your floor.
Always test your flatness and lippage tolerance before tiling. Use a feeler gauge or a straightedge with the 3-4-5 rule to ensure your subfloor is up to par.
Curing, drying times, and sequencing
After applying your chosen product, it’s crucial to let it cure and dry properly. This ensures a strong bond with your tile and prevents future movement.
Most SLUs and patching compounds take around 24-72 hours to dry, depending on the manufacturer’s guidelines and environmental conditions. But curing can take up to 28 days. During this time, keep the area free from traffic and moisture.
Before tiling, ensure your subfloor meets the required moisture and cure requirements. This usually means a moisture content of less than 3% for wood and a pH level between 6-8 for concrete. Always test before you tile to avoid costly mistakes.
Also, consider the sequencing of your work. It’s best to level, flatten, and address lippage risks before installing your moisture barrier and tiling. This ensures a smooth, even surface for your tiles to adhere to.
Underlayment, membranes, and installation systems
Define and compare core underlayment types for tile, including backer boards, cementitious underlayments, uncoupling membranes, and waterproofing layers. Note typical substrates they pair with, such as concrete or plywood. Describe how each system contributes to rigidity, flatness, and movement management.
Explain installation decision criteria, such as load, surface tolerances, and moisture exposure. State when it’s appropriate to combine systems, like uncoupling over concrete with a moisture barrier in wet zones. Include standards to check and practical testing steps before tile beds go in.
Backer Board and Cementitious Options
Cement backer boards and cementitious underlayments are popular choices for tile installation. They provide rigidity, flatness, and help manage moisture.
Installation basics: Backer boards are typically 1/2″ or 1/4″ thick and come in 3′ x 5′ sheets. They’re fastened with screws or nails over wood or concrete substrates. Use construction adhesive at seams for added strength.
Cementitious underlayments can be applied as a slurry, poured-in-place, or lightweight formulas. They’re ideal for leveling uneven surfaces and filling minor cracks. Follow manufacturer guidelines for mixing and application.
Uncoupling and Waterproof Membranes
Uncoupling membranes reduce stress transfer between the substrate and tile, preventing cracking. They’re ideal for concrete slabs with hairline cracks or movement.
Installation: Uncoupling membranes are laid out like a mat, with grooves to accommodate thinset. Waterproofing membranes can be sheet or liquid-applied. Both should be compatible with your chosen adhesive and follow manufacturer guidelines for installation.
In wet areas like showers, always use a waterproof membrane. Some uncoupling membranes also provide waterproofing, but check the product data sheet to confirm.
Combining Systems for Complex Issues
Sometimes, one system isn’t enough. Here’s how to layer them:
Moisture concerns: Start with a waterproofing membrane over concrete or plywood. Then apply an uncoupling membrane followed by a cement backer board or cementitious underlayment.
Movement concerns: Begin with patching and leveling the substrate. Then apply an uncoupling membrane, followed by a cement backer board or cementitious underlayment for rigidity and flatness.
Always follow TCNA Handbook guidelines and perform field verification tests before installing your tile bed.
Surface preparation: cleaning, priming, and adhesion prep
Clarify the scope of cleaning targets, including dust, oils, old coatings, and adhesive residues. Consider concrete porosity and moisture evidence as part of the prep plan. Align cleaning goals with the needs of the next steps in tiling.
Explain when primers or bonding agents are required and how they influence mortar choice. Include adhesion and moisture tests and how results guide substrate prep and repair decisions. Provide a simple planning checklist to avoid rework and ensure compatibility with tile products.
Removing old adhesives and coatings
Before laying new tile, you must remove all old adhesives and coatings from your subfloor. Residual contaminants can prevent proper adhesion of your new mortar and tiles.
Mechanical methods: For tough residues like old thinset or mastic, use a mechanical grinder with diamond blades. Start with a coarse blade to remove the bulk, then switch to a finer one for a smooth finish. Safety first: wear protective gear, including safety glasses and ear protection.
Chemical methods: For stubborn adhesives or coatings, use a chemical degreaser suitable for your substrate. Follow manufacturer’s instructions carefully, ensuring you wear appropriate PPE. After application, allow the solution to sit for the recommended time before scrubbing with a stiff-bristle brush. Rinse thoroughly and let it dry.
Before tiling, test for residual residue using a simple water drop test: apply a few drops of water on the surface. If they bead up or don’t absorb quickly, more cleaning is needed.
Primers, primer selection, and application tips
Primers serve two main purposes: they improve adhesion of thinset mortar to the subfloor and seal porous surfaces to prevent moisture migration.
When to use: Primers are crucial for very dusty or non-porous substrates like concrete slabs with low absorption rates. They’re also necessary after repairing cracks or spalls, as patch products may not provide the same level of adhesion.
Selection: Choose a primer that’s compatible with your substrate and mortar. For example, use an acrylic primer for concrete slabs, and ensure it’s suitable for your chosen thinset mortar. Always check manufacturer’s recommendations.
Application tips: Apply primer using a paint roller or sprayer, following the manufacturer’s guidelines on coverage rates. Ensure the surface is clean, dry, and free of debris before application. Allow the primer to dry for the recommended time before applying mortar.
Final visual and tactile checkpoints before thinset
Timing: Perform this checklist just before mixing your thinset mortar to ensure your subfloor is ready for tiling.
- Flatness: Check for any new high or low spots using a straight edge and feeler gauge. Address any issues with leveling compounds if necessary.
- Dryness: Test for moisture using a calcium chloride test or a more modern alternative like the Tramex moisture meter. Ensure readings are within acceptable limits.
- Cleanliness: Re-check the surface for dust, oils, or residual contaminants. Remove any with appropriate methods.
- Temperature: Ensure the subfloor temperature is between 50°F and 90°F (10°C and 32°C) for optimal mortar performance.
- Materials on site: Have all necessary tools, materials, and manufacturer’s installation instructions ready. This includes thinset mortar, trowels, spacers, grout, etc.
- Tile type: Ensure the tiles you’re about to install match those used for test installations or samples.
- Mortar selection: Double-check that your chosen thinset mortar is compatible with your substrate and tile type.
- Adhesion tests: If performed earlier, recheck adhesion test results to confirm they’re still valid.
Quick rule: If any of these checkpoints fail, address the issue before proceeding. Skipping this step can lead to installation failures and costly rework.
Common problems during and after tile installation and how to fix them
Identify common failures such as hollow spots, cracked tile or grout, debonding, and movement-related cracking. Describe how these issues typically appear and what they signal about the substrate or installation. Use this as a diagnostic baseline.
Offer problem-specific fixes, including removal and re-setting for hollow spots, crack isolation, and regrouting for cracks. Include preventive measures like proper subfloor prep, correct underlayment, and movement joints to minimize recurrence. Determine when to escalate to a professional for structural or large-area issues.
Detecting and repairing debonded or hollow tiles
Hollow-sounding tiles are a common issue. Tap them gently with a wooden block and listen for a dull, hollow sound instead of a solid thud.
Remove and reset any debonded tiles. Scrape off old adhesive, clean the surface, apply fresh thinset, and re-set the tile. Use backer board if needed for extra support.
For minor hollow spots, you might get away with just regrouting. But remember, this is only a temporary fix. The tile may still debond later.
Prevent recurrence by ensuring your subfloor is flat, clean, and properly prepared before tiling. Use the right underlayment and fasteners for your specific application.
Cracked tiles and grout failures
Cracks can happen due to movement, improper support, or substrate issues. First, identify the cause:
– Movement: Cracks follow a pattern, often at corners or near changes in plane.
– Improper support: Cracks radiate from a single point, indicating insufficient support beneath the tile.
– Substrate issues: Cracks are random and widespread, suggesting problems with the subfloor itself.
Repair by replacing cracked tiles, isolating cracks with flexible grout or crack isolation membrane, or addressing substrate issues if necessary. Consider adding control joints to manage movement in large areas.
Moisture-related post-installation problems
Symptoms of moisture intrusion include tiles lifting, grout discoloration, or musty odors. Use a moisture meter to confirm your suspicions.
If the slab is too wet, address the source (e.g., leaking pipes, high humidity) before applying any waterproofing. Then, install a moisture barrier membrane under your tile.
If moisture comes from above (e.g., condensation), ensure proper ventilation and consider using an anti-condensation membrane.
Regularly inspect your tiled area for signs of moisture intrusion. Early detection can prevent costly repairs down the line.
Tools, materials checklist and safety considerations
List core field tools and test equipment such as levels, straightedges, chalk lines, pry bars, and moisture meters. Include common measuring and cutting gear you’d bring to the job. Add waste containment and basic task-specific items for subfloor prep.
Provide a practical materials list, including patching compounds, underlayment options, thinset, bonding agents, fasteners, sealants, and compatible products for different subfloors. Include PPE and safe handling of chemicals, plus waste disposal and environmental considerations to follow on site.
Essential Tools and Test Instruments
Before you start prepping your subfloor, make sure you have these essential tools and test instruments on hand. They’ll help you identify issues and ensure a solid base for your tile.
- Straightedge & Level: Check flatness and levelness of the surface.
- Moisture Meter or Hygrometer: Test for excess moisture that could damage tiles later on. Skip this, risk tile failure due to moisture-related issues.
- Angle Grinder with Diamond Blade: Remove high spots and level uneven surfaces.
- Trowels (1/4″ & 1/2″): Apply thinset mortar and leveling compounds evenly.
- Mixing Equipment (bucket, drill with paddle): Ensure proper mixing of compounds for even coverage and adhesion.
- Chalk Line: Snap lines to mark out areas for patching or tiling.
- Utility Knife: Trim excess material and create clean edges.
- Square: Ensure accurate 90-degree angles when marking and cutting.
Quick rule: Always double-check your tools before starting. Missing one could lead to costly mistakes.
Personal Protective Equipment and Safe Work Practices
Safety should always be your top priority when preparing a subfloor for tile. Here’s what you need to protect yourself and others.
- Safety Glasses: Protect eyes from debris and chemical splashes.
- Dust Mask or Respirator: Guard against inhaling harmful dust particles. Skip this, risk respiratory issues.
- Cut-Resistant Gloves: Prevent cuts when handling sharp tools or materials.
- Hearing Protection: Shield ears from loud power tools and grinders.
- Steel-Toed Boots: Protect feet from falling objects and heavy equipment.
- Proper Lifting Techniques: Avoid back injuries when moving heavy materials. Improper lifting can lead to serious health issues.
- Solvents & Primers: Work in well-ventilated areas, use appropriate PPE, and follow manufacturer’s guidelines for safe handling.
- Cementitious Products: Wear gloves when handling wet products. Wash hands thoroughly after contact.
Quick rule: Never compromise on safety. It’s not worth the risk of injury or illness.
Environmental Impact and Disposal Guidance
Consider the environment when selecting materials and disposing of waste. Here are some tips to minimize your impact.
- Select Low-Impact Materials: Choose products with low VOC emissions, recycled content, or certified sustainable materials.
- Recycle Removed Substrate: If possible, recycle old tile, wood, or concrete instead of sending it to landfill.
- Proper Disposal of Hazardous Wastes: Follow local regulations for disposing of chemicals like adhesives and sealants. Improper disposal can harm the environment.
- Containerized Waste: Use designated containers for waste collection to keep your workspace clean and organized.
- Low-VOC Products: Prefer products with low volatile organic compounds to reduce air pollution.
Quick rule: Every little bit helps. Make eco-friendly choices whenever possible.

Conclusion
Getting this right matters for safety, durability, and a clean, professional look. A solid, level subfloor keeps tiles from cracking, prevents trips, and saves you from costly fixes down the road.
Check the structure and the tests you ran, confirm the area is dry and clean, then address any repairs, level or grind as needed, install the right underlayment or membrane, prime and prep the surface, and finally verify adhesion with a small test patch before full installation. Move in this order, document what you change, and don’t skip a step—each one protects the tile job you want to last.
Common mistakes to avoid are skipping tests or rushing leveling, choosing the wrong underlayment for your system, or skipping priming and clean surface prep. Always wear proper PPE, ventilate when working with primers, keep a clean work area, and work in daylight or good lighting so you don’t miss high spots or debris. Never combine incompatible products or force-fit a repair that isn’t supported by the subfloor conditions.
If you run into unfamiliar structural damage, excessive moisture, or a floor that can’t be brought to a true level within your tolerance, call a professional. For everything else, follow the steps you’ve laid out, keep the work area controlled, and you’ll finish with a durable, safe tile install you can be proud of.
FAQ
Is my subfloor strong enough to tile on?
If you can pry at a corner and it moves more than a whisper, it’s not ready. A solid subfloor should feel stiff and stay flat under light pressure. If you’re unsure, test a small area first and plan fixes before you tile.
What tests should I run before tiling?
Do a straight edge check across the whole floor to find high and low spots. Check for moisture if you have a concrete slab or wood floor that’s been exposed to water. Follow up with a simple pull test to see if the surface pins or delaminates under tape or thinset.
What fixes exist for a concrete subfloor with cracks or uneven spots?
Fill cracks with a quality patching compound and level with a wide-tloor squeegee or trowel. For high spots, grind them down and recheck. If the slab is badly out of level, you may need a self-leveling underlayment and proper curing time before tiling.
What should I do about moisture or a damp subfloor?
Moisture must be controlled before tile goes down. Use a moisture barrier or appropriate underlayment rated for tile if you have a dry, moisture-prone subfloor. Don’t skip this step or you’ll fight peeling and grout failure later.