
Introduction
Uncoupling membranes are a lightweight underlayment that helps separate layers to move with the substrate. They’re designed to reduce cracking and relieve some movement, but you need to check what the product is rated for and follow the label. In plain terms, you install them between the substrate and the finish to give you a gentler ride for coverings.
Materials vary from sheet membranes to mesh-reinforced rolls, and each type has its own installation quirks. For walls, floors, and ceilings, follow the manufacturer’s guidance for prep, seams, and overlap, and verify if you need thinset or adhesive compatible with the membrane. If you’re unsure about the process or your project, weigh the DIY path against professional help and check local rules.
Key takeaways
- Uncoupling membranes isolate substrate movement to reduce tile cracks and edge pops.
- Follow manufacturer directions and wear knee pads and eye protection during installation.
- Choose membranes compatible with substrate, tile type, and anticipated movement in floors.
- DIY installers should verify substrate flatness and waterproofing compatibility before choosing.
- Use appropriate thinset and grout, following membrane manufacturer’s setting requirements.
- Best on floors with moderate movement; walls and ceilings require different detailing.
Table of Contents
- Introduction
- Key takeaways
- What an Uncoupling Membrane Is and How It Works
- Where to Use Uncoupling Membranes — Ideal Applications
- Types of Uncoupling Membranes and How to Choose
- Installation Overview: Steps for Successful Performance
- Costs, Value, and When It’s Worth the Money
- Common Mistakes, Safety, and Long-Term Maintenance
- Real-World Comparisons and Case Studies
- Conclusion
- FAQ
What an Uncoupling Membrane Is and How It Works
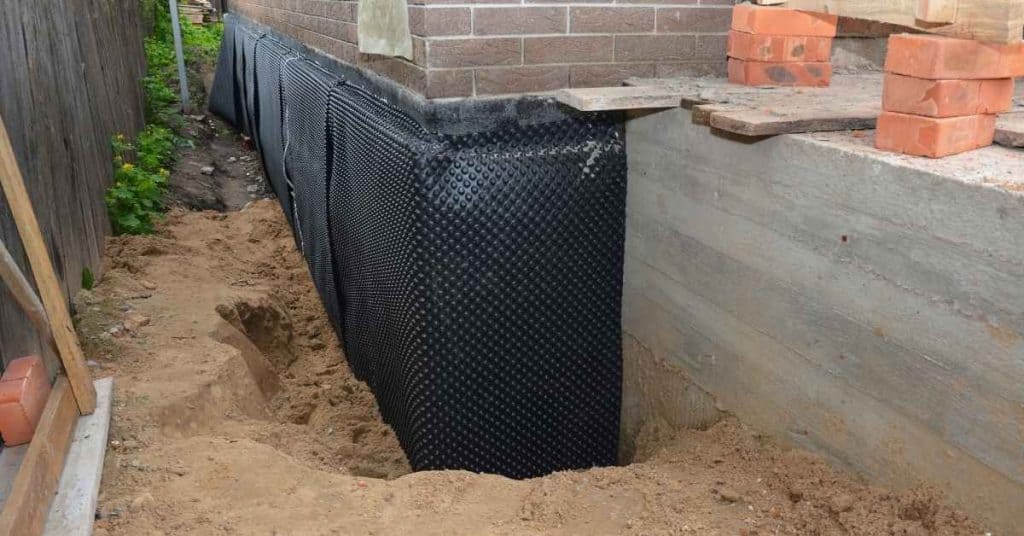
An uncoupling membrane is a specialized layer placed between the substrate and the tile or stone surface. Its main purpose is crack isolation and strain relief. It is not the same as underlayment, waterproofing, or sound-damping layers.
In plain terms, the membrane absorbs substrate movement so cracks in the tile bed don’t transfer to the tile finish. This decoupling works best where movement is expected or where shrinkage could occur over time. Typical materials include plastic or fabric-reinforced sheets, dimpled or mesh membranes, and sheet or mat formats made from polypropylene or HDPE, with various thicknesses and textures.
Core mechanics (decoupling, movement accommodation)
Uncoupling membranes work by isolating your tile or concrete surface from the substrate below. This means they ‘absorb’ any movement or stress from the base, preventing it from causing cracks in your finish.
The key is that these membranes are flexible yet strong. They can stretch and compress to accommodate minor shifts in the substrate without transferring that strain upwards.
Think of it like a shock absorber in a car. It takes the impact from the road and keeps it from jolting the passengers. That’s what an uncoupling membrane does for your floor.
Common membrane materials and construction
The material of your uncoupling membrane can make a big difference in how it performs. Here are the most common types:
- Polypropylene (PP): Lightweight, durable, and resistant to chemicals. Look for membranes with high tear resistance and good flexibility.
- High-Density Polyethylene (HDPE): Stronger than PP but also stiffer. It’s great for heavy traffic areas. Make sure it has enough ‘memory’ to return to its original shape after compression.
- Polyvinyl Chloride (PVC): Offers good flexibility and resistance to moisture and chemicals. Check the PVC content – higher is better for durability.
- Fleece-backed membranes: These have a layer of fleece attached, which improves adhesion and helps distribute stress evenly. They’re great for areas with high movement potential.

Where to Use Uncoupling Membranes — Ideal Applications
Identify primary use cases such as tile over concrete slabs, tile over wood subfloors, showers, radiant-heat floors, and problematic substrates. These scenarios often benefit from a decoupling layer. Look for clear indicators when a membrane is recommended versus optional.
Substrate checks should cover moisture, slab cracks, wood thickness, and crawlspace clearance, plus compatibility with existing underlayment. Performance drivers include shear control, vapor management, crack-bridging ability, and compatibility with radiant heat. Practical prompts focus on load, tile size, and adhesive choice to justify decoupling or forgo it if conditions are stable.
Floors: tile, stone, and radiant-heat systems
Uncoupling membranes are a must for tiled floors. They protect your tiles from subfloor movement, preventing cracks and loose grout.
Tile & Stone: Membranes allow slight movement between the tile layer and the subfloor, absorbing stress from building settlement or temperature changes. This is crucial to prevent cracked tiles and crumbling grout.
Radiant-Heat Systems: When installing radiant heat under tiles, an uncoupling membrane is essential. It separates the heating system from the tile layer, protecting both from each other’s movement. Plus, it helps distribute heat evenly across your floor.
Wet areas and showers
Uncoupling membranes are your best friend in wet areas like showers. They do two things: stop cracks from reaching your tile, and let waterproofing systems work better.
Why use them? In wet areas, you’ve got moisture and movement. Membranes keep these from causing trouble under your tile. Plus, they make it easier to install waterproofing membranes or liquid sealers.
Check the membrane’s label for compatibility with your chosen waterproofing system. Some membranes are designed to work best with specific systems. Always follow manufacturer instructions and local building codes.
Walls and niche applications
Uncoupling membranes aren’t just for floors. They’ve got a place on walls too, especially in tricky spots.
Wet areas around windows: Water can wreak havoc on your walls. Uncoupling membranes here keep water from getting behind tiles and causing damage. Check product labels to ensure they’re suitable for vertical applications.
Old substrates: If you’re tiling over old, crumbly surfaces, an uncoupling membrane can save the day. It bridges cracks and prevents them from showing through your new tiles. Always check substrate condition first though – if it’s too bad, you might need to replace it.
Avoid: Don’t use membranes on walls where they’re not needed. They won’t stick properly in dry areas, leading to peeling and failed tiles. Stick to floors for most applications, unless you’ve got a good reason to use them on walls.
Types of Uncoupling Membranes and How to Choose
Compare categories such as traditional dimpled mats, fabric-fleece membranes, PVC/PE membranes, and hybrid systems. Each handles movement and substrate differently and suits certain tile types better than others. Note where performance may fall short in challenging conditions.
Substrate prerequisites include acceptable subfloors and when primers or patching are needed. Selection criteria should align movement, tile choice, thickness goals, and the impact on floor height. Consider warranties and installation implications for each option.
Dimpled/Waffle-panel membranes
Dimpled or waffle-panel uncoupling membranes are traditional systems with a textured surface that creates an air gap and promotes drainage. They’re typically made from plastic, like polyethylene (PE) or polypropylene (PP).
These membranes excel at handling substrate movement, preventing cracks in tiles due to minor shifts beneath the surface. The dimples create space for small movements while allowing water to drain away.
Best substrates: Concrete and plywood. Avoid using on backer boards as they may not provide enough stability.
Fleece-backed and adhesive-bonded membranes
Fleece-backed uncoupling membranes are ideal for direct bonding to uneven or porous surfaces. The fleece layer promotes better adhesion, while the membrane itself handles movement.
Adhesive-bonded systems work similarly but require a thin-set mortar bed for installation. They’re great for irregular substrates and can help level out minor imperfections.
Best uses: For direct bonding to uneven or porous surfaces like plywood, existing tile, or concrete with minor imperfections. Avoid using on smooth, non-absorbent surfaces without a primer.
Material/chemical differences and standards to check
Material choices significantly impact an uncoupling membrane’s performance. Here are key specs to verify:
- Shear strength: Look for membranes with high shear strength ratings (e.g., ≥250 psi) to handle substrate movement effectively.
- Elongation: Check elongation rates (e.g., ≥30%) to ensure the membrane can stretch and accommodate movement without tearing or cracking.
- Warranty: Verify warranty coverage, especially for heavy-use areas like bathrooms and kitchens. Longer warranties indicate better quality materials.
- Alkali resistance: Ensure membranes are resistant to alkali in concrete to prevent staining or degradation over time.
- Installation guide: Always check the manufacturer’s installation guide for specific instructions, as improper installation can void warranties and lead to failures.
Installation Overview: Steps for Successful Performance
Start with substrate prep and verification, including moisture checks, flatness, cleaning, and repairs. A stable base is essential for membrane and tile performance. Plan layout to control expansion joints and grout lines to prevent lippage.
Choose compatible adhesive systems and understand open time and cure requirements. Place the membrane with proper overlaps and transitions, detailing around penetrations. During tiling, use careful down-pressing and maintain clean surfaces for a strong bond and long-term durability.
Substrate Preparation and Troubleshooting
The first step to a successful uncoupling membrane installation is preparing the substrate. Here’s what you need to do:
Moisture Testing: Use a moisture meter to test your substrate. Uncoupling membranes work best on dry substrates with a moisture reading of 4% or less.
Surface Flatness: Check for flatness using a straight edge. Any high spots should be ground down, and low spots filled with leveling compound.
Cleaning and Priming: Clean the surface to remove any dirt, grease, or contaminants. Apply a primer suitable for your substrate type to improve adhesion.
Troubleshooting Common Problems: If you’re working with OSB, ensure it’s properly sealed before installing the membrane. For old tile, check for loose tiles and repair any cracks or imperfections.
Bonding, Adhesives, and Tile Setting
Choosing the right adhesive is crucial for a successful installation. Here’s how to do it:
Adhesive Selection: Choose an adhesive that’s compatible with your uncoupling membrane. Check the datasheets for recommended products.
Trowel Practices: Use a square-notched trowel for spreading the adhesive. The size of the notches will depend on the tile you’re using, so check the datasheet for recommendations.
Tile Setting: Apply the adhesive to the substrate, then embed the uncoupling membrane into it. Press the tiles firmly into the adhesive, ensuring they’re level and aligned with your layout lines.
Seaming, Flashing, and Transitions
Proper seaming, flashing, and handling of movement joints are critical for a durable installation. Here’s how to do it:
Seaming: Overlap the uncoupling membrane by at least 2 inches when installing it. Seal the seams with a suitable seam sealer.
Flashing: In wet areas, flash the membrane up the walls and around fixtures to prevent water from getting behind the tile.
Movement Joints: Install movement joints where necessary to accommodate substrate movement. Use a movement joint material that’s compatible with your uncoupling membrane.

Costs, Value, and When It’s Worth the Money
Material type, labor time, surface preparation, and any primers drive costs. Factor in contingencies for substrate issues and potential repairs. DIY-friendly options may differ from professional-grade systems in ease and reliability.
Use a simple framework to compare value, focusing on moisture control, crack accommodation, and long-term durability. Decide when multi-layer floors, radiant heat, or high-moisture zones justify the extra expense. Have a quick screening checklist ready to guide the decision.
Situations that justify the expense
Membranes are worth their cost when you’re dealing with high-risk substrates or expensive finish materials. Here’s where they often pay off:
Substrate Movement: Membranes accommodate minor substrate movement, preventing cracks in your tile or stonework. If your slab is prone to movement due to soil conditions, temperature changes, or other factors, a membrane can save you from costly repairs down the line.
Expensive Finishes: High-end tiles and natural stones are pricey. A membrane can protect your investment by preventing cracks that could lead to tile replacement. It’s like buying insurance for your floor.
Scenarios where membranes are low-value or unnecessary
In some cases, skipping a membrane might be reasonable. Here’s when:
Stable Substrates: If your concrete slab is solid and stable, with no signs of movement, you might not need a membrane. A good way to check is by performing a ‘bounce test’ – if the floor bounces back quickly and evenly, it’s likely stable.
Small Low-Risk Jobs: For small projects or areas where there’s little risk of substrate movement, like a tiny bathroom or laundry room with no radiant heat, you might be able to get away without a membrane. Just remember, skipping it in low-risk areas doesn’t mean you can ignore proper surface preparation.
Comparative options and trade-offs
Membranes aren’t the only way to address substrate movement. Here’s how they stack up against alternatives:
Uncoupling Mortars: These can be a good, cheaper alternative for small projects or where you’re using thin-set mortar anyway. However, they don’t provide the same level of movement accommodation as membranes and may not last as long.
Cement Backer Boards and Extra Plywood: These can help with stability but don’t address substrate movement like a membrane does. They also add thickness to your floor, which might not be desirable in all situations. Plus, they require more labor for installation.
Common Mistakes, Safety, and Long-Term Maintenance
Common installation mistakes include poor substrate prep, wrong membrane orientation, and weak seams or laps. Address these with careful detailing and following manufacturer guidance. Pay attention to transitions around edges and penetrations to avoid breaches.
Safety matters when cutting membranes, handling adhesives, and working with solvents. Use PPE and good ventilation, and clean up promptly to prevent residue. Plan maintenance and warranty proof by documenting the install and following care guidelines.
Installation pitfalls to avoid
Steer clear of these common mistakes that can compromise your uncoupling membrane’s performance.
- Inadequate subfloor prep: Skipping proper leveling, priming, or addressing substrate issues leads to poor adhesion and membrane failure. Always prepare the surface as per manufacturer’s guidelines.
- Wrong adhesive choice: Using incompatible adhesives can cause delamination. Stick with products recommended by the membrane manufacturer.
- Poor seam treatment: Insufficient overlap, gaps, or improper sealing at seams and transitions allow moisture intrusion. Ensure proper lapping, troweling, and rolling of adhesive for a solid bond.
- Improper fastening: Fastening through the membrane can compromise its integrity. Avoid nailing or screwing directly into the membrane; use appropriate fasteners and techniques to secure it to the substrate.
Addressing these pitfalls ensures your uncoupling membrane performs as expected, saving you time and money in the long run.
Safety and environmental considerations
Prioritize safety during installation and disposal to protect yourself and the environment.
Handling: Wear appropriate PPE, including gloves, goggles, and a dust mask when cutting or handling membranes. Keep work areas clean and free of debris.
Ventilation: Ensure adequate ventilation when applying adhesives and solvents to minimize exposure to harmful fumes. Use fans or open windows as needed.
Disposal: Follow local regulations for disposing of membrane scraps, adhesive remnants, and other construction waste. Do not dispose of materials in regular trash or down drains.
Additionally, check compatibility with existing waterproofing systems and heating elements to avoid damage or reduced performance.
Durability, inspection, and maintenance checklist
Regularly inspect your uncoupling membrane system to maintain its longevity and warranty compliance.
- Annual visual inspection: Check for cracks, gaps, or other signs of damage. Address any issues promptly to prevent further deterioration.
- Grout/caulk care: Inspect grout lines and caulking around fixtures annually. Re-grout or re-caulk as needed to maintain a watertight seal.
- UV exposure: Monitor areas exposed to sunlight for signs of UV degradation, such as discoloration or cracking. Apply appropriate sealants or coatings to protect these areas.
- Load/right-to-use era requirements: Regularly review and update your warranty documentation to ensure ongoing compliance with manufacturer’s guidelines.
Quick rule: Inspect your uncoupling membrane system annually, addressing any issues promptly to maintain its performance and extend its lifespan.
Real-World Comparisons and Case Studies
Present a few baseline scenarios: a successful install on a plywood subfloor with tile, a marginal case with limited prep, and a failure example due to poor substrate or missing isolation joints. These illustrate risk versus reward in real terms. Look for measurable outcomes like moisture protection and crack control from the cases.
Map project context to decisions by substrate, load, tile type, and room use. Highlight pitfalls and practical lessons, and offer a compact decision tree and takeaways for readers to apply to their projects.
Successful installations (what went right)
The best way to see uncoupling membranes’ value is in real-world success stories. Here are two brief examples:
Bathroom subfloor with plywood and tile: Joe installed a membrane over properly prepared plywood before tiling his bathroom. The membrane prevented cracks from forming in the tiles due to minor substrate movement, saving him a costly repair.
Crawlspace with radiant heating: Sarah used a membrane under her crawlspace’s concrete slab with radiant heating. Despite some minor settling, the membrane allowed for independent movement of the slab and flooring above, preventing cracks in both the tile and the slab itself.
Less effective or unnecessary uses (what went wrong)
While uncoupling membranes are powerful tools, they’re not always necessary. Here are two examples where their use wasn’t beneficial:
Concrete slab on grade with minimal movement: Mark installed a membrane under his garage’s concrete slab, expecting it to prevent cracks due to minor slab movement. However, the slab moved so little that the membrane added unnecessary cost without providing significant benefit.
Improper substrate preparation: Lisa tried to save money by installing tiles directly on a plywood subfloor without a membrane. When the subfloor dried and shrunk slightly, it caused cracks in the tile that could have been prevented with proper preparation or a membrane.
Decision flowchart (practical checklist)
Before you decide to use an uncoupling membrane, follow this practical checklist:
- Check substrate type: Membranes are most effective on concrete slabs and plywood subfloors. Skip if unsure about substrate’s stability.
- Evaluate tile value: High-value tiles warrant extra protection. Skip for low-cost tiles where repair is affordable.
- Assess movement risk: Membranes excel at preventing cracks due to minor substrate movement. Skip if movement is unlikely or major.
- Consider budget: Membranes add cost but can prevent expensive repairs. Skip if budget is tight and repair costs are low.
- Check climate: Membranes help control moisture in humid climates. Skip if climate is dry with no moisture concerns.
- Review room usage: Membranes are crucial in high-traffic areas or where heavy loads are present. Skip for low-use areas with light loads.
- Inspect substrate prep: Proper preparation prevents membrane failure. Skip if substrate isn’t clean, dry, and level.
- Check tile type: Membranes work well with all tile types but are especially beneficial with large format tiles. Skip for small mosaic tiles where crack risk is low.
Quick rule: If you’re unsure about any of these factors, consult a professional or consider using a membrane to err on the side of caution.

Conclusion
Getting this right pays off in safety, durability, and a professional-looking finish. When used properly, an uncoupling membrane helps prevent cracks and keeps tiles looking good for years; when misused, it can lead to leaks, wasted material, and costly repairs.
First, plan the install and check the basics: confirm the substrate is clean and dry, choose the right membrane for your area, map out the layout, follow the manufacturer’s adhesive and thin-set guidelines, place and press the membrane firmly, back-butter where required, and give joints and transitions a proper seal. Do a small test area first, then roll out in sections so you don’t trap air or debris, and finally inspect for movement or hollow spots before you grout.
Common mistakes to avoid include using the wrong membrane for the substrate or climate, skipping surface prep, rushing the layout, and not allowing products to cure as specified. Safety rules matter too: wear cut-resistant gloves and eye protection when cutting or handling membrane, keep moisture barriers and substrates dry, and work in a well-ventilated area to avoid inhaling fumes. If you see gaps, tears, or signs of movement during testing, stop and fix it before moving on.
When in doubt about complex layouts, heavy showers, or radiant heat scenarios, it makes sense to call a professional rather than push ahead. The right call now saves headaches later and keeps your project on track. Stay steady, test often, and you’ll finish with a durable, good-looking, properly protected surface.
FAQ
What are the basic principles of an uncoupling membrane and why do they matter?
An uncoupling membrane isolates tile and substrate so movement in the substrate doesn’t crack the tile. It provides a slip layer and a bond that tolerates some movement. This is your first line of defense against cracks in wet and high‑movement areas.
What materials are uncoupling membranes made from, and how do you choose?
Membranes come as sheet products or liquid/applied membranes. Look for compatibility with your substrate and the tile adhesive you’ll use. Always check the label or manufacturer instructions for wall vs floor use and load expectations.
Can I install membranes on walls, floors, and ceilings, and how do methods differ?
Floors require proper substrate prep and a reliable bond across the whole area. Walls and ceilings use different fasten and thinset requirements, and some membranes aren’t rated for vertical surfaces. Follow the product instructions closely for prep, sealing, and curing times.
Should I DIY or hire a pro for uncoupling membranes, and when is it worth it?
DIY is doable for straightforward jobs with clear directions and simple layouts. Hire a pro for complex bathrooms, kitchens, or areas with heavy movement or unusual substrates. Always ensure you can meet the label’s installation tolerances and safety notes.