
Introduction
Tile on plywood is a build-up method that stabilizes a tile surface on a plywood base to prevent cracking.
Prep the plywood by cleaning it, dulling any slick spots, and making sure the panel is firmly fastened. Choose an adhesive and any underlayment per the label and local rules, and follow the manufacturer’s prep instructions.
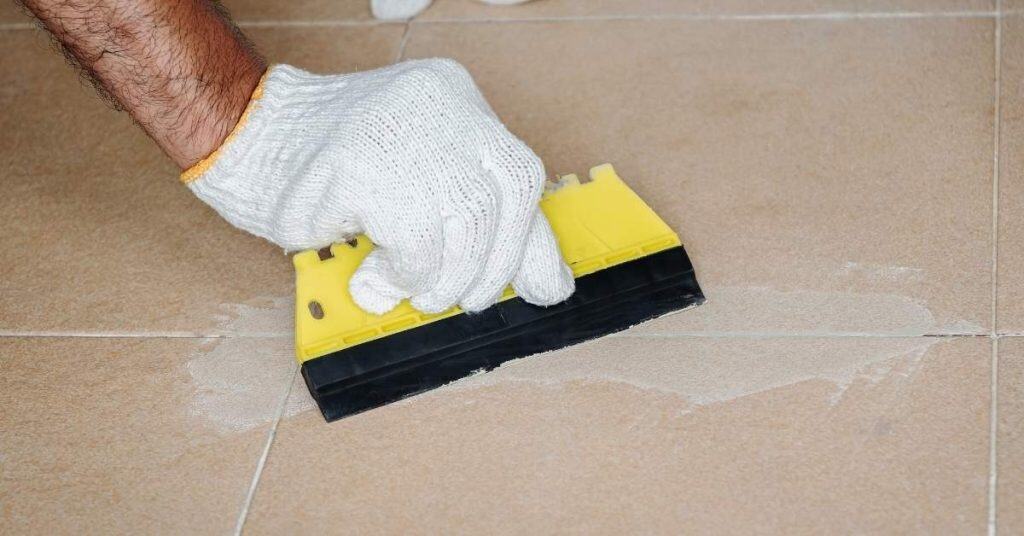
Install the tiles with a suitable mortar and consistent spacing, following the manufacturer’s directions and your layout. Back-butter or back-bed as required by the adhesive, then press and wiggle the tiles to seat them evenly. Grout with a formulation that works on plywood and keep joints clean during work, checking for proper expansion joints and local rules.
Key takeaways
- Inspect plywood: ensure structural grade, clean, dry, and securely fastened before tiling.
- Use compatible thinset and membrane system per manufacturer instructions for tile over plywood.
- Sand, prime, and roll thin skim coats to create a stable, flat substrate.
- Wear PPE and follow safety practices; install membranes without gaps to bridge movement.
- Use proper tile layout and staggering to minimize cracked grout lines.
- Grout promptly but avoid over-watering; seal joints and inspect for cracks regularly.
Table of Contents
- Introduction
- Key takeaways
- Planning and Pre-Installation Checklist
- Which Plywood Works for Tile and Why
- Creating the Correct Build-Up: Layers and Their Purposes
- Proper Substrate Preparation Step-by-Step
- Applying Membranes, Underlayments, and Thinset Correctly
- Tiling Technique to Avoid Cracked Grout Lines
- Grouting, Finishing, and Maintenance to Prevent Cracks
- Common Mistakes, Troubleshooting, and Safety
- Conclusion
- FAQ
Planning and Pre-Installation Checklist
Before you lay a single tile, map out decisions and measurements that impact the build. Check tile type, anticipated traffic, and room moisture levels. Set a realistic budget and timeline, and note any permits or notices that may be required.
Clarify substrate compatibility and preparation: assess plywood thickness, flex and movement, moisture content, and the need for an underlayment or backer board. Outline steps to stiffen and waterproof the base so the tile and grout don’t crack later. Verify layout implications for large- vs small-format tiles, edge profiles, and transitions. Plan cuts to minimize waste and ensure even grout lines around doorways. Evaluate moisture, humidity, and ventilation to guide sealing and waterproofing decisions. Establish a measurement plan for accurate tile quantity and grout-line consistency, with clear milestones and decision points. When in doubt, check product labels or manufacturer instructions and local requirements.
Assessing the existing subfloor
Before you start tiling, it’s crucial to assess your plywood subfloor. This checklist helps ensure your floor is up to par.
- Plywood thickness: Measure. Ideal for tile is ¾” or thicker. Less than that may flex and cause cracks later.
- Stiffness: Check for flexibility by walking on it. Too much give? You might need to stiffen it.
- Squeaks: Listen for squeaks when you walk. They indicate loose joists that need tightening.
- Deflection: Check for deflection using a long level or straight edge. More than ⅛” in 10’ means issues.
- Framing spacing: Ensure joist spacing is no more than 16” on center. Wider can lead to sagging and cracks.
- Moisture content: Check with a moisture meter. Too much (above 12%) needs addressing before tiling.
- Underlayment: Check if one is needed based on your assessment. It can stiffen, level, and waterproof the subfloor.
- Framing condition: Inspect joists for rot, rust, or damage. Any issues? Call a pro.
Quick rule: If in doubt about any of these, consult a structural engineer or local building inspector.
Tools and materials checklist
Gather the right tools and materials before you start. Here’s what you need.
- Trowels: Buy a ⅜” notched trowel for thin-set mortar application, and a ¼” or ⅛” margin trowel for grout.
- Thinset mortar: Choose a polymer-modified type for better adhesion and flexibility. Follow manufacturer’s guidelines on mixing.
- Waterproof membrane: For bathrooms, kitchens, or areas prone to moisture, use a liquid membrane or uncoupling membrane.
- Underlayment screws: Use appropriate screws for your underlayment. Stainless steel resists corrosion.
- Tile nippers: For cutting tiles to size. A must-have for DIY projects.
- Tile spacers: Ensure even grout lines. Choose a size based on your tile and grout choice.
- Grout: Buy sanded or unsanded grout depending on your tile joint width. Follow manufacturer’s guidelines for mixing.
- Sealer: Get a penetrating sealer to protect your grout and tile from moisture and stains.
Quick rule: For pro jobs, consider renting or buying higher-quality tools. Cheap tools can lead to poor results.
Cost and time estimate considerations
Understanding costs and time estimates helps you plan your project better.
- Plywood types: Compare costs of different plywood types. Thicker, higher-quality plywood may cost more but provides a sturdier base.
- Underlayment options: Consider the cost of different underlayment materials (plywood, cement board, etc.).
- Labor costs: If hiring help, get quotes from multiple contractors. Compare rates and services.
- Tile type: Larger format tiles can be cheaper per square foot but may require more skill to install.
- Grout choice: Sanded grout is usually cheaper than unsanded but requires wider grout lines.
- Sealer types: Compare costs of different sealers. Some are better suited for your tile and grout type, but may cost more.
- Time estimate – Prep: Allow 1-2 days for subfloor prep, underlayment installation, and thinset application.
- Time estimate – Tiling: Estimate 1 day per 30 sq. ft. of tiling, plus additional time for cuts and layout.
- Time estimate – Grouting: Allow 2-3 days for grout application, curing, and sealing. Plus clean-up time.
Quick rule: Always add a contingency fund (10-15%) to your budget for unexpected costs. Also, pad your timeline with buffer days for curing and drying.

Which Plywood Works for Tile and Why
Compare plywood grades and construction to see how they influence adhesion, edge stability, and moisture performance. Look at common types such as CDX, AC, tongue-and-groove, and exterior-rated options. Consider how each affects long-term tile durability under load.
Assess thickness options and how veneer quality and subfloor orientation impact moisture resistance and delamination risk. Differentiate exterior-rated vs interior-rated plywood and note how tongue-and-groove joints influence flatness and seam gaps. Use safe thickness recommendations tied to typical joist spacing and deflection concerns. Practically check your current subfloor, moisture exposure, and whether you’ll need backer board or a waterproofing layer. Confirm fastener patterns and test for flatness and squeaks before tile. Validate requirements with product data sheets or manufacturer guidance and local code rules.
Structural Plywood vs. Decorative Substrate
Alright, listen up. You’ve got two main types of plywood here: structural and decorative. Let’s keep ’em straight.
Structural Plywood: This is your heavy-duty stuff. It’s designed to bear weight and support your tile installation. Use it for subfloors, where you need strength. Check the label – it should say “structural” or have a load rating.
Decorative Substrate: Now, this is what you’ll use right under your tiles. It’s lighter, thinner, and designed to provide a smooth surface for tiling. Don’t confuse it with the structural stuff. Check the manufacturer’s instructions – they should tell you how to use it.
Here’s when to switch: Once you’ve got your strong structural subfloor down, you’ll add a layer of decorative substrate on top before laying your tiles. No need for extra layers unless you’re dealing with major unevenness. And remember, never use plywood alone under tile – it needs a cement backer board or rated underlayment to prevent moisture issues.
Moisture-resistant and exterior-rated options
When tiling outdoors or in high-moisture areas like bathrooms, you need plywood that can handle the damp. Here’s what to consider:
Exterior-grade plywood: This is your best bet for outdoor use. It’s designed to resist rot and decay from moisture. It’s usually marked as “Exterior” or “X”. Check the label before buying.
However, even exterior-grade has its limits. It’s not waterproof, just resistant. So, don’t skimp on underlayment and ensure proper base compaction to prevent moisture from getting in. Also, it might not be suitable for areas with heavy foot traffic or frequent temperature changes.
Treated plywood: This is regular plywood with a water-resistant treatment. It’s cheaper but less durable than exterior-grade. It’s okay for indoor use in damp areas like bathrooms, but avoid it outdoors unless you’re on a tight budget and can’t find exterior-grade.
Waterproofed panels: These are pricey but offer the best protection against moisture. They’ve got a waterproof layer or coating. They’re great for showers or areas with constant water exposure. But, they might not be necessary if you’ve done a good job with underlayment and base compaction.
Creating the Correct Build-Up: Layers and Their Purposes
Outline the full layer sequence from joists up: blocking or bridging, plywood subfloor, leveling layer, decoupling or waterproof membrane, thinset, and tile. State the function of each layer and how it contributes to stiffness and movement control. Keep your eye on load transfer through the system.
Detail structural requirements that affect longevity: adequate joist spacing, minimum subfloor thickness, and proper blocking. Explain how these prevent deflection that causes cracked grout lines. Discuss movement joints, why decoupling membranes help, and how expansion gaps are handled at transitions. Talk through leveling methods and target flatness, plus options like self-leveling compounds or skim coats. Address moisture and waterproofing needs and when to choose a membrane vs a decoupler. Include installation sequence checks and risk flags, such as substrate dryness, fastener presence, curing times, and pre-tile inspections.
Leveling and stiffening the plywood
Before laying tile, your plywood subfloor needs to be level and stiff. Here’s how:
Sistering joists: If you’ve got sagging or weak joists, sister them with new ones alongside. This doubles their strength and stiffness.
Adding a second layer of plywood: For minor low spots, add another layer on top. Make sure to stagger the joints between layers for extra strength.
Using self-leveling compound: For small dips or unevenness, spread this over the area. It’ll level out and harden, giving you a smooth surface.
Vapor barriers and underlayment membranes
A good underlayment protects your tile from moisture and movement. Here’s what to use:
Vapor barrier: In cold climates, a vapor barrier like polyethylene sheeting can stop warm, moist air from condensing in the subfloor.
Uncoupling membranes: These are flexible sheets with dimples that let your tile move independently of the substrate. They’re great for preventing cracked grout due to minor substrate movement.
In wet areas, use a waterproof membrane like cement board or a dedicated waterproof underlayment. This protects your thinset and plywood from moisture damage.
Proper Substrate Preparation Step-by-Step
Inspect and clean the subfloor: remove debris, vacuum, and note any loose boards or adhesive remnants. Record moisture conditions and any gloss that could affect adhesion. Start with a solid, dry base.
Verify flatness and rigidity: run a straightedge to identify high and low spots. Plan leveling with an appropriate underlayment if needed. Secure squeaky boards, replace damaged sections, and fill gaps to create a continuous surface. Scuff glossy faces or sealers to improve grip, then remove all dust. Manage expansion gaps per code and ensure joints won’t telegraph through tile. Check moisture and substrate compatibility with the chosen underlayment and thinset according to product guidance.
Step-by-Step Process
Follow these practical steps to properly prepare your plywood substrate for tiling, ensuring a solid foundation that prevents cracked grout lines.
- Inspect and clean the subfloor: remove all debris, vacuum thoroughly, and check for any loose boards, nails, or adhesion remnants. Note moisture conditions and any gloss or sealers that affect adhesion.
- Verify flatness and rigidity: run a straightedge across the plywood, identify high/low spots, and plan for leveling with a cementitious or compatible underlayment as needed.
- Secure and repair the substrate: fasten squeaky or loose boards, replace damaged sections, and fill large gaps or knotholes to create a continuous, solid surface.
- Prepare the surface texture: scuff glossy faces or sealers with light sanding or abrading to create a mechanical grip for underlayment and adhesive; remove all dust after scuffing.
- Manage gaps and tolerances: fill or bridge expansion gaps per local code, ensure edge joints won’t telegraph through tile or grout, and confirm substrate is compatible with the chosen underlayment. Test moisture and substrate compatibility: check plywood moisture content and consider a moisture barrier if required by the tile or adhesive system; ensure underlayment and thinset compatibility with plywood.
Fastening and seam treatment
Properly fasten and treat seams to create a continuous, solid substrate for your tile installation. Use the right screws and spacing:
Screw Spacing: Space screws 6-8 inches apart along joists and edges, and 12-16 inches in fields.
Apply construction adhesive between layers to enhance bond strength:
Seam Treatment: Tape or fill plywood seams with a flexible, paintable compound to prevent cracking and create a smooth surface for tiling.
Surface checking and straightedge tolerances
Check your plywood substrate’s flatness using a straightedge. Acceptable tolerances are:
High Spots: No more than 1/8 inch over 6 feet.
Low Spots: No more than 1/4 inch over 6 feet.
If tolerances aren’t met, remediate as follows:
High Spots: Sand or plane down to acceptable level. Low Spots: Level with a cementitious underlayment or compatible compound.

Applying Membranes, Underlayments, and Thinset Correctly
Clarify when to use decoupling membranes vs cement backer board over plywood, focusing on movement control and crack isolation. Assess substrate compatibility with membrane or board systems. Plan your flow from plywood prep to final installation, including priming and seam details.
Describe latex-modified thinset requirements: proper substrate prep, recommended thickness, trowel size, and bonding to both membrane and backer board. Address fastening and joint details for backer boards and plywood, plus how to treat expansion joints. Include curing times, moisture testing, and how to verify adequate adhesion before grouting. Emphasize manufacturer compatibility and avoid overlaps that could void warranties; run a quick QA check against labels or data sheets.
Choosing and installing uncoupling membranes
Uncoupling membranes are a must when laying tile on plywood. They prevent cracks from the substrate reaching your tile work. Here’s how to choose and install them right.
Choose wisely: Membranes come in various types – liquid, sheet, or mat. Check product labels for compatibility with your subfloor and tile type. Most are suitable for plywood, but always double-check.
Installing is simple but crucial:
– Clean the plywood. Any dirt or debris can compromise adhesion.
– Apply thinset mortar (follow manufacturer’s instructions for mix ratio) over the entire surface using a notched trowel. Aim for around 1/4″ to 3/8″.
– Embed the membrane into the wet thinset, following the product’s guidelines. Typically, you’ll use a grooved or U-notched trowel.
– Let it cure as per the manufacturer’s instructions before tiling.
Installing cement-based underlayments or backer boards
Before you start, check base compaction. It should be solid. If not, fix it first.
Now, let’s talk about when to choose a backer board. Use them in areas with high moisture or where you’re tiling over existing surfaces like plywood. They provide extra strength and stability.
When installing, use the right screws. For backer boards, that’s usually 1-1/4″ or 1-5/8″ galvanized or stainless steel screws. Space them out in a straight-line pattern, about 6″ apart along studs and joists.
Here’s how to treat gaps and edges: Tape all seams with a quality fiberglass mesh tape, then apply thin-set mortar over it. This stops movement from transferring to your tile. Don’t forget to feather the edges to avoid creating high spots.
Tiling Technique to Avoid Cracked Grout Lines
Focus on preparation and containment: seal and stabilize plywood, correct surface flatness, and identify movement joints where needed. Keep the work area dry and protected from moisture during installation. Establish a consistent plan for transitions.
Cover mortar coverage basics and large-format tile methods. Use the right notch size and target uniform coverage, including butter-and-butter techniques if needed. Apply back-buttering for large tiles and maintain consistent pressure to avoid voids. Control spacing with quality spacers, clamp temporarily if possible, and plan for expansion joints at perimeters and transitions. Mind environmental controls and curing timelines to minimize stress on grout and tiles.
Adhesive application and coverage checks
Choosing the right trowel notch is crucial for full mortar coverage. For small tiles (2×2 to 6×6), use a 1/4″ or 3/8″ V-notch trowel. For larger tiles, opt for a 3/8″ to 1/2″ square-notch trowel.
Shoot for 95-100% mortar coverage on your tiles. This means the mortar should completely fill the back of the tile and create a smooth, even surface.
To check for full bedding, run a straightedge across the back of the tile before pressing it into place. If you feel any hollow spots or see light through the tile, that’s a sign you need more mortar.
Expansion joints, tile layout, and grout selection
Install expansion/movement joints where needed to allow for natural substrate movement. For tiles larger than 12″ or in areas with high movement potential, place joints every 6-8 feet.
The width of your grout joint should match the thickness of your tile minus 1/4″. So, if you’re using 1/2″ thick tiles, aim for 3/8″ wide joints. Use sanded grout for joints wider than 1/8″.
Choose flexible grouts or sealants to accommodate movement. For areas with high stress or temperature changes, consider using a latex-fortified or polymer-modified grout.
Grouting, Finishing, and Maintenance to Prevent Cracks
Explain grout options and mixes, noting when cementitious vs epoxy grout is appropriate for plywood installations. Describe how substrate movement affects crack resistance and grout selection. Plan for consistent color and texture by following manufacturer guidance.
Detail surface prep and application: start with clean, dry plywood and follow sealer or primer requirements. Use backer rods if needed and emphasize correct trowel technique and grout thickness. Discuss curing, sealing, and finishing steps to reduce staining and color fading. Provide safe cure windows before heavy use and describe contingencies for humidity or cool temperatures. Outline a maintenance plan to detect and address cracks early and keep joints intact.
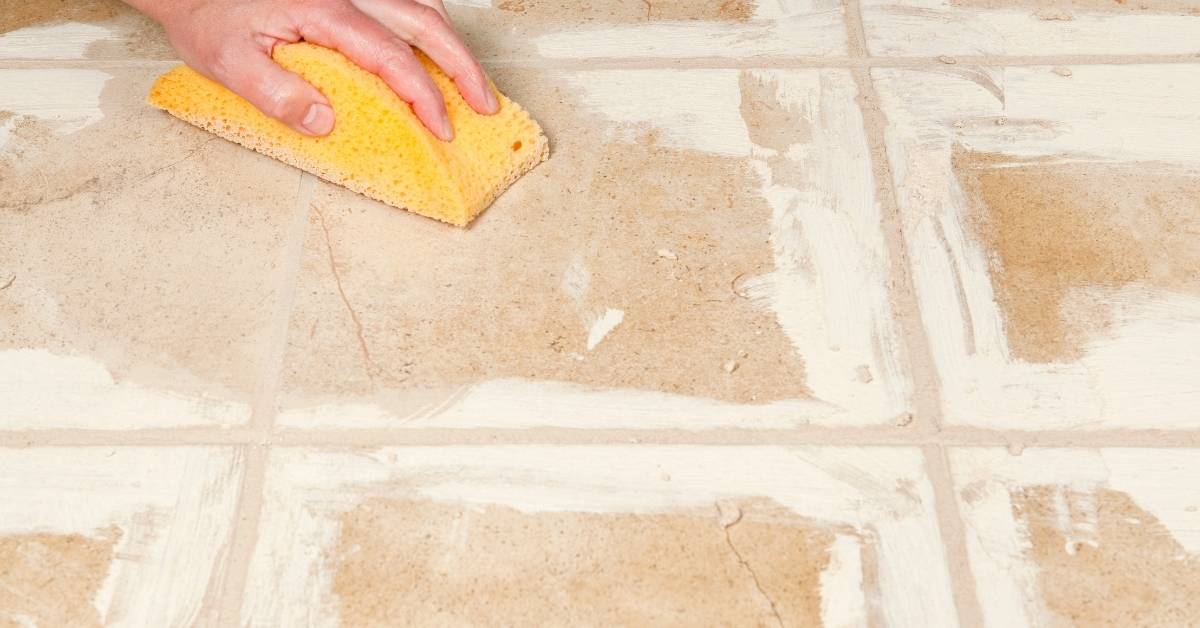
Grouting techniques to avoid uneven or cracked lines
While grouting is a straightforward process, there are common mistakes that can lead to uneven or cracked grout lines. Here’s how to avoid them:
- Avoid overworking the grout: Overworking can cause excessive air bubbles and weaken the grout.
- Wipe consistently: Ensure you wipe each joint thoroughly and evenly to maintain a consistent grout line density.
- Use appropriate tooling: A rubber float is ideal for grouting, while a squeegee can help remove excess grout.
- Maintain consistent pressure: Apply even pressure when wiping to avoid thin or thick spots in the grout line.
- Avoid leaving grout too long before wiping: This can cause it to dry out and crack.
By following these techniques, you’ll achieve durable, even grout lines that resist cracking.
Long-term maintenance and moisture control
Maintaining your tiled floor involves regular cleaning and timely resealing to prevent moisture damage. Here’s a simple maintenance plan:
Clean regularly: Use a mild detergent or grout cleaner to remove dirt and stains every 6-12 months.
Reseal when needed: Inspect your grout lines annually. If water no longer beads on the surface, it’s time to reseal.
Also, watch for signs of moisture or substrate issues such as discoloration, warping, or a musty smell. These warrant immediate inspection and repair to prevent further damage.
Common Mistakes, Troubleshooting, and Safety
List the most frequent DIY missteps when tiling over plywood, such as insufficient thickness, skipped membranes, or improper fasteners. Explain how these mistakes lead to cracked grout or tile failure. Tie each error to a practical fix you can implement on site.
Offer a diagnostic workflow: inspect thickness, flatness, moisture, and fastener patterns; verify membrane status and thinset compatibility. Provide practical fixes like upgrading plywood, installing a proper membrane, reinforcing the subfloor, and using correct thinset and admixtures. Include a quick troubleshooting guide with tests for flatness, moisture, and grout movement. End with safety precautions and PPE recommendations for dust, chemicals, noise, and overhead work.
Diagnosing cracked grout and tile movement
Cracked grout lines or tiles can be frustrating. Here’s a quick checklist to find the root cause:
Substrate Deflection: Check for sagging, bouncy spots. Use a straight edge to see if it wobbles.
Adhesive Failure: Look for tiles lifting or moving slightly. Tap them; hollow sounds indicate poor adhesion.
Thermal Movement: Cracks at corners or near walls might be due to expansion/contraction. Check if they’re consistent with the room’s temperature changes.
Jobsite safety and handling materials
Safety starts with choosing right tools and materials. Here are some basics:
- Plywood Cutting: Use a circular saw with a fine-tooth blade. Wear safety glasses, gloves, and keep the work area clean.
- Lifting Heavy Materials: Use a dolly or ask for help. Lift with your legs, not your back.
- Dust Control: Wet down surfaces before cutting. Vacuum up dust after sanding.
- Waste Disposal: Segregate waste. Recycle if possible. Follow local disposal guidelines.
- Protective Gear: Wear a respirator when mixing thinset, gloves for handling materials, and hearing protection when using power tools.
Conclusion
Getting this right matters for safety, durability, and a clean look that lasts. A solid build-up and careful substrate prep protect against cracked grout and failed tile work.
Now act as a quick check before you proceed: confirm the plywood choice and support, verify the layer order, dry-fit membranes and underlayment, mix and apply thinset per spec, set the tiles with the right rhythm and pressure, allow proper curing, then grout and finish with maintenance steps. Test a small area first, and protect the work from moisture and temperature swings during install.
Avoid these common missteps: skip or misjudge the substrate prep, use the wrong plywood or wrong layer sequence, skip membrane or wrong thinset practice, rush grout or seal too early, and ignore safety gear. Safety rules are simple: wear eye protection and gloves, ventilate, keep clear of dust and fumes, and never work at heights or with damaged materials without proper support.
If you encounter warped joists, persistent moisture, or a large area with questions about waterproofing, call in a professional instead of pushing on. With discipline and vigilance, your tile job will stay tight and crack-free for the long haul.
FAQ
How should I prep the plywood surface for tiling?
Clean the surface and let it dry completely. Sand any high spots and fill low spots with a patch material. Check the surface with a straight edge and fix gaps before you start.
Which adhesive and materials should I use on plywood?
Use an adhesive your tile and thinset manufacturer approves for plywood. Often a polymer-modified thinset or a decoupling membrane is recommended. Always read the label and follow local rules or the product instructions.
What are good tile installation techniques to prevent cracks?
Create a proper substrate with movement joints if needed. Back-butter large tiles and use the right trowel notch per the product, then stagger joints. Avoid forcing tiles or creating excessive glue squeeze-out.
How do I grout without cracking and when should I seal?
Follow the grout manufacturer’s mixing and curing guidance. Clean grout haze promptly and let it cure fully before sealing. Check the product label to see if sealing is required and when to re-seal.