

Introduction
Thinset coverage troubleshooting is the on‑site check to find areas where adhesive is too thin, has dry joints, or shows trowel-related defects before you grout. Think of it as walking the job, tapping tiles, and lifting a few to confirm full contact and correct buttering technique. Fixing issues now saves rework and loose tiles later.
Look for hollow sounds, visible ridges under tile edges, and dry spots at grout lines; these are signs something’s wrong and you should investigate further. If you’re unsure about a product’s open time, pot life, or recommended trowel notch, check the manufacturer’s label or data sheet and follow their instructions. When in doubt, lift a few tiles to inspect the mortar bed and adjust mixing, trowel choice, or back‑buttering before grouting.
Key takeaways
- Inspect pre-grout thinset for uniform bed, voids, and ridges before tile setting.
- Visually check joints and edges for dry pockets and potential lippage after pressing tile.
- Use a straightedge and a consistent trowel grip to ensure coverage uniformity.
- Keep tools clean and avoid cross-contamination between thinset and grout; wear PPE.
- Perform simple tests like pencil-scratch or notch checks to verify coverage.
- If starved ridges or dry joints appear, pause, remediate, recheck before grout.
Table of Contents
- Introduction
- Key takeaways
- Why Pre-Grout Thinset Inspection Matters
- Visual Checkpoints: How to Spot Starved Ridges, Dry Joints, and Trowel Issues
- Tools and Materials Checklist for Inspection and Repair
- Trowel Selection, Condition, and Technique Impacts
- Simple Tests and Measurements to Verify Coverage Before Grouting
- Remediation Options Before Grouting
- Preventive Practices to Avoid Thinset Defects During Installation
- Special Considerations: Large-Format Tile, Natural Stone, and Wet Areas
- Conclusion
- FAQ
Why Pre-Grout Thinset Inspection Matters
Thinset that doesn’t fully contact the tile can fail in ways grout won’t fix, compromising bond strength and water resistance over time. Catching problems now prevents rework, leaks, and cosmetic failures that are harder and costlier to repair once grout seals the joints.
Inspecting before grout also lets you choose a targeted remedy instead of tearing out whole areas later. If a specification matters for your thinset or substrate, check the product label or technical data sheet before deciding on a fix.
Structural and Cosmetic Risks
Before grouting, check for these issues to prevent tile movement, cracking, lippage, and visible grout failures.
- Voids: Check for air pockets or missing thinset. Tap tiles gently; if they sound hollow, there’s a void.
- Starved Ridges: Look for ridges with little to no thinset. They should be well-filled and level.
- Dry Joints: Ensure all joints are filled with thinset. Dry joints can cause tiles to lift or crack.
- Lippage: Check for uneven tile edges. Tiles should be level and flush with each other.
- Cracked Thinset: Inspect thinset for cracks, which can cause tiles to move or break.
- Inadequate Bond: Ensure tiles are well-bonded to the substrate. Gently pull on a tile; if it moves, recheck your bond.
- Missing Trowel Marks: Check for skipped trowel marks, which can lead to weak bonds and tile failure.
- Uneven Thinset Spread: Ensure thinset is spread evenly. Uneven coverage can cause tiles to lift or crack.
Quick rule: Fix any issues before grouting to avoid costly repairs and rework later on.
Cost and Repair Implications
Identify problems pre-grout for easier, cheaper fixes. Post-grout repairs are messy and expensive.
- Starved Ridges: Pre-grout, you can simply add more thinset to ridges. Post-grout, you’ll need to remove grout and redo.
- Dry Joints: Before grouting, fill dry joints with more thinset. After grouting, you’ll have to grind out the grout and refill.
- Voids: Pre-grout, add more thinset to voids. Post-grout, you’ll need to remove tiles, fix the issue, and reapply.
- Cracked Thinset: Before grouting, repair cracks with fresh thinset. After grouting, repairs are much harder and more expensive.
- Lippage: Pre-grout, adjust tiles to be level. Post-grout, you’ll have to grind down high spots or build up low ones.
- Inadequate Bond: Before grouting, recheck and improve bonds as needed. After grouting, repairs can be very labor-intensive.
Quick rule: The earlier you catch issues, the cheaper and easier they are to fix.
Visual Checkpoints: How to Spot Starved Ridges, Dry Joints, and Trowel Issues
Look for visible ridges, line gaps at edges, and tiles that sit high on adhesive peaks; press the tile edges and listen for hollow sounds or feel movement to confirm. Run a finger along grout joints to detect exposed substrate or dry pockets that grout would hide but not fix.
Check for transfer on the tile back and thinset tails squeezed through joints to assess coverage beneath. If you need exact coverage guidance for your material, consult the manufacturer instructions or product data sheet.
Identifying starved ridges and partial contact
Use this checklist after applying thinset mortar to ensure proper ridge formation and full tile contact. This helps prevent expensive rework due to weak bonds or tiles falling off.
- Check ridge height: Look for consistent, well-formed ridges (about 1/4″ to 3/8″ high) across the entire surface. Thinset should not be too thin or too thick.
- Feel for ridge firmness: Gently press your finger on a ridge. It should feel firm and stable, not soft or mushy. If it’s too soft, you may have added too much water to the thinset.
- Inspect tile edges: Ensure ridges extend to all four edges of each tile. Incomplete ridges at edges can lead to weak bonds and tiles popping off.
- Check backs of large tiles: For tiles larger than 12″ x 12″, ensure there’s a full ridge along the back center. This prevents sagging and maintains even support.
- Look for concentrated contact strips: These appear as narrow, over-trowelled areas where thinset has been pushed into a thin strip. They can cause weak bonds and tiles to pop off.
- Feel for partial contact: Gently press on tiles to check if they feel securely bonded. If some areas feel loose or wobbly, you may have partial contact due to insufficient thinset or improper trowel technique.
- Check for dry spots: Look for any areas where the thinset appears dry and powdery. These can cause weak bonds and tiles falling off.
- Inspect trowel marks: Ensure trowel ridges are well-formed and consistent. Irregular or missing trowel marks can indicate insufficient thinset or improper troweling technique.
Quick rule: Always ensure full, even coverage of thinset with well-formed ridges to prevent weak bonds and tiles falling off.
Detecting dry joints and perimeter voids
Use this checklist after tiling to ensure you’ve got a solid bond between tiles and the substrate. It’s best to check at different stages of the installation process.
- Check grout lines for gaps: Look closely at the joints where tiles meet. If there are visible spaces or gaps, it could mean you’re missing thinset mortar.
- Tap on tile edges: Gently tap each tile with a rubber mallet or your knuckle. A hollow sound indicates a void behind the tile, likely due to insufficient thinset.
- Inspect perimeter tiles: Pay extra attention to tiles along walls and edges. They’re prone to having dry joints if not properly supported during installation.
- Feel for backing through joints: Run your finger along grout lines. If you can feel the backing material (like plywood or concrete board) through the joint, it’s a sign of a dry joint.
- Check corners and intersections: These areas are critical but often overlooked. Ensure there’s no missing thinset at corners and where tiles intersect.
- Inspect around obstacles: Check behind toilets, vanities, and other obstacles. It’s easy to miss these spots during installation, leading to dry joints.
- Look for cracks or separations: Any visible cracks or separations in the tile could indicate a dry joint underneath, which needs immediate attention.
- Check under heavy fixtures: Once you’ve installed heavy fixtures like bathtubs or shower pans, check behind them to ensure there are no voids or dry joints.
Quick rule: If you find any of these issues, don’t ignore them. Dry joints and perimeter voids can lead to tile popping off, water damage, and costly repairs down the line.
Tools and Materials Checklist for Inspection and Repair
Have on hand essentials like a flashlight, margin trowel, grout float, notched trowels, a small brush, mixing bucket, and extra thinset for touch-ups. Bring a straightedge or level for spotting lippage and a sharp utility knife or razor for opening suspect joints carefully.
A damp sponge, clean rags, and a grout removal tool can help during small repairs without full removal. Verify any specialty material or tool suitability on the product label or manufacturer instructions before use.
Inspection tools and simple tests
Before you start, gather these tools to inspect your thinset work. Use this checklist before grouting.
- Rubber mallet: Tap tiles to check for loose or hollow spots. Skipping this can lead to tile failures later on.
- Flashlight and small mirror: Inspect hard-to-reach areas like corners and behind fixtures. Missed issues here can cause water damage.
- Margin trowel (1/4″): Check for starved ridges by running it along tile edges. Skipping this might hide partial contact problems.
- Notched trowel (1/2″ or 3/8″): Ensure proper thinset coverage and ridge formation. Inadequate ridges can cause tiles to lift.
- Level: Check for lippage (uneven tile heights). Skipping this might result in a wavy, uneven surface.
- Straight edge and feeler gauge: Ensure joint width is consistent. Inconsistencies can lead to grout issues.
- Vacuum or soft brush: Remove dust and debris before grouting. Skipping this can cause grout voids.
- Water spray bottle: Lightly mist tiles to check for proper thinset adhesion. Skipping this might hide dry joints.
Quick rule: Always inspect before grouting. It’s cheaper and easier to fix issues now than later.
Repair materials and replacement supplies
When you find issues, have these repair items on hand. Use this checklist before fixing problems.
- Matching thinset: Follow manufacturer type (e.g., MAPEI AquaDefense, LATICRETE 254). Using the wrong type can cause adhesion failures.
- Mixing tools: Have a mixing paddle and drill, or a mixing bucket. Inadequate mixing can lead to poor thinset performance.
- Back-buttering trowel (same size as notched trowel): Apply thinset to the back of tiles for better adhesion. Skipping this can cause tile failures.
- Replacement tiles: Have extras in case you need to replace damaged ones. Not having spares can lead to mismatched tiles.
- Grout (same color and type): Have extra grout for touch-ups. Using the wrong grout can cause discoloration or poor performance.
- Silicone sealant: Seal edges where water might get in. Skipping this can lead to water damage.
- Cleaning supplies (e.g., sponge, cloth, bucket): Clean up any thinset residue before grouting. Residue can cause grout voids or discoloration.
- Product data sheets: Keep these to ensure compatibility of repair materials with existing ones. Using incompatible materials can cause failures.
Quick rule: Always check product data sheets for compatibility before making repairs.
Trowel Selection, Condition, and Technique Impacts
Trowel size and notch shape control how much mortar transfers to the tile; worn or rounded notches and a dirty blade reduce transfer and create starved ridges. Technique matters too—angle, speed of setting, and how you butter edges influence ridge formation and edge voids.
Inspect trowel edges before starting and replace or square them up when worn rather than compensating with extra material. If you’re unsure which notch to use for your tile, check product guidance or manufacturer recommendations.
How trowel choice affects coverage
The right trowel makes all the difference. It’s not just about size, but also the notch profile.
Smaller notches (like 1/4″ or 3/8″) create thinner beds—good for light duty tiles. Larger notches (like 1/2″ or 3/4″) make thicker beds, ideal for heavy tiles and uneven surfaces.
Check your tile’s manufacturer guidelines and thinset packaging for recommended trowel types.
Signs a trowel is worn or misused
A worn-out trowel can ruin your coverage. Here’s what to look for:
1. Flattened notches: If they’re smooth, it’s time for a new one.
2. Uneven ridges: Inconsistent lines mean inconsistent coverage.
3. Inconsistent bedding: If you’re getting thin spots or thick clumps, your trowel might be the culprit.
Simple Tests and Measurements to Verify Coverage Before Grouting
Do lift-and-checks by removing a few tiles that are loose or suspect to look at back transfer and full contact, and use a tap test to hear for hollowness. Spot-peel panels or pull a corner if you find a pattern of poor transfer; that tells you whether a local fix or larger rework is needed.
Measure coverage against the manufacturer coverage recommendations and follow local code where applicable for wet areas. If a specific metric matters, verify it on the product technical data sheet or with local building authorities.
Quick mechanical checks (lift, tap, see-through)
Before grouting, perform quick, simple tests to ensure your thinset coverage is up to par. These checks help spot issues early, saving you time and money.
Lift Test: Gently lift a sample tile from one corner. If it lifts easily, there might be insufficient mortar contact or dry joints. Recheck and repair if necessary.
Tap Test: Tap tiles gently with a trowel or hammer. A hollow sound indicates voids under the tile. Inspect those areas closely.
Use a bright light to inspect tile backs. Look for full mortar contact and any dry spots. Partial contact or dry spots need attention before grouting.
Coverage targets and when to act
Consult your tile, thinset, and substrate datasheets for recommended coverage. Most pros aim for near-full contact in wet or high-traffic areas.
If you find large voids (1/4 inch or more) during your inspections, act immediately:
- Remove the affected tiles.
- Scrape off old thinset.
- Reapply fresh thinset, ensuring full contact.
- Replace and reset tiles.
Small voids (less than 1/4 inch) can often be grouted over, but keep an eye on them. If they grow or cause issues, repair as needed.
Remediation Options Before Grouting
Start with the least invasive fixes: back-butter a tile or pack fresh thinset into edge voids and compact it with a margin trowel, then re-seat the tile. For limited hollow spots, inject fresh thinset or adhesive through drilled weep holes or opened joints to fill voids before grout.
If coverage problems are widespread or the bond is compromised, remove and re-bed the tile area and correct the underlying technique. Always check product instructions and local rules to confirm the appropriate repair method for your materials.
Minor repairs: back-buttering and spot-filling
If you’ve caught issues early, minor touch-ups might be all you need. Back-buttering fills voids behind tiles, while spot-filling targets dry joints or starved ridges.
Back-buttering: Apply a small amount of fresh thinset on the back of the tile where it’s thin or missing. Press firmly into place, ensuring full contact.
Spot-filling: For dry joints or starved ridges, apply thinset directly onto the ridge or joint, then press the tile back into place. Use a trowel to remove excess and ensure a smooth surface.
When to remove and re-bed tiles
Sometimes, spot repairs aren’t enough. Full re-bedding is required when issues are widespread or critical.
Persistent large voids: If you find multiple large voids under tiles, it’s a sign that the original bedding was inadequate. Remove and re-bed these tiles to ensure proper support.
Widespread poor bedding: When many tiles have thin or missing thinset beneath them, full re-bedding is necessary. Removing and replacing these tiles will provide better coverage and prevent future issues.
Critical wet-area failures: In areas like showers or bathrooms, any failure in the tile bedding can lead to water penetration and damage. If you find significant issues in these areas, remove and re-bed the affected tiles immediately.
Preventive Practices to Avoid Thinset Defects During Installation
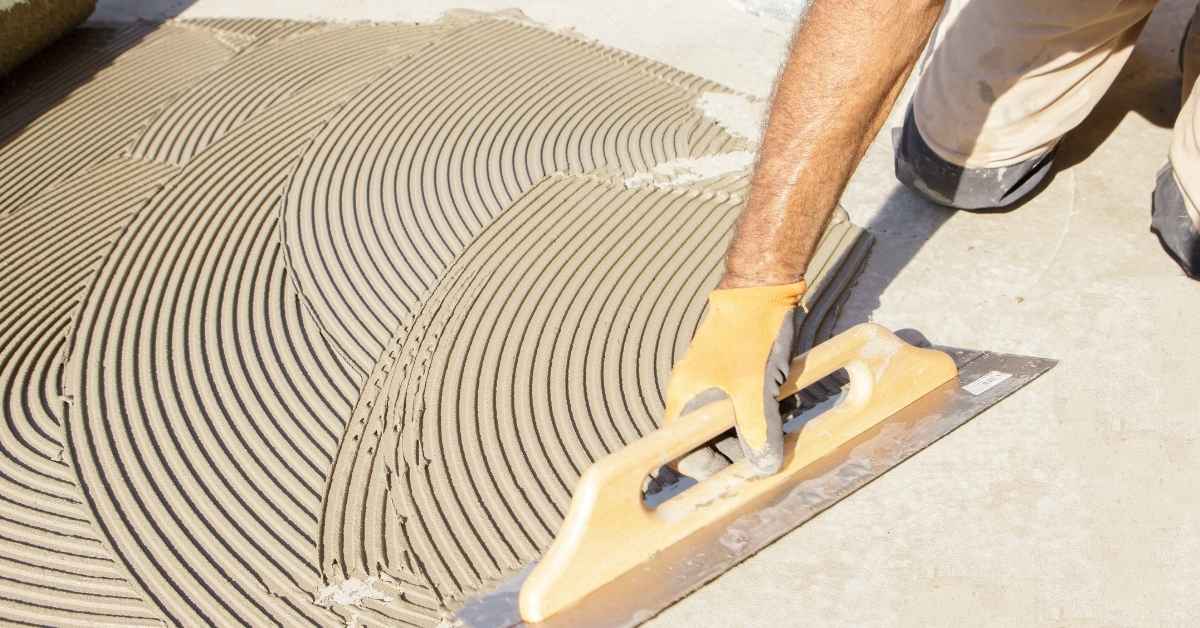
Prep the substrate clean, flat, and primed as required, and mix thinset to the working consistency on the product label to preserve open time and transfer. Butter edges on large or heavy tiles, comb the mortar in one direction, and periodically test transfer to avoid starved spots as you go.
Control working time, keep trowels clean and sharp, and set tiles with even pressure using a beating block or rubber mallet. When in doubt about open time or mixing, consult the thinset manufacturer instructions for guidance specific to your product.
Substrate preparation and priming
Before you start spreading thinset, ensure your substrate is flat. Use a straight edge to check for any dips or humps.
Cleanliness is key. Remove all dust, dirt, and debris with a damp cloth. Let it dry completely before applying thinset.
Prime the surface if required. This helps thinset bond better and prevents moisture from wicking into your tiles. Use a primer suitable for your substrate – concrete, plywood, or existing tile.
If using backer boards, ensure they’re securely fastened with appropriate screws or nails. Fill any seams with thinset before priming to create a smooth surface.
Application technique and working in sections
Start by combing your thinset. This ensures it’s well-mixed and free of lumps. Use a margin trowel to spread the mix onto the substrate, then use a notched trowel to create grooves.
For large tiles, back-butter them before setting. Spread thinset on the back of the tile using a rubber float or trowel. This ensures full coverage and helps prevent dry joints.
Work in small sections – about 3′ x 3′. This keeps your thinset within its open time, preventing it from drying out before you can set your tiles.
Use a straight edge to flatten any ridges or high spots. This helps ensure even coverage and prevents dry joints. If you find any low spots, add more thinset and smooth it out with the straight edge.
Special Considerations: Large-Format Tile, Natural Stone, and Wet Areas
Heavy or large-format tiles and porous natural stone often need full-coverage bedding and additional back-buttering to prevent dead spots and staining. Wet areas like showers demand consistent coverage and proper substrate waterproofing—grout won’t cure coverage defects or stop leaks.
Adjust technique and checks for these scenarios, and use manufacturer guidance for coverage expectations and any special mortars or admixtures. If you’re unsure about a specific tile or area, verify requirements on product technical data sheets or check local code for wet-area rules.
Large-format and heavy tiles
When dealing with large or heavy tiles, you need to ensure a strong bond between the tile and the substrate. This is where back-buttering comes in.
Back-buttering involves applying mortar to the back of the tile before setting it in place. This increases the contact area between the tile and the mortar, creating a stronger bond. It’s like giving your tiles a pair of suction cups to stick better.
But wait, there’s more! You also want to check for any sag or voids during installation. Large tiles can sag if the base isn’t solid enough, and voids can form if you don’t apply enough mortar. So, before you start laying those big boys down:
- Check your base compaction. Make sure it’s solid as a rock.
- Use the right mortar. Thinset is usually your best bet for large tiles.
- Apply enough mortar. Don’t be stingy, but don’t go overboard either. Aim for about 3/4″ to 1″ thick.
Remember, prevention is better than cure. A bit more effort upfront can save you a lot of trouble later on.
Showers, pans, and wet area specifics
Wet areas like showers need extra attention. You’ve got to keep water where it belongs – in the shower pan and out of your walls.
Waterproofing is a must before you even think about tiling. Follow both your waterproofing membrane’s and thinset mortar’s instructions to the letter. They know their stuff, so don’t mess with it.
Check base compaction too. Loose substrate can lead to cracks and leaks. You want a solid base, not a squishy one. And remember, large-format tiles need extra support, so check your backer board’s strength if you’re going big.
Conclusion
Getting this right now protects durability, keeps water out, and avoids costly redo. If you nail the pre-grout thinset checks, your grout line will look clean and perform well for years, even in wet areas or with large-format tile.
Make the next steps clear: visually scan the work in good light, identify starved ridges, dry joints, or trowel issues, and then verify with simple tests in a small area before moving forward. Do a light comb or rake pass in a test spot, press a tile to feel for hollow spots, back-butter where needed, recheck with a straight edge to confirm even bed thickness, and confirm there are no voids or high spots that could telegraph through the grout.
Common mistakes to avoid are obvious but costly: never grout over a hollow or starved area, don’t rush the back-buttering or overwork the thinset, and always stop if you see inconsistent coverage on more than one tile. PPE, good lighting, and working in small, checked sections helps keep you safe and stops damage from spreading. Safety first: test in a small area, wipe off excess before it skins, and keep tools clean to prevent contamination.
If you’re unsure about large-format tile, natural stone, or a wet area, or you run into persistent coverage problems after the checks, call a professional before you push on. Resolve the root cause now, then grout with confidence. Stay focused, document what you changed, and you’ll finish with a solid, durable installation.
FAQ
What quick signs tell me thinset has starved ridges or incomplete coverage before I grout?
Look for ridges or hollow spots that show lighter color or patched areas where the thinset didn’t fill evenly. Tap the surface gently; if it sounds hollow or soft spots press in, that’s a red flag. If you see gaps that could trap air or show through the tile edges, rework it.
How should I verify coverage across large or uneven areas without pulling up tiles?
Use a straightedge or level to scan for high and low spots, then run a notched trowel across those areas again to re-embed. Check with a short straight edge across multiple tiles to confirm a uniform bed. If you spot consistent thin spots, rework the field before moving forward.
What should I do if I find dry joints or starved sections after DIT (do-it-thinset) work?
Back-butter the back of the tile or re-trowel the substrate where you see gaps, then re-check the transfer by pressing the tile into the thinset firmly. Recombine with a fresh skim coat to fill the voids and avoid pinholes. Don’t grout over a known dry area; fix it first.
Are there safe checks I can do at the jobsite to prevent future issues?
Make a quick test by placing a few tiles with a consistent amount of thinset and press to see if coverage is even. Confirm the trowel size matches the tile and substrate; if unsure, reference the manufacturer’s instructions. If anything feels off, pause and fix it before grouting.