

Table of Contents
- Introduction
- What is a “dead bag” in testing context?
- Causes of clumps and lumps in bags
- How “dead bag” conditions affect test results and setting risk
- Standard testing and inspection methods for detecting dead bags
- Protocols to minimize dead bag formation and setting risk
- Troubleshooting and remediation when clumps are found
- Case studies and real-world examples
- Frequently Asked Questions About “Dead Bag” Tests
- Regulatory, safety, and quality considerations
- Frequently asked questions (FAQ) and quick-reference checklists
- Resources, templates, and further reading
- Conclusion
- FAQ
Introduction
Dead Bag tests help you detect clumping and lumping that indicate setting risk.
You’ll learn why these signs matter for material performance and handling, and you’ll be guided through practical steps, tips, and everyday rules of thumb to assess samples and interpret results.
What is a “dead bag” in testing context?
A ‘dead bag’ is a testing term for a bag that can no longer serve its intended purpose. It most commonly refers to physical sample or reagent bags that have failed or been compromised, not data dead zones.
On a DIY or field job, spotting a dead bag helps prevent spoiled samples, inconsistent results, and wasted time. Check seals, labeling, and storage conditions to avoid using compromised bags and to keep measurements reliable.
Origin and common usage
The name came from field crews who wanted a quick way to mark material that shouldn’t be mixed back into the job. Over time crews started folding suspect soil or broken concrete into a labeled bag and leaving it aside. That shorthand stuck because it was faster than writing long notes on every sample.
You’ll see “dead bags” most on road, trench and concrete jobs where materials get sorted on site. Labs and inspectors use the same term when they want a sample kept separate for review or disposal. If you’ve read the earlier definition, this is just the practical, on-the-ground version of that idea.
What to do: tag the bag, record who isolated it, and note why. If someone says “dead bag,” treat it like a potential problem—don’t reuse the contents. Also make it a habit to check base compaction or other nearby work immediately after, so you don’t bury a mistake.
Differences between bag types (sample vs reagent vs waste)
Sample bags hold the material you actually test. A “dead” sample bag usually means lost volume, broken seal, or contamination. If you suspect that, treat it like trash for results: sample integrity is non-negotiable. Don’t try to patch a compromised sample bag—collect a new one or repeat the draw.
Reagent bags are different. A dead reagent bag can mean depleted chemistry, precipitates, or expired reagent. You can sometimes revive the run by swapping to a fresh bag and flushing lines, but check reagent lot and expiration first. If the reagent shows cloudiness, particles, or a changed color, replace it and log the change.
Waste bags are the least critical for data, but they create operational problems fast. A dead waste bag—full, ruptured, or improperly sealed—causes spills, backpressure, and instrument errors. Replace or secure waste bags immediately, and don’t keep testing if the waste path is compromised. Label, seal, and dispose according to protocols to avoid fines and cross-contamination.
Causes of clumps and lumps in bags
Clumps in bags occur when physical factors such as moisture and temperature swings make particles stick together. Chemical factors like reactive dust or ingredient interactions can glue powders into lumps, while procedural factors such as packing density and vibration during filling accelerate aggregation.
Recognizing these overlooked causes helps you adjust storage, handling, and mixing to reduce waste and improve consistency. On a jobsite, small clumps can clog tools, alter ratios, or slow progress, so controlling moisture, vibration, and packing after opening matters.
Material incompatibility and precipitation
Pick the right bag and additives or you’ll see precipitates, clumps, or weak spots later. The chemistry and solubility of what you mix determines whether solids stay suspended or settle into nasty lumps that ruin strength and finish.
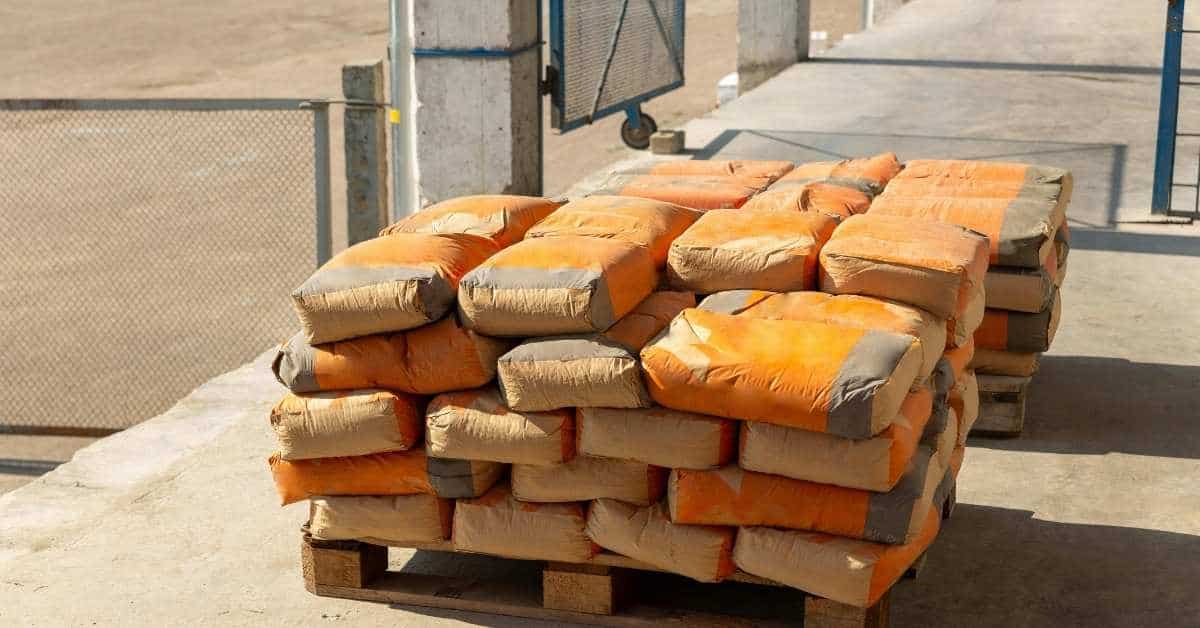
- Portland cement Used as the basic binder for concrete and many mortars. Look for strength class (e.g., 32.5 or 42.5) and “CEM I” on the bag. Cheaper or wrong grade can lead to incomplete hydration, surface dusting, and cracking; expect $8–$15 per 25 kg bag.
- Masonry cement Pre-blended for brick and block work. Check for ASTM or EN conformity and plasticizer content on the label. Use when working with bricks to match flexibility; wrong use causes poor bond or hard, brittle joints and staining; $10–$20 per bag.
- Type N mortar General-purpose mortar for above-grade masonry. Look for recommended mix ratios and compressive strength (usually moderate). Choose it for softer brick; using overly strong mixes will crack old masonry and ruin appearance; inexpensive and DIY-friendly.
- Polymer-modified mortar Mortars with added polymers for adhesion and flexibility. Label should state polymer % or “improved adhesion” and reduced water demand. Use on thin-beds or repairs where movement occurs; avoid straight cement in these spots or you’ll get delamination and spalling; expect $15–$30 per bag or cartridge.
- Bonding admixtures Liquid additives that keep fine particles suspended and improve bond. Look for compatibility notes (cementitious, lime-based) and dosage instructions. Use small doses to prevent separation; wrong admixture causes flocculation and visible lumps, and weakens the cured joint; $10–$25 per litre.
- Lime (hydrated) Added for workability and plasticity in mortar mixes. Check for “hydrated lime” and fineness on the bag. Use when you need flexible joints and fewer shrinkage cracks; leaving it out or substituting quicklime causes poor texture or chemical reactions and premature failure; cheap and measured by kg.
- Sand and aggregates Filler that controls bulk and porosity. Use clean, well-graded sand and check sieve specs or “sharp sand” label. Dirty or overly fine sand causes bleeding, sedimentation, and clumping; cheap sand saves money now but can cost you repairs later.
- Waterproofing sealer Surface treatments that prevent salts and precipitates migrating into the mix. Look for breathable, cement-compatible products and UV resistance. Use on masonry exposed to salts or freeze-thaw; the wrong non-breathable sealer traps moisture and causes blistering and salt efflorescence; expect $15–$40 per litre.
Pro tip: Buy from a reputable supplier, store bags off the ground and dry, and mix to the bag’s exact ratios. Over-watering, under-mixing, or using expired bags guarantees lumps and weak joints — don’t wing it.
Temperature, agitation, and storage effects
Too hot or too cold will make powders and wet mixes change texture fast. Check storage temperature and keep it steady. A freeze–thaw cycle or a hot day in an unventilated garage will harden things into lumps that won’t break down easily.
How you move the bag matters. Rough handling and constant banging create compacted cores. Gentle rolling or slow tumbling is usually enough to keep things free-flowing. If you find large hard clumps, stop tossing the bag around — avoid over-shaking and reassess your handling.
Storage decisions can prevent most problems. Use sealed, dry storage and short shelf rotation. If you already have lumping, try warming slightly to loosen adhesives or break up small pieces by hand before using. And remember other causes like incompatibility or precipitation could be at play; check those if lumps keep returning.
Contamination and microbial growth
If clumps look slimy, discolored, or smell sour, think biological contamination first. Microbes and stray organic particles thrive where moisture or dust gets in. You’ll often see localized spotting, sticky patches, or little gas bubbles inside the bag rather than uniform precipitation like from wrong mixing or temperature issues.
Don’t dig through with bare hands. Put on gloves, isolate the bag, and check seals, vents, and any torn areas where material or water could have entered. If nearby bags show the same pattern, the storage area or handling practices are the likely culprits. A damp pallet, dirty scoops, or insects can bring in spoilage organisms.
For a DIY check: look, smell, and feel (with protection). Note rapid heat, weird odors, or sliminess — those are strong signs of microbial activity. If you suspect contamination, don’t use the product in critical applications. Either return it, dispose of it per local rules, or have a sample tested. For prevention, improve dry storage, fix seals, and keep tools clean; that’s more useful than fiddling with formulations already covered under other causes.

How “dead bag” conditions affect test results and setting risk
When a bag contains dead pockets or lumps, the material isn’t evenly mixed. That clumping reduces analytical accuracy, harms sample representativeness, and increases setting or decision risk. Common error types are bias in the measured value and greater imprecision from uneven distribution, which can vary with sample size and how the sample is taken.
On a DIY or jobsite scale, clumps mean a small sample may not reflect the whole batch, leading to over- or underestimation of required settings. The practical effect is you might under- or over-treat the material, wasting resources or failing to meet specs. Visually inspecting bags, mixing thoroughly, and taking multiple subsamples helps improve representativeness and lowers risk.
Measurement bias and variability
When the test area isn’t uniform, readings will drift and lie to you. Pockets of softer material or wet spots near the edges push results one way, while harder patches push them the other. Think of it like weighing a fruit bowl that has a rock hidden under the apples — the average isn’t telling you the true condition of the whole slab.
That inhomogeneity both biases the mean and inflates uncertainty. A few bad spots can move your reported value enough to change pass/fail decisions or the setting risk you already checked under “dead bag” conditions. If you rely on a single test point, expect it to be misleading.
Do a quick sweep before you test: check base compaction, note visible layers, and document sampling locations. Take several measurements across different spots and compare them. If results scatter widely, treat the data as uncertain and err on the side of more compaction or remediation rather than trusting a lucky good reading.
False negatives/positives and regulatory implications
When a “dead bag” or similar sampling problem skews results, you can either miss a real contaminant or trigger a needless alarm. Missed contaminants mean unsafe conditions stay in place and later show up in a report or as a health incident. False alarms lead to wasted time, costly retests, and loss of trust with regulators and neighbors.
Practical fixes are simple: visually inspect the bag and fittings before each run, check base compaction and sampling pressure, and run a duplicate or blank when anything looks off. If you suspect bias or extra variability, flag the sample immediately and document the reason on the chain-of-custody. Retest fast rather than guessing.
Regulators expect clear records and defensible action. If your paperwork is sloppy or you discard questionable samples, you risk fines, shutdowns, or orders to redo entire investigations. Be frank in reports, tell the regulator when a sample is suspect, and keep the raw data—those moves save headaches and money later.
Standard testing and inspection methods for detecting dead bags
A practical, stepwise approach helps you detect dead bags by visual checks for clumping, physical feel for integrity, and basic cues before testing. Start with quick visual checks and simple physical tests, and perform more thorough methods if any concerns arise.
This on-site know-how saves time, cuts wasted material, and helps identify compromised bags before they affect results. Combining quick visual cues with physical tests and selective instrument-based checks gives you reliable, proactive bag integrity assessment on the job.
Visual inspection checklists
Look at the bag straight on and against light. Check translucency first: a good bag will have consistent opacity. Hold it up and look for cloudy patches, dark streaks, or areas that let too much light through. If you see bubbles or unusual sheen, mark the bag for closer testing.
Next feel and inspect the outside and the seams. Run your hand over the surface for beads, lumps, tears, or weak spots. Check the bottom for sediment, granules, or clumps that shift when you tilt the bag. Smell briefly for unusual odors; chemical or sour smells mean do not use the bag.
Reject the bag if you find rips, holes, heavy sediment, irregular translucency, or loose seams. Also reject any bag with sticky residue or a strong chemical smell. When you reject a bag, set it aside clearly labeled and remove it from the work area immediately. If unsure, err on the side of caution and send it for the standard tests mentioned earlier.
Sampling and homogenization techniques
Don’t guess — take several small samples instead of one big scoop. Work across the bag: top, middle, and bottom, and from different sides. Use a clean scoop or coring tool each time to avoid cross-contamination. If you’ve already done the visual checks, use those notes to target suspicious spots but still collect a representative spread.
Combine those small samples into a clean container or on a clean tarp and mix them until the material looks uniform. For powders or fines, fold and turn with a flat shovel; for lumpier contents, break clumps before mixing. If you must re-homogenize a whole bag, empty it onto a clean surface, remix in manageable batches, then rebag or test from the mixed pile. Wear gloves and a dust mask when mixing — no excuses.
Always keep a small backup aliquot and label and seal samples immediately. Note where each subsample came from and the time. If results will decide removal or reuse, take extra samples rather than relying on one. Clean tools between bags and don’t shortcut sampling to save time — that’s where mistakes hide.
Instrumental verification (particle counters, microscopy)
When you already did the visual checks and grabbed samples, bring in instruments to quantify what your eyes can’t: particle counters for counts and size bins, microscopy for shape and aggregates. Use a particle counter when you need quick numbers—counts per milliliter and simple size ranges. Use microscopy when you need to see whether material is flaky, fibrous, or clumped. Don’t skip microscopy if the counter shows a high count but you can’t tell what it is by feel.
Set up the counter with the right flow rate and sample volume for the expected load; too small a volume gives noisy data, too fast a flow misses small particles. Run at least three repeat draws from the same homogenized sample and report median values, not the lowest number you like. For microscopy, concentrate or filter the sample to get visible material, then examine multiple fields and record typical particle sizes and whether aggregates break apart with gentle agitation.
Calibrate and clean equipment before use. Run a blank to check for background contamination, and use a reference standard or beads to verify sizing accuracy. If your counts jump after swapping bottles or tools, you picked up contamination—stop, clean, and re-sample. Trust the instrument, but cross-check with a microscope image if the numbers look weird.
Decide based on purpose: routine screening uses particle counters; forensic troubleshooting or aggregate identification uses microscopy. If you must choose one and you don’t know the problem, run a quick counter first—if it flags high, follow up with microscopy. Simple, repeatable checks beat fancy guesses every time.
Protocols to minimize dead bag formation and setting risk
Follow clear operating procedures and preventive controls to minimize dead bag formation and lumping from collection through analysis. Use proper handling practices at every step to prevent clumps and ensure consistent results.
On a jobsite, proper handling reduces delays and rework caused by clogged samples. Consistent sample integrity means safer, faster analyses and more reliable outcomes. Following these guidelines helps you avoid costly mistakes and keeps workflows smooth.
Collection and filling best practices
Pick the right bag for the job and don’t guess. Use bags rated for the product weight and chemical compatibility. If you are mixing layers, choose thicker seam construction or a bag with an inner liner. A poor bag will fail long before other controls do, so pay attention at ordering time.
Fill to the designed volume, not “as much as will fit.” Leave the planned headspace to allow for settlement and thermal expansion. Overfilling hides voids and invites pressure on seams. For small batches, use a simple fill-stop method and mark the fill line on the bag so every helper knows when to stop.
Seal with clean, dry surfaces and the right method—heat seal, twist-and-tie, or clamp—depending on the bag type. Remove debris and moisture from the lip before sealing. Check seals immediately and again after initial set; a quick squeeze test or visual inspection catches leaks early. If you’ve followed the earlier protocols on placement and compaction, these filling and sealing steps finish the job and keep dead bags from forming.
Transport and storage controls
Keep it simple: keep temps steady. Store and transport bags in a cool, dry spot between about 5°C and 25°C. Avoid freezing and don’t let internal temperatures climb above ~30°C — heat speeds setting and ruin bags. If you must move between climates, allow products to re‑stabilize at target temperature for several hours before use.
Time matters. Unopened stock should follow the manufacturer’s expiry, but once bags are filled or exposed, aim to use them fast — 24–48 hours is a sensible rule for most mixes; anything beyond 72 hours raises the risk of partial setting or dead pockets. Mark times on each batch and toss anything that sat beyond the window rather than guessing.
Don’t batter the load. Minimize shock and vibration by securing pallets, using soft dunnage, and avoiding drop forklifts or rough handling. Use gentle acceleration and braking during transit, strap stacks to prevent shifting, and isolate sensitive batches with foam or air bags if the route is rough. These steps prevent internal movement that creates voids or early set — you’ve already covered proper filling and collection, so this is about keeping that work intact until you use it.
Pre-analysis preparation and standards
Before you touch the analysis equipment, do a quick checklist. Confirm sample IDs and lot numbers, record the ambient temperature, and give samples time to sit if they were recently moved. Don’t guess—write it down. If a sample looks clotted or odd, set it aside and flag it rather than plowing ahead.
Handle the sample gently. For most liquid samples, do a few slow end-to-end rotations or a single slow roll—no violent shaking. If a protocol calls for temperature equilibration, warm or cool samples in a controlled block or water bath to the target, not in your hands. Follow the assay’s instructions for how long and to what temperature; those small details matter.
Always run a known reference or control at the start and whenever you change batches or operators. Label controls clearly and keep a short log of control values and deviations. If controls fail, stop and troubleshoot—don’t pretend the run is fine. Good paper trails and consistent pre-analysis steps cut down on surprises. Run a control sample and document conditions every time.

Troubleshooting and remediation when clumps are found
When clumps are found, follow a clear decision process to determine if recovery is safe and whether re-sampling is needed. Start with immediate safety steps, then branch to recovery or containment based on observed properties. Document each action and outcome to ensure traceability.
This approach helps field teams act quickly without guesswork and improves data integrity. It supports proper remediation and follow-up sampling. Clear documentation also aids communication with laboratories and supervisors.
When to accept, recondition, or reject a bag
Look at the bag and then test it quick. If the clumps are few, soft, and break apart with firm pressure, you can usually accept the bag after you check base compaction and confirm the mix spreads and levels correctly. If the bag tears or the contents are damp but workable, don’t toss it—confirm it will place to grade and cure as expected.
If reconditioning is allowed, break clumps by hand or with a mortar-board and hammer, then dry-sieve or screen the material before mixing. For small jobs, spread the contents thin, let it dry to workable consistency, and remix. For larger volumes use a mechanical breaker or mixer and avoid adding water blindly—too much water ruins the mix. Wear a mask and gloves when breaking dusty bags.
Reject and resample if clumps are hard as rock, the bag shows contamination, the color or smell is off, or more than a small portion won’t break down with reasonable effort. In plain terms: if you can’t get the material to behave like the rest of the batch, reject and resample. Get a replacement bag from the supplier and, for large jobs, send a sample for lab testing before you keep using that lot.
Safe procedures for breaking up aggregates
When you find a clump, start small and observe. Pull a tiny sample from the edge and try a gentle fix first. If the piece comes apart with light tapping or by running it through a properly sized sieve, you’ve got a low-risk path. If it resists, stop and reassess before applying more force.
Use mechanical methods that don’t add heat or shear: hand spatulas, low-speed rotary tumblers, or sieving with the correct mesh. Work slowly and in short bursts. Avoid pounding, high-speed blenders, or grinding that can heat the material or change particle chemistry. Always keep a reserved untouched sample for comparison so you can check analyte integrity after treatment.
For stubborn aggregates, consider a validated, gentle dispersant or minimal-volume solvent known not to react with your target analyte. Apply the smallest effective amount, mix gently, then remove or neutralize the dispersant per protocol. Run a quick control test (blank and treated replicate) to confirm recovery before treating the whole bag. If you can’t break the clump without risking the analyte, refer back to your acceptance/reconditioning criteria and don’t improvise.
Recording and reporting deviations
If you find clumps, stop guessing and write it down. Take clear photos, note the time, bag ID, and job location. Then update chain-of-custody records immediately so the sample trail is solid. Don’t let loose notes or text messages be the only record.
Fill a formal deviation report that states what you found, who saw it, and the immediate action taken (accept, recondition, or reject). Reference any corrective work you performed or ordered — no need to re-explain the procedure here, just link to the decision and who approved it. Keep any retained samples sealed and labeled for possible lab checks.
Tell stakeholders what they need to know, fast. Alert the project manager and client if there’s a quality or safety risk. Be clear about impact: potential delays, extra testing, or increased cost. If the situation is minor and handled on site, say so; if it could affect performance or safety, stop work and escalate. Plain language and timestamps are your friends.
Case studies and real-world examples
Case studies show how quick, small mistakes with dead bags can escalate into bigger failures if not caught early. They illustrate the chosen response in real scenarios and highlight the lessons learned.
For a DIY or jobsite reader, these anonymized examples offer practical takeaways you can apply on site to prevent failures and improve safety. Understanding how crews identified signs, made quick decisions, and tested fixes helps you spot risks before they become emergencies.
Example 1 — field sample with temperature-induced precipitation
We had a field soil sample that started showing white flaky precipitation after a cold night. The top inch of the sample developed crystalline patches, and the soil felt powdery when scraped. I ran a simple visual inspection, checked temperature history, and did a quick soluble-salts rinse to see if the crystals dissolved. Those diagnostics pointed to temperature-induced salt segregation rather than contamination from nearby materials.
Corrective action was straightforward. I warmed the sample slowly to room temperature, dried it under controlled conditions, and retested the soluble salts and moisture content. On the site we adjusted storage practices: keep samples covered and insulated overnight and check base compaction before leaving them exposed. If you see the same flakes in the field, stop further compaction or mixing until the sample stabilizes.
Outcome: after controlled warming the crystals disappeared and test values returned to expected ranges. The job stayed on schedule once we changed the overnight storage routine. Bottom line: when cold causes weird precipitation, don’t assume contamination — warm, retest, and fix handling practices so you don’t waste time or ruin mixes.
Example 2 — reagent bag contamination causing assay failure
We opened a shipment and found a reagent bag with a milky film and a torn corner. That bag went straight into assays and produced wildly low signals. The root cause was cross-contamination from a leaking solvent bottle stored above the reagents and loose caps during transport.
When assays fail like this, don’t guess. Stop the run, mark affected plates, discard contaminated reagents, and rerun controls with fresh lots. Record batch numbers, photograph the damage, and test an unaffected reagent from the same lot to see if the problem is isolated or widespread.
Fixes are simple and cheap: rework storage so liquids sit below dry reagents, enforce cap checks before shipping and receiving, and add a quick visual acceptance step on arrival. Also add a “no mixed storage” rule and one person responsible for incoming QC. These steps prevent repeat mistakes—unlike Example 1, this one’s totally avoidable with better handling.
Regulatory, safety, and quality considerations
Regulatory and quality standards require clear documentation, traceability, and validated procedures for dead bag testing and decision-making. These guidelines help ensure safety, reliability, and consistent results.
For a DIY or jobsite reader, understanding these controls helps prevent unsafe testing, reduces the risk of errors, and supports compliant, repeatable decisions. Following established safety checks and basic quality practices makes the process more predictable and protects everyone involved.
Compliance with sampling and testing standards
Follow the right standard for the job. Pick the method that matches your target analyte and material — ISO, EPA, ASTM, or the relevant pharmacopeia. Don’t guess. If a method calls for a sterile vial, chilled transport, or a preservative, do it. Cutting corners here destroys the sample and wastes money.
Make the paperwork as strict as the field work. Use a clear chain of custody, record timestamps, temperatures and who handled the sample. Note the method version and any deviations. Labs and inspectors will reject results if the documentation is sloppy.
Send samples to an accredited lab that follows the same standards you used. Confirm lab calibration, QA/QC reports, and holding times up front. If you need legal or regulatory acceptance, insist on the exact EPA, ISO, ASTM, or pharmacopeial method number in writing before you collect anything.
Health and safety precautions for handling compromised bags
Stop work and isolate the area the moment a bag rips or is leaking. Keep kids and pets away. You want a clear perimeter so dust or liquids don’t spread. If the material might be hazardous, follow the sampling and testing standards mentioned earlier before you move anything.
Put on proper PPE before you touch the bag: nitrile gloves, eye protection, a disposable coverall or old clothes you can decontaminate, and an N95 or better respirator when dust or fumes are possible. Don’t rely on one glove or a bandana. If heavy items are involved, wear boots and steel-toe as needed.
Contain the spill; don’t sweep it into the wind. Use damp rags or approved absorbent to gather solids and wipes. Bag the residue and used PPE in heavy-duty bags, double-bag and label them, and store in a secure, ventilated area until proper disposal. Decontaminate tools and wash hands and exposed skin thoroughly. If in doubt about disposal or contamination, stop and call the pros rather than guessing — paperwork and proper waste handling matter for safety and compliance.
Frequently asked questions (FAQ) and quick-reference checklists
This FAQ provides concise answers to common practitioner questions and two quick checklists for on-site assessment of dead bag issues. The focus is on practical, actionable guidance you can use in the field or lab. Use the checklists to quickly identify symptoms and respond appropriately.
Two compact checklists help you triage dead bags quickly and minimize downtime. Checklist A: Visual and seal integrity (check bag material, seams, labeling) and an airflow/seal test; Checklist B: Immediate actions (isolate bag, label status, notify supervisor) and documentation.
Top 10 quick checks before running an assay
You’re about to run an assay. Do a fast sweep first. These are quick, practical things to spot problems before they cost you time or samples.
In under five minutes, check bag integrity (no leaks, tears, or swollen seams), confirm labels match the run ID and date, verify controls and standards are present and unexpired, glance at storage temperature logs, ensure the sample volume meets minimum, inspect for visible contamination or foreign matter, confirm pipettes and tips are clean and loaded, check reagent color/clarity for odd changes, verify the instrument status/readiness light, and confirm you’ve got spare consumables on hand.
If anything fails a quick check, stop and fix it — don’t run a partial or compromised assay. If everything looks good, start the run and note any anomalies in the log. Quick, decisive action here saves a lot of rework later.
FAQ: re-sampling timelines, liability, and reporting
If a result looks off or you skipped a quick check from the Top 10, don’t guess—re-sample. In most field cases, do a confirmatory sample within 24–48 hours and keep the original sample sealed and labeled. If conditions changed (rain, traffic, new contamination), wait until you can isolate the cause before trusting a repeat result.
Liability follows who handled the sample and who signed the work order. If you collected the sample wrong, that’s on you. If a contractor or tech altered the chain of custody or ignored protocols, they bear responsibility. Always get signatures, timestamps, and the lab name on file. Those simple records settle most disputes faster than arguing later.
If you suspect a compromised result, stop work, alert the lab, and file a short report with photos, timestamps, and the sample ID. Ask the lab to flag the batch and rerun or hold analysis pending an investigation. If costs or safety are at stake, notify the client and keep a written trail—insurance and regulators want paper, not memory. Remember: quick documentation beats long explanations.
Resources, templates, and further reading
This section highlights practical templates, reference texts, and training resources you can use to implement the recommendations. It points you to templates such as an inspection checklist and a deviation report, plus key reference texts and training links at https://example.com/inspection-checklist and https://example.com/deviation-report. These resources are described to help you get started quickly.
For a DIY or jobsite reader, these materials save time and reduce guesswork by standardizing how you assess conditions and document changes. Using them on the job helps you stay compliant, communicate clearly with your team, and track improvements over time. Access to practical templates and training supports turning recommendations into real, on-site action.
Sample SOP and inspection checklist template
The template lays out step-by-step actions: setup, safety checks, sample ID, test method, acceptance criteria, and final sign-off. It gives fields to note who did the work, what equipment was used, and the exact readings. Use the template as your starting point, then delete or add lines to match your site.
To adapt it, change the test method and acceptance criteria for different materials. For soil tests add moisture and compaction lines and check base compaction. For concrete swap in slump, cylinder strength, and curing notes. For coatings or finishes include surface prep, temperature, and adhesion checks.
Also tweak frequency and tolerance based on risk and contract. If you’re on a fast job, tighten sampling intervals. In bad weather or unusual conditions record extra details and record test conditions. Finally, keep one copy in the field book and one digital copy for signatures and traceability.
Recommended training and certification courses
Get hands-on courses that teach proper sample handling and contamination control. Look for classes that cover bag filling techniques, sealing methods, and how to spot contamination before it becomes a headache. A one-day workshop plus a refresher every year will keep crews sharp.
Take a quality management course that covers chain-of-custody and root-cause investigation. You want training that shows how to run basic checks, document failures, and fix the process so the same “dead bag” mistake doesn’t repeat. If you already use the sample SOP and inspection checklist template, pick courses that align with those procedures.
Certifications from recognized bodies add real value. Prioritize certificates that include practical assessments over purely online theory. And don’t skip vendor or equipment training — knowing how your baggers and seals actually work prevents lazy shortcuts. Train, test, and enforce — anything less invites problems.
Conclusion
Dead bags can quietly ruin results, lead to setting risks, and show up as costly damage later. Stay vigilant, test methodically, and keep safety front and center so the project stays durable and looking right.
Start by checking the bag with your standard testing and inspection methods, look for obvious clumps, assess any setting risk, and then rebag or remediate as needed before you proceed. Test first on a small, controlled area, follow the protocol step by step, and document results so you know exactly what you corrected and what still needs watching.
Common mistakes to avoid are pushing forward with a suspect bag, skipping remediation when clumps show up, and ignoring small signs of degradation that can cascade into bigger problems. Always wear the right PPE, work in a controlled area, and don’t mix batches or skip the small corrective steps listed in the protocols.
If you’re unsure, or if clumps keep showing up after remediation, call in a professional rather than risk bigger damage or a failed project. With careful checks, disciplined remediation, and a clear plan, you’ll keep the work safe, solid, and on track to finish on time. Stay practical, stay focused, and keep moving with confidence.
FAQ
Understanding dead bags is crucial for anyone working with concrete or other materials prone to clumping. These FAQs address common concerns and provide practical solutions to help you manage and mitigate risks effectively. Whether you’re on a job site or tackling a DIY project, these insights will keep your work safe and durable.
- How can I prevent dead bags from forming? Store materials in a cool, dry place and use them within the recommended timeframe. Avoid rough handling and ensure bags are sealed properly to prevent moisture ingress.
- What should I do if I find clumps in a bag? First, assess if the clumps can be broken down manually or with gentle tools. If they can’t, consider rejecting the bag and sourcing a new one to ensure material integrity.
- Is it safe to use material from a dead bag? If the material is clumped or compromised, it’s best not to use it. Using compromised material can lead to weak mixtures and structural failures.
- How does temperature affect dead bag formation? Extreme temperatures can cause materials to clump or set prematurely. Keep storage conditions stable and avoid exposure to direct sunlight or freezing temperatures.