
Introduction
You can speed up cyanoacrylate curing on cold or damp concrete by improving surface dryness and controlling temperature and humidity. This guide walks you through practical steps for surface prep, adhesive selection, and curing tricks to achieve a strong bond in challenging conditions. By the end, you’ll know how to handle cold, damp substrates and what indicators show your glue is setting correctly. The guide includes vetted product examples, a short printable protocol, and clear safety and pro-call thresholds so you can act without guesswork.
Related: Time is of the Essence: Understanding the Drying Process of Super Glue.
Key takeaways
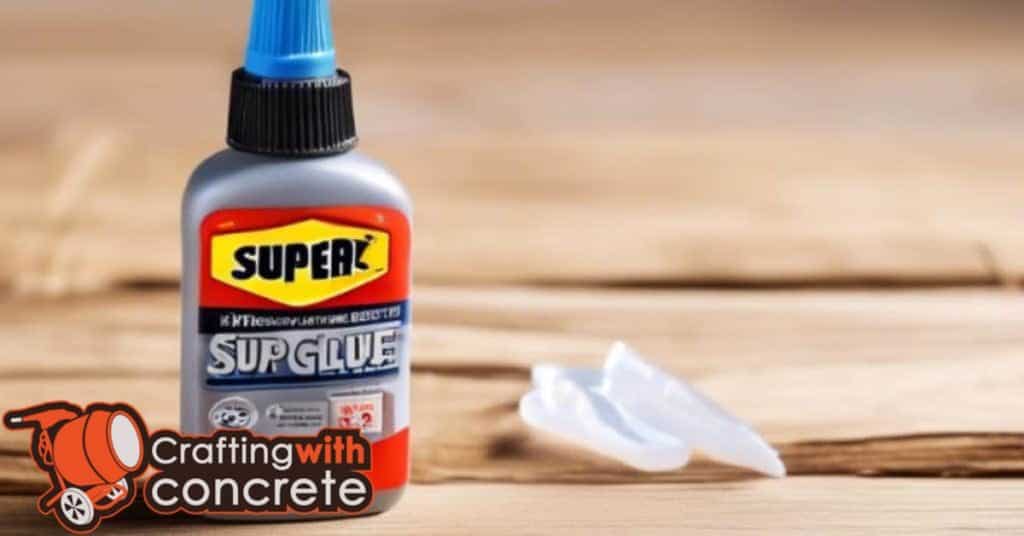
- Choose fast-setting cyanoacrylate formulated for concrete with moisture tolerance and bonding efficiency (examples: Loctite Plastics Bonding System (a concrete-rated CA variant), Permabond P101 or P2 for porous substrates, and industrial CA/activator pairs from Bob Smith Industries / BSI for cold conditions).
- Dry and clean the surface to a damp-free, dust-free condition before bonding; use the substrate diagnostic checklist below to decide go/no-go.
- Pre-warm adhesive and substrate to near-room temperature for faster cure; use controlled heat and monitor surface temps with an IR thermometer.
- Use micro-dots or thin beads (target bead thickness ≈ 0.2–1.0 mm) instead of globbing to accelerate even curing and reduce exotherm risk.
- Apply commercial curing accelerants/activators per label — e.g., 1–2 short 0.2–0.5 second sprays at 6–12″ distance for handheld sprays — and test on scrap first.
- Allow initial set under light load guidance before full cure; for cold/damp jobs expect tack-free in minutes to an hour and serviceable strength in 24–72 hours depending on conditions.
Table of Contents
- Introduction
- Key takeaways
- Quick overview: when CA glue is appropriate for concrete
- Surface preparation for cold or damp concrete
- Proven methods to accelerate CA curing on cold or damp concrete
- A step-by-step protocol for fastest reliable cure on cold/damp concrete
- Safe household and shop accelerants — what works and hazards
- Tools and materials checklist
- Cleanup, storage, and troubleshooting common failures
- Safety, cost, and decision-making: quick fixes vs. permanent repairs
- Conclusion
- FAQ
Quick overview: when CA glue is appropriate for concrete
CA glue is best for small, dry, clean concrete repairs and quick, non-structural bonds, such as patching pinholes, stabilizing loose tiles, or resealing minor veneer cracks. It is not suitable for large gaps, load-bearing joints, damp or oily surfaces, or anywhere moisture sealing is required, where epoxy or polyurethane might be better options. For best results, ensure the surface is dry, apply thin beads in a single pass, and use light clamping or pressure; avoid puddling and limit exposure to high humidity or cold temperatures during cure.
When you compare CA glue to epoxy or polyurethane, CA dries faster and works well on porous, small-fill repairs, but epoxy and polyurethane handle bigger fills, higher moisture tolerance, and longer cure times with stronger bonds in structural or wet conditions. Key safety and spec notes include ventilation, skin protection, curing times, shelf life, and product specs like gap-filling ability, bond strength, temperature range, and recommended cold/damp-condition formulations to guide buying decisions.
Strengths and limitations of CA on masonry
CA glue sticks almost instantly and can be great for small, non-structural repairs where you need a quick tack. It bonds well to clean, dense patches of concrete and grout. But remember: that instant grab comes with a downside—CA cures into a hard, brittle layer that won’t flex with the masonry. If the joint moves, or the piece is under repeated shear, the CA will crack or pop off.
Concrete and brick are porous and often dusty. CA hates dust and moisture; it soaks in and leaves a weak surface bond. Before you glue, clean and dry the area, remove loose powder, and test a small spot. For gaps wider than a hairline, CA alone won’t fill or bridge — it will just form a thin film and fail. Don’t rely on CA where you need gap-fill, impact resistance, or long-term weather exposure; use an epoxy or a masonry-specific adhesive instead.
Common failure modes you’ll see on the job: peel-off where the glue never reached solid substrate, brittle fracture through the cured glue, and gradual loss of bond from trapped moisture or dust. If you must use CA, use the substrate diagnostic checklist (below) to confirm compaction, porosity, and moisture before proceeding, test bond on scrap, and expect it to be a temporary fix unless backed up with a structural adhesive. When in doubt, butt it up to a mechanical fix or a proper masonry product.
Temperature and moisture thresholds
Cyanoacrylate likes a warm, slightly damp surface. Aim for about 50–86°F (10–30°C) and moderate humidity. In that window CA sets quickly and gives a useful bond on concrete. If you already skimmed the strengths and limits above, treat this as the practical temperature band for work.
Below roughly 40–50°F (5–10°C) the cure slows drastically and can stall. Above about 86–95°F (30–35°C) the glue can skin or become brittle. High relative humidity over ~70–80% makes CA craze, foam, or cure too fast at the surface and fail underneath. Low humidity under ~25–30% will also slow the reaction because there’s not enough moisture to start polymerization.
Check the slab: it should be dry to the touch or only slightly damp. Do not use CA on freshly poured concrete or where there’s standing water. If you’re unsure, use a moisture meter or a taped plastic-sheet test and wait until the slab reads low moisture or the sheet shows no condensation. The plastic-sheet test: leave a 2 ft x 2 ft clear plastic sheet taped down for 24 hours — that is the definitive field check. Shorter “quick checks” (10–30 minutes) are only preliminary screens to find gross wetness; rely on the 24-hour test for final decision-making. Above all, when conditions are out of the bands above, don’t gamble—choose a different adhesive or wait for better weather.

Surface preparation for cold or damp concrete
Assessing the surface is the first critical step: check porosity and moisture with quick tests, moisture meters, or surface tack tests to predict how well an adhesive will grab and how fast the cure will proceed. Then clean and decontaminate thoroughly, removing dust, oils, curing compounds, efflorescence, and release agents, using mechanical brushing or solvent wipe-downs as appropriate to ready the concrete for bonding.
If the surface is damp, reduce moisture with dehumidification, indirect heat, and maximum airflow, without triggering rapid evaporation that could undermine cure. For low-porosity or sealed patches, consider light roughening or micro-sanding to boost mechanical interlock without creating excess dust or widening pores. Always perform a small test bond on a representative patch under the same conditions to confirm adhesion before tackling broader areas.
Substrate diagnostic checklist (actionable)
- Moisture: run a 2 ft × 2 ft plastic-sheet test for 24 hours. If condensation or darkening occurs, don’t bond. Use a moisture meter and aim for readings in the manufacturer’s acceptable range.
- Compaction: check for hollow-sounding areas by tapping; soft/dusty spots indicate poor compaction—repair or mechanically abrade to solid substrate.
- Contamination: remove oil/grease—repeat solvent-clean until rags show no darkening. For decorative or sealed concrete, test the solvent in an out-of-sight spot.
- Profile: abrade lightly (60–80 grit or diamond cup) to expose a uniform texture; remove all dust with vacuum before bonding.
- Temperature: warm substrate into the 50–86°F (10–30°C) range with indirect heat; confirm surface temp with an IR thermometer.
If any checklist item fails, correct it before applying CA. This single consolidated checklist replaces repeated “check base compaction” notes elsewhere — refer back here during prep and before any re-application.
Testing and reducing surface moisture
Do a quick check before you mix anything. Tape a 2 ft x 2 ft clear plastic sheet to the slab for 24 hours and look for condensation or darkening under the sheet. If you don’t have plastic, feel the surface: a cold clammy slab or visible damp patches means moisture. These simple checks beat guessing and tell you whether to proceed or pause.
If the plastic shows moisture or the slab feels damp, don’t try to cover it up. Wait until dry or actively dry the area. Open doors and windows, run high-volume fans, and use a dehumidifier indoors. For faster results in small areas use forced warm air (not open flames) or portable electric heaters. Check again with the plastic test after drying.
If puddles or heavy bleed water are present, start by blotting and removing standing water with towels or a wet-vac, then speed drying as above. For persistent moisture coming through from below, you’ll need a moisture-tolerant adhesive or a proper vapor barrier—don’t just glue over a wet slab. When in doubt, stop and get a moisture meter reading or professional advice rather than risking a failed bond.
Cleaning, degreasing, and mechanical prep
Start by removing loose material and dust with a broom and shop vacuum. For surface dirt and mud use a pressure washer or a stiff push broom and water. For oil and grease stains, scrub with a commercial concrete degreaser or a strong detergent and rinse well — check for oil until it stops darkening the area. Don’t paint or coat over stains; they’ll bleed through unless fully removed.
Efflorescence (white powder) needs to be brushed off and washed. For stubborn deposits a diluted muriatic acid rinse will work, but wear gloves, eye protection, and neutralize afterward. If acid makes you nervous, repeat detergent scrubbing and mechanical brushing until the salts are gone.
Finish with light mechanical abrasion to open the surface and improve bond. For DIY use a diamond cup grinder or 30–60 grit disc and take off just enough to remove laitance and create a uniform texture — light abrasion, not deep cutting. After grinding, vacuum thoroughly and, if you’ve used water or cleaners, let the slab pass your 24-hour plastic test or moisture meter check before coating or patching.
When to use a primer or sealer
If your moisture tests show elevated readings or the slab feels cold and damp, don’t skip the primer. A thin penetrating sealer can reduce moisture vapor and stop salts from bleeding through paint or coatings. If you see powdery dust, flaking, or inconsistent absorption after cleaning, use a primer to bind the surface and give your topcoat something to grab onto.
Choose a product based on the problem. Use a breathable silane/siloxane sealer when you need to reduce vapor without trapping moisture. Use a concrete primer or epoxy primer when you need to improve adhesion for paints, thinset, or epoxy systems—especially on porous or weak surfaces. Always follow the coating manufacturer’s requirements; some systems demand a specific primer.
Compatibility rules-of-thumb: avoid solvent or acid preps that can damage adjacent decorative coatings—test first. Acetone and mineral spirits can dull some sealers; if working near painted or decorative surfaces, mask and spot-test. If embedded metals are present, dry the area and consider a rust inhibitor before bonding; excessive salts or chlorides require full remediation. When in doubt, refer to the adhesive and primer technical data sheets for substrate compatibility.
If the slab is dry, solid, and properly cleaned, you can often skip extra treatments and go straight to your coating. But if there’s any doubt—high RH, recent placement, efflorescence, or uneven absorption—play it safe and prime or seal. Painting over moisture is a fast way to fail a floor. Check moisture readings and primer specs before you lay anything down.
Proven methods to accelerate CA curing on cold or damp concrete
Ranked, safe methods to accelerate CA curing on cold or damp concrete prioritize minimally invasive steps with measurable time savings, followed by targeted interventions if needed, all while protecting bond strength. Start with surface prep, fast-acting primers, and modest dew-point management as quick wins, then progress to controlled heat or moisture control schemes if curing remains slow, noting clear time reductions and the exact conditions where each method shines or is limited. Each option carries a concise pro/con snapshot and a recommended sequence from least to most invasive to help plan quickly and avoid overreach.
This approach matters on job sites where low temperatures, high humidity, or damp substrates threaten timely strength gain, since even small accelerations can cut curing hours and reduce project delays. Readers get practical guidance on product types and usage—accelerator additives, fast primers, and moisture-control products plus safe heat or drying methods—along with safety checks, compatibility cautions with CA formulations, and potential impacts on bond strength and future repairs. A brief troubleshooting flow helps identify common failures on damp concrete and keeps progress moving without compromising long-term performance.
Commercial CA accelerators / activators
Commercial accelerators are specially formulated sprays or liquids that you apply to the concrete or to the adhesive joint to make cyanoacrylate set fast even when the surface is cold or damp. Think of them as a catalyst that forces the glue to polymerize on contact. They’re the most reliable option when moisture or low temperature would otherwise keep the CA from curing.
Application specifics: hold the activator can 6–12 inches (15–30 cm) from the joint and deliver 1–2 short bursts of 0.2–0.5 seconds (enough to mist the joint, not soak it). For brush-on activators apply a thin film with a disposable brush and allow solvents to flash per label (usually a few seconds) before joint contact. Too much accelerator causes foaming, brittle joints, or surface skinning—if you get any foaming, remove and re-prepare the joint. Always test a small, representative area first so you know how the adhesive reacts. Recommended commercial options include Loctite Instant Bonding Accelerator, Permabond activators (matching P-series adhesives), and Bob Smith Industries Insta-Set for porous substrates—follow manufacturer pairing charts for best results.
Pick a product rated for concrete and cold conditions and follow manufacturer instructions. Store bottles away from heat and seal them tightly; accelerators can lose effectiveness with moisture exposure. If you want fast, consistent bonds on damp or cold slabs, skip guesswork and use a proper accelerator—it’s the difference between a one-shot fix and wasted time.
Controlled heat: hot air and infrared
When concrete is cold or damp you can speed CA cure with gentle heat. Use a hair dryer on high about 6–12 inches away, or a heat gun set to low and kept at least 12–18 inches from the glue. For infrared lamps keep the lamp 18–36 inches back depending on wattage. Move the heat source slowly and evenly — don’t hold it in one spot.
Aim for a surface temperature of roughly 30–50°C (86–122°F). Monitor surface temperature with an IR thermometer if you have one and never let the concrete or glue exceed about 60°C (140°F). Higher temps or focused heat on thick CA layers can trigger an exotherm, causing smoke, burning, weakening of the bond, or even surface damage to the concrete.
Work in short passes, keep good ventilation, and avoid trapping fumes. Don’t use heat as an excuse to apply thick, globbed-on CA — thin coats cure fast and are safer. If the job feels too hot or you see vapor or discoloration, back off and let it cool before continuing.
Using humidity and warm dampness strategically
CA glue needs a little water to kick off—think trace moisture, not a soak. On cold or slightly damp concrete, lightly mist the surface or wipe with a damp cloth so the concrete is uniformly damp but with no puddles or drips. Let the surface stop beading; you want a thin sheen, not wet spots. Test on a scrap piece first to judge cure speed.
Trap that gentle warmth and humidity by covering the area with plastic sheeting or a tarp to hold the moisture and a bit of heat. Don’t try to create steam or saturate the slab; excessive water slows bonding and can leave the CA gummy or weak. If you’re already using a commercial activator or controlled heat, use humidity as a complement—don’t double up and overdo it.
Watch for simple signs: cured CA should lose tack and harden in minutes rather than hours. If the glue stays stringy or soft, you’ve probably got too much moisture or too cold a surface. Keep the workspace ventilated and wear simple PPE—gloves and eye protection—because trapped humidity can concentrate fumes.
A step-by-step protocol for fastest reliable cure on cold/damp concrete
This protocol outlines a tested, step-by-step workflow to achieve the fastest reliable cure of cyanoacrylate on cold, damp concrete, emphasizing pre-work conditions, robust surface preparation, moisture management, and a timed sequence that minimizes squeeze-out while maximizing bond strength. It pairs a plan-ready toolkit with explicit checkpoints, including target temperatures, dew point awareness, moisture testing (spot checks and practical surface feel), and controlled open/clamptime windows at each stage. You’ll follow precise timings for surface drying, degassing, adhesive application, accelerated curing, and heat/air-assisted steps to keep the bond progressing without premature cure or moisture entrapment.
The kit-friendly approach lists heat sources, safe temperature ranges, dehumidifying aids, fans that move air without disturbing the bond, clamps or weights, wipes and solvents, timing devices, and a quick test bond protocol in a single plan-ready package, plus guidance on patching small concrete flaws and ensuring compatible surface conditions before adhesion. Checkpoints describe moment-by-moment decisions—from 5–10 minutes to assess bond feel, to 1–2 hours for initial cure verification, to near-maximum cure expectations—while outlining PPE, ventilation, and a quick troubleshooting flow if cure is inconsistent or the bond stalls. Optional product notes help you choose accelerants or primers suitable for cold/damp concrete and decide when fastest cure serves structural versus cosmetic goals, allowing you to tailor the approach to a given job without compromising strength or reliability.
Quick printable protocol (one-page on-site card)
- Prep: run plastic-sheet test 24 hr OR moisture meter reading per TDS → pass = go.
- Clean: vacuum, degrease, light abrasion, vacuum again.
- Warm: raise substrate to 50–70°F (10–21°C) with indirect heat; confirm with IR thermometer.
- Apply CA: thin bead (0.2–1.0 mm). For porous concrete use a concrete-rated CA (see Key takeaways examples).
- Activator (if used): 6–12″ distance, 1–2 short sprays (0.2–0.5 s). Press/clamp immediately.
- Clamp: minimum tack-free hold 30–60 min; expect serviceable strength 24–48 hr; heavy loads wait 72+ hr.
- Safety: ventilate, nitrile gloves, goggles; respirator with organic vapor cartridge for enclosed spaces.
Step-by-Step Process
This sequence gets fresh concrete through a fast, reliable cure on cold or damp sites so you avoid surface scaling, weak strength, and bond failures. Follow each step in order and respect the short wait times between actions.
- Set up weather protection and heat sources. Place insulated tarps, temporary enclosures, or a heated tent and use forced-air heaters to raise ambient and substrate temperature; this keeps the slab in the target cure range. Check with a surface thermometer—aim for consistent 50–70°F (10–21°C) for CA work. Call a pro if you can’t maintain stable temps overnight or if heaters cause condensation; wait until temperature is steady before proceeding (usually 1–2 hours).
- Remove standing water and dry the surface quickly. Use a wet vacuum, squeegee, and fans to clear puddles and surface dampness so curing compounds and blankets will work properly. Verify by running a cloth over the slab—no pooled water and only light dampness allowed. Call a drainage expert if water keeps appearing from below; you must wait until free water is removed (minutes to an hour depending on extent).
- Apply a fast-acting curing compound or membrane-forming sealer where appropriate. Spray or roll the product per label to lock in moisture and speed strength gain in cold conditions. Check coverage visually—no pinholes, even sheen across the slab. Stop and call the product manufacturer or a pro if the compound beads or flashes off; let the film set as directed (often 1–2 hours before covering).
- Install insulating blankets or curing mats immediately after compound sets. This keeps heat and moisture next to the concrete so hydration continues despite cold air. Confirm by feeling the blanket temperature—should be noticeably warmer and dry below. Call a pro if blankets won’t conform over joints or formwork; leave them in place for the specified cure period (commonly 3–7 days for early strength in cold weather).
- Monitor temperature and humidity for the first 48 hours. Use a thermometer and a simple hygrometer inside the enclosure to ensure temps stay in range and humidity stays high enough for curing. Check readings every 4–6 hours and log them—stable readings mean the system works. Hire a specialist if temps fluctuate wildly or heaters cycle off; don’t remove protection until readings are acceptable (minimum 48–72 hours for cold cures).
- Remove protection and check surface strength before light traffic. Peel back a small section of blanket and tap with a hammer or use a simple penetration test; concrete should resist surface damage and scale. If dusting, soft spots, or flakes appear, reseal and re-cover and extend cure time. Call a structural pro if large cracks or settlement show up; otherwise wait the full recommended period for light loads (usually 7 days) before allowing foot traffic.
- Final inspection and cleanup. Sweep, remove any residual curing compound per product instructions, and document surface condition and ambient data for future reference. Check for uniform color and sound by tapping—no hollow or spalled areas. If you find widespread defects, call a concrete contractor; if minor, note repairs and let full design strength develop (28 days for full cure, but normal finishing can resume after the cold-weather cure window).
Pro tip: Don’t skimp on maintaining steady heat and moisture during the first 48–72 hours—short, repeated cold spells do more damage than a single cold night. If you’re unsure about your heater setup or detect ongoing water ingress, get a pro to avoid wasting the slab.
Preparation (0–10 minutes)
Start by clearing the area. Sweep or blow away dust, dirt and loose debris. Scrape off any paint flakes, oil blobs or loose laitance so the product can grab the concrete.
Next, test moisture. Use a moisture meter or tape a plastic sheet down for a 24-hour definitive check; a short 10-minute taped feel is only a preliminary screen. If you see visible water or heavy dampness in the preliminary screen, blot with towels or a shop vacuum and run the 24-hour test before proceeding. Don’t cover up standing water — postpone or remove it.
Finally, abrade surface with a stiff brush or 60–80 grit disc to break the sheen and expose a clean profile. Wipe or blow the dust away and, if the slab feels cold and clammy, warm it briefly with controlled indirect heat so the curing step bonds properly.
Application and accelerator use (0–5 minutes)
Work fast and in this exact order: lay down your glue, apply a thin accelerator mist or a single small drop where the glue sits, then press the parts together immediately. Application details: for spray activators hold can 6–12″ away and use 1–2 short bursts (0.2–0.5 s). For brush-on activators, apply a thin film and allow solvent flash for the time on the product label (usually a few seconds) before making contact. Think of the accelerator as a nudge, not a bath — a fine spray or one small drop per joint is all you need. If you overdo it you’ll get brittle edges or cause foaming which ruins the bond.
After pressing, clamp right away. Use steady pressure that brings the surfaces into full contact and squeezes a light bead of squeeze-out — not so much that you crush the material. For panels or trim, put the clamps evenly along the joint and tighten until you see a uniform thin bead. If the substrate was cold or damp during prep, err on the side of firmer, continuous pressure for the first few minutes so the glue can wet out properly.
Quick checks: make sure the glue spread was even, the accelerator didn’t form puddles, and the parts didn’t shift when clamping. If something moved, reapply fresh glue and accelerator and start over — don’t try to rescue a compromised joint. For clamp-off time follow your adhesive manufacturer’s initial set guidance, but within the 0–5 minute window you must have glue, accelerator, press, and clamps all in place.
Post-cure checks and final set (5–60 minutes)
After you finish the application and accelerator step, watch the surface close. In cold, damp conditions the final set window stretches — expect somewhere between about 5 and 60 minutes depending on temperature and how much accelerator you used. Do the simple touch test: light fingertip press against an out‑of‑the‑way corner. If it smears or feels sticky, give it more time. If it resists and the surface feels dry, you’re at the tack stage.
Once tack-free, do a quick peel/pull test on a scrap or hidden seam. Apply light pressure and try to lift. If the material lifts cleanly without stretching, it’s safe to remove clamps for handling, but not for heavy loads. Keep clamps on longer than you think: in cold/damp work, plan for a minimum of 30–60 minutes of clamping after tack-free. If conditions are near freezing or the pour looked sluggish, leave clamps for a few hours or overnight for insurance.
Full strength takes longer. Expect serviceable strength in 24–48 hours in damp coldwork; heavy traffic or structural loads should wait 72 hours. While curing, avoid disturbing edges and refer to the substrate diagnostic checklist if you see settlement — fixing that now beats redoing the job later. When in doubt, err on the side of time: longer cure, fewer callbacks.

Safe household and shop accelerants — what works and hazards
Cyanoacrylate cures quickly by polymerizing in the presence of moisture, but cold or damp concrete slows the bond and can lead to weak cures. Accelerants—commercial CA sprays or primers—help jumpstart cure on difficult substrates, yet they must be chosen for the right conditions and used with attention to exotherm, fumes, and material compatibility; household options like isopropyl alcohol or baking soda have distinct mechanisms and tradeoffs that can undermine strength or trap moisture if misapplied.
This matters on a DIY or jobsite because the wrong choice can cause weak joints, skin bonding, or fire hazards, especially when moisture is present or when large volumes are used. The practical approach is a concise protocol: prep the surface, sequence adhesive then accelerant if using one, clamp or fixture during cure, and watch for signs of proper cure such as edge tightness and clear resin with minimal heat. Clear safety steps and a tested sequencing plan reduce surprises and help you decide when to proceed or pause for a more suitable method.
Isopropyl alcohol, water, and baking soda: pros and cons
Quick rundown from the jobsite: these three are cheap and common accelerants or modifiers. Each changes cure speed and bond behavior in different ways. Below are straight-up pros and cons and when to leave them off concrete.
Pros
- Low cost and easy to find — rubbing alcohol, tap water, and baking soda are household items that won’t break the bank.
- Speed control: isopropyl alcohol evaporates fast and can speed surface dry times for some adhesives and coatings, saving you minutes to hours.
- Baking soda sharply accelerates cyanoacrylate (super glue) cure and adds gap-filling bulk — handy for quick repairs and building up a fillet.
- Water can be used deliberately to slow cure for some two-part or moisture-curing products, giving you a little more working time when needed.
- Minimal tooling or mixing required — no special equipment for small jobs.
Cons
- Adhesion risk: alcohol or excess water can reduce adhesion on some adhesives by removing necessary surface moisture or leaving residues; you can lose bond strength.
- Unpredictable on porous concrete — alcohol and water soak in, changing cure speed unevenly and causing weak spots or surface whitening.
- Baking soda can make cured joints brittle and can leave a gritty, weak layer if overused or applied on concrete, reducing long-term durability.
- Safety and finish issues: isopropyl is flammable and can leave streaks; baking soda can stain or alter concrete texture; water can promote flash rust on embedded metals.
- Short-term fix only: these tricks aren’t a substitute for proper accelerators or correct surface prep on structural or outdoor concrete work.
When to use them: for small indoor fixes, quick super-glue jobs, or to tweak working time on noncritical parts, they’re worth it. Avoid on bare or structural concrete, large bonded areas, or where long-term strength matters — on those jobs use proper concrete prep and manufacturer-recommended products instead.
Exotherm, fumes, and ventilation precautions
When you speed up cures or use solvents, remember thick glue or resin layers can generate real heat as they set. Watch for heat — a hot, bulging bond means you mixed or poured too much in one go. Best practices to avoid exotherm:
- Limit bead/layer thickness to about 0.2–1.0 mm for routine CA work; avoid layers thicker than ~2–3 mm in a single pass. For gap-filling use staged applications with cooling time between passes.
- For mass repairs (large-area or deep fills) do multiple thin beads and allow full cooling and tack-free between passes; do not accelerate large-volume fills with activator or heat.
- If you see temperature approaching 60°C (140°F), stop and allow cooling. Excessive exotherm can char substrates, produce smoke, or generate combustion risk with soaked rags.
Fumes matter more than smell. Work outside or with windows open and a fan blowing fumes away from you. If you must work indoors, use a properly rated respirator and keep power tools and open flames well away. Don’t assume “household” cleaners are harmless — refer back to the isopropyl/water/baking soda notes earlier for safer picks, but still ventilate.
Safety add-ons: use a half-mask respirator with an organic vapor cartridge when working in enclosed spaces or with accelerators and solvents; P100 particulate filters are required for sanding dust. Keep heaters placed outside of the working enclosure when possible; if inside, position heaters downwind so exhaust does not concentrate fumes and maintain 3–6 ft clearance from solvent/adhesive containers and rags.
Wear gloves and eye protection. Test a small area first so you can see how the product behaves. Keep buckets and rags in metal containers with lids and discard soaked rags safely. If you smell strong solvent for more than a few minutes or feel lightheaded, stop work, ventilate, and don’t go back in until the area is clear and cool.
Tools and materials checklist
A compact, on-site checklist of essential tools, consumables, PPE, and product types helps you execute the fast-cure protocol on damp concrete with confidence, covering heat sources, ambient control, moisture management, application aids, and timing gear in a practical sequence. It also highlights CA formulations and accelerators designed for porous substrates, plus activator options and real-world cautions about moisture, open time, and bond strength to keep cure performance reliable from prep through final set.
Having this clear plan matters on a DIY project because it reduces guesswork, speeds up the workflow, and supports consistent results by encouraging proper surface prep, masking, and pre-test patches, while outlining safety measures and containment steps to protect yourself and the surrounding area. With a repeatable on-site sequence and documentation of ambient conditions and cure results, you can reproduce successful cures across different rooms or days, troubleshoot effectively when conditions shift, and maintain a safer, cleaner work environment for everyone involved.
Recommended applicators and clamping methods
For on-site, small runs use simple, proven tools: a pistol caulking gun for cartridges, a squeeze bottle or syringe dispenser for thin beads, and a small bulk applicator for thicker adhesives. Keep a few extra nozzles and a handheld spatula for smoothing. These let you control flow without over-applying and make clean-up faster than trying to wrestle a large pneumatic gun on a two-piece job.
When you need to hold parts while an adhesive cures, don’t overcomplicate it. Use bar or F-clamps for big panels, spring clamps for trim and thin pieces, and strap clamps when you need uniform compression on irregular shapes. For very short setups, concrete blocks, sandbags, or heavy steel plates work fine as temporary weights. The goal is even pressure across the bond—crooked clamps will ruin the joint.
Before you commit, run a quick mock-up on scrap and time your clamp removal. If you’re working solo, plan clamp placement so you can reach every screw or release without disturbing the assembly. And don’t be cheap with clamp quality—rusty, slipping clamps are false economy that causes callbacks.
PPE and cleanup supplies
Pick the right protection and cleanup gear and you save yourself from ruined finishes, skin burns, and a long, ugly cleanup. The wrong glove, respirator, or solvent can cause staining, weak bonds, or health headaches—so buy the right class for the job and don’t guess.
- Nitrile gloves — Use for all solvent, adhesive, and grout work. Choose 4–6 mil thick for dexterity; 8–10 mil for heavy peeling or solvent exposure. Cheap latex will dissolve or let chemicals through and give you skin irritation; expect $6–15 per box.
- Chemical-resistant gloves — For strong solvents and acids used in aggressive cleanup. Look for butyl or neoprene, rated for the specific chemical on the label. Use these when sanding or using acid cleaners; wrong gloves will degrade and burn skin. Rent or buy for $12–30 per pair.
- Safety glasses/goggles — Eye protection against splash and flying debris. Choose ANSI Z87.1-rated goggles for splash and impact protection. Regular glasses aren’t enough; dust or solvent in the eye can ruin your day and your sight. $6–25 for decent lenses.
- Respirator (half-mask) — Use when cutting, sanding, or working with solvent fumes. Choose an NIOSH-rated half-mask with organic vapor cartridges for accelerator/solvent fumes and P100 filters for dust. A dust mask is not enough for solvents; bad choice = headaches and lung damage. Expect $25–80 for a good half-mask and cartridges running $10–20 each.
- Acetone or mineral spirits — Solvents for adhesive and finish cleanup. Check label for “cleaning grade” and compatibility with your adhesive or finish (acetone for epoxy/cured polyurethane, mineral spirits for oil-based products). Don’t use a solvent that attacks the finish or substrate or you’ll stain or soften materials; $8–20 per quart.
- Disposable rags & waste bags — For wiping and safe disposal of solvent-soaked waste. Use lint-free rags for finishes and flameproof bags for solvent waste. Rags left in a pile can self-ignite with certain solvents and oils; $5–12 for a pack of rags, $5–10 for heavy-duty bags.
- Shop vacuum & scraper — Mechanical cleanup for dust and cured blobs. Choose a shop vac with a HEPA/super filter for fine dust and a rigid scraper or putty knife for stuck material. Hand brooms just spread dust; a cheap homeowner vac is fine, $50–150; rent a grinder if you need heavy removal.
- Mixing bucket & paddle — Clean, dedicated mixing for adhesives and cleaners. Use a graduated, solvent-resistant bucket and a cage paddle that fits your drill. Dirty buckets contaminate batches and weaken bonds; a $10–30 bucket and $10–25 paddle save wasted product.
Pro tip: Buy only what you’ll use within a year and store solvents sealed and upright in a cool place. Replace respirator cartridges after heavy work and keep a small disposal bin lined with a fire-safe bag for solvent rags — that one habit prevents a lot of late-night headaches.
Cleanup, storage, and troubleshooting common failures
This section covers a practical, step-by-step approach to cleanup, storage, and troubleshooting common CA adhesive failures on concrete, including how to safely remove uncured adhesive with solvents or mechanical methods without damaging the surface, how to clean cured adhesive through scraping and sanding with minimal dust and gouging, and a concise storage workflow that emphasizes cap tightness, original containers, a cool, dry environment, moisture control, expiry awareness, and stock rotation.
It also provides a quick decision tree to diagnose failures based on surface moisture, temperature, and prep quality, plus quick fixes and mitigation steps such as re-prepping, re-application guidelines, and the use of surface primers or activators where appropriate, all aligned with a clear do/don’t storage checklist and a simple expiry cue to keep materials fresh and ready for the job. This matters for DIYers and on-site teams alike, because proper cleanup, storage, and troubleshooting prevent surface damage, ensure reliable bond performance, minimize dust and waste, and help keep projects on schedule and within budget.
Removing squeeze-out and cured residue on concrete
When CA squeezes out while still wet, wipe as much as you can immediately with a clean rag soaked in acetone or 99% isopropyl alcohol. Work fast and use a fresh rag so you aren’t just smearing glue around. Wear gloves and eye protection. If the surface is colored, sealed, or decorative concrete, test the solvent in a hidden spot first — acetone can dull or remove some finishes.
For cured glue, start with mechanical removal. Use a sharp razor or carbide scraper for thin films and a stiff wire brush or a medium-grit diamond cup on a low-speed grinder for thicker beads. Don’t gouge the concrete — take light passes and check progress often. A commercial CA debonder will help soften older residue; apply it, let it soak per directions, then scrape. Keep the area ventilated and wear a respirator when grinding or using strong solvents.
If the glue is in a pore or textured surface, alternate solvent soaking and gentle brushing rather than aggressive grinding. Pressure washing after scraping clears dust and small particles, but won’t remove deeply set CA. If you’re unsure, stop and try a small trial patch or call a pro — it’s easier to avoid damage than to repair spalled or stained concrete. For more on storage and handling to prevent squeeze-out, refer back to the earlier cleanup and storage notes.
Storage, shelf life, and how to avoid clogging
Quick list of things people mess up when storing sealants and caulks. These errors kill shelf life and lead to clogged nozzles. No long theory—just what to watch for on the job or at home.
- Storing warm or damp — Heat and humidity speed cure and spoil the product. Keep bottles in a cool, dry spot away from direct sun and heaters to preserve pot life.
- Leaving the tip unsealed — A loose cap or taped tip doesn’t stop skinning. Use the original cap snugly, or push a nail through the nozzle and cap it; clean the tip before resealing to prevent trapping cured bits.
- Not purging the nozzle — Squeeze a short bead until flow clears before storing. If you leave partly cured material in the tip it will harden and block the next use.
- Ignoring signs of expiry — Gritty texture, strange color, or sour/chemical smell mean the product’s gone bad. Don’t try to thin or save it; discard and replace.
- Freezing or extreme cold — Some formulations separate or go unusable after freeze-thaw. If you expect cold storage, check the product label and keep it above the minimum temp or rotate stock.
Double-check these points before you store or pull a bottle for use. Fix the simple mistakes above and you’ll avoid most clogging and waste.
Troubleshooting bond failures and visual defects
First, do quick reality checks: look for contamination, loose or chalky concrete, and signs of movement. If the material won’t stick, check substrate moisture, surface profile, and whether a primer was used. Temperature and pot life matter — too cold or pot-expired material kills adhesion fast. Don’t waste time guessing; note conditions and move to a targeted fix.
White haze or “bloom” usually comes from moisture or additives migrating to the surface, or from solvent-rich surfaces curing incorrectly. Light bloom can often be wiped or brushed off after it fully cures. If it’s stubborn, remove the affected skin mechanically and recoat following the cleaner/primer steps you already used for squeeze-out and residue removal.
Brittle joints and full adhesive failures point to wrong product, bad mixing, or joint movement beyond what the product can handle. If the joint pulls apart, you’ll often have to remove and replace the failed bead, using the correct joint size, correct primer, and proper cure window. When in doubt, cut a small section out and inspect the bond line — that tells you whether the problem was surface prep, material condition, or design. If failures repeat, rethink product selection or joint detail rather than patching forever.
Safety, cost, and decision-making: quick fixes vs. permanent repairs
Safety boundaries matter from the start: cyanoacrylate fumes, especially when used on cold or damp concrete, can pose CO2/chemical exposure risks, so wear gloves and eye protection, provide adequate ventilation, and handle materials with moisture presence to avoid brittle fixes that fail under load, while distinguishing acceptable quick CA-based methods (color-matching, rapid cure accelerants, surface prep, thin-film applications) from truly permanent repairs (structural re-anchors, epoxy or polyurethane bonding, concrete patching) and noting when each approach is appropriate for the job conditions and exposure levels.
The practical takeaway for DIYers is a clear decision framework that weighs cost against durability, moisture exposure, traffic, and temperature ranges, empowering you to choose speed over longevity when the load is light or temporary containment is sufficient, and to commit to a durable joint or patch when long-term safety and reliability are paramount; a simple flowchart or checklist can guide pre-cleaning, surface moisture testing, controlled application techniques, cure-boosting methods (like humidity control or safe light heat), and post-cure inspection to confirm a sound result.
Cost/time tradeoffs and longevity expectations
Quick CA repairs are cheap and fast. A tube of superglue or quick crack filler runs under $10 and takes minutes to apply. Expect a short-term patch — typical life expectancy ranges:
- Indoor damp but protected (no direct water): 6–24 months.
- Outdoor intermittent moisture/exposed to freeze-thaw: 3–12 months.
- Constant wet or load-bearing exposure: likely to fail within weeks to months; CA not recommended.
Epoxy and polyurethane systems cost more and take longer to install. DIY kits range from $30 to $200; professional injections or resurfacing can be several hundred to thousands depending on scope. These products cure more slowly but give a much stronger, longer-lasting repair — typical lifespans: 5–30 years when installed correctly with proper moisture control.
Decide by checking the job: is it cosmetic or structural? Use the objective thresholds below to decide whether to DIY or call a pro. Use quick fixes for temporary stops or low-stress areas. Spend on epoxy/polyurethane for cracks that carry load, let water in, or will be expensive to redo later. If in doubt and the repair affects safety or moisture control, spend more now.
When to consult a pro or switch adhesives
If the joint carries weight, supports people, or keeps utilities running, stop using CA and call a pro. CA glue is fine for small fixes and non‑load parts, but when a failure risks injury, water damage, fire, or collapse you want an engineered fix — epoxy, structural adhesive, mechanical fasteners, or a licensed contractor depending on the job.
Objective triggers to hire a professional or switch adhesives:
- Crack width > 1/8″ (3 mm) or depth through slab.
- Active water infiltration, ongoing leakage, or standing water.
- Vertical displacement, settlement, or structural movement.
- Repeated failure after two proper repairs or failure under expected load.
- Bonds on load-bearing elements, stairs, railings, or areas with safety implications.
Look for these red flags: big gaps or missing material, ongoing movement, repeated failures after re-gluing, exposure to heat, UV, or moisture, or bonding materials that CA doesn’t stick well (certain plastics, greasy metal, or unclean porous surfaces). If you can’t get a clean, tight fit after basic prep — check the substrate diagnostic checklist, clean and roughen the surfaces — don’t try to force a miracle with more CA.
When unsure, get a short consult. If the part is expensive, historic, or hard to replace, if fumes or allergies are a concern, or if your repair requires special temperatures or curing times, a pro will tell you whether epoxy, polyurethane, construction adhesive, or mechanical repair is the right call. Quick fixes save time, but a pro saves you repeated repairs and bigger bills down the road.

Conclusion
Speeding up cyanoacrylate cure on cold or damp concrete is all about proper prep, choosing the right accelerant, and controlling the cure environment—done safely, you get a durable bond with a clean appearance and minimal call-backs. Use the substrate diagnostic checklist, follow the printable protocol steps, and match adhesive/activator pairs recommended by manufacturers for consistent results.
Proceed with a clear plan: verify CA suitability for the job, ensure a clean, dry, and roughed surface, apply the recommended accelerant in a small test bond, follow a deliberate application and clamping sequence, ventilate and protect yourself, handle cleanup promptly, and store materials per instructions—do these in that order and you’ll avoid wasted product and failure.
Common mistakes to avoid include using improvised or incompatible accelerants that can foam or contaminate the bond, skipping surface prep or rushing cure times, and ignoring ventilation or personal protection. Safety first means gloves, eye protection, good lighting, and working in a well-ventilated area; test a small area before full-scale use, and never apply accelerants near heat sources or open flames. If the job involves structural loads, large spans, or unseen damage, call a professional rather than pushing ahead solo; otherwise, you can complete a solid, long-lasting repair and move on with confidence. You’ve got this—get it done right, and your repair will stand up to tomorrow’s use.
FAQ
Why is cyanoacrylate curing slow on cold or damp concrete?
Cold temps slow the chemical kick. Damp concrete soaks up the glue and cools the mix. Get the surface warm and dry before applying for a faster cure.
How can I speed up curing without weakening the bond?
Clean the surface and remove loose dust. Use a light, even bead and press or clamp briefly so the glue sets faster. Use a matched accelerator at low dose (1–2 short sprays from 6–12″) only after testing. Don’t flood it with glue; too much slows things down and can trap moisture.
Should I prep the concrete with water or solvents before applying?
No watering down the surface. Wipe away moisture and debris with a dry cloth. If there’s stubborn grime, use a dry brush, then let the surface air dry before gluing. Use solvents for degreasing only where safe and test in an inconspicuous area first.
What if it still won’t cure quickly enough?
If it refuses to cure, remove the glue and start over with a dry, warm surface. Consider a faster-setting adhesive designed for damp or cold conditions (see Key takeaways examples), or wait for better weather rather than forcing a weak bond.