
Introduction
Fresh paint can revitalize a historic landmark while preserving its character. This article covers why painting matters for preservation, how to test surfaces, and simple fixes you can do as a DIY homeowner. You’ll learn to balance aesthetics with protection, and what to check on paint labels and old surfaces.
To do the work safely and respectfully, choose methods that respect historic materials and appearances. Before you start, follow the paint label, manufacturer guidance, and any local preservation guidelines, and set expectations for aging, prep, and touch-ups. If you notice peeling, staining, or moisture issues, address those causes first with proper fixes.
Key takeaways
- Prioritize breathable finishes recommended by manufacturers to respect historic substrates.
- Use preservation-minded painting methods that minimize surface disruption and preserve character.
- Always verify safety requirements, especially lead risk, before any scraping or sanding.
- Inspect for deteriorated paint and structural issues to plan appropriate repair strategy.
- Document existing materials and match finishes to maintain historic appearance.
- Plan realistic scheduling with weather and drying times, avoiding rushed coats.
- Research brand options that offer compatible, historically appropriate paints and primers.
Table of Contents
- Introduction
- Key takeaways
- Why Fresh Paint Matters for Historic Landmarks
- Common Causes of Paint Failure on Historic Buildings
- Tests and Inspections to Do Before Painting
- Safety, Lead Abatement, and Regulatory Considerations
- Paint Types and Material Specifications for Historic Buildings
- Surface Preparation and Techniques That Preserve Original Character
- Cost, Scheduling, and Project Planning
- Common Mistakes and How to Avoid Them
- Conclusion
- FAQ
Why Fresh Paint Matters for Historic Landmarks
Paint on historic fabric does more than color the surface. It acts as a visual revitalizer and as a protective layer against moisture, UV damage, and microclimate changes that can accelerate deterioration. Understanding this dual role helps guide responsible choices for preservation.
Material compatibility and finish decisions matter for brick, stone, wood, and decorative details. Different coatings have different breathability, reversibility, and suitability; avoid binders that harm historic materials. Small, era-appropriate tests and proper documentation help prevent unintended impacts while supporting ongoing stewardship.
Aesthetic and community impact
Fresh paint isn’t just about making your historic landmark look good. It’s about restoring civic pride, attracting visitors, and supporting adaptive reuse.
Color and finish can transform a building’s appearance, making it inviting again. Visible repairs show respect for the past and commitment to preservation.
Think about: era-appropriate colors, finishes that match historic details, and how your project fits into the broader community context.
Protective and preservation benefits
Paint does more than just look pretty. It’s a protective layer that slows water intrusion, UV damage, and biological growth – all enemies of historic materials.
Appropriate coatings can extend the life of your landmark by decades. They block moisture, shield from harmful rays, and create a barrier against mold and mildew.
Consider: breathable coatings for masonry, reversible finishes for future changes, and eliminating harmful binders like vinyl.
Short case study example
Take the old lodge turned music venue. Before, it was rundown, ignored, and losing visitors to newer venues. After a fresh paint job, it was transformed.
The vibrant colors attracted attention, visible repairs showed care, and the whole place felt alive again. Now, it’s a thriving hub for live music lovers and locals alike.
It’s not just about aesthetics; it’s about revitalizing historic spaces, giving them new life, and making them relevant again.
Common Causes of Paint Failure on Historic Buildings
Identify four primary root causes that are especially relevant to old structures: moisture intrusion, substrate incompatibility, legacy coatings, and building movement. Each factor can undermine adhesion and performance if not addressed.
Moisture shows up as damp patches, efflorescence, or condensation; substrate issues relate to lime plaster, historic masonry, and porosity differences; prior coatings may be non-breathable or incompatible; movement from cracking or settlement affects adhesion. Plan assessments accordingly.
Environmental and moisture drivers
Historic buildings face unique challenges from their environment. Moisture is the biggest culprit causing paint failure.
Rising damp can seep through walls, weakening the substrate and causing peeling. Condensation forms when warm, moist air meets cold surfaces, leading to blistering and staining. Even sun exposure can cause paint to crack and fade.
Moisture intrusion can be exacerbated by faulty flashing or poor drainage. Regularly inspect these areas to prevent water from entering and damaging your paint job.
Incompatible previous coatings and poor prep
Using modern, impermeable coatings on historic buildings can trap moisture beneath the surface. This can lead to delamination, where the paint peels off in large sheets.
Oily residues from previous coatings or improper cleaning can also cause adhesion issues. Ensure your substrate is clean and free of contaminants before applying new paint.
Some older coatings, like elastomerics, lack breathability. These can trap moisture and cause problems over time. Always test for and remove old coatings before repainting.
Structural movement and substrate decay
Historic buildings settle over time, causing cracks in the substrate. These cracks allow moisture to enter, weakening the paint’s adhesion.
Rotten timber or crumbling masonry can also undermine your paint job. Regularly inspect your building for signs of decay and address any issues promptly.
Thermal expansion and contraction can also cause hairline cracks in the substrate. These may not be visible to the naked eye but can lead to paint failure over time. Use flexible, breathable coatings to accommodate these movements.
Tests and Inspections to Do Before Painting
Begin with a thorough visual survey to document coatings, moisture cues, cracks, and historic features. This sets the scope for prep and repaint strategy.
Then perform moisture checks with non-destructive meters and humidity tests if needed. Follow up with lead testing and adhesion tests to guide containment, primers, and compatible systems for historic substrates.
Lead-based paint testing protocols
Before you start painting, test for lead to protect yourself and others. Here’s a checklist of when and how to use different testing methods.
- Use chemical swabs: For initial screening on suspected areas. Apply the swab, rinse with distilled water, and check for color change.
- Send samples to lab: For definitive results. Collect dust or paint chip samples and send them to a certified lab.
- XRF screening: For quick, non-destructive testing. Hire a professional with an XRF gun to scan surfaces.
- Check local regulations: Before work begins, know your area’s lead safety rules and follow them strictly.
Quick rule: Always prioritize safety. If you’re unsure about testing or results, consult a professional.
Moisture surveys and non-destructive imaging
Before painting, find and fix moisture issues. Here’s how to use various tools and methods.
- Use moisture meters: Press the pins into surfaces to measure moisture content. Acceptable levels vary by material.
- Infrared scans: Hire a professional to scan walls for hidden moisture. This is especially useful on large areas.
- Targeted probes: Drill small holes in suspicious areas, insert probes, and measure moisture content.
- Avoid painting wet surfaces: Moisture can cause paint to peel, bubble, or mildew. Fix issues before painting.
Quick rule: If you find moisture, fix it first. Painting over dampness leads to costly repairs later on.
Adhesion and substrate sampling tests
Before painting, ensure your surfaces are stable and compatible with new coatings. Here’s how to test adhesion and sample substrates.
- Cross-cut tape/peel tests: Score the surface, apply painter’s tape, pull it off quickly. If paint comes off, adhesion is poor.
- Small patch adhesion: Apply a small test patch of your chosen paint. Let it dry, then check for adhesion issues.
- Selective sample removal: Carefully remove small samples from hidden areas to assess substrate stability and composition.
- Avoid painting unstable surfaces: If substrates are crumbling or delaminating, fix these issues before applying new paint.
Quick rule: Good adhesion starts with a stable, compatible surface. Test first to avoid costly repaints later.
Safety, Lead Abatement, and Regulatory Considerations
Outline safety standards and best practices for painting historic structures, including containment, ventilation, and fall protection. Protect occupants and workers during all phases.
Lead paint assessment and abatement planning should determine when to test, how to contain, and how to schedule work to minimize exposure. Coordinate permitting and preservation requirements early with local authorities.
Lead-safe work practices and contractor credentials
The EPA’s Renovation, Repair, and Painting (RRP) rule requires certified firms to perform any work that disturbs lead-based paint. Here’s why:
Certified renovators are trained in lead-safe work practices. They know how to contain the area, minimize dust, and clean up properly.
Before hiring, ask for their certification number. It should start with ‘NAT-‘. Also, ensure they follow these steps:
– Contain the work area with plastic sheeting.
– Use HEPA vacuums and wet cleaning methods to control dust.
– Dispose of waste properly at a licensed facility.
Historic preservation rules and approvals
Before you paint, check local historic district guidelines. Many areas have strict rules about colors and materials:
– Design review boards may need to approve your color choice.
– Permit timelines vary, so apply early. It could take weeks or months.
Contact your local preservation authority for guidance. They can help you navigate the process and avoid costly mistakes.
Protecting workers and the public
Safety is paramount when painting historic structures. Here’s how to protect your crew and the community:
– Contain the work area with plastic sheeting to prevent lead dust from spreading.
– Use ventilation to remove dust from the air. HEPA vacuums are a must.
– Clearly mark the work area with signs warning of lead hazards. This protects passersby and limits your liability.
– Dispose of waste at a licensed facility following local regulations.

Paint Types and Material Specifications for Historic Buildings
Compare traditional breathable finishes like limewash and lime-based paints with modern breathable coatings such as silicate and lime-putty compatible acrylics. Explain how each affects moisture transfer and substrate health.
Match coatings to historic substrates such as lime plaster, lime mortars, brick, stone, and aged wood, noting compatibility and risks. Outline a practical testing and selection workflow that addresses pots of mixed substrates.
Traditional coating options and suitability
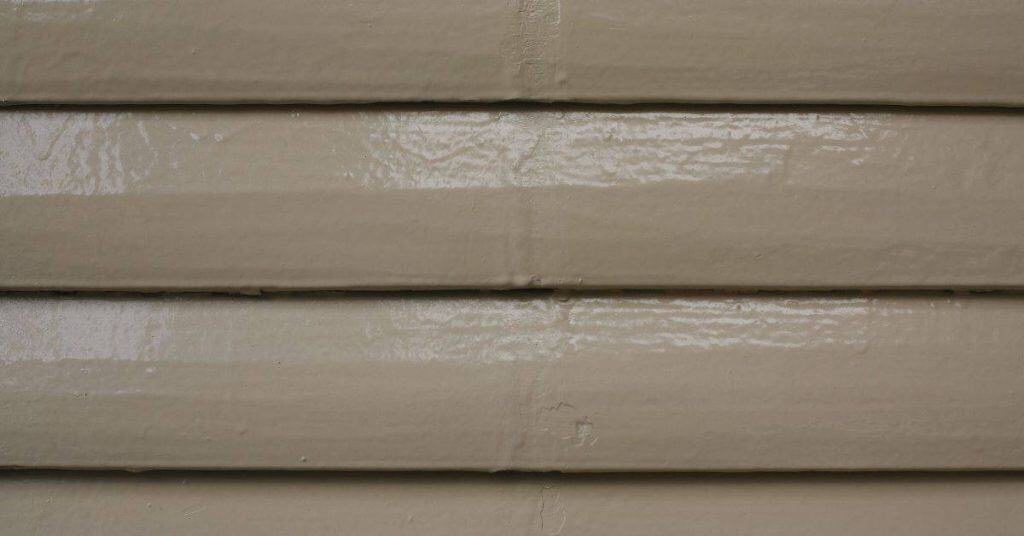
Limewash is a classic choice for historic buildings. It’s breathable, allowing moisture to escape, and it’s great for lime plaster and brick substrates. But it might not be durable enough for high-traffic areas or exposed locations.
Linseed oil paints are another traditional option. They’re flexible and can handle minor substrate movement. They work well on wood and some masonry surfaces, but they may darken over time due to oxidation.
Oil/alkyd paints offer good durability and color retention. They’re suitable for aged wood and metalwork, but they might not be breathable enough for all historic substrates, leading to moisture buildup.
Modern high-performance and breathable formulations
Silicate paints are highly breathable and resistant to alkali. They’re a good choice for lime plaster and brick, but they might not be suitable for all types of stone or wood.
Siloxane coatings offer excellent water repellency while maintaining breathability. They work well on most masonry surfaces, but they may not provide sufficient color retention for some applications.
Lime-putty compatible acrylics combine the benefits of traditional lime-based paints with modern acrylic technology. They’re versatile and can be used on various substrates, including mixed substrates within a building. However, they might not offer the same level of durability as dedicated masonry coatings.
Material specs and standards to request
Choosing the right material is crucial for a successful paint job that preserves historic integrity. Here’s what you should ask manufacturers and labs for:
- Vapor permeability rating: Look for high values (g/m²·24h) to ensure breathability.
- Alkali resistance: Important for lime-based substrates; ask for test results showing no reaction with alkali.
- Efflorescence control: Request data on how the coating handles salt deposits to prevent staining and weak bond.
- UV stability: Ask for colorfastness data under UV exposure to ensure long-term durability.
- Long-term durability testing: Inquire about accelerated aging tests or real-world performance data in heritage contexts.
Surface Preparation and Techniques That Preserve Original Character
Assess the original fabric and significance to decide what can be reversible or removable without damage. Document features before any work begins.
Use gentle cleaning methods and avoid aggressive chemicals. Prioritize test patches, removable coatings, and reversible removal strategies when necessary to protect historic textures and details.
Gentle cleaning and appropriate removal methods
Start by assessing your surfaces. Identify contaminants like dirt, grime, or old paint.
Use low-pressure washing to clean gently. It’s like a soft touch for historic surfaces. Too much pressure can damage delicate materials.
Be gentle with abrasives too. Soft brushes and cloths are your friends here. For tough spots, use chemical poultices. They lift contaminants without harming the surface.
If paint needs removing, start with hand-stripping. It’s labor-intensive but kind to old materials. Reserve harsh stripping for areas beyond repair, and contain the area to protect surrounding fabric.
Repairing substrates and matching textures
First, stabilize any loose substrates. This could be rotten wood or crumbling masonry. Use compatible materials to avoid further damage.
Fill cracks with lime or cementitious mortars. They’re sympathetic to old buildings. Match the texture of the surrounding material for a seamless repair.
Replacing moldings? Find matching profiles and materials. It’s worth the effort to maintain historic character.
For missing details, recreate them using historically appropriate textures and profiles. The goal is to preserve original character while updating performance.
Color matching and finish selection
Start with an on-site color analysis. Look at existing colors, consider the building’s history, and consult historic records if possible.
Create test patches to see how colors look in different lights and conditions. This helps you make informed decisions about your final scheme.
Choose finishes wisely. Gloss or matte? It depends on the period and desired effect. Remember, the goal is to retain period authenticity while ensuring durability and maintenance accessibility.
Select breathable, low-alkali, water-based or lime-based paints. They’re kinder to old buildings and help maintain a healthy indoor environment.
Cost, Scheduling, and Project Planning
Define a clear project budget with line items for coatings, prep, testing, permits, scaffolding, containment, and contingencies. Base numbers on scope determined by assessments rather than guesses.
Develop a phased work plan that isolates sensitive areas and minimizes disturbance. Build a weather and occupancy strategy that respects landmark events and avoids long closures.
Cost drivers and budgeting tips
Historic paint projects have unique cost drivers. Testing for lead/asbestos, abatement if needed, repairs to match original textures, and high-quality coatings drive the budget.
Prioritize scope: Start with safety tests and abatement. Then focus on repairs that maintain original character. Lastly, invest in durable, historically appropriate coatings.
Contingencies are crucial for historic projects. Plan for 10–20% extra to cover unexpected issues like hidden damage or material price fluctuations.
Phasing, access, and minimizing disruption
Minimize risk by phasing work. Isolate sensitive areas first. Use temporary coverings to protect surfaces from dust or damage.
Active venues: Plan heavy prep during non-public hours. Rapid cleanup limits disturbance. Coordinate with landmark events or tours to avoid closures.
Scaffold planning is key. Schedule access with work sequencing. Ensure safety protocols are in place for fragile finishes.
Best seasons and timing considerations
Exterior coatings have seasonal constraints. Summer’s warmth is ideal, but high humidity can affect cure time. Winter’s freeze-thaw cycles can cause issues.
Avoid extreme temperatures: Coatings typically need 50°F (10°C) minimum to cure properly. Avoid applying in extreme heat or cold.
Allow adequate cure time before exposing freshly painted surfaces to weather extremes or heavy use. Buffer for delays in material delivery or inspections.
Common Mistakes and How to Avoid Them
Document frequent missteps such as skipping tests, using incompatible paints, inadequate surface prep, and weak documentation. Pair each with a practical corrective action plan you can implement.
Outline essential pre-paint tests and assessments with step-by-step methods and clear decision points. Include a robust documentation routine to preserve historic records for future work.
Overpainting without proper tests
Before you grab that paintbrush, stop! Don’t make the common mistake of diving right into painting historic concrete or masonry without checking for lead, moisture, and adhesion issues.
Lead Paint: Lead was commonly used in paints up until 1978. If your building is older, it might have lead paint. A simple test kit can tell you if you need to take precautions or hire a professional for safe removal.
Moisture and Relative Humidity: Excess moisture can cause peeling and damage. Use a moisture meter to check for dampness before painting. Ideal relative humidity is between 30-50%.
Adhesion Tests: Ensure the surface will hold paint by performing an adhesion test. Scrape a small area, clean it, let it dry, then apply painter’s tape and pull it off quickly. If paint comes off, you need to prep better.
Choosing wrong coating systems
Historic buildings need breathable coatings that let moisture escape. Non-permeable paints trap moisture, leading to damage over time.
Wrong Binder: Some binders like acrylic or oil-based are not suitable for historic masonry and concrete. They can’t breathe, causing issues. Opt for lime-based or silicate binders that mimic traditional materials.
Gloss Level: High-gloss paints aren’t historically accurate and reflect too much light. Matte or eggshell finishes are usually best.
Compatibility Trials: Before applying, do a small test patch to ensure the paint adheres well and doesn’t cause issues like efflorescence (white salt deposits).
Poor contractor selection and lack of records
Hiring the wrong contractor can lead to shoddy work and further damage. Always vet your candidates thoroughly.
Qualifications: Look for contractors with experience in historic preservation. Ask about their certifications, like the Secretary of the Interior’s Standards for Rehabilitation.
References: Check references and ask to see examples of their past work on similar projects. If they’re hesitant, that’s a red flag.
Records Keeping: Keep detailed records of materials used, test results, permits obtained, and any preservation guidelines followed. This helps maintain the building’s historic integrity and aids future maintenance.
Conclusion
Safety, durability, and preserving character must drive every decision. Fresh paint on a historic building isn’t just cosmetic; done right, it protects the structure and keeps history readable for years to come.
Do this: inspect and test early, confirm surface condition and lead status, plan around permit and regulatory steps, choose compatible materials, protect surrounding areas, prepare properly, apply in the right order, and allow proper cure times at suitable temperatures. Do it in that rough sequence and document what you see so you can stay on track and avoid costly fixes later.
Common mistakes to avoid include skipping tests or underestimating lead hazards, applying new coatings over unstable substrates, and rushing surface prep or approvals to save time. Safety rules are simple: ventilate, wear PPE, test in a small area first, and never proceed if moisture, peeling, or unknown lead conditions show up. If you’re unsure about material compatibility, or if the building is heavily damaged or you suspect lead, slow down and verify before continuing.
If the project touches intricate historic finishes, complex lead concerns, or regulatory hurdles, don’t push past limits. Call a professional when the risk is high or when code and preservation guidelines demand expert handling. Stay steady, follow the plan, and you’ll see steady improvement that lasts.
FAQ
1. How can painting help preserve the historical character of a landmark?
Painting can protect the surface and slow deterioration, but you must choose products that are compatible with the original materials. Use breathable coatings and follow manufacturer guidance to avoid trapping moisture. Always test on small areas first and look for finishes that respect the historic look.
2. Are there painting methods that work better for old or historic buildings?
Gentle surface prep and thin, even coats work better than heavy builds on old siding or trim. Scraping, cleaning, and priming with period-appropriate primers helps adhesion without damaging textures. Avoid pressure washing fragile surfaces; use soft tools and low-pressure methods when needed.
3. What about regulations and community input when painting a historic property?
Check if there are local guidelines or neighborhood conservation rules before starting. Get input from the community or a preservation board if required, and document the materials and colors you plan to use. Follow any approved color palettes or finish requirements you’re given.
4. Should I consider specific brands or materials for historic restoration?
Brand choice matters for compatibility and durability. Read labels and datasheets for breathability, film thickness, and compatibility with old materials. If you’re unsure, consult the product instructions and local authorities to confirm suitability for your project.