

Introduction
Choosing a paintbrush means selecting the right brush to lay down even coats and control the finish.
For concrete work, start with cleaning and preparing the surface so the brush can work effectively. That means removing dust, debris, and any loose material, and planning for gaps and patches that you may encounter.
You’ll also test how well sealants and patch compounds behave on the concrete, noting ease of application and surface texture. Practice filling gaps with backer rod and sand to keep joints clean, then check how the product dries and adheres. Check labels and manufacturer instructions for cure times, surface prep, and any local rules before committing to a full coat.
Key takeaways
- Before buying, assess project scale and choose natural, synthetic, or hybrid bristles accordingly.
- Inspect brush for loose ferrule, brittle bristles, and clean with warm water after use.
- Test self-leveling sealant compatibility on scrap concrete and note cure behavior.
- Use backer rod and sand to fill gaps before patching and finishing surfaces.
- Prevent brush wear by rinsing, dry brushing, and storing bristles upright to maintain shape during cure.
- Plan projects with brush life expectations to optimize cost and maintenance; always wear gloves.
Table of Contents
- Introduction
- Key takeaways
- Tools and Materials Checklist
- Common Paintbrush Problems and Their Causes
- How to Test a Brush Before Buying or Using
- Fixes and Restoration Techniques
- Choosing Between Natural, Synthetic, and Hybrid Bristles
- Preventative Maintenance to Prolong Brush Life
- Safety, Common Mistakes, and When to Replace a Brush
- Project Planning, Cost-Effectiveness, and Maintenance After Repairs
- Conclusion
- FAQ
Tools and Materials Checklist
Start with the essentials you actually need for testing, repairing, and maintaining brushes. Include options for water-based and oil-based paints so you’re not swapping gear mid-job. Identify the right brush types by size and material for each system you’ll work with, and keep a small spare set handy.
Next, list cleaning supplies and maintenance steps in plain terms: soap and water for water-based paints, mineral spirits or brush cleaner for solvent-based finishes, and quick salvaging methods for dried bristles. Add drying and storage routines that won’t warp or bend bristles. Have testing tools ready, like bristle integrity checks, ferrule rust detection, bristle splay tests, and paint pickup tests to interpret results on the fly.
Recommended brushes by task
Choose the right paintbrush for each job to ensure a smooth, professional finish.
- Trim work: Use angled sash brushes (1.5-2.5 inches) with synthetic bristles for sharp lines and easy cutting-in.
- Walls: Opt for flathead brushes (3-4.5 inches) with synthetic or natural bristles, depending on paint type.
- Detail work: Select detail brushes (0.25-1 inch) with fine, tapered bristles for intricate areas and small projects.
- Textured surfaces: Choose block brushes (1.5-3 inches) with stiff, flagged bristles to hold more paint and cover texture evenly.
- Oil-based paints: Use natural bristle brushes for better paint absorption and release.
- Water-based paints: Opt for synthetic bristles to prevent bristle damage from water retention.
- High-gloss finishes: Select dense, flagged bristles for a smooth, reflective finish.
- Matte or eggshell finishes: Choose softer, less dense bristles to avoid leaving brush marks.
Quick rule: Always match the brush type to the task and paint type for best results.
Cleaning and repair supplies
Proper cleaning and maintenance extend your brush’s life and keep it in top condition.
- Brush soap/solvent: Use dish soap for water-based paints or mineral spirits for oil-based to clean brushes effectively.
- Combs/brush cleaners: Use plastic combs or wire brush cleaners to remove excess paint and straighten bristles after each use.
- Ferrule protectors: Apply ferrule tape or protective covers to prevent rust and damage during storage.
- Gentle adhesives: Use super glue or epoxy to reattach loose bristles or ferrules, if necessary.
- Storage sleeves: Use brush sleeves or covers to keep brushes clean and dry during storage.
- Rags or paper towels: Have absorbent materials on hand for quick touch-ups and cleaning.
- Plastic bags: Store wet brushes in plastic bags to keep them moist until reuse, preventing bristle damage from drying out.
Quick rule: Clean and maintain your brushes after each use to prevent permanent damage and extend their lifespan.
Optional specialty tools
Invest in these optional tools for faster repairs, improved results, and added convenience.
- Brush reshapers: Use brush reshaping tools or heat guns to reshape bristles after use or storage.
- Ultrasonic cleaners: Invest in an ultrasonic cleaner for deep cleaning, removing paint and debris from hard-to-reach areas.
- Brush holders: Use brush holders or stands to keep brushes upright during storage, preventing bristle damage and maintaining their shape.
- Labeling system: Implement a labeling system for easy organization, ensuring you always grab the right brush for the job.
- Paint tray liners: Use disposable tray liners to minimize cleanup and protect your paint trays from damage.
- Bucket grids: Use a bucket grid or roller screen to keep brushes clean and dry during breaks, preventing contamination and bristle damage.
Quick rule: While not essential, these tools can make your painting experience more efficient and enjoyable.
Common Paintbrush Problems and Their Causes
Outline the four main issues you’ll encounter—shedding, splaying, a dull or uneven finish, and visible brush marks. Note when each tends to show up, such as with new brushes or after cleaning, and which surfaces reveal patterns you should watch for. This helps you recognize the early signs quickly.
Map each symptom to likely root causes, from low-quality construction to nap length and material choices. Consider wrong paint type or viscosity, improper loading, technique flaws, and poor storage or cleaning practices. Explain how these factors interact so a bad cleaning job doesn’t mask deeper wear.
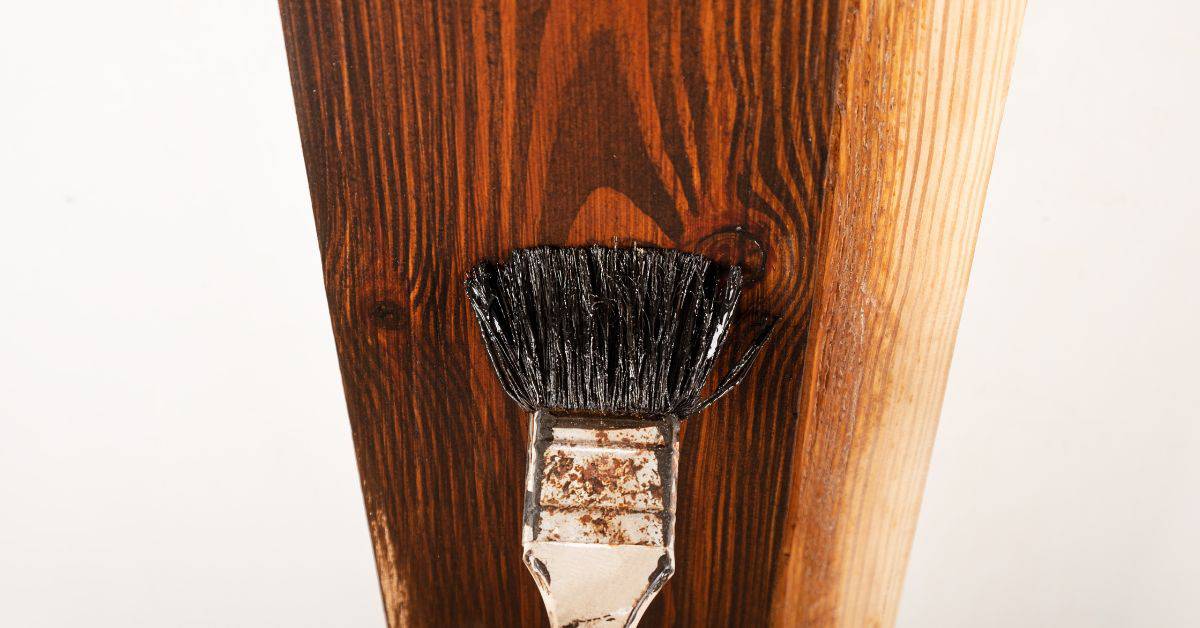
Bristle Shedding and Contamination
Loose staples, poor glue, or manufacturing defects can cause bristles to shed. This results in a messy finish with lint and stray hairs.
Check for: loose bristles by tugging gently; uneven glue lines along the ferrule (metal part).
Contaminated brushes introduce foreign particles into your paint, ruining the finish. This happens when improper cleaning leaves residue or debris.
Inspect for: hardened paint or dirt in bristles; a sticky feel to the ferrule.
Splaying, Loss of Shape, and Split Ends
Heat from improper drying or solvents can warp bristles. This causes splaying – the brush loses its shape, leading to poor edge control.
Look for: bent or twisted bristles; a brush that’s wider at the tip than it should be.
Split ends happen when bristles are too soft or weak. They fray and break apart, leaving your finish with tiny, unwanted lines.
Check for: fine white hairs at the tips of bristles; a ‘fuzzy’ edge to the brush.
Poor Paint Pickup and Visible Brush Marks
The wrong type of bristle for your paint can lead to poor pickup. Natural bristles don’t work well with water-based paints, while synthetic bristles struggle with oil-based ones.
Ensure: you’re using the right brush for your paint type (water-based or oil-based).
Overloading a brush can cause visible marks. Too much paint makes it hard to control the brush, leading to streaks and drips.
Avoid: dipping the brush too deep into the paint; overfilling the bristles.
Hardened residue from improper cleaning or storage can restrict paint flow, causing poor pickup and visible marks.
Inspect for: dried paint in bristles; a stiff, unyielding feel to the brush.
How to Test a Brush Before Buying or Using
Check the basics first: ferrule tightness, comfortable handle, and bristle integrity with no loose hairs. Look for signs of shedding during light brushing. These quick checks save you from buying junk brushes.
Then verify bristle type and brush compatibility for your coatings. Match synthetic or natural bristles to elastomeric paints, epoxy coatings, or concrete sealers. Test load and release by taking a few strokes on scrap and noting consistency and control.
Step-by-Step Process
Before buying or using a paintbrush, follow these steps to test its quality and performance.
- Prepare your workspace: lay out the brush, some paint, a scrap board, and cleaning supplies.
- Check safety: ensure no flammables nearby if using solvent-based paints.
- Perform visual inspection (see next section).
- Test bristle flex and load/release performance (see following sections).
- Clean the brush, assess recovery, and inspect for shedding or damage.
Visual Inspection and Flex Test
Before use, check these aspects to ensure your brush is in good condition.
- Ferrule tightness: Gently tap the ferrule. If it’s loose or rattles, skip this brush.
- Bristle alignment: Check bristles are evenly spaced and not splayed. Splayed bristles won’t hold paint well.
- Bristle integrity: No loose or frayed hairs? Good. Loose hairs can shed into your paint.
- Shedding test: Brush over a wipe. If it leaves marks, the brush sheds.
- Flex test: Gently bend and release bristles. They should spring back to shape.
Quick rule: Any issues here? Move on; this brush isn’t worth your time.
Paint Loading and Stroke Test
Load a small amount of paint onto the brush, then stroke it onto a scrap board to assess performance.
Dip the brush into paint. It should hold enough for 2-3 strokes without dripping.
Stroke the paint onto the board. The brush should release paint evenly, with no streaking or splattering.
Tip: If the brush leaves visible bristle marks or skips areas, it’s not picking up paint well enough.
Ferrule and Handle Durability Check
Test the ferrule and handle for strength and stability to ensure longevity.
Gently tap the ferrule with your other hand. If it feels loose or wobbles, skip this brush.
Twist the handle gently. It should feel secure; no play or wobble.
Tip: A weak ferrule or handle can cause bristles to fall out or the brush to break during use.
Fixes and Restoration Techniques
Start by diagnosing common problems like dried paint, stiff bristles, bent filaments, a loose ferrule, or shedding. Decide which salvage steps apply based on the severity. Heavier damage may require replacement, lighter issues can be repaired.
Follow cleaning protocols tailored to bristle type and paint solvent, including pre-soak, gentle agitation, and thorough rinsing. Use reconditioning blends or brush conditioners to restore pliability without harming bristles. Finish with reshaping and ferrule care; consider ferrule tightening or replacement if feasible.
Cleaning and deep-conditioning methods
Start by removing excess paint with a rag. For water-based paints, use warm soapy water to clean your brush. Soak it for 15 minutes, then agitate gently. For oil-based paints, use mineral spirits or paint thinner. Let the brush soak for an hour, then agitate and rinse.
To deep-condition, mix a solution of mild detergent and clarifier. Soak your brush overnight, then rinse thoroughly. Alternatively, you can use commercial brush conditioners or natural oils like linseed oil to restore softness.
Never soak synthetic bristles in oil-based solvents as it can damage them.
Reshaping, setting, and drying techniques
To reshape tips, dip the brush into water or solvent, then use your fingers to gently comb the bristles back into shape. For natural bristles, you can use a brush liner or clip to hold them in place while drying.
Dry your brush upright to maintain its shape. This prevents water from pooling at the ferrule and causing damage. For natural bristles, you can set them with heat-free methods like wrapping the head in aluminum foil overnight.
Never use high heat to set natural bristles as it can damage them.
Repairing minor bristle damage
If your brush has split ends, carefully trim them with scissors. For loose bristles near the ferrule, you can use a small amount of wood glue to reinforce them. Make sure not to get glue on the ferrule itself.
For more extensive damage, you might need to re-tie or consolidate bristles using thread and a needle. This is a temporary fix, so keep track of when you did this for maintenance purposes.
If your brush has significant damage, it’s often cheaper and easier to replace it than to perform major repairs.
Choosing Between Natural, Synthetic, and Hybrid Bristles
Define the bristle materials and typical use cases, noting how each behaves with latex, oil-based, or epoxy coatings. Explain how materials influence absorption, stiffness, edge control, and lint shedding. Use this to guide initial picks for a concrete job.
Pair bristle type with job scenarios such as interior floors, exterior slabs, or decorative coatings. Cover common mismatches and practical fixes, plus a quick on-site test and cleanup routine to verify compatibility. Include a simple decision flow to speed up replacements or repairs.
Natural bristles: strengths and limits
Natural bristles, typically made from animal hair like hog or ox, excel with oil-based paints and lacquers. They’re soft, flexible, and hold a lot of paint.
Why they’re poor for water-based paints: Natural bristles absorb water, making them limp and ineffective with latex or acrylic paints. They can also lose their shape over time due to moisture retention.
Use natural bristle brushes for applying oil-based sealers, varnishes, or lacquers on concrete surfaces where a smooth, even finish is desired.
Synthetic bristles: strengths and limits
Synthetic bristles, usually made from nylon or polyester, are designed for water-based paints. They’re stiff, durable, and retain their shape well.
Tips on stiffness: Stiffer bristles are better for high-gloss paints and smooth surfaces like concrete floors. Softer ones work well with low-luster paints and textured surfaces.
Synthetic brushes are ideal for applying latex or acrylic sealers, stains, and paints on both interior and exterior concrete slabs.
Hybrid and specialty brushes
Hybrid brushes combine natural and synthetic materials for balanced performance. Specialty brushes have unique features like flagged tips or split ends.
Ideal for pros and multi-purpose painters: Hybrids offer good paint pickup and durability, working well with a range of paint types. Specialty brushes cater to specific needs, like edging or detailed work on concrete surfaces.
For example, use an angle sash brush with flagged tips for applying edge coats and sealants on concrete countertops or walls.
Preventative Maintenance to Prolong Brush Life
Explain the purpose of preventative maintenance in practical terms: longer tool life, better paint results, and real cost savings. Tie the routine to how often you actually use brushes on concrete projects. Keep expectations realistic so you don’t overdo it.
Lay out a cleaning cadence after each use that works for water-based and solvent-based paints, including removing hardened paint without fraying bristles. Provide solvent and cleaner guidance, safety notes, and disposal tips to protect bristles and ferrules. Finish with drying, storage methods, and routine checks to catch wear early.
Daily cleaning routines
End each day by giving your concrete brush a quick clean. This prevents paint buildup and keeps it performing at its best.
Water-based paints: Rinse thoroughly under warm water until the water runs clear. Use mild soap if needed, but avoid harsh detergents that can damage bristles.
Solvent-based paints: Wipe excess paint off with a rag, then soak in the appropriate solvent (see below). Rinse well and let dry.
Proper storage and handling
Store your brush upright to keep its shape and prevent bristle splaying. Never store it on its bristles as this can damage them.
For transport, protect the tips by wrapping them in a plastic bag or covering with a cap. This prevents damage from other tools or debris.
If you must store your brush flat, place it in a brush liner to maintain its shape and keep dust out.
Long-term care and seasonal storage
For short-term layup (up to a few months), preserve your brush with solvent. Soak it in the appropriate solvent, then wrap in plastic and store upright.
For long-term storage (more than a few months), give your brush a deep clean first. Remove all paint residue, rinse well, and let dry completely. Store upright in a cool, dry place to prevent mold or rust.
Before using again, check for any signs of wear or damage and make necessary repairs or replacements.
Safety, Common Mistakes, and When to Replace a Brush
Summarize safety fundamentals: PPE, ventilation, and safe solvent handling. Explain when to avoid mixing solvents or using poorly ventilated spaces, and include basic first-aid and spill response steps. Keep these tips practical for DIY homeowners.
List frequent mistakes that shorten brush life, such as hot water, harsh chemicals, or leaving brushes in solvent too long. Describe how to assess condition with signs of wear and simple tests. Give clear criteria for retirement and quick replacement guidance based on project needs.
Health and safety precautions
Safety first when handling solvents and cleaning brushes. Wear gloves and goggles, use a respirator if needed, and work in a well-ventilated area.
Never mix different types of solvents or cleaners. They can react violently, causing fumes that are harmful to inhale. If you spill solvent, absorb it with rags immediately and dispose of them safely according to local regulations.
For first-aid, keep a basic kit handy. If skin or eyes come into contact with solvents, rinse thoroughly with water. If symptoms persist, seek medical advice.
Common user mistakes to avoid
Here are some common errors that shorten brush life:
- Soaking handles: Submerging the handle in water or solvent can damage it. Instead, clean bristles gently.
- Using wrong cleaner: Natural bristles need natural cleaners like soap and water; synthetic ones can take solvents. Check your brush type before cleaning.
- Leaving in paint: Brushes left in paint or solvent dry out, making them stiff and unusable. Clean immediately after use.
- Pressing or twisting bristles: This bends and breaks filaments, reducing the brush’s lifespan.
Avoid these mistakes to keep your brushes in top shape longer.
Signs it’s time to replace the brush
Even with proper care, brushes wear out. Here are signs it’s time for a new one:
Frayed or splayed bristles: If filaments are broken, bent, or spread out, the brush can’t hold paint properly anymore.
Cracks in handle: A cracked handle is weak and may break during use. Replace it before it does.
Persistent odor or mildew: Even after thorough cleaning, if your brush still smells bad or has mold growth, it’s time to retire it. It won’t perform well and could harbor bacteria.
Project Planning, Cost-Effectiveness, and Maintenance After Repairs
Balance investment versus disposable options by outlining when to choose higher-quality brushes for multi-room projects. Provide a simple decision guide to help you decide based on project scope and coatings. Keep this grounded in real-life workflow considerations.
Map brush selection to coatings and plan a room-by-room workflow, including prep, coats, and cure times. Include a basic tools checklist and staging plan. End with post-use maintenance steps and clear signals for replacement after repairs or wear.
Upfront cost vs long-term value
When choosing paintbrushes, it’s tempting to go for the cheapest option. But remember, you get what you pay for.
Disposable brushes might seem like a good idea for one-off jobs. They’re cheap and easy to find. But they don’t last long. You’ll end up buying more in the long run.
For regular use, higher-quality brushes are worth the investment. They cost more upfront but last longer and perform better. Plus, many can be repaired or reconditioned, extending their lifespan even further.
Consider your project’s scope and frequency before making a decision. It might seem pricier in the short term, but investing in quality brushes could save you money in the long run.
Planning for multiple or large projects
When tackling multi-room or big projects, planning your brush selection is key. You want to minimize cross-contamination and keep workflow smooth.
Use different brushes for different rooms if possible. This helps prevent mixing colors or coatings. Label each brush to avoid confusion.
Consider using angled brushes for corners and edges, and stiffer bristles for textured surfaces. Have a mix of sizes on hand too – smaller brushes for detail work, larger ones for broad strokes.
Don’t forget to account for cleaning time between coats or rooms. Plan your workflow step-by-step, including prep timing, number of coats, and cure times. This way, you won’t be caught off guard by delays.
Aftercare and maintenance schedule
Maintaining your brushes after each project is crucial to keep them in good condition. A simple, repeatable checklist can help prevent common problems.
After use, clean your brushes thoroughly. Remove all paint residue with appropriate cleaners. Rinse well and let dry naturally, bristles down, to maintain their shape.
Store your brushes properly between uses. Keep them in a cool, dry place, away from direct sunlight or heat sources. This extends their lifespan significantly.
Inspect your brushes regularly for signs of wear. Replace when bristles fray, shed, or lose their paint-holding ability. Regular maintenance ensures your brushes are always ready to use and perform at their best.
Conclusion
Choose a brush with safety, durability, and a good finish in mind, and tackle each project with a plan you can stand behind. When you respect the test-and-prepare steps, you protect surfaces, save money, and avoid costly misfires.
Check in this order: test the brush before buying or using it, inspect the bristles for wear or loose fibers, match the bristle type to your paint, clean and restore after use, store properly to prevent damage, and plan maintenance into your project timeline. Keep PPE handy, work in a well-ventilated area, and never rush the cleanup or drying steps, especially on delicate surfaces.
Common mistakes to avoid include skipping a real test on a scrap area, choosing the wrong bristle type for the job, and skipping cleaning or drying steps. Safety rules are simple: wear eye protection and gloves, use the right solvent or water only as recommended, and never leave brushes soaked in solvent or paint overnight. If a job is large, tricky, or involves hard-to-reach areas, consider bringing in a pro rather than pushing through with a subpar tool or technique.
When in doubt about a tricky finish or a stubborn brush problem, don’t hesitate to call in a pro. Stay disciplined with your plan, follow the checks, and you’ll deliver a solid coat with minimal waste. Stay ahead, stay safe, and keep the brush moving toward a sharp, lasting result.
FAQ
How do I properly clean and prep a concrete surface before applying patch or crack filler?
Sweep and vacuum to remove dust and loose debris. Lightly wash with a stiff brush and soapy water, then rinse and let it dry completely. Etch or profile only if the product label requires it and follow manufacturer instructions.
What’s the best way to fill gaps with backer rod and sand, and when should I use this method?
Insert a backer rod to control depth and prevent squeezing out. Add enough sand or cement-sand mix to fill the gap, then skim with patch compound. Check the product guidance to ensure compatibility with the crack size and substrate.
When should I test self-leveling sealant versus concrete patch compound, and what are the pros and cons?
Test small patches to compare leveling, cure time, and adhesion. Sealants stay flexible and handle movement; patches are stiffer and repair structural gaps better. Read the label for cure time, substrate prep, and temperature range.
What safety steps should I follow when applying crack fillers and sealants on concrete?
Wear gloves, eye protection, and a dust mask if sanding. Ventilate well and avoid skin contact with uncured materials. Follow all label directions and local rules for storage and disposal.