
Introduction
Painting stair treads can transform your staircase, but it’s essential to understand the time commitment involved. This step-by-step guide breaks down the process into a manageable timeline, ensuring you allocate enough time for each stage.
From preparation to final coats, we’ll walk you through the entire project, helping you estimate how long it takes to paint stair treads and achieve professional-looking results.
The Complete Timeline: How Long Does It Take to Paint Stair Treads?
Painting stair treads is a multi-step process that requires careful planning and execution. Here’s a detailed timeline outlining how long each stage takes, helping you estimate the total project duration.
- Inspection and Planning (1-2 hours): Inspect your stairs for damage, plan your work, and gather materials.
- Cleaning and Degreasing (30 minutes – 1 hour): Thoroughly clean the stair treads to ensure optimal paint adhesion.
- Sanding (30 minutes – 1 hour)
- Primer Application (1-2 hours, plus drying time): Apply primer to seal the surface and improve paint durability. Allow it to dry according to the manufacturer’s instructions (usually 1-4 hours).
- Paint Selection and Preparation (30 minutes – 1 hour): Choose a suitable paint color and finish, then prepare your workspace and protect your home from paint.
- Painting (2-3 hours per coat, plus drying time): Apply the first coat of paint using the best techniques for even coverage. Allow it to dry according to the manufacturer’s instructions (usually 4-24 hours). Apply additional coats as needed, allowing adequate drying time between each.
- Cleanup and Touch-ups (30 minutes – 1 hour): Clean your tools, remove any protective materials, and perform touch-ups if necessary.
Total estimated time: The total time required to paint stair treads can range from 8 to 24 hours, depending on the size of your staircase, the number of coats needed, and drying times. It’s essential to allocate enough time for each stage and consider any potential delays or interruptions.
Key takeaways
Proper preparation is key to a successful paint job and can significantly impact the overall timeline. Taking the time to thoroughly clean, sand, and prime your stair treads will ensure better paint adhesion and reduce the need for touch-ups later on.
- Inspect stairs, plan work, protect home from paint.
- Clean and degrease treads for optimal paint adhesion.
- Sand lightly with fine grit (120-150) before painting.
- Choose durable, non-slip paint finish for high-traffic areas.
- Apply primer to seal and improve paint durability.
- Use flooring paint or general-purpose paint with added grip.
- Paint in manageable sections, allowing 24 hours drying time between coats.
Table of Contents
- Introduction
- Key takeaways
- Quick Project Overview and Expected Results
- Tools and Materials Checklist
- Preparing the Staircase: Inspection and Planning
- Cleaning and Degreasing for Best Adhesion
- Sanding: When, How, and Grit Choices
- Choosing Paint Color and Finish for Durability and Style
- Primer Selection and Application
- Paint Selection: Flooring Paints vs. General-purpose Paints
- Setting up Your Workspace and Protecting the Home
- Best Painting Techniques for Even Coverage
- How Many Coats and Ideal Drying Times Between Coats
- Timing the Project: a Step-by-step Timeline
- Handling Tricky Substrates: Laminate, Painted, or Varnished Treads
- Common Mistakes and How to Avoid Them
- Safety Considerations and Ppe
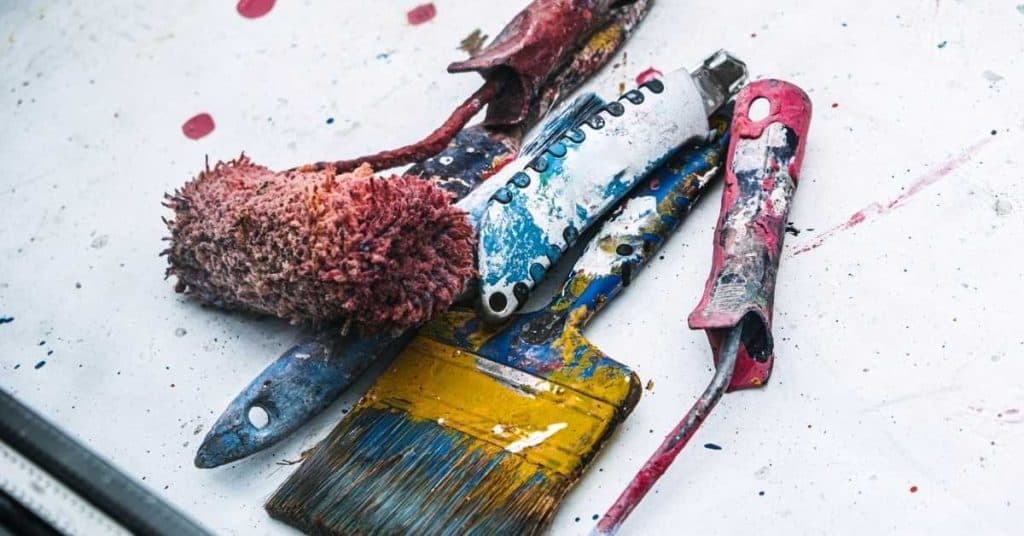
- Clean-up: Brushes, Rollers, and Tools
- Final Cure, Returning to Normal Use, and Maintenance
- Cost Breakdown and DIY vs. Replacement Analysis
- Visual Checkpoints and Quality Inspection Before Closing the Job
- Project Variations: Painting Only Treads, Treads + Risers, or Full Stair Makeover
- Aftercare: Seasonal Checks and Long-term Durability Tips
- Wrap-up: Final Tips and Quick Reference Cheat Sheet
- Conclusion
- FAQ
Quick Project Overview and Expected Results
The project involves painting the tread faces of all stairs while keeping risers intact. Prep includes cleaning, degreasing, light sanding, and repairing cracks to ensure a smooth surface before painting.
Expect a full day for prep plus drying times for primer, two coats of paint, non-slip additive, and sealant. Budget mid to upper hundreds for materials like primer, paint, slip additive, sealant, brushes or rollers, PPE, and basic tools based on stair count.
Good prep and a solid coating system are crucial for durability, preventing slips, and simplifying maintenance. Skipping prep can lead to chipped edges and the need for touch-ups down the line. Before-during-after photos illustrate progress from “dull, chalky tread” to “smooth, durable color with clear edges.”
Why it matters: Proper preparation ensures a long-lasting finish that reduces slip hazards and makes maintenance easier. Ventilation, surface compatibility, and correct drying times are key factors for success.
What This Guide Will Cover
We’ll start with the prep work, making sure your concrete surface is clean and free of debris. You’ll need to cover any areas you don’t want painted.
The materials section will walk you through what you should buy, like paint and brushes or rollers. It’s important to get good quality stuff that can handle concrete.
Once everything is ready, we’ll dive into the painting process. You’ll learn how to apply the paint evenly and cover any spots that missed the first coat. Afterward, give it time to dry properly before you start cleaning up.
The final part covers maintenance tips to keep your painted concrete looking great for years to come.
Who Should (and Should Not) Paint Their Own Treads
If you’re handy and comfortable with painting, tackling your treads yourself can be a great way to save money. But if you’ve never painted before or aren’t confident in your skills, it might be best to call in the pros.
Painting treads requires some physical effort—bending over for long periods and reaching up high. If these tasks are tough on your body, consider hiring a pro who can handle the work without strain.
A typical starting point is to assess if you have the time and patience for prep work like sanding and cleaning surfaces thoroughly before painting. If that sounds manageable, go ahead; otherwise, it might be worth the peace of mind to hire someone else.

Tools and Materials Checklist
A Tools and Materials Checklist keeps your job on track by listing every item you need from start to finish, including tools, consumables, and safety gear, with quick notes on why each is necessary. It covers when to use each tool during prep, paint, and cleanup, and it shows budget or availability alternatives so you can tailor the kit without blowing the budget. Expect guidance on quantity planning for brushes, rollers, and containers, plus practical reminders to assemble a basic “tools on hand” kit before day one.
This section matters because a well-prepared kit reduces mid-project runs to the store and cuts downtime when you switch tasks or tackle stubborn spots. You’ll see why choosing the right primer, floor paint, patch material, and sealant depends on your stair substrate and traffic, and how PPE like respirators, glasses, gloves, and knee pads protect you during sanding, grinding, or chemical exposure. The guidance also reinforces safety and prep discipline—dust control, masking, ventilation, and slip-resistance considerations—that influence tool selection and setup, helping you plan a smoother project flow and better results.
Recommended Paint Types and Primers
Selecting the right paint type is crucial for durability and appearance.
- Acrylic Enamel: Best for high traffic areas due to its durability and water-resistance. It’s ideal when you notice signs of wear or if the treads are exposed to moisture.
- Floor Paint: Ideal for concrete or wood treads as it can withstand heavy foot traffic. Use this when treads show scuff marks or have a rough texture.
When choosing a primer, consider the material of your stair treads:
- Oil-Based Primer: Provides a strong base layer, essential for adhering paint on porous surfaces like concrete. Use this when you see uneven absorption or patchy application during initial painting.
- Epoxy Primer: Excellent for metal stair components to prevent rust and corrosion. Apply if you notice any red or orange discoloration indicating rust.
A common mistake is not preparing the surface properly, leading to poor paint adhesion and a shorter lifespan of your paint job. Always ensure treads are clean, dry, and free from debris before applying primer and paint.
Brushes, Rollers, and Applicators Explained
The right tools make painting stair treads smoother and more efficient.
- Bristle Brush: Use a 2-inch brush for detailed work around the edges of each tread. Check that bristles are firm yet flexible to ensure durability and paint pickup.
- Foam Applicator: Ideal for applying primer in hard-to-reach spots like under nosings. Ensure it’s dense enough to hold primer without dripping.
- Roller with Long Handle: A roller with a long handle is perfect for reaching high areas without bending over too much. Verify the handle’s stability and grip for safe use.
- Mini-Rollers: Useful for small sections or tight corners where larger rollers won’t fit. Ensure they have a comfortable, non-slip grip.
When choosing applicators, consider tread material and area size for optimal coverage and ease of use.
- For concrete: Use bristle roller covers to ensure better coverage and adhesion.
- For wood: Opt for foam roller covers to achieve a smooth finish.
Common mistake: Not checking applicator condition before use. Result: Poor paint application, increased effort, and possible damage to treads.
Preparing the Staircase: Inspection and Planning
Inspect each tread and railing for damage, movement, or squeaks to ensure stability before painting.
A thorough inspection helps you decide if repairs like tightening, replacement, or leveling are needed. It also informs your choice of primer and adhesion methods for glossy surfaces.
Repairing and Securing Loose Treads
Before painting stair treads, ensure their stability by checking for and addressing any looseness or damage:
- Inspect each tread visually: Look for gaps between the tread and riser, or any visible movement when you step on it.
- Check for creaking: Apply light pressure to each tread to listen for any squeaks or creaks. These indicate loose connections that need attention.
If a tread is loose, follow these steps:
- Tighten screws from below if accessible.
- Apply wood glue in gaps and use clamps until dry.
- Insert shims under edges of lifting treads to prevent further movement.
Common mistake: Overlooking minor creaking or slight movement. This can lead to further damage, instability, or even safety hazards over time.
Once you’ve addressed any looseness, fill small cracks with wood filler and sand rough edges lightly but thoroughly. Clean all surfaces with a damp cloth to remove dust, and prime any bare wood areas for better paint adhesion.
If treads continue to move despite these fixes, or if you notice signs of structural movement, rot, mold, or active moisture, stop immediately and consult a professional. These issues may require expert attention before painting can safely proceed.
Measuring and Total Surface Area Calculation
To estimate paint and material needs:
- Measure length of each tread from front to back.
- Note width of treads at their widest point.
- Multiply length times width for area of each tread.
- Add up areas of all treads and risers separately.
- Determine total surface area by adding both sums together.
- Consider additional coverage if painting edges or undersides.
- Estimate paint quantity based on manufacturer’s coverage rate.
- Note any irregular shapes that may require extra attention.
- Plan for touch-ups and potential rework areas.
- Factor in drying time between coats to avoid rushing.
If your calculations indicate you need more material than expected, reassess measurements or adjust coverage estimates accordingly. Before full application, perform a patch test with primer and paint on a small area to ensure adhesion and compatibility. Wait the recommended period (typically provided by the manufacturer) before assessing results.
Cleaning and Degreasing for Best Adhesion
Clean and degrease the surface thoroughly before painting to ensure proper adhesion. Identify any flakes, peeling paint, or deep stains on concrete or other underlayers. Remove loose dust, dirt, and debris using a tack cloth, vacuum, or stiff brush.
Choose a mild detergent, TSP substitute, or commercial degreaser to scrub the tread thoroughly. Remove old wax, sealant, or coatings completely to avoid blocking adhesion.
Tack Cloths and Vacuuming Tips
Thoroughly vacuum your stair treads using a brush attachment to reach tight spots like corners and edges.
Inspect for any remaining dust or debris, especially where the tread meets walls or railings. Use tack cloths to pick up fine particles missed by vacuuming. These sticky sheets grab dust without leaving residue, ensuring a clean surface for painting.
- Check for any pet hair or fibers that may have accumulated in corners.
- Ensure no visible dust remains on the tread’s surface.
- Feel with your hands to confirm no grit or particles are left.
If you see dust or feel grit, re-vacuum and use tack cloths until the surface is smooth.
Common mistake: Using water-based cleaners without ensuring complete drying before painting. This can lead to paint bubbling or peeling over time due to trapped moisture.
Dealing with Stubborn Stains or Gummy Residues
Before tackling tough stains, assess their nature:
- Light oils: mild detergent should suffice.
- Heavy buildup: mineral spirits or denatured alcohol is needed.
- Old wax/sealant: scrape off excess before degreasing.
If old wax or sealant: Scrape, apply commercial degreaser, let sit for 15 minutes, scrub with stiff brush, rinse thoroughly.
Common mistake: Not ensuring the surface is completely dry before painting. Consequence: Paint blisters or peels later on.
Always check for complete dryness before applying paint. Any leftover moisture compromises adhesion and durability.
Sanding: When, How, and Grit Choices
Sanding on stair treads is about choosing the right level of abrasion: do a full sanding when old coatings or deep wear blocks paint adhesion, or opt for light scuffing to knock down shine and create a key if the finish is in decent shape and the tread depth is good. Use a practical grit sequence, starting rough with 60–80 for roughing, moving to 120–150 for intermediate abrading, and finishing with 220–320 for a smooth, paint-ready surface, and pick your tool to match the edge profile so you don’t gouge or sand away too much material.
The way you apply that plan matters because it affects how well the new finish bonds and how long the job lasts, so you must remove old finishes, clean between grits, and ensure the surface is dry and dust-free before painting; dents or deep scratches may need filler, and you should protect risers and surrounding trim while you work. Tools matter too: an orbital sander gives you speed and uniformity, but a sanding block offers better control on rounded edges and corners, which helps prevent gouges or skips on treads. Always secure the work area, use proper PPE, contain dust, and clean thoroughly to prevent slip hazards on stairs and to keep the crew safe throughout the job.
Feathering Edges and Transitions
To ensure a smooth transition where the tread meets the riser or nosing, feather the edges carefully with sandpaper or an orbital sander set to a lower speed. Start with a finer grit paper like 220 for a smoother finish.
When working around corners and edges, use a sanding block to maintain control and avoid over-sanding which can weaken the tread’s structure. Make sure to feather out any rough spots or paint residue to create an even surface that will accept paint evenly without visible lines.
This careful approach helps prevent uneven wear patterns later on and ensures your stairs look professionally finished from every angle.
Dust Control While Sanding
To minimize dust during sanding, use a vacuum equipped with attachments designed for tight spaces around stair treads. Regularly clean up the area to prevent dust accumulation and airborne particles.
What to check:
- Ensure your vacuum has a HEPA filter to trap fine particles.
- Check that vacuum attachments fit securely to maintain suction.
- Inspect the stair treads for any nails or screws that could become dislodged during sanding.
When to use a damp cloth:
- Before changing sandpaper grit, wipe down surfaces with a damp cloth to remove loose dust.
- After completing the sanding process, wipe all surfaces again before applying primer or paint.
Common mistake: Not wearing a respirator mask and safety glasses can lead to inhalation of fine particles and potential eye irritation.
Thoroughly vacuum and wipe down all surfaces after sanding to avoid dust interfering with the final finish quality. Wear a respirator mask and safety glasses for your protection.
Choosing Paint Color and Finish for Durability and Style
Color on stairs shapes mood, perceived space, and safety. Warm neutrals offer a timeless look while bold accents make a style statement. Plan contrasts with risers and adjacent walls to improve visibility.
Select a durable finish with slip resistance in mind, like low-sheen enamel or satin polyurethane. Test swatches on scrap treads, check lighting at different times, and consider anti-slip additives for high-traffic spaces. This approach saves wear, makes cleaning easier, and helps you avoid costly rework later.
Using Color to Hide Wear and Define Spaces
When selecting a color for your stair treads, consider the following:
- Darker colors (e.g., brown, gray) hide scuffs and wear better in high-traffic areas.
- Lighter colors brighten spaces but show wear more easily.
- Contrast treads with risers or walls to enhance visibility and add a decorative touch.
If you’re painting an open staircase, consider lighter shades to maximize brightness. However, be prepared for more frequent maintenance to keep them looking fresh.
Common mistake: Not considering the contrast between treads and risers or walls.
Consequence: Reduced visibility can lead to accidents and a less aesthetically pleasing result.
Non-slip Additives and Matting Options
To enhance safety on painted stair treads, consider these non-slip solutions:
- Additives: Mix non-slip agents into your paint or apply a clear anti-slip coat. These provide traction without roughening the surface.
- Matting Options: Install anti-slip strips along tread edges for extra safety. Choose styles that complement your painted surfaces.
- Textured Paint/Aggregate: Use textured paint or add broadcast aggregate during application to create subtle grip, ideal for modern homes.
What to check:
- Ensure the chosen non-slip solution is compatible with your paint type and color.
- Check that the product’s anti-slip properties meet your safety needs, especially in high-traffic areas or homes with elderly residents.
Common mistake: Not considering the aesthetic impact of non-slip solutions. While functionality is crucial, ensure the chosen option blends well with your home’s decor to avoid a jarring contrast.
Primer Selection and Application
Select primers based on your substrate type—wood, laminate, painted surfaces, or bare concrete—and consider tannin-blocking or bonding properties as needed. Clean, degrease, lightly sand or de-gloss, and repair any damage to ensure a smooth surface.
Choose primers with strong adhesion, good sealing ability for tannins or knots, moisture tolerance, and compatibility with your topcoat. Follow manufacturer recommendations for thinning, tools, and coat thickness.
Spot-priming vs. Full Priming
A full primer coat is best for bare wood or recently patched areas to ensure even coverage and prevent peeling paint.
For small problem areas, consider the following:
- Tannin bleed: If you see dark spots on the surface (tannin), spot-prime these areas only.
- Knots: If there are visible knots that could cause bleeding, spot-prime them to prevent discoloration.
- Previously painted surfaces: If the treads have been previously painted and are in good condition, you can skip priming or do a light spot-priming.
Common mistake: Overlooking tannin bleed or knots. Consequence: Paint may peel or discolor over time.
Drying Times and Temperature Considerations
Primer typically dries within 4 to 6 hours before applying another coat. Environmental conditions can affect drying times.
Cold temperatures and high humidity slow down drying, so work in a well-ventilated area with moderate temperature and low moisture levels for optimal results.
Paint Selection: Flooring Paints vs. General-purpose Paints
Floor and stair paints are different from general interior paints. For treads, choose specialized floor/stair coatings for better adhesion on concrete and higher abrasion resistance. They usually come with clearer warranty guidance and defined limits.
Before applying any paint, test the primer and paint on a small area to ensure compatibility and proper adhesion. Allow this patch to cure fully before assessing its quality. If it shows signs of peeling or poor bonding, reassess your product choices or consult a professional.
Good results come from proper prep and the right primer, plus following curing times and slip-resistance needs. For durability and easy cleaning, go epoxy-based floor paints or acrylic floor paints with a urethane topcoat; for budget jobs, a general-purpose paint with non-slip additive can work but expect wear.
Oil-based vs. Water-based Pros and Cons
Choosing between oil-based and water-based paints for your stair treads involves weighing several factors like cleanup, durability, and environmental impact.
Pros
- Oil-based paints offer better adhesion on concrete surfaces, ensuring a strong bond with the substrate.
- They have a longer curing time which allows them to bond more thoroughly with the surface, providing enhanced durability.
- Less prone to yellowing over time compared to some water-based options, maintaining the paint’s original color better.
Cons
- Cleanup can be messy and requires solvents like mineral spirits, making it less convenient for homeowners.
- Higher VOC levels mean indoor application should be avoided without proper ventilation to prevent potential health issues.
- Slower drying times mean longer wait periods before recoating or use, which could disrupt your project timeline.
To decide, consider the level of foot traffic your stairs receive and whether you can manage adequate ventilation during application. If your stairs are in a high-traffic area, opt for oil-based paint’s better durability. If ventilation is an issue, choose water-based paint to minimize VOC exposure.
Common mistake: Not considering the specific surface material of your stair treads. Consequence: Poor adhesion and premature wear or peeling of the paint.
What to check before painting:
- Surface condition: Ensure stair treads are clean, dry, and free from any damage or contaminants.
- Paint compatibility: Check if your chosen paint is suitable for the material of your stair treads (e.g., concrete, wood, metal).
- Ventilation: Assess your workspace to ensure proper ventilation, especially when using oil-based paints with higher VOC levels.
Vocs, Ventilation, and Low-odor Options
When painting stair treads indoors, choosing low-VOC paints is essential for maintaining good indoor air quality. These products minimize harmful emissions while still providing durability.
What to check: Inspect paint labels for VOC content; look for low-VOC or zero-VOC claims. Also, consider the following factors when selecting a paint:
- Durability: Ensure the paint can withstand heavy foot traffic.
- Adhesion: Check if it adheres well to existing stair tread materials (wood, concrete, etc.).
- Drying time: Opt for paints with reasonable drying times to minimize downtime.
- Color retention: Choose a paint that maintains its color and finish over time.
- Cleanup: Select water-based paints for easy cleanup with just soap and water.
When painting in tight spaces or poorly ventilated areas, always: Use exhaust fans or open windows to maintain adequate ventilation. This helps prevent health issues such as headaches, dizziness, and nausea, and also speeds up drying times.
Common mistake: Using high-VOC paints indoors without proper ventilation can lead to elevated VOC levels, causing short-term health effects and potentially contributing to long-term health problems. To avoid this, always prioritize low-VOC or zero-VOC paints and adequate ventilation.
Setting up Your Workspace and Protecting the Home
Temporary Barriers and Signage for Household Members
Setting up clear barriers around your work area is crucial to keep family members and pets safe from wet paint.
- Check that caution tape or plastic sheeting extends at least 2 feet beyond the painting area on all sides.
- Ensure signs are placed at every entry point, with clear, large font, and visible from a distance.
- Use bright colors or reflective materials for better visibility in low light conditions.
- Create detour paths using tape or cones, clearly marking alternative routes around the work zone.
If tape or signs are damaged or missing, replace them immediately to maintain safety.
Common mistake: Not securing barriers properly, allowing pets or children to enter the painting area. Consequence: Slips, trips, paint damage, or worse – accidental ingestion of paint by pets.
Lighting and Visibility Tips
Good lighting is essential for a thorough job when painting stair treads. Ensure that you have adequate light sources to illuminate every corner of the stairs, especially in areas with low natural light.
Use work lights or task lamps placed strategically along the staircase to highlight edges and corners where paint might be missed. This helps you see clearly and avoid uneven coverage or missed spots.
- Check for dark shadows cast by banisters, walls, or other structures that could hide imperfections.
- Ensure light sources are positioned at varying heights to eliminate glare and provide well-rounded visibility.
- Use a flashlight or headlamp as a backup to inspect hard-to-reach areas closely.
If you notice any dark spots, adjust your lighting setup accordingly.
Adequate visibility also prevents drips and splatters from going unnoticed, allowing for quick cleanup before they dry. Keep a rag handy near your light sources to wipe up any spills immediately.
Common mistake: Relying solely on natural light can lead to missed spots and uneven coverage, especially in staircases with poor lighting or complex layouts.
Best Painting Techniques for Even Coverage
Achieve even coverage by painting treads, risers, and nosing separately with consistent stroke direction, careful load management, and deliberate overlap to minimize lap marks. Focus on a damp edge and steady speed across 2–3 treads at a time.
Preparation is key: clean, patch cracks, and seal edges for uniform porosity before applying the topcoat. Choose appropriate brushes and roller naps for concrete and high-traffic stairs. Blend tool use and timing—cutting-in at edges, rolling to avoid stipple, and re-coating at the right interval—to finish with crisp edges and minimal touch-ups.
When adding a non-slip additive, ensure consistent coverage across high-wear areas. Use objective slip-test methods like pendulum tests to verify safety before finalizing your work.
Working Around Nosing and Overhangs
Before you start painting, inspect the nosing for any damage or wear. You’ll want to address these issues before applying paint.
- Check for loose or missing pieces that need to be reattached or replaced.
- Inspect for deep scratches or gouges that may require sanding and priming.
- Ensure the nosing is clean and free of debris to promote better paint adhesion.
To paint the nosing without dripping onto the riser, mask off the riser with painter’s tape first. Apply thin layers of paint along the edge of the nosing using a small brush from top to bottom.
Wait for the paint on the nosing to dry slightly before moving on to the tread and riser below. This prevents drips and ensures clean edges. If excess buildup occurs, gently scrape it off with a plastic scraper once the paint is tacky but not fully set.
Common mistake: Rushing through the process can lead to drips and uneven coverage. Take your time to ensure each layer dries properly before moving on to the next step.
Two-person Workflow for Efficiency
A two-person team can significantly speed up painting by dividing tasks: one paints while the other handles masking and cleanup, allowing continuous work without interruptions.
- Painter: Focus on applying even coats. Check for drips or missed spots after each pass.
- Assistant: Ensure edges are well-taped and paper is secure. Monitor painter’s progress to anticipate next areas to mask.
If the painter encounters a difficult area, such as a worn spot, they should signal the assistant to touch it up before proceeding. When a section is completed, the assistant moves on to prepare the next area while the painter continues painting.
Common mistake: Not checking for and addressing lap marks promptly can lead to visible lines in the finished product.
How Many Coats and Ideal Drying Times Between Coats
Plan for a primer if needed, then 1–2 finish coats. Drying times are tack-free or dry-to-recoat, while full curing takes longer, and temp, humidity, and airflow shift these windows.
Concrete projects change the plan, so use the right primer and floor paint or epoxy as required; that affects how many coats you apply. Between coats, clean dust, lightly scuff if needed, and test readiness with a tack-free touch or slight sheen. Recoat windows run roughly 2–4 hours for water-based products and 12–24 hours for oil-based products, with cooler or more humid conditions adding time.
Testing Tack-free and Cure Readiness
To ensure your stair treads are ready for another coat of paint, follow these steps to test the surface:
- Touch Test: Gently touch the painted area with a clean finger. If no residue or marks remain, it’s likely dry enough.
- Coin Test: Place a small coin on the surface for 30 seconds to 1 minute. If the paint doesn’t stick to the coin when lifted, the coat is tack-free.
Remember, cure time (when the paint reaches full hardness) can take longer than drying time between coats. Always check the manufacturer’s guidelines for specific products.
Common Mistake: Rushing recoating before the previous layer is fully cured can lead to poor adhesion, peeling, or a rough surface in high-traffic areas like stair treads.
Accelerating Dry Time Safely
To speed up drying times without compromising paint quality, use a combination of heat and air circulation.
- Check for: A dehumidifier to reduce moisture levels in the room.
- Use: Fans or heaters to increase airflow and warmth.
- Avoid: Direct sunlight or high-heat sources that might cause uneven curing or blistering.
When using heat: Maintain consistent temperatures above 50°F (10°C) to ensure proper drying without damaging the paint finish. If you notice any signs of warping or bubbling, reduce heat immediately.
Common mistake: Overusing heat can cause uneven curing and blistering. Ensure consistent temperature and avoid direct sunlight.
Timing the Project: a Step-by-step Timeline
A practical, repeatable timeline from prep to final cure for a 1–7 day project. It covers prepping, priming or sealing, first coat, second coat if needed, sanding between coats, and the final topcoat, with realistic time blocks and walk-away periods.
Temperature and humidity affect drying times; ensure proper curing by allowing adequate rest periods between steps. Avoid rushing through stages to prevent poor quality and durability issues.
Step-by-step Process
Prepare your workspace and safety measures first, then proceed with painting:
- Preparation: Clean stair treads thoroughly and apply primer if needed.
- Dry time after priming: Allow at least 24 hours before applying paint.
- First coat of paint: Apply evenly and let dry according to product instructions.
- Sanding between coats: Lightly sand the surface once it’s tack-free but not fully cured.
- Second coat (if necessary): Repeat application process, allowing for drying time.
- Cleanup or final checks: Ensure all surfaces are clean and free of debris before sealing off work area.
Final check to ensure no areas missed and that the paint is properly dried and cured.
Single-day vs. Multi-day Approaches
A single-day approach focuses on speed, aiming for quick results but may compromise durability due to rushed drying times. A multi-day method allows each coat ample time to cure fully, enhancing longevity and quality.
The faster option is suitable for those needing immediate use of the stairs, while a longer timeline ensures better adhesion and protection against wear over time.
Weekend Project Plan for Busy Homeowners
Plan your project to fit within a weekend timeframe. Start with preparation on Friday evening or Saturday morning, ensuring you have all materials ready.
Apply the first coat of paint early in the day and allow it to dry overnight. Sand lightly the next morning before applying the second coat if needed. Finish by sealing off work areas and allowing final curing over the weekend.
Handling Tricky Substrates: Laminate, Painted, or Varnished Treads
Laminate, painted, or varnished treads require special prep to ensure paint adheres properly. Assess the surface for soundness and choose a bonding primer or epoxy designed for non-porous materials.
Lightly sand tricky substrates using fine grit paper before testing your method on a small patch. Proper preparation prevents peeling, blistering, or failure under daily use. Use the right primers, careful sanding, and compatible topcoats to avoid costly rework and ensure longevity.
Repairing Chips and Gouges in Finished Surfaces
Clean chips or gouges thoroughly with a degreaser before repairing. Apply an epoxy-based filler that matches the tread material over damaged areas and let it dry according to instructions.
Sand down any raised edges until smooth, then wipe away dust before priming and painting. This ensures proper adhesion and coverage.
When to Strip Down to Bare Wood
If your stairs exhibit severe damage such as deep gouges or cracks, flaking finish that cannot be removed by scraping and sanding, or significant wear through to the wood, it’s time to strip the old surface entirely and start fresh. For minor isolated damage like small scratches or scuffs, clean thoroughly with a suitable degreaser and apply a bonding primer designed for non-wood substrates.
Before you proceed, check for:
- Structural movement or instability in the stairs, which may require professional assessment and repair;
- Rot or active mold/moisture issues, as these need professional attention to prevent further damage;
- Electrical issues, such as exposed wires or damaged outlets, which pose safety hazards and should be addressed by a licensed electrician;
- Previous coatings that keep failing despite proper preparation, indicating underlying problems that may require professional intervention.
A common mistake is to proceed with painting when these conditions are present. This can lead to poor adhesion, further damage, or even safety hazards. If the paint does not adhere properly after initial application, reassess your surface preparation and consider using a stronger bonding primer or epoxy. Test small patches to ensure adhesion before proceeding with full coverage. If problems persist, consult a professional painter for further advice.
Common Mistakes and How to Avoid Them
Common mistakes come from skipping proper prep and the wrong lab setup: insufficient surface cleaning, leaving sealers or dust, and not roughening the concrete. Do not skip degreasing, etching or light sanding, or vacuuming thoroughly before paint goes on, and fix cracks with a concrete patch. Know which paints work on concrete steps—epoxy, acrylic, or hybrid—and when a concrete or bonding primer is essential for adhesion and long life.
Ventilation and indoor air quality matter as much as the paint itself—watch humidity, use masks, and mind dry times to avoid coating failures. Get the surface and environment right first: temperature ranges, dew point, curing times between coats, and avoid sun on fresh concrete. Then follow a simple layering checklist: patch, prime, first coat, sand between coats if needed, then topcoat with slip-resistant additives or a textured finish for safety.
Drips, Brush Marks, and Uneven Sheen
Uneven sheen can be caused by inconsistent application techniques or using the wrong brush size for your paint. Drips happen when you apply too much paint at once or don’t work quickly enough.
To avoid these issues, use a high-quality brush that matches the viscosity of your paint and move it smoothly across the surface without pausing. If you notice drips forming, stop immediately and feather them out with additional strokes before they set.
After curing, if you see visible flaws like brush marks or uneven sheen, sand lightly with fine-grit paper to smooth out any rough spots. Then apply a thin coat of paint to even things out. Make sure the surface is clean and free from dust before applying the new coat.
Adhesion Failures and Peeling
If your paint starts peeling or lifting off, it’s usually a sign of poor adhesion. This can happen if you didn’t properly clean the surface before painting or if the primer wasn’t applied correctly.
What to check:
- Inspect for any remaining dirt, grease, or oils on the surface.
- Check if the previous paint layer was adequately sanded and primed.
- Ensure that the primer used is compatible with the topcoat and suitable for concrete surfaces.
Common mistake: Using a low-quality or incompatible primer can lead to adhesion failures, causing your paint to peel off prematurely.
To fix this issue, start by scraping away any loose paint and cleaning the area thoroughly with degreaser to remove dirt and oils. Once clean, sand lightly with fine-grit paper to create a rougher surface for better adhesion.
Decision rule: If you find any of the above issues, address them before proceeding with painting to avoid further problems.
After preparing the surface, apply a new coat of primer followed by your chosen topcoat. Make sure you’re using compatible products designed specifically for concrete surfaces. If peeling persists after these steps, consider consulting a professional for further advice.
Safety Considerations and Ppe
Safety starts with the right gear and a practical plan for respiratory protection, gloves, knee protection, and ladder setup to keep painters and occupants safe. Use task appropriate respirators—organic vapor or paint respirators for fumes, or simple dust masks for light work—and make sure the mask fits, you’ve performed a seal check, and you’re wearing suitable gloves such as nitrile or neoprene, knee pads, long sleeves and pants, with a stable ladder position in confined stair spaces and ventilation awareness built in from day one.
Ventilation tactics matter: create cross drafts, vent from above when possible, use temporary enclosures, and store volatile products away from the work area while clearly communicating disruption to occupants. This approach minimizes fume exposure, reduces skin and eye risk, prevents splashes during pouring and mixing, and avoids costly rework or complaints from neighbors, ultimately letting the job move forward more smoothly and safely.
Safe Disposal of Solvents and Rags
When working with solvents, it’s crucial to dispose of oil-soaked rags safely to prevent fires.
- Never leave oily rags in piles or loosely balled up; they can spontaneously combust due to heat buildup.
- Lay out the rags flat and let them dry completely before disposing of them properly.
- For leftover solvents, check local regulations for hazardous waste disposal. Some areas have specific drop-off locations or collection days designed for these materials.
What to check:
- If rags are still warm after use, do not pile them up; spread them out immediately.
- When disposing of solvents, look for local hazardous waste collection days or facilities.
Common mistake and consequence:
Many DIYers neglect to check local regulations for solvent disposal. Improper disposal can lead to environmental hazards and potential fines.
Working with Children and Pets in the Home
If children or pets are present during painting, create barriers using painter’s tape and plastic sheeting around stair treads to prevent access. Check that:
- The tape is securely adhered to both sides of each step.
- The plastic sheets overlap and are taped down at the edges for a secure seal.
After painting, do not allow re-entry until the paint is fully dry. This can take several hours depending on ventilation conditions. To check if it’s dry:
- Gently touch the painted surface with your finger or a cloth.
- If no paint transfers, it’s likely dry.
- Wait an additional hour to ensure fumes have dissipated before allowing children and pets back into the area.
Common mistake: Not waiting long enough for paint to dry can result in sticky or tacky steps that attract dust, hair, and debris, leading to a poor final appearance.
Clean-up: Brushes, Rollers, and Tools
Clean brushes, rollers, and tools using appropriate cleaning solutions based on the paint type. For water-based paints like acrylics and latex, use soap and water; for epoxy or solvent-borne coatings, a suitable solvent is necessary.
Between coats, keep damp tools capped or covered to extend their life, and label them to avoid mixing with other types of paint later. Drying, sanitizing, and inspecting the tools are crucial steps: check bristles for deformation, sleeves for shedding, and look for any residue before reuse. This care prevents issues like tool-drift, fumes, and finish defects.
Storing Leftover Paint and Labeling
To keep leftover paint fresh:
- Seal the can tightly with its original lid or a new one if damaged.
- Store in a cool, dry place away from direct sunlight to prevent color fading.
- Check for any signs of leakage or damage before storing.
When checking stored paint:
- If the paint has separated, stir it gently before use.
- If you see mold or a strange odor, discard the paint immediately to avoid contamination.
Label each sealed container clearly with the date and type of paint inside. This helps track storage duration and ensures older cans are used first to minimize waste.
Common mistake: Not checking stored paint for separation or contamination before use. Consequence: Poor paint quality, wasted effort, and potential health risks from mold exposure.
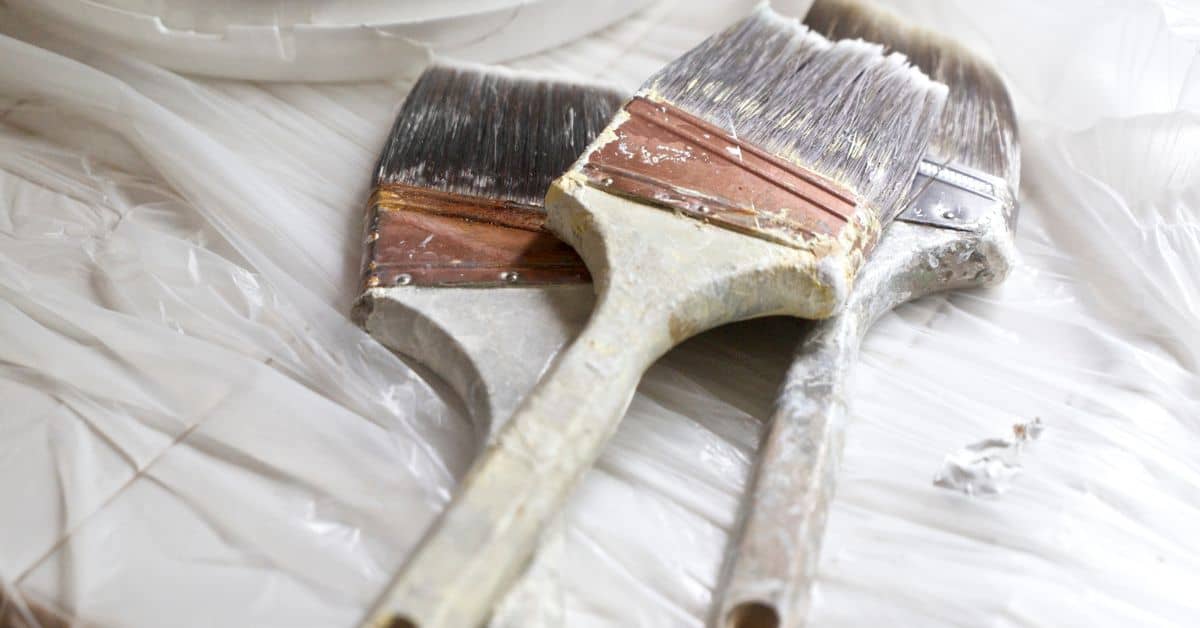
Reconditioning Rollers and Brushes
If your brushes or rollers are slightly dried but not completely stiff, soak them in a bucket of warm water for about 15 minutes. Gently work out the paint with your fingers before rinsing thoroughly.
For more stubborn residues, use a solvent like mineral spirits to dissolve the paint. Rinse well afterward and let air dry completely before storing or reusing. If tools are too stiff or damaged, it’s best to replace them for optimal performance on future projects.
Final Cure, Returning to Normal Use, and Maintenance
Dry-to-touch means the finish feels dry on the surface but can still transfer to your finger. Fully cured is when the chemistry has set, odor has faded, and the finish won’t stick to your skin or fingerprint in like hours to days depending on traffic. Plan for different wait times: bare stairs with light foot traffic may be able to bear gentle use sooner, while a coated surface in a busy hallway should stay off until the product is truly cured; humid or cool environments slow the cure and need extra patience.
Return-to-use guidance is straightforward: test readiness with a fingernail test and then try light foot traffic in a small area before full use. Maintenance life hinges on routine cleaning with a mild, non-abrasive cleaner, quick spill management, and timely re-coats when wear patterns show through or gloss/color dulls, usually at intervals tied to traffic levels.
Periodic Touch-ups and Repair Kits
Maintaining your painted stair treads involves regular inspections to catch minor issues before they escalate. Here’s what to look for:
- Check for: Chips, scuffs, or wear spots on the surface.
- What you’ll see: Small areas where paint is missing or damaged, often around high-traffic zones or edges.
If you notice any of these signs, follow this simple decision rule:
- If the damage is minor (less than 1 inch in diameter), use a touch-up repair kit to fix it immediately.
- If the damage is extensive or covers a large area, consider hiring a professional or renting specialized tools for a thorough repair job.
A common mistake homeowners make is ignoring small chips and scuffs, thinking they’re minor. However, these can quickly worsen due to continuous foot traffic, leading to larger repairs and potentially compromising the stair tread’s structural integrity.
Cleaning Painted Treads without Damage
Keeping your painted stair treads clean is crucial for maintaining their appearance and longevity. Use gentle cleaning methods to avoid scratching or damaging the finish.
Avoid harsh chemicals like bleach or abrasive cleaners that can strip away protective layers of paint. Instead, opt for mild soap mixed with water or a commercial cleaner designed specifically for painted surfaces.
For tough stains, apply the solution lightly and let it sit for a few minutes before wiping clean with a soft cloth. Rinse thoroughly to remove any residue and dry immediately to prevent water spots.
Cost Breakdown and DIY vs. Replacement Analysis
This section breaks down cost by line item for a DIY stair painting project, shows how materials translate into labor savings, and explains when it makes more sense to replace or hire out refinishing. Expect clear price ranges for common items like primer, paint, anti-slip grit, brushes and rollers, tape, and safety gear, with regional variations so you know what to budget. It also frames a practical decision rule for when to refinish versus replace, and highlights the ROI factors that drive home value and future maintenance costs.
In plain terms, you’ll see a straightforward materials estimate, plus how many hours a DIY project typically saves compared to hiring help, and what you lose if it runs long or delays other work. The “when to replace” guidance covers damaged treads, structural issues, and high-traffic wear, while the ROI lens weighs cosmetic appeal, durability, resale edge, and lower maintenance over time. Practical tips cover snagging seasonal sales, choosing durable coatings, procurement hacks, and routines to extend life without breaking the bank.
Budget-friendly Product Choices
When it comes to painting stair treads, you don’t have to break the bank to get quality results. Look for primer and paint that offer good coverage and durability at a reasonable price point.
Avoid going too cheap on brushes and rollers; mid-range options will last longer and give better application than disposable ones. Use painter’s tape to protect edges, but opt for the thicker blue or green tapes rather than the thin white variety for better adhesion and ease of removal.
For anti-slip grit, consider a fine sand mixed with clear epoxy sealant. This provides traction without making your stairs look too industrial. Remember, the key is finding balance between cost and quality to ensure your project stays within budget while still delivering professional-looking results.
When to Hire a Pro: Signs and Cost Ranges
If you notice significant structural damage or wear on your stairs, it’s crucial to consider hiring a professional. Here are some key signs to look for:
- Broken or severely cracked spindles. These can compromise the safety of your staircase and should be addressed by a pro.
- Severely worn treads with deep gouges or cracks. Worn treads can cause trips and falls, making them unsafe for use.
- Wobbly or unstable handrails. A wobbly handrail could lead to loss of balance and injury. It’s best to have it checked by a professional.
If you observe any of these issues, consult with a professional before proceeding with any DIY work. They can assess the damage and provide an accurate estimate for repairs or replacement.
Common mistake: Attempting to refinish stairs with severe structural damage without consulting a pro can lead to further damage and costly repairs down the line.
Typically, hiring a professional for stair refinishing ranges from $50 to $150 per hour depending on complexity and location. For major repairs or replacements, costs could escalate quickly if extensive work is needed beyond just painting the treads.
Visual Checkpoints and Quality Inspection Before Closing the Job
Before closing the job, run a focused visual and tactile checklist to confirm even coverage, solid adhesion, and safe, non-slip surfaces. Inspect surface uniformity, color, edges, and texture, then test adhesion by a gentle rub at several tread spots and note any feathering, peeling, or roller marks. Document key angles and marks to confirm results and guide any quick fixes.
Doing this on site saves callbacks and protects your finish. Clear photos from edge to center and riser, with a steady distance, neutral light, and a scale reference show the real state of work and help convince stakeholders. When issues show up, you already know exactly what to tweak: touch-ups, extra coats, or re-rolling, plus a signed off check list and air-dry time adherence.
Common Defects to Look For
Before signing off on your painted stair treads, perform a thorough visual inspection to ensure quality and longevity.
What to check:
- Check for any uneven sheen or gloss across the treads that might indicate inconsistent application or drying.
- Inspect the edges for any raggedness or fuzziness where painter’s tape was used, as this could lead to a sloppy finish.
What you’ll see:
- Pooling or runs in the paint, indicating too much product applied at once.
- Missed spots where primer didn’t cover properly, leaving areas susceptible to future damage.
- Glossy patches that might be slippery when wet, posing a safety hazard.
Common mistake: Rushing through the final inspection can lead to missed defects that may become costly to fix later on.
Documenting Progress for Warranty or Disputes
Photograph your work thoroughly to protect yourself and your project.
- Check: Each tread’s edge and center for even coverage and proper adhesion. You should see a smooth, uniform surface with no visible brush strokes or missed spots.
- Check: Riser angles from multiple perspectives to ensure they’re clean and free of drips or runs. Look for any areas where the paint may have pooled or not adhered properly.
- Use consistent lighting to maintain clarity in your photos.
- Include scale references, like a ruler or measuring tape, to provide context.
- Take before-and-after comparisons to show the transformation and progress made.
- Capture close-ups of any problem areas for easy reference later on.
Common mistake: Not photographing the underside of treads. This can lead to disputes if there are issues with adhesion or damage not visible from above.
Store all receipts and warranty information securely, and address any immediate issues to prevent future disputes.
Project Variations: Painting Only Treads, Treads + Risers, or Full Stair Makeover
Project Variations give you three clear paths: paint only treads, paint treads plus risers, or a full stair makeover, each with defined scope and inclusions/exclusions. They differ in aesthetic impact, light handling, and the amount of prep, priming, coating, and drying time you’ll face, along with price and maintenance implications.
Choosing the right path matters because it sets the look of the space, how much of the room’s color it carries, and how long you’ll be tied to the project. Use the decision criteria and quick-read checklist to decide when to pick each option, what to avoid, and how to plan safety, ventilation, and lead-time with kids or pets around. Practical tips on color, finish, edge protection, and handling risers when you skip full demolition will save you real time and money on a DIY job.
Painting Risers for Contrast or Continuity
When deciding whether to paint your risers, consider the impact on the overall look of your stairs.
- Contrast: Painting treads and risers in different colors can create visual interest and highlight each step.
- Continuity: Matching treads and risers in color can make your stairs appear more uniform and spacious.
- Highlight safety features: Light-colored risers can help define each step, improving visibility for those with mobility issues or poor lighting.
To achieve clean lines where the tread meets the riser, use painter’s tape or masking tape along the edges before painting. This helps prevent bleeding and ensures crisp borders.
Common mistake: Not using tape can result in paint bleeding onto adjacent surfaces, leading to a sloppy finish that may require touch-ups or re-painting.
Combining Paint with Stair Runners or Treads Covers
When integrating stair runners or tread covers into your painting project, consider the following:
- Runner installation timing: Install the runner before applying paint if it will cover areas that don’t need repainting. This helps avoid damaging freshly painted surfaces.
- Color coordination: Choose a runner color that complements your newly painted stairs for a cohesive look, or opt for a contrasting runner to enhance visual appeal.
Common mistake: Not considering the runner’s placement and size before painting. This can lead to awkward gaps or overhanging edges that detract from the staircase’s appearance.
Aftercare: Seasonal Checks and Long-term Durability Tips
Establish an annual inspection rhythm that targets post-winter and high-humidity periods, checking for cracking, delamination, peel, and finish dulling, plus any underlying substrate issues. Look closely at moisture intrusion, staining, edge wear on busy treads, and any rough or slippery textures that signal coating degradation. Keep the focus simple: a routine pass each season that flags issues early before they grow into big repairs or costly recoats.
This matters because small problems quickly compound under foot traffic and fluctuating moisture, so timely touch-ups save time and money later. A clear cleaning and maintenance protocol helps you avoid solvent damage, while a sensible repair workflow keeps worksites moving with minimal downtime. Record-keeping and reminders turn a DIY job into a durable system, with notes on warranty terms and recoat windows guiding future choices for longer life and safer, more confident treads.
Recoating Schedule and Signs You Need It
In high-traffic homes, stair treads painted surfaces can wear down faster due to constant foot traffic. Look for signs like dulling of the finish or minor scratches as indicators that a light recoat might be necessary.
A good rule of thumb is to inspect your stairs annually and consider a light touch-up every two to three years if they show wear. If you notice significant damage such as deep cracks or large areas of peeling paint, it’s time for a full recoating before the problem worsens.
- Dulling of the finish: This indicates that the protective layer is wearing off and needs to be renewed.
- Minor scratches: These can deepen over time if not addressed, leading to further damage.
- Slight peeling at edges: Peeling paint can worsen and lead to larger areas of damaged paint that will require more extensive repair.
Common mistake: Ignoring minor scratches or slight peeling. This can lead to further damage, requiring a full recoating instead of just a touch-up.
Protective Measures for Heavy Use Areas
To extend the life of your painted stair treads in high-traffic zones:
- Inspect for signs of wear, such as scuff marks or small chips.
- Check for any loose or peeling paint, which indicates a need for touch-up.
- Ensure there’s no excessive moisture buildup, as this can lead to mold growth and damage.
If you notice wear or damage: Address these issues promptly by lightly sanding the area, applying a primer, and repainting. This will help maintain the stair treads’ durability and appearance.
Common mistake: Neglecting to clean stairs regularly, leading to dirt buildup that can dull the paint’s finish and cause long-term damage.
Wrap-up: Final Tips and Quick Reference Cheat Sheet
Keep a concise print-ready cheat sheet at hand. List the essential prep steps (cleaning, dedusting, sanding high-traffic areas), the recommended primer and paint types for concrete stair treads, and the ideal number of coats with minimum drying intervals. Put prep at the top, including a moisture test, porosity check, edge sealing, and tape-off or covering of risers to avoid slip-residue or paint bleed. Include notes on finishes (matte or satin), and mention slip-resistant additives or non-slip topcoats when needed. State indoor vs outdoor use and appropriate temperature/humidity ranges.
This matters because a solid prep plan prevents failures and saves you time. A quick, easy protocol helps you finish evenly: roll for wide areas, brush edges, watch for lap marks, and touch up corners quickly. Be clear about recoat windows and cure times so you don’t trap moisture. Also cover safety, ventilation, PPE, cleanup steps, and how to store leftover paint for touch-ups later. A well-filled cheat sheet keeps the job moving, reduces guesswork, and protects your hard work from peeling or staining.
One-page Printable Checklist
Before you start, make sure everything is ready and accounted for.
- Clean the stair treads thoroughly with a degreaser or concrete cleaner.
- Sand high-traffic areas to ensure better paint adhesion.
- Apply an appropriate primer based on your surface condition (moisture level, porosity).
- Choose a slip-resistant topcoat if stairs are outdoors or in heavy use areas.
- Tape off risers and edges carefully to prevent overspray and bleed-through.
- Use a roller for even coverage and a brush for corners and edges.
- Allow at least 24 hours between coats, depending on humidity and temperature.
- Clean brushes and rollers immediately after use with soap and water or paint thinner.
Double-check your work before the final coat dries to avoid any touch-ups later.
Top Three Pro Tips for Lasting Results
Proper preparation is key. Clean and dry your stairs before applying primer and paint.
Select the right paint and primer combination to ensure durability and longevity of your finish.
Allow ample time for each coat to fully cure, especially in humid conditions, to prevent peeling or cracking.

Conclusion
Finish with confidence by following the steps you’ve learned, protecting the investment you’ve made, and keeping safety front and center so the tread job looks good and lasts.
Complete the project in this order: confirm the final coats are fully cured, clean and store tools properly, remove protection from adjacent areas, return the stairs to traffic only after the recommended drying times, and do a final visual and tactile check for smooth, even coverage before normal use. If you’re unsure, run a quick test on a small area to verify adhesion and finish before proceeding with the whole staircase.
Two or three common mistakes to avoid are skipping proper surface prep, which undermines adhesion; rushing drying times, which leads to fuzz, tackiness, or scuffs; and applying too thick a coat, which causes sagging or peeling. Always ventilate the space, wear PPE, and keep the area well-lit and dry during and after painting. Don’t skip the test patch—start there and adjust your technique if the test area doesn’t behave as expected.
If the substrate is laminate, painted, or heavily varnished and you’re unsure about long-term durability, consider calling in a pro for a quick evaluation—especially if the stairs get heavy daily use. Stay practical, stay safe, and you’ll have stairs that look sharp and perform reliably for years to come. You’ve got this—wrap it up, then enjoy the results and plan the seasonal checks to keep them looking new.
FAQ
How many coats of paint should I apply?
Two coats are usually enough, but I recommend a third for durability. Let the first dry at least 4 hours before applying the next.
Can I use my existing stair carpet as a guide for painting?
No, that’s a bad idea. Paint will soak into old carpet and it’ll peel off soon enough. Tape off the edges instead.
What about painting over varnished treads?
You can, but I’d advise against it. Better to sand down the varnish first with 120-grit paper for a smooth finish and better paint adherence.
How long until I can use my stairs again after painting?
You’ll want to keep off the treads for at least 24 hours to let the paint fully cure. Less time means risking footprints or peeling.