
Introduction
Transforming a staircase from drab to fab is a dream DIY project that can dramatically enhance your home’s aesthetic. But before you grab your paintbrush and dive in, let’s address the burning question: how long does it take to paint a staircase?
The timeframe depends on several factors, including the size of your staircase, the current condition of the surface, and the type of paint you’re using. On average, plan for around 2-3 days of active work, spread over a week or two.
The Complete Timeline for Painting Your Staircase
Painting a staircase involves several stages, each with its own duration. Here’s a detailed breakdown of the timeline:
- Planning and Preparation (1-3 days): Measure your stair area, assess risks, and gather materials. This step includes cleaning, repairing, sanding, and masking.
- Priming (optional, 1 day): If required, apply a primer coat to ensure better paint adhesion.
- Painting (2-3 days): Apply the final coats of paint, allowing each layer to dry fully. Maintain a wet edge and ensure even coverage.
- Finishing and Final Checks (1 day): Install non-slip finishes, touch up any rough patches, and perform a final inspection.
Total estimated time: 5-8 days
Key takeaways
The preparation stage is crucial as it sets the foundation for a successful paint job. It also significantly impacts the overall timeline, so allocate enough time to ensure thorough cleaning, repairs, and sanding.
- Plan stair area dimensions, risk assessment, and budget before starting any work.
- Protect floors, rails, and occupants with masking, drop cloths, and proper PPE.
- Sand lightly, clean thoroughly, and repair gaps to ensure even paint adhesion.
- Apply even coats, maintain a wet edge, and let each layer dry fully.
- Use anti-slip finishes and clear topcoats for longevity and safety.
- Inspect, touch up high-wear areas, and schedule repaint every few years.
Table of Contents
- Introduction
- Key takeaways
- Before you start: planning, safety, and cost
- Tools and materials checklist (what to buy and why)
- Preparation step-by-step (cleaning, repairs, sanding, and masking)
- Painting the staircase — step-by-step workflow
- Finishes, protection, and anti-slip solutions
- Common mistakes and what to avoid
- Maintenance, touch-ups, and when to repaint
- Eco-friendly options, disposal, and final checks
- Conclusion
- FAQ
Before You Start: Planning, Safety, and Cost
Effective planning sets clear expectations and helps avoid rework. Define your project scope: surfaces to be treated, priming, painting, sealing, or adding non-slip coats, and the number of coats needed. Develop a simple timeline and access plan considering drying periods, peak traffic, and household flow.
Consider access and site constraints upfront—entry points, ladder/scaffold needs, landing clearance, railing protection, and containment to prevent dust drift. Choose materials and finishes that fit your daily life: paint type, primers, bonding agents, slip-resistant additives, color, and prep work like cleaning and patching. A clear budget helps identify major cost drivers early.
Assess the Staircase and Create a Plan
Inspect your staircase for material (wood, MDF, concrete) and existing finishes. Check for damage such as cracks or loose boards that need repair before painting. Decide which parts to paint—treads, risers, handrails—and consider if a full overhaul might be better than just painting.
Creating a plan avoids rework. Note your goals and how you’ll achieve them: choose paint types, decide on priming or sealing, and determine the number of coats for durability.
Safety Checklist and Workspace Setup
Before starting, review this safety checklist:
- Fall prevention: Install guardrails or use a harness.
- Ventilation: Open windows or run fans. Confirm no paint smell.
- Dust control: Use drop cloths and vacuums. Check floors after work.
- Protect household members: Set up barriers, post signs.
- Masks: Wear respirators during painting. Check no paint particles inhaled.
- Knee pads: Protect knees while working on treads. Check for comfort and support.
- Gloves: Use to avoid skin contact with chemicals. Check clean hands after work.
Always prioritize safety over speed when working on stairs.
Budget and Time Estimate Guidelines
Create a budget for your project, including costs for paint, primer, tools, protective finishes, and replacement parts. Develop a realistic timeline considering surface preparation, drying times between coats, and final curing periods.
Quality materials often mean fewer coats and longer-lasting results. Don’t skimp on essentials like proper ventilation equipment or protective gear to ensure a safe job site.
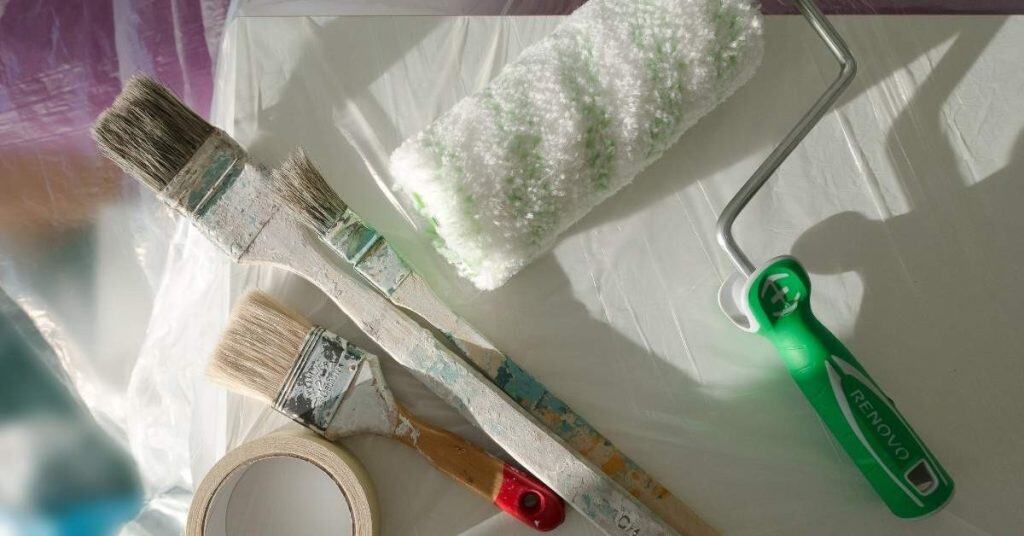
Tools and Materials Checklist: What to Buy and Why
This section helps you distinguish essential tools and materials from optional extras for painting a staircase. We’ll focus on prep, bonding, durability, and finish quality, ensuring you understand why each item matters. Pay close attention to surface prep steps, moisture testing, and choosing the right coating type to avoid issues like peeling or uneven appearance.
We’ll also provide practical shopping and planning context, guiding you on when to splurge or save, and how to organize your purchases by project phase to minimize waste. You’ll find actionable guidance on safety gear, ventilation, protecting nearby trim and rails, plus workflow tips for prepping, priming, painting, and topcoating to help you finish with fewer hiccups.
Paint Types and Finishes for Stairs
Choose the right paint type based on your staircase’s traffic level:
- Enamel Paint: Durable, glossy; ideal for high-traffic areas. Ensure surface is smooth and clean.
- Acrylic Paint: Versatile, easy to apply; suitable for moderate traffic. Apply only on dry surfaces.
- Chalk Paint: Soft look, no primer needed; ideal for low-traffic areas. Use on clean, grease-free surfaces.
- Mixed Floor Paints: Combines durability with aesthetics; suitable for all traffic levels. Verify compatibility with the substrate.
Choose paint based on staircase usage and desired finish.
Primers, Sealers, and Protective Topcoats
Select the right primer or sealer for your project:
- Bonding Primer: Essential for glossy surfaces; ensures paint adheres properly. Test surface with water.
- Stain-Blocking Primer: Prevents bleed-through of stains and discolorations. Use on clean, grease-free areas.
- Durable Clear Topcoat: Protects paint underneath; use for high-traffic areas. Apply only on dry surfaces.
- Semi-Gloss Polyurethane: Adds shine, enhances durability; ideal for stairs. Use on clean, dust-free surfaces.
Use primers and sealers based on surface condition and expected wear.
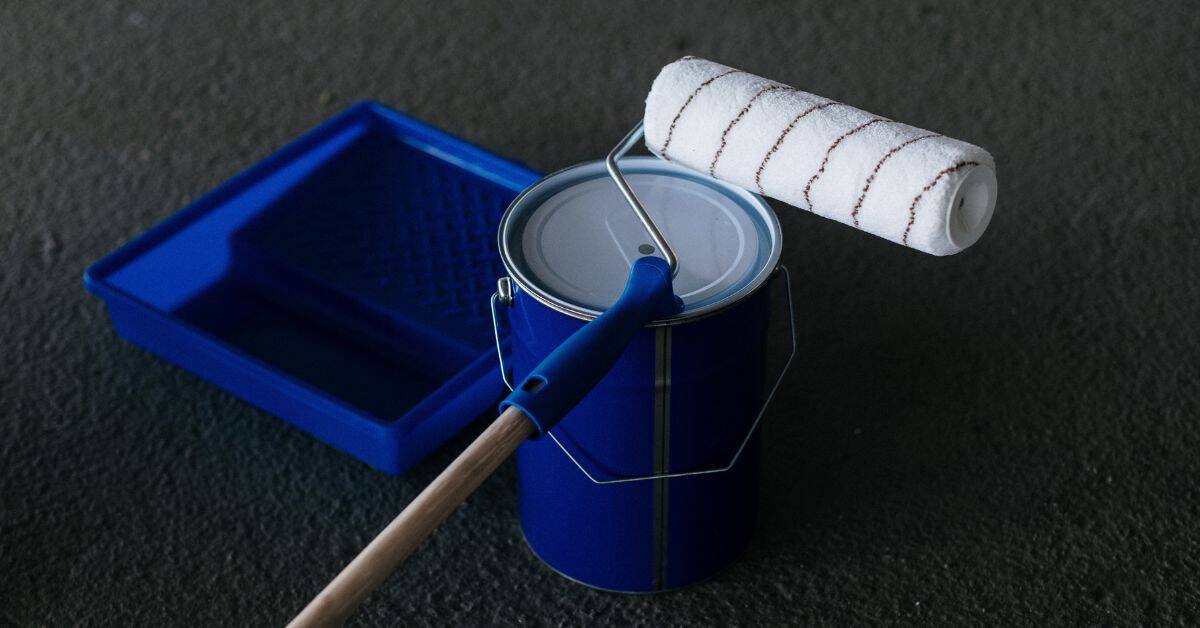
Tools and Consumables
Gather necessary tools before starting your project:
- Sandpaper Grits: 60, 120, 220; use for surface preparation. Ensure sandpaper is clean and sharp.
- Bristle Brushes: For cutting in edges; ensure bristles are stiff enough. Confirm brush fits into tight corners.
- Paint Rollers: 3/8-inch nap for smooth surfaces; use clean, lint-free rollers.
- Dust Masks: Essential for dust control during prep work. Ensure mask fits snugly around face.
Gather tools and materials based on project needs and safety requirements.
Preparation Step-by-Step: Cleaning, Repairs, Sanding, and Masking
Follow this clear, sequential process to prepare your staircase for painting: cleaning, removing loose paint, filling holes and repairs, light sanding, then masking off areas. Allocate short, manageable time blocks for each stage, aiming for a one-day workflow. Times vary based on product and condition, so consult labels and datasheets.
This prep order minimizes cross-contamination, ensures predictable finish times, and protects nearby surfaces from paint splatter or overspray.
Step-by-Step Cleaning Process
- Safety first: Wear gloves and goggles. Remove any loose paint or debris now.
- Use a soft brush to sweep away dust from treads and risers, preventing grit from scratching the surface during sanding.
- Mix degreaser with water in a bucket, then apply to the staircase using a microfiber cloth. Rinse thoroughly with clean water afterward. Allow at least 2 hours for drying.
- Inspect surfaces again for any missed spots or new debris. Repeat cleaning steps if necessary until everything is spotless.
Cleaning and Contaminant Removal
For grease, grime, and nicotine stains, use a degreaser like TSP (Trisodium Phosphate) or its substitute. Apply the solution with a soft brush or sponge, then rinse thoroughly to avoid residue.
Allow surfaces to dry completely before proceeding with repairs and filling to prevent moisture issues later.
Repairs, Filling, and Leveling
Inspect the staircase for cracks and holes using a flashlight. Patch these areas with wood filler or epoxy; epoxy is stronger but more challenging to work with.
Secure loose treads or balusters back in place using screws or nails to ensure structural integrity before painting.
Level the surface after filling by sanding lightly to prevent bumps and uneven paint application.
Sanding and Surface Profile
Start with a coarse grit (80-120) to strip away gloss, then move to finer grits (220-400) for a smooth finish. Use sanding sponges for tight corners like risers and railings to prevent damage.
Vacuum up dust after each pass using a HEPA filter attachment, followed by a final wipe with tack cloth to prepare the surface for masking.
Painting the Staircase — Step-by-Step Workflow
Efficiently painting a staircase involves a clear, sequential process: surface preparation, priming, applying coats, and final inspection. Focus on keeping steps accessible by staging work, protecting trim, and employing suitable techniques for risers and treads.
This approach is crucial as stairs remain in use during the project. Use partial closures, safe temporary work zones, and smart scheduling to minimize disruptions. Choose the right primer for your substrate, control dust, ventilation, and footwear for clean work, and phase access to complete sections as per your schedule.
Step-by-Step Process
This sequence ensures a smooth, safe painting process from start to finish.
- Ensure safety gear (gloves, mask, eye protection) and tools are ready. Lay down drop cloths around the stairs.
- Prime the entire surface using a suitable primer for concrete or wood. Allow it to dry as instructed before painting.
- Paint treads first with a roller or brush in thin, even coats. Let each coat dry completely before proceeding.
- Move up and down the stairs, painting risers next with a smaller brush. Avoid drips at edges.
- Apply topcoat over primer and paint layers using light strokes to prevent lap marks or uneven coverage.
Sequence for Treads, Risers, and Rails
Begin with the treads, as they bear more foot traffic. Paint one tread at a time to keep stairs usable.
Once treads are done, move on to the risers. Work in sections, painting every other step for accessibility during drying times.
Finally, tackle the railings and newel posts. Use a small brush for intricate details like spindles or balusters. Allow these areas to dry thoroughly before use.
Application Techniques and Drying Times
Use a roller for treads due to their large surface area, but switch to a brush or pad for risers where precision is key.
Apply thin coats of paint in multiple layers. Each coat should be dry to the touch before adding another to avoid smudging or uneven coverage.
Drying times vary by product and environment. Check the label for specific instructions, but generally allow at least 24 hours between coats for optimal results.
Achieving Clean Lines and Professional Edges
Mask off areas with painter’s tape to protect them from paint. Use a small brush or angled tool to cut-in around edges where treads meet risers.
For crisp transitions, use an angled brush along the corners of steps and railings. A mini-roller works well for tight spots on banisters.
Remove all masking before paint dries completely to prevent residue from sticking to your freshly painted surfaces.

Finishes, Protection, and Anti-Slip Solutions
Select durable topcoats with suitable sheen levels for painted stairs, balancing wear resistance, ease of cleaning, and light reflection. Compare clear sealers and finishes—oil or water-based—and consider cure times, odor, and compatibility with your painted surface. Enhance slip resistance using grit additives or discreet non-slip coatings without compromising aesthetics, and protect treads or risers as needed.
Protect wear-prone zones during painting with masking tape and baseboard protection. Establish a post-paint maintenance routine to extend the lifespan of your staircase paint job, reduce cleaning efforts, and maintain appearance in high-traffic areas. Always consult product labels and manufacturer instructions for compatibility and local disposal/aftercare guidelines.
Clear Topcoats and Curing Schedules
For clear topcoats, choose between water-based (faster drying but less durable) or oil-based (slower curing but better wear protection).
- Water-based: Walk on stairs after 24 hours; full cure in about a week.
- Oil-based: Avoid traffic for at least three days; fully set up over two weeks.
Adhering to the curing schedule ensures your paint job remains intact and looks great long-term. Rushing heavy use can lead to scuffs, scratches, or peeling.
Anti-Slip Additives and Tread Options
Add anti-slip additives directly to your topcoat for subtle texture underfoot. For more visible but sleek options, consider textured tapes or non-slip stair runners on high-use treads.
Focus on the front edge of each tread for maximum grip while keeping risers smooth and elegant in high-traffic areas.
Decorative and Advanced Finishes
Consider faux wood grain, distressing techniques, or paint patterns like runner stripes or inlays to enhance your staircase’s aesthetic appeal. For complex finishes, consult a professional painter for expert results that remain functional and safe.
Common Mistakes and What to Avoid
Proper preparation and application are key to a lasting staircase paint job. Common pitfalls include inadequate prep, incorrect product use, and rushing the process.
Addressing these ensures your staircase’s longevity, safety, and aesthetic appeal under regular foot traffic. Always adhere to product labels and local guidelines for best results.
Problems from Inadequate Preparation
Insufficient preparation can lead to severe issues like adhesion failure and early chipping:
- Weak Base Compaction: Check the base before pouring concrete. A weak foundation causes cracks or shifting over time.
- Air Bubbles: Thoroughly mix your concrete and use a vibrator to prevent air entrapment during mixing or improper vibration techniques. Ensure no standing water on the base before pouring.
- Early Chipping: Poor curing practices or low-quality materials can cause early chipping. After pouring, cover your concrete with plastic sheeting for at least seven days to keep it moist and prevent cracking.
Mistakes During Application
These common errors can compromise your project:
- Over-brushing Concrete: Lightly brush to embed aggregate; over-brushing weakens the surface and causes cracks.
- Painting in Extreme Temperatures/Humidity: Follow local rules for ideal conditions. Avoid extremes that affect drying time and quality.
- Skipping Drying Time Between Coats: Strictly follow manufacturer instructions on drying times to prevent peeling or poor adhesion.
Long-term Issues from Wrong Protection
Avoid using low-durability finishes like cheap sealants or paints. They may save money initially but lead to costly repairs later:
- Check Product Labels for Durability Ratings: Ensure your chosen products can withstand regular foot traffic and wear.
- Slip-resistance on Walkways and Stairs: Wet concrete can be slippery. Include aggregates or grit in your mix during prep work to ensure safety.
Maintenance, Touch-ups, and When to Repaint
Regular upkeep keeps your staircase looking fresh. Here’s a simple maintenance plan:
- Monthly Checks: Inspect for wear and tear.
- Biannual Deep-Clean: Use a mild pH-neutral cleaner and soft-bristle brush, rinse thoroughly. Avoid harsh solvents.
- Annual Repaint Evaluation: Check for small problems early to prevent bigger issues.
For chips, lightly sand the edge, then feather in new paint using a small brush or foam roller. Address moisture or structural issues before repainting. Use product-specific guides for compatible sealants and paints, and schedule repaint in dry, mild weather.
Cleaning and Everyday Care
Maintain your staircase with regular cleaning:
- Daily Dusting: Use a soft-bristle brush or microfiber cloth with a mild cleaner.
- Tough Scuffs: Gently scrub with a damp cloth. Avoid harsh solvents that could strip protective layers.
Prevent scuff marks and gouges by using doormats at both ends of the staircase. Inspect for wear and tear monthly, addressing minor issues early to prevent bigger problems. Adjust your cleaning schedule based on traffic patterns; consider every two weeks if you have pets or young kids.
Minor Repairs and Touch-Up Guide
When small areas chip or fade:
- Lightly Sand: Smooth out rough edges of the chipped area.
- Feather In New Paint: Use a small brush or foam roller for a seamless blend. Consider mini-match spray cans for precision work.
Let each coat dry thoroughly before applying another layer. If touch-ups become frequent, consider a full repaint after addressing underlying issues like moisture damage or structural instability.
When to Call a Professional
DIY may not always be the answer:
- Significant Structural Damage: Bring in professionals for complex refinishing and safety checks.
- Hazardous Materials: Always hire certified professionals to safely remove old coatings, especially lead paint.
If unsure about repairs needed, consult a contractor. Provide photos and detailed descriptions of issues for accurate advice on DIY fixes or professional intervention.
Eco-friendly options, disposal, and final checks
Choose eco-friendly paint options to minimize environmental impact. Opt for low-VOC or zero-VOC acrylic/water-based paints with natural pigments where suitable. Ensure proper ventilation when using these products on stairs.
Low-VOC and low-odor product recommendations
Selecting the right eco-friendly paint is crucial before starting your project:
- Brand selection: Choose a reputable brand known for low-VOC options. Check their website or packaging for specific VOC content.
- Water-based topcoats: Opt for water-based over oil-based to minimize odor and fumes during application.
- Natural pigments: Look for paints with natural or plant-based pigments, which are less harmful to the environment.
- Zero-VOC options: If possible, go for zero-VOC paint to reduce indoor air pollution further.
- Test samples: Always test a small area first to ensure color and finish meet expectations.
- Avoid rework: Minimize touch-ups by ensuring proper surface prep and application techniques.
- Odor control: Use low-odor paints or apply in well-ventilated areas to reduce smell.
Rags, waste, and hazardous-materials handling
Safely dispose of all materials after painting to avoid environmental harm:
- Dry rags: Allow paint-soaked rags to dry completely before disposal to prevent spontaneous combustion.
- Solvent-free cleanup: Use water-based cleaners instead of solvents for a safer and more eco-friendly option.
- Paint recycling: Check local programs that accept leftover paint for donation or recycling.
- Hazardous waste: Dispose of hazardous materials at designated facilities to prevent environmental damage.
- Packaging disposal: Empty and clean cans before recycling them according to your municipality’s guidelines.
- Rags storage: Store used rags in a fire-safe container until they can be disposed of properly.
Final visual and safety checkpoints
Before allowing foot traffic, perform a final inspection to ensure your staircase is safe and visually appealing:
- Evenness check: Inspect for roller marks or streaks using a light to spot uneven areas.
- Sanding dust removal: Confirm all sanding dust has been removed from surfaces for smooth finishes.
- Adhesion test: Gently scratch the surface with your fingernail to ensure paint adheres well without flaking off.
- Anti-slip testing: Walk on the stairs in different footwear to confirm adequate grip.
- Dry times met: Ensure all coats have dried according to manufacturer’s instructions before allowing use.

Conclusion
Successfully painting a staircase hinges on careful planning, safety measures, and steady execution. This ensures a durable, attractive result that preserves your time and investment.
Begin by verifying your tools and materials, clearing the area, masking edges, and addressing any repairs or sanding needs before applying finish. Proceed through masking, priming (if necessary), and applying final coats in smooth, even layers, allowing each to dry completely and testing a small area first for adhesion and color.
Post-painting, install non-slip treatments as planned, dispose of waste responsibly, and conduct a final check for drips, rough patches, or loose trim. Establish a one- to two-year maintenance plan for touch-ups and future repainting.
Avoid common pitfalls such as rushing drying times, skipping masking, or applying thick coats that drip or peel. Maintain clean edges by sealing gaps as you go, test adhesion in a hidden spot, and always ventilate and wear protection when sanding or applying finishes. If a step feels uncertain or the stairs bear heavy traffic or unusual angles, pause and reassess before continuing.
If doubts arise regarding structural repairs, finish compatibility, or anti-slip safety after initial work, consult a professional rather than pressing on. Maintain a methodical approach, prioritize safety, and you’ll achieve a staircase that looks sharp, lasts longer, and withstands wear without showing every scratch. You’ve got this—do the work with care, and the result will speak for itself in every step.
FAQ
What is the first thing I should do before painting the staircase?
Stabilize the stairs. Remove loose boards and nails. Sand the surface smooth so the paint sticks well.
What kind of paint should I use for stairs?
Choose a durable enamel or a high-quality porch and floor paint. It resists scuffs and sticks to wood better than wall paint.
How do I protect the rest of the house during the job?
Mask off banisters, walls, and floors with tape and drop cloths. Take the stairs one section at a time to avoid drips on other surfaces.
How long will it take to dry between coats?
Plan for at least 4 to 6 hours between coats, depending on temperature and humidity. Don’t rush; a thin, even coat dries better than a thick one.