
Introduction
Painting stairs for grip is a crucial project that ensures safety and longevity. But how long does it take? This step-by-step timeline breaks down the process, helping you plan your project efficiently.
From surface preparation to final inspection, we’ll guide you through each stage, so you know exactly what to expect at every phase of your stair painting journey.
The Complete Timeline for Painting Stairs with Grip
Painting stairs for grip involves several stages that require careful planning and execution. Here’s a detailed timeline to help you understand the duration and sequence of each step:
- Surface Preparation (1-3 days): Cleaning, sanding, and priming your stairs is crucial for adhesion and long-term wear. This stage may take longer if your stairs are heavily soiled or damaged.
- Selecting Coating System & Additives (1 day): Choose a coating system that matches your expected abrasion resistance and select the right non-slip additives following manufacturer instructions.
- Application (2-4 hours): Apply the grit-laden coat, ensuring you maximize grip without creating sharp ridges or voids. This stage can be completed in one day but may require additional time for drying and recoating.
- Sealing & Final Inspection (1-2 days): Seal the stairs where appropriate to enhance wear resistance and perform a thorough inspection to ensure quality and safety.
Total estimated duration: 4-7 days, depending on your specific project requirements and weather conditions.
Key takeaways
The preparation stage significantly impacts the overall timeline. Proper cleaning and sanding ensure better adhesion, but it may extend the initial phase of your project.
- Define traffic goals and wear expectations before selecting coatings and additives.
- Match non-slip additives to your coating system following manufacturer instructions.
- Prepare surface thoroughly: clean, dry, and mechanically profile for best adhesion.
- Apply techniques that maximize grip without creating sharp ridges or voids.
- Regularly inspect for wear, delamination, and loose aggregates; address promptly.
- Include safety considerations for accessibility, fall protection, and proper PPE usage.
Table of Contents
- Introduction
- Key takeaways
- Why Stair Grip Matters and How to Set Goals
- Selecting the Right Coating System for Abrasion Resistance
- Non-Slip Additives and Aggregates: Types and How to Use Them
- Surface Preparation for Adhesion and Long-Term Wear
- Application Techniques That Maximize Grip and Durability
- Testing, Inspection, and Quality Assurance
- Maintenance, Cleaning, and Re-Coating Strategies
- Safety, Accessibility, and Regulatory Considerations
- Conclusion
- FAQ
Why Stair Grip Matters and How to Set Goals
Adding grip to stairs reduces slip risk, helps protect you from liability, and extends the life of the tread finish when done correctly. Think of the project as meeting three outcomes: acceptable traction, durable wear life, and an appearance that fits the location.
Define success by traffic level, whether the stairs are inside or outside, and how the finish should look and feel underfoot. Common mistakes include choosing the wrong aggregate for the traffic, neglecting surface prep, or prioritizing looks over traction and abrasion resistance.
Assessing traffic and environmental factors
The first step in setting your goals is to understand how your stairs will be used. This helps you choose the right paint and plan for maintenance.
Foot Traffic: Classify it as light (occasional use), moderate (regular daily use), or heavy (constant use).
Environmental Factors: Consider if your stairs are indoors or outdoors, and if they’re exposed to moisture, chemicals, or other harsh conditions. These factors influence how often you’ll need to maintain the grip.
Visual checkpoints and performance expectations
Regularly inspect your stairs to ensure they’re safe and performing as expected. Use this checklist:
- Shine Loss: Check for areas where the paint’s sheen has dulled. This could indicate reduced grip.
- Smooth Patches: Feel for smooth spots. These might be signs of wear or improper application.
- Visible Aggregate: If you used aggregate in your paint, check if it’s still exposed and providing traction.
- Cracking or Peeling: Inspect for any damage to the coating. This can lead to grip loss.
- Slippery When Wet/Dry: Test the grip in both conditions. It should be non-slippery.
- Uneven Wear: Check if some areas are wearing faster than others. This might indicate a problem with the paint or traffic patterns.
- Color Fading: While not a grip issue, fading can affect aesthetics and may require touch-up.
- All-Weather Performance: If your stairs are outdoors, check if they’re performing well in all weather conditions.
Quick rule: Don’t wait until you see these signs to maintain your stairs. Regular inspections and proactive maintenance will extend the life of your grip paint.
Selecting the Right Coating System for Abrasion Resistance
Coating bases behave differently—acrylics are easy to apply, epoxies generally offer strong abrasion resistance, polyurethanes provide UV stability, and oil-based options can be flexible but may yellow. Match the system to the stair location, expected wear, and whether flexibility or UV resistance is a priority.
Check product data sheets for abrasion tests and recommended service temperature ranges before choosing a product. If unsure about how a system performs on both stairs and landings, ask the manufacturer for application guidance and field use examples.
When to choose primers, sealers, or full-system mortars
A primer or sealer is your first line of defense. They improve adhesion and block moisture. Use them on bare concrete or before applying a topcoat.
Choose a primer: When you need better adhesion, like on new or unsealed surfaces. It’s like giving the paint something to grip onto.
Opt for a sealer: If you want to protect against moisture and minor wear. Sealers are great for landings where traffic is lighter than stairs.
Go with full-system mortars: When heavy-duty abrasion resistance is needed, like on high-traffic staircases. These thick coatings provide excellent protection but can be more time-consuming to apply.
Material specs and compatibility checklist
Before you start painting, check your materials are compatible with each other and the substrate. This ensures a long-lasting grip.
- Substrate: Check if it’s concrete, wood, or metal. Each needs a different prep.
- Coating base: Match acrylic, epoxy, polyurethane, or oil-based with your needs (see earlier).
- Service temperature: Ensure the coating can handle your climate.
- Abrasion resistance: Check if it meets your traffic needs (see earlier).
- Moisture content: Test for excess moisture to prevent peeling.
- pH level: Ensure the substrate isn’t too acidic or alkaline.
- Chemical resistance: If exposed to chemicals, test for compatibility.
- Curing time: Allow enough time between coats and before use.
Quick rule: Always consult product datasheets. They’re your best friend in ensuring compatibility.
Non-Slip Additives and Aggregates: Types and How to Use Them
Non-slip options include synthetic aggregates, silica sand, polymer beads, and flake systems; each differs in grip, feel underfoot, and longevity. Consider how coarse the aggregate is, whether you want a rough or subtle texture, and how the material will wear with traffic and cleaning.
Always use aggregates recommended for the chosen coating and follow manufacturer guidance on broadcast methods and embedment. If a product requires a specific broadcast or topcoat timing, check the instructions or technical data before starting.
Choosing aggregate texture and particle size (fine/medium/coarse)
The texture and size of your non-slip aggregates determine grip, feel underfoot, and wear.
Fine particles give a smoother finish. They’re less harsh on shoes but may offer reduced slip resistance.
Medium particles strike a balance between grip and comfort. They’re suitable for most residential stairs.
Coarse particles provide maximum grip, ideal for high-traffic areas or wet conditions. However, they can feel rough underfoot and wear faster.
Broadcast methods vs. mix-in systems
There are two main ways to apply non-slip additives: broadcasting or mixing in.
Broadcasting involves sprinkling aggregates onto the wet coating. This method allows for easy adjustment of aggregate density and better visibility of coverage. However, it may result in inconsistent grip if not done evenly.
Mix-in systems involve premixing additives into your paint. This ensures consistent grip throughout the entire surface. However, it’s harder to control aggregate density and can lead to hiding issues if too many aggregates are used.
For best results, consider doing a trial area with both methods before committing to one for your entire staircase.
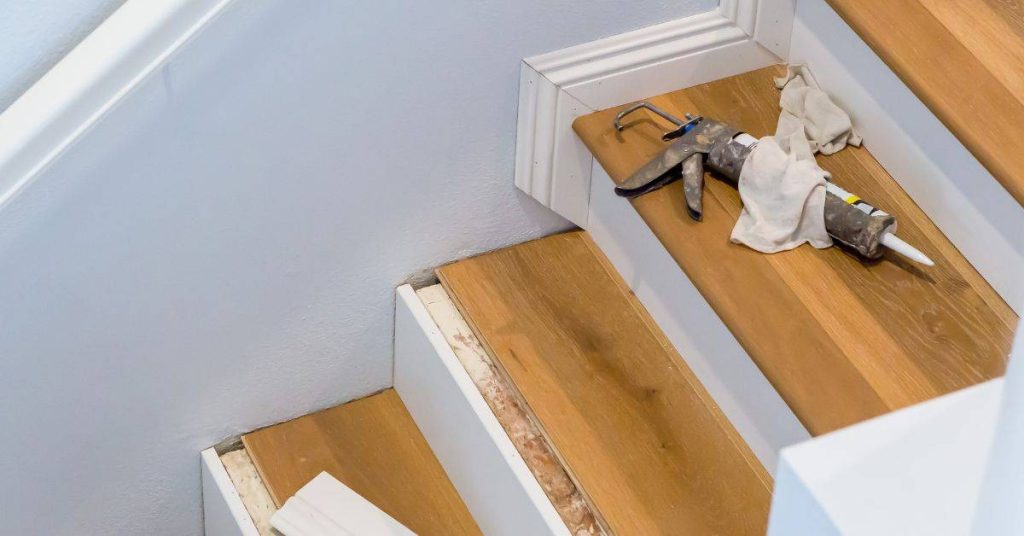
Surface Preparation for Adhesion and Long-Term Wear
Good prep is non-negotiable: clean and degrease, repair gouges, remove loose coatings, and create a mechanical profile for the new coating to bite into. Skipping steps or doing a surface-scape on a weak substrate leaves the coating vulnerable to rapid wear and delamination.
Use methods appropriate to the material—pressure washing for exterior concrete, solvent cleaning for oil, and mechanical abrasion where coatings remain. Verify substrate compatibility and any required primers on the product label or technical sheet before proceeding.
Mechanical profiling and cleaning techniques
Before you start painting, you need to prepare the surface. This means getting rid of any old coatings, dirt, or grease.
For old paint, use a grinder with a wire cup brush. For tougher stuff like epoxy, you might need a chemical stripper. Always follow the manufacturer’s instructions for these products.
Pro tip: Always wear proper PPE and ensure good ventilation when using chemicals or power tools.
After stripping, use a vacuum to remove dust. Then, do a moisture check with a simple meter. You want your surface dry before painting.
Patch repairs and leveling for even wear
Stairs take a beating, so they often need some TLC before painting. First, fix any cracks or spalls with a suitable filler. For larger gaps, use a patch product.
For uneven treads, you might need to level them out. Use a self-leveling compound for this. Apply it according to the manufacturer’s instructions and let it dry.
Pro tip: Always test your repairs before painting. Tap on them with a hammer to ensure they’re solid.
Remember, you want an even surface so your coating system wears uniformly. This means no high or low spots that could cause tripping hazards or uneven wear.

Application Techniques That Maximize Grip and Durability
Select the right tools—roller, brush, or squeegee—and apply aggregates by broadcast or mix-in per the product instructions to get consistent coverage without puddles. Time your broadcasts so aggregates embed properly and avoid over-thinning the coating which can reduce film build and abrasion resistance.
Work in suitable ambient conditions and follow the manufacturer’s drying and cure guidance to achieve full bond and wear performance. Cold surfaces, high humidity, or applying too-thick coats are common mistakes that harm adhesion and durability.
Layering strategy and wet-on-wet vs full cure broadcasts
The way you apply your grip coating can make a big difference in its performance. Here’s how to layer it right:
Wet-on-Wet: For better aggregate retention, broadcast into the still-wet first coat. This locks particles in place as it dries. But be careful not to over-broadcast or you’ll lose grip.
Full Cure Broadcasts: Apply multiple cured layers for stronger bond strength. Let each layer cure fully before broadcasting. This gives better adhesion but may take longer.
Edge work, stair nosing, and transition areas
Stair edges, nosings, and transitions need special attention. Here’s why:
Edges take the most wear. Use a stiffer, more durable coating here. Apply with a brush for better control.
For nosings, apply coating at an angle to follow the slope. This gives continuous grip as you step onto or off the stair.
At transitions, feather the edge of your coat to blend with the landing’s surface. This prevents tripping hazards and maintains consistent grip.
Testing, Inspection, and Quality Assurance
Perform on-site inspections and simple tests to confirm slip performance and visual wear after curing and during use; ask manufacturers for lab reports or field data to verify claims. Common test names to request include coefficient of friction testing and standardized abrasion tests.
Document results, batch numbers, and application conditions so you can track performance over time and support any warranty or liability concerns. If a test or result is unclear, request the product technical data or third-party reports for clarification.
Visual and tactile QA checklist for installers
After applying the coating, use this checklist to ensure a quality job.
- Check aggregate coverage: Ensure at least 90% of the surface has aggregates. Less can lead to slippery spots.
- Inspect gloss uniformity: Check for any glossy or shiny areas. These could indicate missed aggregate application or inadequate curing.
- Perform adhesion spot checks: Gently scrape a corner of the coating with a coin or utility knife to ensure it’s well-adhered. Poor adhesion can cause delamination over time.
- Look for loose particles: Tap the surface and listen for rattling. Loose aggregates should be vacuumed off immediately.
- Check stair edges: Ensure nosings are fully coated and no aggregate is missing, which can cause trips.
- Inspect transition areas: Check where stairs meet landings or walls for proper coverage and edge work.
- Feel the surface: Run your hand over the steps to ensure a consistent texture. Any smooth spots need rework.
- Check for air bubbles: Tap the surface to listen for hollow sounds, indicating trapped air that can cause delamination.
Quick rule: If anything fails these checks, address it immediately. Fixing issues early prevents costly rework later.
When to ask for lab data or third-party testing
Before starting the project, request these test results from manufacturers to ensure you’re using quality products.
- Abrasion resistance: Ask for Taber Abrasion Test (ASTM D4060) results. This shows how well the coating resists wear.
- Slip resistance: Request Coefficient of Friction (COF) test data (ANSI A326.3). This ensures the coating provides adequate grip.
- Chemical resistance: Ask for ASTM D1308 test results to see how the coating holds up against common household chemicals.
- Dry film thickness (DFT): Check DFT data (ASTM D7091) to ensure the coating meets your required thickness.
- Cure time: Ask for cure time data to plan your project schedule effectively.
- Compatibility with other materials: Request data on how the coating works with existing substrates and sealers.
- Fire resistance: Check for fire ratings (ASTM E84) if required by local building codes.
- Read datasheets: Look for these test standards and results in the product’s datasheet. If they’re not listed, ask the manufacturer directly.
Quick rule: Don’t assume a product is suitable based on its label alone. Always verify with lab test data.
Maintenance, Cleaning, and Re-Coating Strategies
Routine maintenance preserves both aggregate and coating—sweep regularly, use gentle washing, and avoid harsh chemicals that can strip binders or loosen aggregates. Monitor high-traffic spots and note when aggregate wears smooth or the coating shows thinning.
Decide between spot repairs and full recoats based on how localized the damage is and what the manufacturer recommends. Use the cleaner types and procedures suggested by the coating maker to avoid voiding performance or warranty expectations.
Routine cleaning and stain removal
Regular cleaning keeps your stairs looking good and slip-resistant. Here’s how to tackle dirt, oil, and salts without damaging the coating or aggregate.
Dirt: Start with a soft-bristle broom or brush. Sweep gently along the grain of the aggregate. Be careful not to scrub too hard as it might dislodge the aggregate.
Oil and grease stains: Use a mild, non-abrasive cleaner recommended by your coating manufacturer. Apply with a soft cloth or sponge, let it sit for a few minutes, then wipe off gently. Rinse with clean water if needed.
Salt stains: These can happen in winter due to de-icing agents. Use the same mild cleaner as for oil stains. If the stain persists, you might need to lightly scrub with a soft-bristle brush. Always rinse off any cleaner residue.
Repair vs. full recoat: decision guide
Knowing when to repair or recoat your stairs is crucial for maintaining their grip and longevity.
Minor wear: For small areas with light wear, you can often get away with spot repairs. Remove any loose aggregate, clean the area, and reapply fresh coating and aggregate using a patching technique similar to your original application.
Moderate wear: If more than 50% of the surface shows signs of wear or adhesion failures, consider a full recoat rather than multiple spot repairs. Remove any loose material, clean the surface, and apply fresh coating and aggregate according to your original system’s instructions.
Heavy traffic areas: Even if the wear isn’t severe, high-traffic areas might need more frequent attention. If you notice significant wear in these spots, consider re-broadcasting new aggregate or applying a full recoat system sooner rather than later to maintain grip and durability.
Safety, Accessibility, and Regulatory Considerations
Grip solutions must balance slip resistance with access needs; overly coarse aggregates can impede mobility aids and create trip hazards while too-smooth surfaces defeat the purpose. Check local building codes and accessibility guidelines to ensure the chosen finish is compliant for the stair setting.
Keep documentation of product properties, test reports, and application records to support liability protection and maintenance decisions. If you need definitive code interpretation, consult your local authority having jurisdiction or an accessibility specialist.
Balancing slip resistance with wheelchair and cane use
Stair safety’s a balancing act. Too much grip can hinder wheeled mobility or cane glide.
Test your chosen product in-situ with actual users or equipment before committing to the whole project.
Overly coarse surfaces can cause issues, so find that sweet spot between slip resistance and smooth operation.
PPE, ventilation, and safe work practices
Safety first. That’s our motto on site.
PPE like gloves, goggles, and masks are must-haves. For solvent-based or epoxy systems, proper ventilation is crucial – open windows, use fans, or set up temporary ventilation systems.
Handling aggregates and dust during prep and cleanup? Wear a mask to avoid respiratory issues. Always follow safe handling practices for chemicals and materials.
Conclusion
Get the stairs you can trust under every footfall. A proper grip setup stops slips, resists wear, and keeps the look you want without constant touch-ups.
First, assess the job in plain terms, then lock in a plan: pick a coating system that matches expected abrasion, choose the right non-slip additive or aggregate, clean and prep the surface for good adhesion, apply per the product guidelines, and test the finished steps for grip before moving on. Inspect after cure, and schedule maintenance or re-coating as needed so the job stays durable and safe.
Common mistakes to avoid are skipping surface preparation, using incompatible additives, or applying too thick or too thin a coat. Don’t rush the cure, don’t varnish over moisture, and don’t ignore a balky grip test. Safety first means ventilation, PPE, and not mixing products without checking compatibility; test in a small area before a full rollout to catch issues early.
If stairs carry heavy use, are part of a public or regulated space, or you’re unsure about the coating system, it makes sense to call a pro rather than push ahead. Stick to the plan, follow the steps, and stay focused on a finish that is safe, durable, and easy to maintain—you’ll have solid, confident grip from top to bottom.
FAQ
How do I choose a non-slip additive or aggregate for stair treads?
Read the product label to see what coatings it works with. Make sure it’s compatible with your base coating and that it’s rated for pedestrian use. Check for proper safety data and any application limits from the manufacturer.
How can I verify the grip after the coating cures without harming the surface?
Do a light, controlled abrasion test with a soft pad or toweled foot to feel for traction. Look for even texture across the tread and check that the additive isn’t leaving bare spots or high-wear areas.
Can I repaint or reapply coatings over worn stair treads?
Yes, but prep matters. You’ll likely need to strip or abrade the surface, clean well, and follow the new coating’s recommended adhesion steps. Always respect the new product’s instructions and any recoat window.
What maintenance steps help keep grip long term?
Keep the stairs clean from dirt and wax, since slick buildup hides wear. Inspect for worn edges and recoat or touch up when you notice loss of traction or surface wear.