
Introduction
Flooring problems can be understood through common causes, simple tests, and practical fixes.
You’ll learn how to spot warning signs, assess condition, and apply reliable, real-world steps to resolve issues.
The guide walks through examples and rules of thumb you can follow at home to decide when to repair, replace, or seek professional help.
Key takeaways
- Assess moisture before any repair; use a reliable meter and surface check.
- Document visible damage with photos and notes to guide fixes.
- Identify root causes: improper installation, humidity, leaks, or poor materials.
- Test methods: moisture readings, moisture meters, and gentle probe tests.
- Choose fixes by severity: DIY repairs for minor squeaks, professional for structural damage.
- Implement prevention: proper acclimation, vapor barriers, and routine maintenance checks.
Table of Contents
- Introduction
- Key takeaways
- Overview — What this guide covers
- Common visible signs and symptoms of floor damage
- Root causes: moisture, installation, materials, and environment
- Testing and diagnosis: tools, methods, and safety
- Fixes and repair strategies — from DIY to professional
- Prevention and maintenance best practices
- Costs, trade-offs, and decision-making
- Common misconceptions and safety precautions
- Conclusion
- FAQ
Overview — What this guide covers
This guide tackles common flooring problems you’ll encounter at home, from moisture pulls to finish failures. You’ll learn how to spot issues early and what to test for moisture and structural clues. It’s written for homeowners, DIYers, and pros who want a clear path from problem to solution.
Expect a practical scope with definitions, a quick diagnostic checklist, moisture testing and structural evaluation basics, and a tiered fixes plan. We’ll cover prevention as a cornerstone and outline when to bring in a professional. Use this as a roadmap for safe, persistent results.
Why flooring problems matter
Ignoring flooring issues can lead to serious consequences. Problems don’t fix themselves; they get worse over time.
Moisture-related issues, for instance, can cause structural damage, warping, and cupping. This not only ruins the look of your floor but also compromises its safety. A weak floor is a trip hazard waiting to happen.
Early detection is key to saving money. Catching problems early means simpler, cheaper fixes. Let issues fester, and you’re looking at expensive repairs or even full replacement.
Types of flooring included
This guide covers common problems affecting hardwood, engineered wood, laminate, and epoxy or concrete coatings. Each material has its unique characteristics, so you’ll find specific advice tailored to each.
For example, hardwood is sensitive to moisture changes, while laminate can be affected by improper subfloor preparation. Epoxy coatings on concrete need different care than wooden floors.
Rest assured, if your floor type isn’t listed here, the principles of observation, testing, and repair still apply. Just expect some material-specific nuances.
Common visible signs and symptoms of floor damage
You’ll find observable indicators that suggest trouble, from surface blemishes to structural hints. Distinguish cosmetic issues like stains or minor cracks from deeper problems such as sagging or delamination. This helps you decide what you can fix vs. what needs expert input.
Break signs down by flooring type, noting red flags for wood, concrete, vinyl, and tile. Quick checks include visual inspection, tapping for hollow spots, and basic moisture checks. Document findings to guide the next steps and conversations with contractors.
Cupping, crowning, and buckling — visual checks
These issues are common in wood flooring. Here’s how to spot them:
Cupping: Boards slope downward towards the center, like a cup. Check edges for this.
Crowning: Boards slope upward in the middle. Look at seams; they should be even.
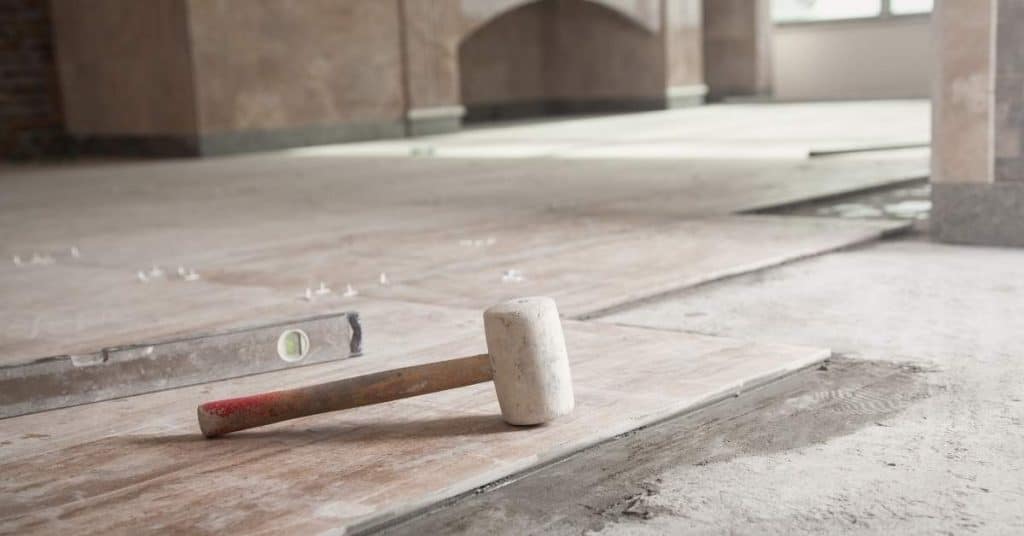
Buckling: Boards lift off the subfloor. Tap them gently; if it feels hollow, there’s a problem.
Gaps, squeaks, delamination, stains, and surface failures
These signs point to different underlying issues:
Gaps: Boards separating. Could be due to dryness or poor installation.
Squeaks: Noises when walked on. Might indicate loose boards or subfloor issues.
Delamination: Coatings peeling. Likely a sign of moisture damage or improper sealing.
Stains: Discoloration. Could be due to water, mold, or other contaminants.
Root causes: moisture, installation, materials, and environment
Moisture sources cover subfloor dampness, humidity in crawlspaces, leaks, and vapor movement from the ground. Seasonal or climate shifts can amplify these issues. Identify where moisture is entering to target fixes effectively.
Installation errors and material choices also invite failure. Look for improper acclimation, prep, barriers, or fasteners, plus mismatches in moisture content and substrate. Pair these findings with environmental factors like humidity cycles and ventilation to determine likely culprits.
Moisture sources and pathways
Moisture is flooring’s number one enemy. It can come from many places, so let’s tackle them one by one.
Leaks: Plumbing, roof, or HVAC system leaks can seep into your subfloor, causing moisture issues. Inspect these systems regularly to catch any leaks early.
Vapor drive: Moisture from the ground can rise through concrete slabs and into your flooring. This is more common in humid climates or when there’s no vapor barrier. Consider installing a moisture barrier if you’re building on a slab.
Ambient humidity: High humidity levels in crawlspaces, basements, or the surrounding environment can lead to moisture problems. Monitor and control humidity levels in these areas using dehumidifiers or proper ventilation.
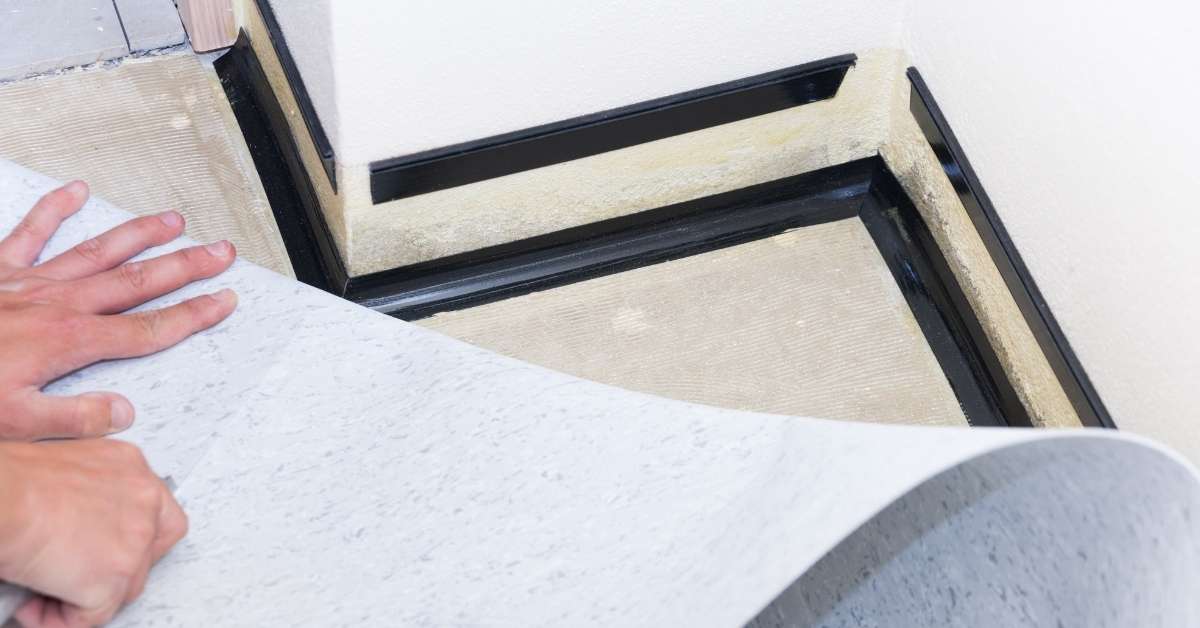
Installation and subfloor issues
Proper installation is key to a long-lasting floor. Here are some common mistakes that can lead to failure:
Improper acclimation: Wood flooring needs time to adjust to your home’s humidity levels before installation. Skipping this step can cause planks to expand or contract unevenly, leading to gaps or buckling.
Wrong fasteners/adhesives: Using the wrong type of adhesive or fasteners for your subfloor and flooring material can result in weak bonds that fail over time.
Inadequate moisture retarders: Without a proper moisture barrier, subfloor moisture can seep into your flooring, causing problems like cupping or delamination. Always use a suitable moisture barrier for your subfloor type.
Uneven subfloors: Installing flooring on an uneven surface can lead to squeaks, gaps, and other issues. Ensure your subfloor is smooth and level before installing any flooring.
Material and environmental factors
The right material choice is crucial for a floor that lasts. Here’s what to consider:
- Wood species: Different woods react differently to moisture and temperature changes. Choose a species suitable for your climate zone and expected humidity levels.
- Finish types: Some finishes are more resistant to moisture than others. Opt for durable, moisture-resistant finishes in high-humidity areas.
- Seasonal RH swings: Wide fluctuations in relative humidity can cause wood flooring to expand and contract, leading to gaps or buckling. Consider using engineered wood or other stable materials in areas with extreme RH swings.
- HVAC absence: Without proper heating, ventilation, and air conditioning, indoor humidity levels can rise, causing moisture problems. Ensure your HVAC system is functioning correctly and maintaining appropriate humidity levels.
- Geographic climate impacts: Different climates present unique challenges to flooring materials. Research the best flooring options for your geographic location and expected weather conditions.
Testing and diagnosis: tools, methods, and safety
Use a practical sequence from quick checks to deeper diagnostics to pinpoint problems. Start with visual cues, then move to moisture meters and surface tests, ending with more advanced assessments as needed. Follow a logical flow that suits your project scope.
Know the strengths and limits of each method, including accuracy and disruption. Safety gear and proper ventilation are essential during testing. Keep records of readings to track progress and plan fixes with confidence.
Moisture Testing Methods (Pin, Pinless, RH Probe, Calcium Chloride)
Before you start testing for moisture, make sure your surface is clean and dry. Don’t test on wet or freshly poured concrete.
Pin Test: This old-school method involves sticking a small pin into the concrete. If it goes in easily, there’s moisture. But beware, this can damage the surface and isn’t very accurate. It’s best for checking base compaction during construction.
Pinless Moisture Meter: This is like a metal detector for moisture. It sends an electrical signal into the concrete and measures how quickly it returns. It’s non-destructive and more accurate than the pin test. Great for testing slabs before flooring installation.
Relative Humidity (RH) Probe: This measures the moisture content in the air inside the concrete. It’s useful for checking curing progress during construction. But it won’t tell you if there’s liquid water present, so use it with other methods for a full picture.
Calcium Chloride Test: This is like a moisture litmus test. You apply a calcium chloride solution to the concrete and measure how much water it absorbs. It’s accurate but destructive – it leaves a white residue that’s hard to clean up. Use it when you need high accuracy, like before installing sensitive flooring.
Visual and structural inspection checklist
Before starting any concrete work, use this checklist to inspect your site. It’s best to do this on a dry day with good light.
- Check for cracks: Look for hairline or wider cracks in the concrete. Use a mirror on a stick to check hard-to-reach areas.
- Measure gaps around slabs: Use a tape measure to ensure there’s at least 3/4″ gap between the slab and any walls, trim, or other structures. Too little space can cause cracking.
- Inspect under trim and in corners: Check for signs of moisture damage, rot, or insect activity. Use a flashlight to see into dark areas.
- Examine expansion joints: Ensure they’re intact and filled with a flexible material. Missing or damaged joints can lead to cracking.
- Check for settling or heaving: Look for signs of uneven surfaces, dips, or humps. These could indicate soil issues that need addressing before pouring new concrete.
- Inspect crawlspace/basement below slab: If accessible, check for moisture, mold, or structural damage. Any issues should be addressed before proceeding.
- Document problem locations: Take photos and notes of any cracks, gaps, or other issues. This helps identify patterns and plan repairs.
- Check for rebar corrosion: If visible, tap rebar with a hammer. A dull thud indicates sound rebar; a hollow sound may indicate corrosion, which could cause structural issues.
Quick rule: Always check for and address any moisture issues before pouring new concrete. Moisture is the enemy of concrete and can lead to expensive repairs down the line.
When to call a professional and what to ask
You’ve done your visual and moisture tests (check here), but sometimes you need an expert’s eye. Here’s when:
Extensive buckling or cracks: If you see widespread, severe damage, it’s time to call a pro.
Slab vapor issues: Persistent moisture problems could mean slab issues that need professional diagnosis.
When you call, ask these questions:
Testing type: What specific tests will they perform? Make sure it’s not just a visual inspection.
Mitigation plan: How do they propose to fix the issue? Get details on materials and methods.
Warranties: What kind of guarantee do they offer? Make sure it covers both labor and materials.
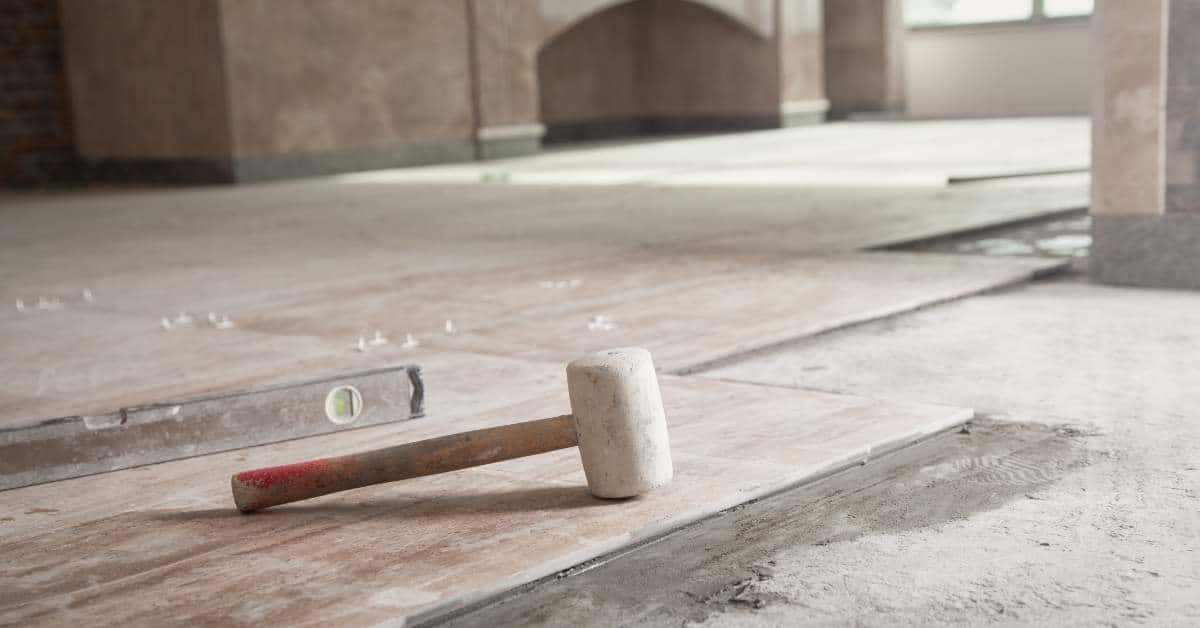
Fixes and repair strategies — from DIY to professional
Begin with immediate DIY stabilization and moisture-control steps and label them as temporary fixes. These include simple measures to curb movement and buy time for a solid plan. Document what you try and observe for results.
Progress to mid-level repairs such as surface work, sealing, or patching, and know when to escalate to a professional. Evaluate visible structural indicators to decide if a contractor is needed and prepare for a formal handoff with clear expectations.
Temporary and DIY fixes
When you spot floor damage, don’t panic. There are quick, temporary fixes to stabilize the situation until you can plan a permanent repair.
Weighting: Use temporary shims or wedges to level slightly uneven floors. This isn’t a fix, but it buys time.
Drying: If moisture is the culprit, use fans and dehumidifiers to dry out the area. Keep in mind, this only addresses surface moisture; persistent issues may need professional intervention.
Clean spills promptly to prevent further damage. Tighten loose boards with screws driven through pilot holes, but be careful not to over-tighten or split them.
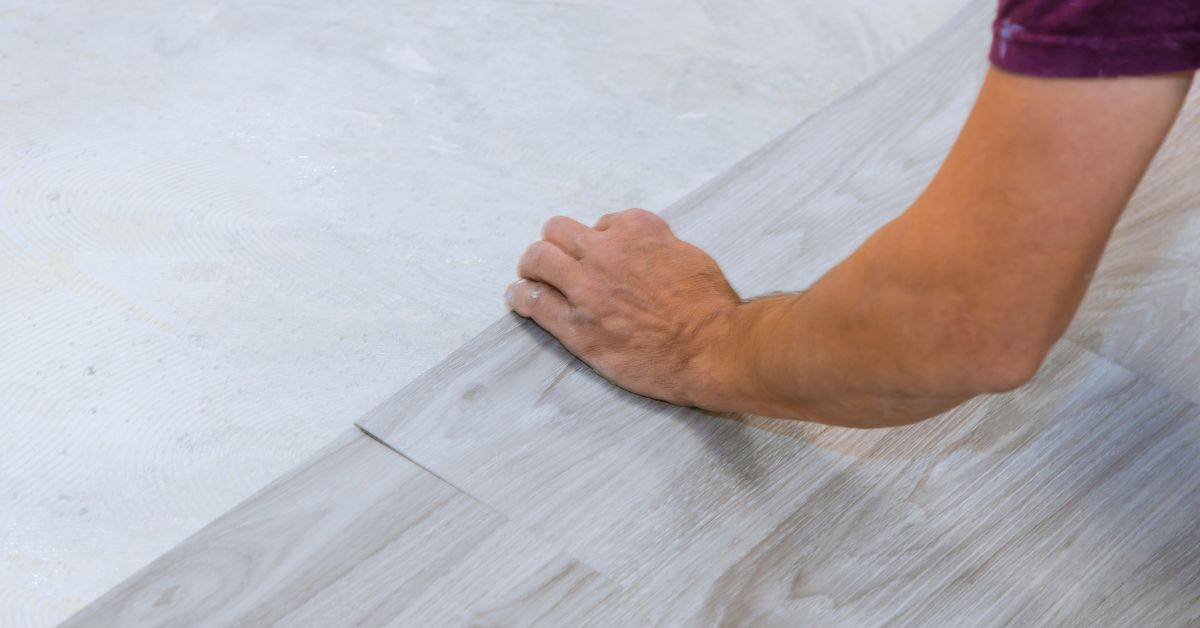
Permanent repairs for wood floors
Once you’ve identified the problem and gathered materials, it’s time to tackle permanent fixes. Here are some common repairs:
Sanding/refinishing: For minor scratches or dull finish, sand lightly and refinish. Be careful not to sand too deeply; you don’t want to thin the floor.
Board replacement: Remove damaged boards by cutting through the tongue-and-groove joint with a sawzall, then pry them out. Replace with new boards, ensuring they match in size and species.
Reattachment: If boards are loose but not damaged, reattach using construction adhesive and finish nails driven at an angle.
Subfloor fastenings: Tighten or replace subfloor screws that have come loose. If the subfloor is damaged, you may need to sister new pieces onto it.
Concrete and coating-specific repairs
Concrete floors present unique challenges. Here are some specific repair methods:
Moisture vapor barrier: If moisture is causing problems, install a moisture vapor barrier to prevent it from reaching the surface.
Urethane cement: For areas with heavy traffic or chemical exposure, consider using urethane cement. It’s more durable and resistant than standard concrete.
Polished concrete alternatives: If your floor is delaminating, consider polishing it instead of applying a new coating. This can be more cost-effective and longer-lasting.
Delaminated coatings: If a coating has delaminated, remove the loose material, clean the surface, and apply a new coat. Ensure the surface is properly prepared to prevent future issues.
Prevention and maintenance best practices
Pre-installation checks are essential: verify slab readiness, moisture, alkalinity, and flatness before laying flooring. Address issues now to prevent future problems. This sets a solid baseline for long-term performance.
Ongoing routines keep problems at bay: proper barriers, expansion gaps, and regular resealing where applicable. Manage humidity and ventilation to minimize moisture cycles and damage, and log inspections and results for early warning signs.
Installation prep and materials checklist
Use this checklist before you start laying concrete to ensure a successful pour. It’s best to go through these steps the day before or morning of your installation.
- Check subfloor moisture: Concrete should not be poured on a subfloor with a moisture content above 4 lbs/1000 sq ft (20 kg/m2). Use a moisture test kit to check. If it’s too high, consider using a moisture barrier or wait for the subfloor to dry.
- Acclimate materials: Store and use concrete, aggregates, and admixtures at temperatures between 50°F-90°F (10°C-32°C). Check product labels for specific recommendations. Cold or hot materials can lead to weak concrete.
- Use moisture retarder: Apply a moisture retarder membrane to prevent moisture from the subfloor wicking into your new concrete. This helps prevent curling and delamination.
- Check fasteners/adhesives: Ensure all anchors, screws, or adhesives are compatible with concrete and follow manufacturer guidelines for installation. Incorrect fasteners can cause concrete to fail or pop out.
- Inspect forms: Check wooden forms for straightness, level, and secure attachment. Warped or loose forms can result in uneven slabs or leaks.
- Check reinforcement: Ensure rebar is properly placed, secured, and aligned with the formwork. Incorrect placement can lead to weak spots in your concrete.
- Prep site for concrete delivery: Clear a path for the concrete truck, ensure proper drainage, and have all necessary tools ready (shovels, rakes, floats, trowels, etc.). A chaotic site can cause delays or mistakes.
- Check weather forecast: Avoid pouring in extreme temperatures or when rain is expected. Concrete needs to cure properly, and rain can wash away the surface layer of cement paste.
Quick rule: Always follow manufacturer guidelines for all materials used. If unsure about any step, consult a professional or contact the product’s customer support.
Ongoing home maintenance and humidity control
Humidity’s a sneaky one. Too much, and you’re looking at mold, warped wood, and peeling paint. Too little, and your place feels like a desert. Here’s how to keep it in check:
Target Relative Humidity (RH): Aim for 30-50%. Check your hygrometer regularly. If you’re not sure, check the product label or manufacturer instructions. Too high? Time to dehumidify.
HVAC and Dehumidifiers: Your HVAC system can help, but if humidity’s a real pain, consider a standalone dehumidifier. Make sure it’s sized right for your space – check the specs. Run ’em when you need to, but don’t forget to empty and clean the water bucket.
Spills: Water on the floor? Mop it up quick! Standing water’s an open invitation to mold. And while we’re at it, use proper cleaning products. Bleach ain’t always the answer – it can damage some surfaces. Check what works best for your floors and coatings.
Seasonal Checks: Spring and fall, check your place for any water intrusion. Look under sinks, around windows, and in basements. If you find something, fix it quick. Water’s cheap, but repairs aren’t.
Visual checkpoints and monitoring schedule
Use this checklist monthly for floors and seasonally for subfloors to catch issues early. It’s like giving your concrete a quick health check.
- Check floor level: Use a long level or laser level to ensure no low spots where water can pool. What goes wrong if you skip this: Water can collect, leading to efflorescence and potential structural issues.
- Inspect cracks: Look for new or widening cracks. Hairline cracks are normal, but wider ones need attention. What goes wrong if you skip this: Cracks can let in water, causing damage and encouraging further cracking.
- Check moisture content: Use a moisture meter on the surface and at least 2 inches deep. Ideal readings are between 4-6%. What goes wrong if you skip this: High moisture can lead to delamination, curling, or other structural problems.
- Monitor subfloor (seasonally): Lift any carpet edges or check under vinyl planks for signs of moisture or damage. What goes wrong if you skip this: Subfloor issues can cause squeaks, warping, and other floor problems.
- Check expansion joints: Ensure they’re clean and filled properly to prevent water intrusion. What goes wrong if you skip this: Water can seep through, causing damage and encouraging joint deterioration.
- Look for stains or discoloration: These could indicate moisture issues or other problems. What goes wrong if you skip this: Stains might hide underlying issues that can worsen over time.
- Check drainage around the slab: Ensure water drains away from the foundation to prevent hydrostatic pressure. What goes wrong if you skip this: Poor drainage can lead to cracks, leaks, and other structural problems.
- Inspect caulking and sealants: Check for cracks or gaps that need reapplication. What goes wrong if you skip this: Gaps can let in water, causing damage and encouraging further deterioration.
Quick rule: If you find any issues, address them promptly to prevent small problems from becoming big, expensive ones.
Costs, trade-offs, and decision-making
Understand the spectrum of costs from DIY steps to contractor work, including materials and overhead. Consider long-term maintenance and potential hidden expenses as you compare options. Use a practical lens to assess value over time.
Weigh repair versus replacement with clear criteria: structural concerns, ongoing moisture, and repeated failures. Prepare a contractor checklist with scope, warranties, and tests, and use a quick decision framework to guide the choice that fits your situation.
Cost factors and typical ranges
Repair costs vary greatly depending on the extent of damage. Here’s what to expect:
DIY repairs typically range from $0.50 to $2 per sq ft, including materials like crack filler, sealants, and patching compounds.
Contractors charge around $3 to $6 per sq ft, covering labor, overhead, and profit margins. Expect additional costs for moisture testing ($100 – $300), surface prep, and cure times.
Don’t forget to factor in hidden expenses. Prep work like grinding or shotblasting can add $2 to $5 per sq ft. Moisture mitigation systems may cost extra.
Choosing between repair, partial replacement, or full replacement
Deciding whether to repair, partially replace, or fully replace your flooring depends on several factors:
Severity of damage. Minor cracks and stains can be repaired. Severe cracking, structural concerns, or significant settling may require partial or full replacement.
Floor age and condition. Older floors with extensive wear or repeated failures might be better off replaced. Newer floors with isolated issues can often be repaired.
Long-term moisture risk. Ongoing moisture problems may warrant partial or full replacement, along with addressing the underlying cause (e.g., grading, drainage).
Consider your budget and disruption tolerance. Repairs are cheaper but may need to be repeated. Replacement is more expensive upfront but offers long-term value.
Common misconceptions and safety precautions
Debunk common myths with straightforward checks, such as why some fixes don’t suit every problem. Use simple validation steps to verify claims before acting. This helps avoid wasted effort and unnecessary risk.
Safety comes first in testing and repairs: wear PPE, ensure ventilation, and manage electrical and moisture risks. Document findings, maintain records, and know when to bring in a professional for grinding, resurfacing, or structural work.
Myths about moisture, sanding, and maintenance
Sanding won’t fix all floor problems. It can’t remove deep-set moisture or structural issues.
Water stains aren’t always surface-only. They could indicate serious moisture intrusion.
Ignoring subfloor issues leads to recurring problems. Address them before laying new flooring.
Safety during testing and repair
Wear gloves, goggles, and a dust mask when sanding or grinding.
Test for electrical hazards before using power tools near moisture. Use GFCI outlets.
Ventilate properly when applying coatings. Follow manufacturer’s guidelines.
Contain and safely dispose of moldy or wet materials to prevent health risks.
Conclusion
Addressing flooring problems starts with safety, a clear plan, and small, confirmable tests. Fixing now protects durability, keeps your space looking right, and avoids costly mistakes later.
First, inspect a small area and test methodically: check for moisture signs, verify moisture meters and tests in the order recommended, and confirm repairs on a limited patch before wider work. Follow a simple workflow: identify symptoms, confirm root causes, choose a repair path from DIY to pro, and monitor for recurrence after each step. Prioritize air movement, proper heat and humidity control, and use appropriate materials for your environment.
Common mistakes to avoid are pushing ahead without proper testing, ignoring safety precautions, and overestimating DIY fixes on structural or moisture-heavy problems. Always ventilate, shut off power when working near water or wiring, and keep a small, non-destructive test area before any major work. If moisture is widespread, or if structural components or subfloor integrity are in question, call a professional rather than risk irreversible damage.
When in doubt, schedule a quick assessment and use the guidance from this guide to frame the next steps. Start with a conservative plan, enforce safety first, and you’ll stay on track to a durable, good-looking floor. You’ve got this.
FAQ
Why is my floor creaking or squeaking?
The boards or subfloor are moving. This happens when nails loosen, staples lose grip, or the subfloor is uneven. Fix it by tightening fasteners and adding a proper subfloor seam seal.
What causes gaps between floor boards?
Drying wood, seasonal humidity changes, or poor installation. Gaps show up fast in solid wood and can cause locks to loosen. Fill small gaps, but re-finish or re-install if the gap is large.
Why does my floor feel soft or bounce in places?
Soft spots mean moisture damage or rotten subfloor. Do not cover it up. Find the source, dry it out, and replace damaged sections before finishing.
How can I tell if moisture is the problem?
Check for high humidity and damp spots. Look for cupping, warping, or mold. Use a moisture meter on wood and concrete before laying new flooring.