
Introduction
Discovering mold in your mud or mortar can be alarming, but understanding the timeline of its growth and the duration of necessary fixes can help you address the issue effectively. This guide walks you through the timeframe of causes, tests, and repairs to ensure a thorough and efficient resolution.
From identifying the problem to completing long-term solutions, knowing how long each step takes is crucial for planning your approach and setting realistic expectations.
The Timeline of Mold Growth in Mud
Mold growth in mud typically follows a progressive timeline, starting with excess moisture and culminating in visible mold. Understanding this timeline helps you identify the problem early and take appropriate action:
- Moisture accumulation (1-7 days): Excess water or humidity creates an ideal environment for mold spores to germinate.
- Mold growth (3-12 days): Given favorable conditions, mold begins to grow and spread, becoming visible as small black, green, or white spots.
- Odor development (5-14 days): As mold continues to grow, it produces a musty smell that becomes increasingly noticeable.
Factors affecting the timeline
The growth rate of mold in mud can vary depending on several factors:
- Temperature: Warmer conditions accelerate mold growth.
- Humidity: Higher humidity levels promote faster mold growth.
- Nutrient availability: The presence of organic materials, like dirt or debris, encourages mold to grow more quickly.
Key takeaways
The duration of prep work, such as containment and safety measures, can significantly impact the overall timeline for fixing moldy mud. Be sure to allocate sufficient time for these crucial steps before beginning repairs.
- Inspect mud for unusual odor, slimy texture, and visible mold before work.
- Use basic DIY tests to confirm moisture and air quality; avoid overreliance.
- Quick cleanup: separate moldy material, containment, and surface disinfection after containment.
- Long-term fixes require proper ventilation, drainage, and material choices to prevent recurrence.
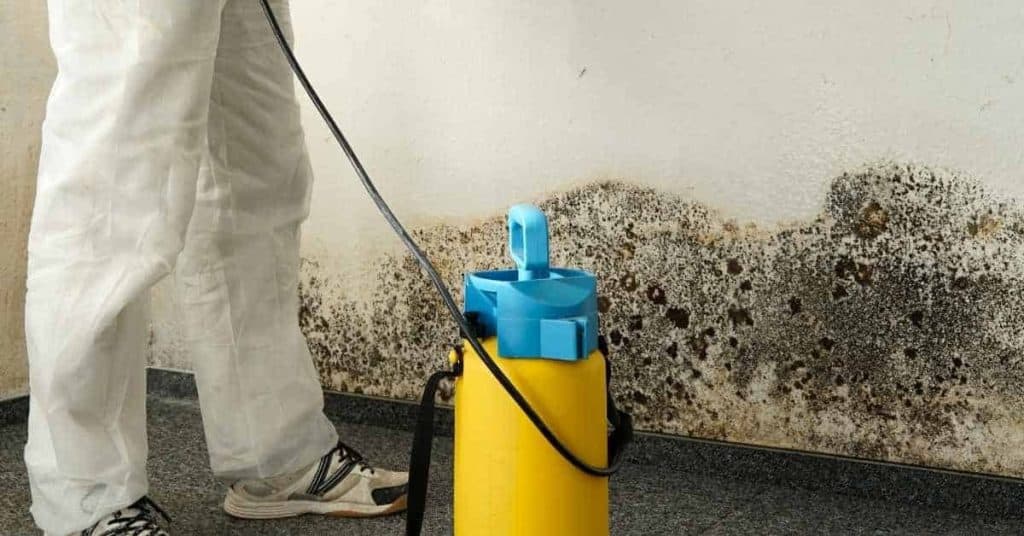
- Safety note: wear gloves, eye protection, and a mask when handling moldy mud.
- Track moisture and microbial growth with a simple schedule and follow-up checks.
Table of Contents
- Introduction
- Key takeaways
- What “Moldy Mud” Means and Why It Matters
- Biological and Environmental Causes of Mold in Mud
- Visual and Olfactory Checkpoints for Identifying Moldy Mud
- Quick DIY Tests and When to Call a Professional
- Short-Term Fixes and Cleaning Methods for Small Areas
- Long-Term Fixes: Prevention, Repair, and Materials Choices
- Tools, Materials Checklist and Safety Equipment
- Monitoring, Maintenance Schedules, and Follow-up Testing
- Conclusion
- FAQ
What “Moldy Mud” Means and Why It Matters
Moldy mud is mold growing on soil, mud-based mortar, or any dirty surface. It’s more than a bad look; it can affect health and the building’s performance. Fix it before it gets worse.
Dealing with moldy mud now prevents bigger problems later. Moisture is the trigger, so address the source and clean surfaces per label instructions. If you’re unsure about products or methods, check the label or datasheet for safe use.
Common scenarios where mold grows in muddy materials
Material choices play a big role in whether your mud-based projects stay clean or turn into a moldy mess.
- Garden beds: Organic matter like compost and manure can harbor mold spores. Use well-composted materials, avoid fresh manure.
- Basement dirt floors: Concrete slab foundations can trap moisture, feeding mold growth. Opt for sealed concrete instead of dirt.
- Earthen walls: Cob or adobe structures need proper ventilation to prevent mold. Use breathable plasters and ensure adequate airflow.
- Grout & mortar: Poorly mixed, low-quality materials can crack, allowing water intrusion and mold growth. Use quality materials, mix well, and keep surfaces clean.
- Tracked-in mud: Mud tracked indoors can lead to mold if not cleaned up promptly. Use doormats, wipe feet, and clean regularly.
Who should care (homeowners, gardeners, restorers)
Moldy mud affects various groups. Here’s why you should take notice:
Homeowners, mold can cause health issues, structural damage, and lower property value. Keep an eye on basements, entryways, and outdoor living spaces.
Gardeners, mold in soil or compost can harm plants and spread allergens. Monitor your garden beds and compost piles.
Restorers & DIY enthusiasts, moldy mud can ruin projects. Inspect materials, ensure proper ventilation, and clean up promptly to prevent growth.
Biological and Environmental Causes of Mold in Mud
Mold grows from spores that land on organic material when moisture is available. Spores are common in the air and will settle on damp mud or concrete surfaces. The presence of nutrients from soil, wood, or decaying matter fuels their growth.
Moisture, temperature, pH, and available nutrients interact to determine how fast mold spreads. Check the surface and surroundings for sources of moisture and verify local guidelines or product data sheets for any recommended moisture limits. When in doubt, ask for manufacturer instructions or local codes before proceeding with fixes.
Role of moisture and drainage issues
Mold loves water. Standing water, high humidity, poor drainage – they’re all mold’s best friends.
If your muddy materials stay wet for too long, you’re asking for trouble. Mold spores only need a bit of moisture to start growing.
Capillary rise is another sneaky culprit. It pulls water up through tiny pores in the material, keeping it damp even if it doesn’t look like it’s sitting in water.
Organic materials, contamination, and nutrient sources
Mold needs food to grow. And guess what? Organic materials are right up its alley.
- Decaying leaves: They’re high in cellulose, a favorite mold snack. Avoid using fresh leaves; let them compost first.
- Compost: It’s rich in nutrients, but make sure it’s well-rotted to avoid mold contamination.
- Soil amendments: Some, like manure or blood meal, can feed mold. Choose amendments low in organic matter.
- Organic binders: In earthen mortars, using the wrong binder can lead to cracking and staining. Opt for natural hydraulic lime instead of clay-based binders.
Temperature, light, and seasonal patterns
Mold grows best in temperatures between 40-100°F (4-38°C). Too hot or too cold, and it slows down. But don’t let that fool you; mold can still cause problems year-round.
Light exposure doesn’t matter much to most molds. They’re more interested in your material’s moisture content than how sunny it is.
Seasonally, mold loves fall and spring the most. These seasons bring rain, warm temperatures, and plenty of organic materials for it to feed on. Keep an eye out during these times!
Visual and Olfactory Checkpoints for Identifying Moldy Mud
Look for colors beyond typical dirt, such as greens, blacks, or grays, that form in patches or streaks. Mold can appear fuzzy, powdery, or slimy depending on conditions and growth stage. A chalky or damp texture is a common clue as well.
Smell is another indicator; a musty or earthy odor often accompanies mold growth. Distinguish mold from efflorescence, algae, or simple soil by noting texture, color changes, and odor. If you’re unsure, compare with a clean, nearby surface and check product labels for mold indicators.
How to Inspect Safely and What to Look For
Before you start, safety first. Here’s a quick checklist.
- Wear protective gear: Gloves, long sleeves, and eye protection.
- Ventilation: Open windows or use fans to keep the area well-ventilated.
- Lighting: Ensure the area is well-lit for a clear view.
- Powdery vs. fuzzy: Mold can appear as powder (like talc) or fuzzy growths.
- Colors: Black, green, or white are common mold colors, but it can also be pink, orange, or other hues.
- Spreading patterns: Look for spots that seem to ‘move’ or spread over time.
- Avoid touching: Unless necessary, don’t touch the affected area. Mold spores can become airborne and cause health issues.
- Keep a record: Note down what you find. It helps track progress and identify new growth.
Quick rule: If in doubt, test or consult a professional. Some molds are toxic and require expert handling.
When It Might Not Be Mold (Lookalikes and Tests)
Mold has some look-alikes. Here’s how to tell them apart.
- Efflorescence: White, powdery mineral salts left behind as water evaporates. Test: It should wipe off easily and won’t stain.
- Rust: Red or orange stains from iron oxide. Test:> Scrape gently; it should flake off.
- Algae: Green or black slimy growth on damp surfaces. Test: It’s usually slippery and can be wiped away.
- Dirt: Brown or gray stains, often with a dusty texture. Test: Should wipe off easily with water and a cloth.
Quick rule: If it’s not clear after initial checks, use a mold test kit for confirmation.
Quick DIY Tests and When to Call a Professional
Try a bleach spot test on a small, inconspicuous area: if the area lightens significantly, you may be dealing with organic mold. Use a moisture meter to gauge relative humidity or surface moisture, and perform a tape lift to capture material for inspection. These tests are simple and don’t require lab work.
If growth persists after cleaning attempts, if moisture remains high, or if you suspect widespread structural impact, it’s time to call a professional. For clear, persistent mold issues or uncertain results, rely on certified testing or remediation experts and follow local regulations or manufacturer guidance.
Step-by-step home test methods
These simple tests help you check for moisture and mold growth at home. They’re quick, affordable, and can give you a good idea of what’s going on.
- Bleach Spot Test:
- Mix 1 part bleach with 2 parts water in a spray bottle.
- Spray the mixture onto suspected moldy areas.
- If the area turns white, it’s likely mold. If not, it might be just dirt or mildew.
- Moisture Measurement:
- Use a moisture meter (available at hardware stores) to measure moisture levels in walls and floors.
- A reading above 16% indicates potential moisture problems.
- Check multiple spots for accurate results.
- Photography:
- Take photos of suspected areas from different angles.
- This helps monitor growth over time and provides visual evidence if you need to call a pro.
- Make sure your photos are well-lit and clear.
When lab testing or a pro is necessary
While DIY tests can be helpful, there are times when you need professional help. Here’s when to call in the experts.
Extensive Contamination: If you find mold covering large areas (more than 10 square feet), it’s time to call a pro. They have specialized equipment and training to handle extensive contamination safely.
Health Symptoms: If you or others in the home are experiencing unexplained health issues like coughing, sneezing, or skin irritation, especially when near suspected moldy areas, get professional help immediately. Some molds produce mycotoxins that can cause serious health problems.
Structural Concerns: If you suspect moisture and mold issues are causing structural damage to your home, like warping walls or floors, or if you notice cracks in the foundation, call a professional. They can assess the extent of the damage and provide appropriate solutions.
Short-Term Fixes and Cleaning Methods for Small Areas
Start with mechanical removal: scrape or brush off loose mold and dry the area thoroughly. Use a mild detergent or cleaners labeled for mold maintenance, and follow surface care warnings on the product label. Rinse and dry completely to reduce recurrence risk.
Avoid aggressive solvents on sensitive materials and wear eye protection, gloves, and a mask during cleaning. If you choose a bleach-based solution, verify the label directions and ventilation requirements before use. Keep the area well-ventilated while working and monitor for reoccurrence after drying.
Mechanical removal and drying techniques
Start by scraping off loose mud with a putty knife or stiff brush. Be careful not to spread spores.
Wear gloves, goggles, and a mask to protect yourself from mold exposure.
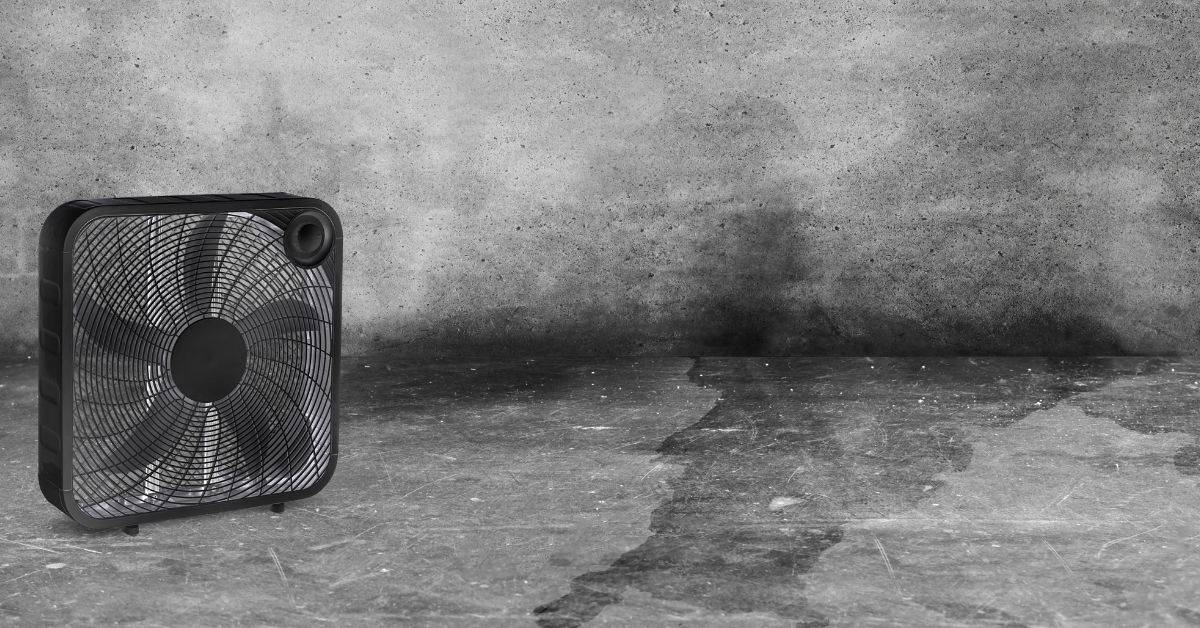
Use fans to dry the area thoroughly. Point them at the affected spot, ensuring good ventilation. You can also use dehumidifiers to remove excess moisture.
Cleaning agents and safe application
For small areas, dilute bleach (1 cup per gallon of water) can be effective. Apply it to the affected area, let it sit for 15 minutes, then scrub and rinse.
Vinegar is a natural alternative. Use white vinegar full-strength, apply, let it soak for 30 minutes, then scrub and rinse.
Borax can also be used (1/2 cup per gallon of water). Apply, let it sit for 20-30 minutes, then scrub and rinse. For commercial fungicides, follow the manufacturer’s instructions.
Long-Term Fixes: Prevention, Repair, and Materials Choices
Address root causes by improving drainage and reducing ongoing moisture around the affected area. Replace or repair contaminated materials where necessary and seal surfaces to limit future moisture intrusion. Consider mold-resistant mixes or finishes where appropriate, after verifying their suitability to your project.
Consult local building practices or product instructions when choosing sealants, barrier coatings, or remediation finishes. Verify compatibility with existing substrates and confirm any required cure times or environmental conditions from the manufacturer before application.
Drainage, grading, and moisture control solutions
Moldy mud is a sign of too much water. Let’s fix that.
First, grade your land. Slope it away from your home, so water doesn’t pool. A 1-inch drop for every 8 feet is good.
Next, consider French drains. They’re trenches filled with gravel and a pipe to carry water away. Dig them around the perimeter of your property, sloping downwards towards a low point where water can safely drain out.
Inside, use vapor barriers in crawlspaces and basements. They stop moisture from seeping up into your home. And run a dehumidifier to keep indoor humidity below 50%.
Material repairs, replacements, and mold-resistant alternatives
Right materials matter. Here’s what works, what doesn’t, and why.
- Earthen Mortar: Use it if you want a natural look. But it’s porous, so seal it with a latex paint or acrylic sealer to prevent moisture absorption.
- Soil Covers: Consider rubber or plastic sheeting. They’re cheap and effective at stopping water from seeping through. But they can crack over time, letting water in again.
- Flooring: Engineered wood and laminate are good choices. They don’t absorb moisture like solid wood does. But avoid vinyl if your subfloor is damp – it can buckle.
- Mold-Resistant Products: Use mold-resistant drywall in damp areas. And add a fungicide to your paint or primer for extra protection.
- Stabilizers: Add them to your mortar mix. They make it stronger and less likely to crack, letting less water in.
Tools, Materials Checklist and Safety Equipment
Have a basic set of hand tools, a moisture meter, brushes, scrapers, and clean rags ready for small-scale work. Stock appropriate cleaners labeled for mold remediation and a disposable trash bag or container for waste. Always include personal protective equipment such as gloves, eye protection, and a respirator or mask suitable for mold tasks.
Keep disposal supplies within reach and check local rules for waste handling. Confirm tool compatibility with the surfaces you’re treating by reviewing product instructions or supplier recommendations. Have a plan for ventilation and safe cleanup after finishing to minimize exposure and mess.
Personal protective equipment and safe disposal
Before starting any concrete work, ensure you have the right personal protective equipment (PPE) and understand how to safely dispose of contaminated debris. This checklist will help you stay safe and avoid costly mistakes.
- Gloves: Check for appropriate size and material. Concrete gloves should be durable, waterproof, and provide a good grip. Try them on to ensure they fit well.
- N95/FFP2 Mask: Ensure it’s certified (check label) and fits properly. Perform a quick seal check by inhaling/exhaling sharply; if air leaks, adjust or replace.
- Eye Protection: Use safety glasses with side shields or goggles to protect against concrete dust and splashes. Check for any scratches or damage before use.
- Ear Protection (optional): If using power tools, wear earplugs or earmuffs to protect against noise levels above 85 dB(A). Follow manufacturer’s guidelines on usage.
- Clothing: Wear long-sleeved shirts and long pants to protect skin from concrete. Check for any tears or holes before starting work.
- Footwear: Use steel-toed boots with good grip to prevent slips and protect feet from falling objects. Check soles for wear and tear.
- Disposal of Contaminated Debris: Keep a separate container for concrete waste. Check local regulations on disposal; some materials may require special handling or recycling.
- Waste Disposal Bags: Use heavy-duty, leak-proof bags to contain and dispose of contaminated debris safely. Check bag thickness and strength before use.
Quick rule: Always dispose of concrete waste responsibly to prevent environmental damage and avoid fines from local authorities.
Recommended tools and meter types
Before you start any concrete work, make sure to gather the right tools. This checklist will help you ensure you have everything needed for a successful project.
- Stiff-bristled brushes (for cleaning): Check bristles are stiff enough to remove dirt and debris effectively. Soft bristles won’t do the job properly, leading to poor concrete adhesion.
- Scrapers (for surface preparation): Ensure blades are sharp and sturdy. Dull or weak scrapers can cause damage to the substrate or fail to remove old material, resulting in delamination.
- Moisture meters: Look for meters with a range of 0-20% moisture content. Check that the meter’s probes are clean and undamaged. Incorrect moisture levels can lead to failed concrete adhesion or premature curing issues.
- Fans (for drying): Ensure fans have adjustable speeds and adequate airflow. Insufficient drying can result in trapped moisture, causing bubbles or cracks in the concrete surface.
- Tape measure: A reliable tape measure is essential for accurate mixing and application of concrete. Incorrect measurements can lead to wastage or insufficient coverage.
- Level (for grading): Check that your level is accurate and undamaged. An incorrect slope can cause water pooling, leading to premature deterioration of the concrete surface.
- Concrete mixer: Ensure the mixer has enough capacity for your project and is in good working condition. A poorly functioning mixer can result in improperly mixed concrete, leading to strength issues or an uneven finish.
- Wheelbarrow (for transporting): Check that the wheelbarrow is sturdy and has a large enough tub for your needs. A weak or small wheelbarrow can cause spills or make transport difficult, wasting time and material.
Quick rule: Always check your tools before starting any work to ensure they’re in good condition and suitable for the task at hand. This simple step can save you time, money, and rework down the line.
Monitoring, Maintenance Schedules, and Follow-up Testing
Set a simple routine to inspect the area after cleaning and drying. Look for any signs of moisture return, discoloration, or odor that suggests mold is returning. Schedule periodic checks based on your climate and material use, and adjust as needed.
If you detect repeat issues, repeat testing or adjust maintenance steps accordingly. Follow up with routine moisture control and, if necessary, professional remediation to ensure mold does not recur. Always verify that any follow-up actions align with local regulations and product guidelines.
Signs of recurrence and what to do next
Mold can grow back if moisture issues aren’t fully resolved. Keep an eye out for these signs:
Musty smell: Even if you don’t see mold, a musty odor could indicate regrowth.
Water stains or new damp spots: These could signal leaks or condensation that’s feeding mold.
If you spot any signs, act fast. Contain the area, turn off HVAC systems to prevent spread, and reapply cleaning agents. Rerun tests to confirm regrowth and reassess your moisture control strategies.
Record-keeping and photographing progress
Keeping records helps you track effectiveness and provides valuable info if you need to call a pro. Here’s what to document:
Dates: Note when you first noticed mold, when you started treatments, and when you completed them.
Photos: Take before, during, and after photos of affected areas. This helps track progress and provides visual evidence for professionals if needed.
Moisture readings: Keep records of moisture levels in affected areas using a moisture meter. Track changes over time to ensure your fixes are working.
Conclusion
Safety first matters with moldy mud because the wrong move can ruin the structure or push spores into the living space. The goal is a durable fix that looks right and keeps the air clean, without creating new damage.
Start by checking the area in a simple, stepwise way: identify the damp spot and affected material, run a small DIY test on a hidden corner, dry and ventilate the space, clean with the approved methods for mold and mud, inspect for any leaks or water entry and fix them, then replace or repair damaged material as needed, and set up a basic monitoring and maintenance rhythm to catch new moisture before it repeats.
Common mistakes to avoid are skimping on the moisture source and rushing repairs, using the wrong cleaners or sealing products, and skipping PPE or a test patch to see if the method works. Always ventilate well, wear gloves, goggles, and a mask, and verify that a patch is dry before moving on to the next step.
If the mold covers a large area, the moisture source is ongoing, or growth persists after your DIY steps, call a professional. With careful steps and a clear plan, you can restore safety, keep costs reasonable, and finish with solid, long‑lasting results.
FAQ
When should I remove moldy mud vs. just cleaning and sealing?
If the mud is soft, crumbles easily, or keeps returning after cleaning, remove it and start fresh. For small, stubborn patches, you can clean and rework the area, but for large or repeated mold, pull it out and repair the underlying condition.
Always base this on the extent you see and how deep the moisture goes. If in doubt, check manufacturer instructions or local guidance for your project.
What quick checks help me confirm the area is ready after a fix?
Feel the surface with the back of your hand; it should be dry and not cooler than surrounding concrete. Look for any new damp spots after a few dry days or after rain. If you still smell mold or see fresh growth, reassess before covering or finishing.
What should I document before and after cleanup?
Take clear photos of the moldy area, the steps you took, and any materials you removed. Note the area size and any changes in moisture perception or odor. Keep records to compare future maintenance and guide new repairs.
What are safe cleaning methods for moldy mud on concrete?
Use cleaners labeled for mold on cement and follow their instructions. Wear eye protection, gloves, and a mask; rinse and dry the area thoroughly. Do not mix cleaners like bleach with ammonia or incompatible chemicals, and dispose of waste material as directed by the product label and local rules.