
Introduction
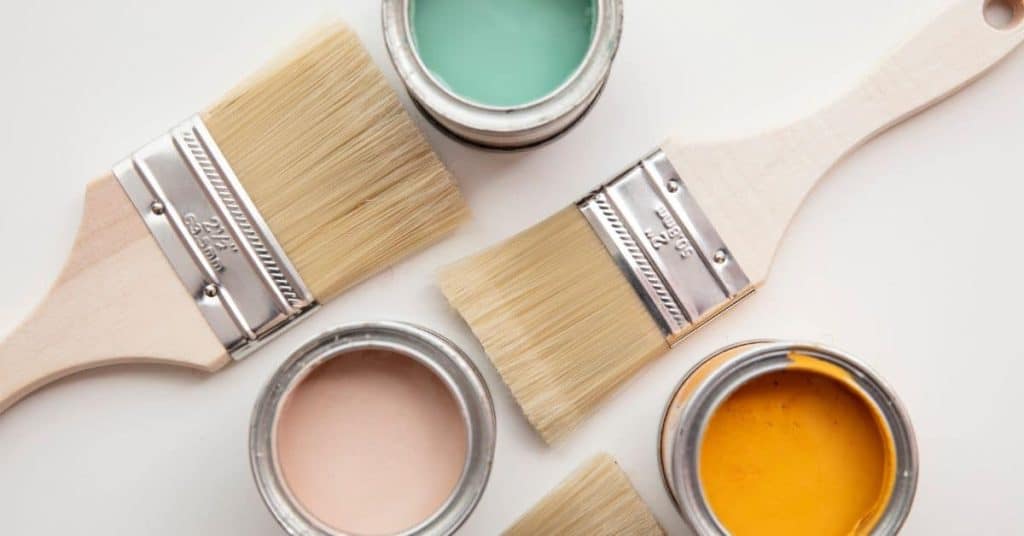
Best paint brushes are the tools you choose to apply paint smoothly and avoid common problems. Different brushes use fiber, natural bristle, or synthetic blends, and the right choice depends on the paint and surface. Think about stiffness, shape, and how you hold the brush to control coverage.
Problems like brush marks, shedding, and uneven edges come from poor fit between brush type and job. Check the brush label and manufacturer guidance for recommended use, and test on scrap material before starting. Clean and store brushes properly to keep them ready and extend life.
Key takeaways
- Understand brush types: natural bristle, synthetic, and fiber behave differently under coatings.
- Check stiffness and shape for your paint to reduce sags and streaks.
- Clean brushes thoroughly after use to extend life and prevent hardening.
- Inspect for loose ferrules and damaged bristles before starting each project.
- Test performance with edge painting, rolling, and quick-dip checks on practice boards.
- Safety: wear eye protection and dispose of contaminated brushes per local rules.
Table of Contents
- Introduction
- Key takeaways
- Quick Overview and How to Use This Guide
- Types of Paint Brushes: Materials, Shapes, and Intended Uses
- Common Brush Problems: Symptoms, Root Causes, and Quick Diagnoses
- Testing Brush Quality and Performance (Practical Tests You Can Do)
- Fixes and Maintenance: Cleaning, Reshaping, and Extending Brush Life
- Choosing the Right Brush: Professional Vs. DIY Lines, Brands, and Models
- Techniques to Avoid Common Mistakes and Improve Results
- Safety, Environmental Impact, and Disposal
- Conclusion
- FAQ
Quick Overview and How to Use This Guide
This guide helps DIYers and pros pick and use paint brushes for concrete projects, with quick troubleshooting and reliable buying decisions. You’ll learn to identify brush issues, run basic tests, and choose the right brush type and size for the job. You’ll also see how to clean and store brushes so they last longer.
Expect practical, step‑by‑step guidance on testing stiffness, shedding, and precision, plus how to compare bristle material, ferrule durability, and overall feel. The layout offers clear anchors for quick troubleshoot, brush material tests, and a buying checklist, plus a simple at‑home test to simulate rough concrete surfaces. This matters because good brushes save time, improve results, and prevent common frustration on a concrete project.
What readers will learn
This guide helps you identify and fix issues with your paint brushes for concrete projects. You’ll learn to:
Identify different brush types, their uses, and common problems.
Diagnose issues like shedding bristles or uneven paint pickup.
Test brush quality with simple at-home tests. Plus, you’ll get tips on maintenance and a buying checklist for informed decisions.
When to consult a pro versus DIY
While this guide empowers you, there are times when professional help is best:
Large historical restorations or hazardous coatings should be handled by pros due to safety and preservation concerns.
For DIY, stick to small to medium-sized projects with non-hazardous materials. If you’re unsure, it’s always better to err on the side of caution and consult a professional.
Types of Paint Brushes: Materials, Shapes, and Intended Uses
Brushes fall into three material families—natural hair, synthetic, and blended. Each material behaves differently with oil-based and water-based paints, and each has its own durability and price range. Ferrule shapes—round, flat, filbert, and angular—change how the brush holds and lays paint, while sizes from small to wide map to detail work or broad coverage.
Choosing the right combination saves you time and gives a better finish on drywall, cabinetry, or furniture. It matters for edge control, feathering, and cleanup—plus how long the brush lasts if you follow proper washing and conditioning. If unsure, check the product label or manufacturer instructions and test on scrap before committing.
Brush materials explained
The material of your paintbrush affects the finish, durability, and overall performance. Here’s a breakdown:
- Hog Bristle: Durable, stiff bristles. Ideal for oil-based paints, primers, and heavy-duty tasks.
- Sable/Synthetic Sable: Soft, fine bristles. Excellent for detail work, watercolors, and delicate surfaces.
- Nylon: Stiff, synthetic bristles. Good for latex/acrylic paints, heavy coverage, and outdoor projects.
- Polyester: Soft, flexible bristles. Suitable for water-based paints, varnishes, and fine detailing.
- Blends: Combination of materials. Offers versatility in handling various paint types and tasks.
Shapes and sizes and what they do
The shape and size of your brush determine coverage, edge work, and detail. Here’s how:
Shape:
– Round: Versatile for general use, broad coverage.
– Flat: Ideal for trim work, narrow surfaces, and cutting in edges.
– Angular/Filbert: Great for corners, fine detailing, and textured surfaces.
Size:
– 1/2″ to 1″: Fine detail work on small surfaces like furniture or trim.
– 1.5″ to 3″: General use, walls, and cabinets.
– 4″ and above: Large surface areas, broad coverage, and quick application.
Use-case matrix (acrylic, oil, latex, watercolor, primers, varnishes)
Matching the right brush to your paint and surface ensures optimal results:
Latex/Acrylic: Nylon or polyester brushes work best. Avoid natural bristles as they can dry out and stiffen.
Oil-based: Hog bristle or blended brushes are ideal. Natural bristles won’t absorb oil, maintaining flexibility.
Watercolor: Sable or synthetic sable brushes provide fine control and delicate application.
Primers/Varnishes: Round or flat nylon brushes offer good coverage and easy clean-up.
Common Brush Problems: Symptoms, Root Causes, and Quick Diagnoses
Common brush problems show up as shedding, splaying, visible brush marks, poor paint pickup, or hardening. Do quick checks: drag a dry scrap panel to feel the bristle tip, run a paint pickup test on a small patch, and inspect for bristle separation, water or solvent residue, and unusual drying times. These clues point to wear, cleaning, storage, or compatibility issues.
By mapping what you see to likely causes, you can fix it fast: clean and condition brushes, store them correctly between jobs, don’t overload the brush, choose the right brush type for the paint and surface, and note any changes in drying time between coats. This matters because it saves you time, improves finish quality, and reduces brush wear on ongoing projects. If in doubt, check the product label or manufacturer instructions for cleaning and storage guidelines.
Shedding and Bristle Loss
Bristles falling out during painting is a common issue. It’s either due to manufacturing defects or wear.
Manufacturing Defects: Check the ferrule (metal part). If it’s loose, bristles might fall out easily. A quick test: Gently tug on bristles; if many come out, it’s a defect.
Wear: Over time, bristles wear down and fall out. Inspect the brush; if ends are frayed or split, it’s worn out. Regularly check your brushes to avoid this.
Splaying, Flagging, and Uneven Strokes
Uneven paint application can be frustrating. It’s often caused by using the wrong brush for your paint or improper cleaning.
Wrong Brush: Use a test panel to check. If strokes are uneven, try a different brush type (e.g., switch from natural to synthetic).
Improper Cleaning: Check for dried paint in the ferrule. If present, clean thoroughly before use.
Overworking the paint can also cause splaying. Avoid overloading your brush and let paint flow naturally.
Paint Drying in Ferrule, Tackiness, and Odor Problems
Dried paint in the ferrule can cause tacky bristles. It’s often due to incompatible paints or solvent residue.
Incompatible Paints: Ensure you’re using the right paint for your brush (e.g., oil-based paint with an oil-based brush).
Solvent Residue: Smell the ferrule. If it has a strong solvent odor, there’s residue. Clean thoroughly before use.
Poor storage can also cause these issues. Always store brushes in a cool, dry place away from direct sunlight and heat sources.
Testing Brush Quality and Performance (Practical Tests You Can Do)
This section outlines practical, low‑tech tests you can do to judge a brush’s quality and performance, focusing on shedding, spring, tip retention, paint pickup and release, and how well the brush cleans up and holds up over time. You’ll compare a new brush with a suspect one by basic checks like tapping bristles on a clean sheet, watching for loose hairs and gaps, noting how the bristles bend and recover, and observing any tip fraying or flattening after painting with different kinds of paint. The goal is to build a simple, repeatable routine you can run at the job site to separate good brushes from poor ones without fancy equipment or guesswork.
Doing these checks helps you avoid slow days and patchy finishes by catching problems early, so you know if a brush will hold its shape, pick up material reliably, and release smoothly in a single pass. It also gives you a practical way to compare brushes from different brands or batches, understand how various paints behave with the tip, and decide when a brush has earned a rest or should be retired, all while keeping cleanup behavior in mind. If something doesn’t feel right, refer back to the label or datasheet and verify instructions for your paint type, then consider safer options or a different brush until you’re confident in its performance.
Five-minute bench tests
Before you start any project, perform these quick tests to check your brush’s quality. You’ll need a clean sheet of paper, some paint, and a test card.
Water Soak and Rub: Dip the brush in water, then rub bristles on the paper. If it sheds more than 3-5 hairs, consider another brush.
Paint Load/Release: Load the brush with paint, stroke it on the card, then pull it off. A good brush should release smoothly without leaving clumps or streaks.
Stroke Consistency: Make a few strokes on the card. The lines should be even and consistent. If they’re uneven or splay out, the brush might not be up to par.
Long-term endurance and cleaning-cycle test
To predict a brush’s lifespan, simulate repeated use and clean cycles. Here’s how:
Repeated Use: Paint with the brush for 10-15 minutes, then let it soak in its respective solvent (water, soap, or solvent). Repeat this cycle 5-10 times, checking bristle loss each time.
Shape Retention: After each cycle, check if the brush’s shape holds. A good brush should maintain its shape even after multiple uses and cleanings.
Track bristle loss and shape retention. If you see significant loss or change in shape, it might be time to replace the brush.
Measuring value: performance vs. cost
To compare brushes, consider these metrics:
Cost per Useful Hour: Divide the brush’s cost by its expected useful hours (calculated from your endurance tests). Lower is better.
Consistency and Replacement Rate: Consider how consistently the brush performs and how often you’ll need to replace it. A cheaper brush might seem like a good deal, but if it needs frequent replacement, it could cost more in the long run.
Here’s what to expect by quality tier:
– Budget: Low cost, short lifespan, inconsistent performance.
– Mid-range: Balanced cost and lifespan, consistent performance.
– High-end: High cost, long lifespan, excellent performance.
Fixes and Maintenance: Cleaning, Reshaping, and Extending Brush Life
This section covers practical cleaning methods for water-based and solvent-based paints, plus reshaping techniques, storage, and knowing when a brush should be replaced to extend its life. You’ll get clear steps, safety cues, and quick tests to judge clogging or wear before you keep it, reshape it, or call it done. Expect guidance on gentle cleaning with warm water and mild soap for water-based paints and proper thinners, ventilation, and disposal considerations for solvent paints.
Getting this right saves you time, hassle, and money, and it keeps edge control for precise work. Immediate post-use care, routine maintenance cadence, and storage that preserves bristle alignment all matter for longevity. Always check local disposal rules and options when a replacement becomes necessary.
Immediate post-use cleaning routines
After each use, clean your brush promptly to prevent paint from drying and damaging the bristles. Here’s how:
For water-based paints (acrylics, latex): Use warm water and mild soap. Gently agitate the bristles in the water, then rinse thoroughly.
For oil-based paints: Use appropriate paint thinner or brush cleaner. Work the liquid into the bristles, then wipe the excess on a rag before rinsing with water.
Deep cleaning, solvent treatments, and ferrule cleaning
Sometimes, a thorough clean is needed. Use stronger solvents sparingly and follow these steps:
Solvents: Soak the brush in appropriate thinner or cleaner for 15-30 minutes, then agitate gently. Rinse with water.
Ultrasonic cleaners: Follow manufacturer’s instructions. Use only paint-specific cleaner to avoid damaging bristles.
Ferrule cleaning: Use a wire brush or toothpick to remove dried paint from the ferrule. Be gentle to avoid scratching.
Reshaping, conditioning, and minor repairs
Over time, bristles can splay or become misshapen. Here’s how to fix that:
Reshaping: Wet the brush, then use your fingers or a comb to reshape the bristles. Natural bristles may need conditioning with oil.
Trimming stray hairs: Use sharp scissors to trim any long or splayed bristles. Be careful not to cut too much.
Loose ferrules: Tighten temporarily using pliers, being careful not to damage the ferrule. For permanent repair, take it to a professional.
Choosing the Right Brush: Professional Vs. DIY Lines, Brands, and Models
Professional-grade brushes differ from consumer DIY brushes in materials, construction, and performance guarantees. Pro brushes use higher quality ferrules, tougher handles, and bristles chosen for durability and edge control, which matters when priming, smoothing, or applying epoxy coatings on concrete. For most DIY projects, a good consumer brush can work, but you’ll see better results and less rework with pro-grade options on demanding surfaces. Choose according to project type, from interior priming to exterior sealers, and remember that the right brush can reduce brush marks and improve flow. Think about the finish you want—smoother, more uniform film—and pick accordingly.
Use this as a guide to choosing: interior walls, exterior surfaces, and different coatings each demand different bristle types, stiffness, and edge control. Look at hold, stiffness, and how the brush feels on a test stroke; testing is cheap compared with redoing a bad coat. Save on misfires by factoring in cleaning routines, drying times, and expected wear, since ferrules and handles take the most abuse. Check the product label or datasheet for suggested life per workload, and remember to check local disposal rules for any leftovers. Also consider a quick maintenance checklist to extend life: rinse, reshape bristles, and dry upright.
Recommended brands and models
Choosing the right paint brush isn’t just about price. You want one that’ll perform well, last long, and give you a professional finish. Here’s what to look for in top-performing lines.
First off, check the bristles. Synthetic or blended bristles are usually best for concrete work. They hold paint well, don’t absorb water, and won’t leave behind natural fibers. Look for ones that are sturdy but flexible – they’ll give you good edge control and coverage.
Next, inspect the ferrule. It should be securely attached to the handle, not wobbly or loose. A good ferrule will keep its shape under pressure and won’t rust or bend out of place.
Lastly, consider the handle. It should feel comfortable in your hand, not too light or heavy. Wooden handles are classic but can be slippery when wet. Plastic ones offer better grip but might not have the same durability.
Budget strategies and lifetime cost analysis
Paint brushes aren’t all created equal, and neither are their prices. You can find decent ones for a few bucks, but they might not last as long or perform as well.
Here’s how to balance upfront cost with replacement frequency:
Cheap brushes ($5-$10) – They’re great for small jobs or one-time use. But expect to replace them often, maybe even mid-project if they shed or splay.
Mid-range brushes ($10-$20) – These offer better performance and durability. You’ll likely get through a few projects before needing to replace them.
High-end brushes ($20+) – They’re pricey upfront but can last for years with proper care. If you’re a frequent painter, they might save you money in the long run.
Where to buy and what to check on arrival
Before you start painting, make sure your brush is in tip-top shape. Here’s a quick checklist to use when you get your new brush.
- Smell test: Give it a sniff. If it smells strongly of chemicals or solvents, let it air out before using.
- Hair check: Run your fingers through the bristles. No loose hairs should come out.
- Ferrule fit: Gently tug on the ferrule. It shouldn’t move around or feel loose.
- Handle check: Give the handle a squeeze. It should feel sturdy, not bendy or weak.
- Tip shape: The tip should be well-shaped and even. If it’s splayed or uneven, reshape it with some warm water.
- Packaging: Check for any damage during shipping. A dented box could mean a damaged brush inside.
- Bristle stiffness: Gently bend the bristles. They should spring back into shape, not stay bent or break off.
- Paint test: Dip it in paint, then run your finger along the bristles. No paint should come off on your finger if the brush is good.
Quick rule: If anything feels or looks off, don’t use that brush. It’s better to return it and get a new one than to start a project with a faulty tool.
Techniques to Avoid Common Mistakes and Improve Results
A practical approach to this H2 means tackling brush work step by step: loading the brush properly, dialing in the right angle, and choosing stroke directions that build smooth, even coverage from edge to edge. You’ll also practice quick drills on scrap boards to get a feel for how the brush carries paint, how it lays out, and how to avoid overload before you touch the real surface. Cutting in at the edges, blending with the surrounding coat, and handling detail work with smaller or angled brushes all come from a deliberate routine and steady movements.
This matters because small errors compound quickly on concrete surfaces, leaving lap lines, halos, or rough texture that’s hard to correct later. The right techniques let you crisp corners, protect trim and outlets, and achieve uniform texture that respects the concrete pores. You’ll see the benefit in fewer reworks, cleaner transitions, and a finish that looks deliberate rather than rushed, with practical fixes like adjusting reload cadence, back-brushing, and light re-rolling when needed.
Application techniques for different surfaces
Different surfaces require varying brush strokes, load amounts, and pressure. Here’s how to adapt your technique:
Walls: Use long, smooth strokes from top to bottom. Load the brush about halfway up the bristles. Apply light pressure for even coverage.
Trim: For detailed work, use a smaller brush with shorter bristles. Lightly tap the paint onto the surface using short, gentle strokes.
Furniture & Canvas: Use a synthetic or natural bristle brush depending on the paint type. Apply light pressure and use smooth, even strokes. For canvas, work in one direction to avoid visible brush marks.
Textured surfaces: Use a larger, stiffer-bristled brush for better control. Work in small sections, applying more pressure where needed to fill the texture.
Avoiding brush marks and streaking
Brush marks and streaks are common mistakes that can ruin your paint job. Here’s how to avoid them:
- Overworking: Avoid overworking the paint, as this can cause it to dry unevenly and leave visible strokes.
- Wrong brush: Using a brush with the wrong bristle type or length for your surface can lead to streaking. Choose the right brush for the job.
- Improper thinning: Thinning paint too much can cause it to streak and drip. Follow the manufacturer’s guidelines for thinning.
- Dry brushing: Brushing over dried paint can cause it to flake off, leaving visible marks.
- Wrong stroke direction: Painting in different directions on each coat can leave visible lap marks.
To avoid these issues, work quickly but carefully. Use the right brush and apply the correct amount of paint. Work in one direction and maintain consistent pressure.
Planning and preparation checklist for painting projects
Before you start painting, use this checklist to ensure a smooth process:
- Surface prep: Inspect the surface for damage. Sand, prime, and clean as needed.
- Primer choice: Choose a primer that suits your paint type and surface. This ensures better adhesion and coverage.
- Brush selection: Select the right brush based on the surface and paint type. Synthetic for latex, natural for oil-based.
- Environmental considerations: Check the weather forecast. Paint in temperatures between 50-90°F (10-32°C) for best results.
- Paint condition: Check your paint’s consistency and thin if necessary. Stir well before use.
- Coverage area: Calculate the square footage to ensure you have enough paint.
- Safety measures: Gather safety gear – gloves, goggles, drop cloths, etc.
- Cleanup supplies: Have soap and water ready for brush cleaning. For oil-based paints, have mineral spirits or paint thinner on hand.
Quick rule: Always inspect your surface before painting. Skipping this step can lead to poor adhesion and visible imperfections in your finished project.
Safety, Environmental Impact, and Disposal
Safety around solvents, VOCs, and old paints starts with recognizing the risks and choosing the right PPE: sturdy gloves, a respirator or suitable mask, eye protection, and good ventilation. Use local exhaust when available and continuously move air through the space, especially indoors, and give paints and brushes a chance to air out after brushing. For older structures or brushes, identify any lead paint risks by testing when indicated, handle suspected materials with extra care, and encapsulate or dispose of hazardous waste according to local guidance, not by guessing.
This matters because improper handling can expose you and your family to fumes, skin irritation, or long‑term health concerns, and it can complicate cleanup and disposal later. Keep cleaning solvents for brushes in a labeled container, wash rags safely or dispose of contaminated material properly, and store brushes in a way that prevents solvent evaporation. When in doubt, read product labels and manufacturer instructions, consult local guidelines on household hazardous waste, and consider non‑toxic or low‑VOC paint options if available to reduce environmental impact and simplify disposal.
Safe handling of toxic paints and solvents
Painting with concrete products involves working with hazardous materials like solvents, VOCs, and ammonia. Always check product labels and Material Safety Data Sheets (MSDS) for safety information.
Protect yourself: Wear gloves to prevent skin contact, use a respirator with a particulate filter or an organic vapor cartridge for solvent-based paints, and wear eye protection.
Ventilation: For indoor projects, open windows and use fans to maintain at least 3-5 air changes per hour (ACH). For outdoor projects, ensure there’s enough space for open-air drying. Never paint in enclosed spaces without proper ventilation.
Environmentally friendly choices and disposal
Choose low-VOC or zero-VOC paints to minimize environmental impact. Look for the Green Seal, EcoLogo, or other eco-friendly certifications.
Brush disposal: If a brush is beyond reuse, check local recycling programs. Some accept paintbrushes for repurposing or proper disposal. Otherwise, dispose of them with regular trash, but avoid landfills if possible.
Solvent waste: Never pour solvents down drains. Allow solvent-soaked rags to dry completely in a well-ventilated area before disposing of them in the trash. Consider using non-toxic cleaners and solvents where feasible.
Regulatory and local disposal considerations
Before disposing of paint waste or brushes, check local regulations for hazardous waste. Some areas require special handling or collection events.
Temporary storage: Store leftover paint and used brushes in a cool, dry place away from heat sources and direct sunlight. Keep them in their original containers with lids tightly sealed to prevent leaks.
Transportation: When transporting hazardous waste for disposal, follow local rules. Typically, you’ll need to use approved containers and keep materials separate from other trash. Always transport materials upright to prevent spills.
Conclusion
Picking the right brush and testing it in small steps protects your results, your surfaces, and your own safety. When you stay disciplined about setup, testing, and maintenance, you get cleaner coats, fewer reworks, and a finish that lasts.
First, assess your project type and the brush type that fits it, then run a quick quality check: load a small amount of paint, drag on a test area, look for even coverage, then clean and reshape the tool before you proceed. Use the guide to guide your choices, test in a hidden spot first, and keep safety gear handy as you go.
Avoid common missteps like overloading the brush, using dirty or incompatible paint, and skipping cleaning or reshaping after a session. Always wear eye and skin protection, work with good ventilation, and dispose of waste materials properly. If the job requires specialized coatings, large surfaces, or unfamiliar techniques, don’t force it—pause, reassess, and consider a professional for the tough parts.
When in doubt about the right brush line or brand for your budget and project, or if you hit persistent problems that testing and fixes don’t solve, call in a pro. With the right tool, a clear plan, and careful testing, you’ll finish strong and stay on track for durable, good-looking results.
FAQ
What are the main types of paint brushes and how do I choose between them?
Brush types include fiber, natural bristle, and synthetic. Synthetic brushes are versatile for most paints, but natural bristle works better with oil-based finishes if the manufacturer allows it. Check the label or datasheet for the recommended uses and compatible paints.
How do I judge a brush’s stiffness and how it affects my project?
Stiffness matters for cut-in work and rough surfaces, while softer brushes lay paint smoothly on flat walls. If the brush feels too stiff, it will leave streaks; if too soft, it may shed and take longer. Always test on a scrap piece or an inconspicuous area first.
What are common painting problems caused by brushes and how can I avoid them?
Common problems include brush marks, shedding, and uneven coverage. Use the right brush for the paint type, keep bristles hydrated if needed, and avoid overloading the brush. If issues show up, review the manufacturer’s instructions for that product and adjust technique accordingly.
How should I test a brush’s performance before committing to a job?
Test by loading a small amount of paint and applying on a scrap surface with even strokes. Check for smooth laydown, no excessive shedding, and good edge control. If it doesn’t perform well, switch to a different brush type or model and re-test.