

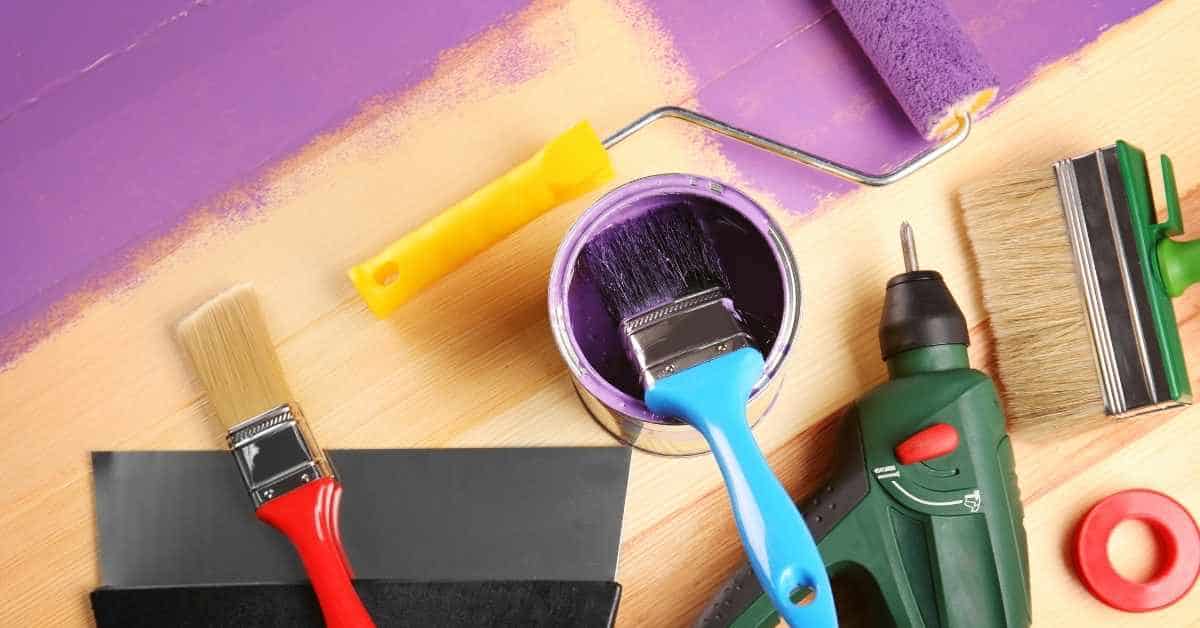
Introduction
Paint problems are coating issues that signal a need to diagnose, test, and fix.
From peeling and bubbling to dull patches, these signs point to what happened under or on the surface. This article walks you through what to look for and how to handle common DIY fixes safely.
Testing matters, especially to check for lead-based paint or other hazards before sanding or scraping. Choose simple, safe methods and follow manufacturer instructions for any products you use, and check local rules. I’ll cover practical fixes and safety steps you can take with basic tools, plus when it’s time to call in a pro.
Key takeaways
- Prioritize addressing peeling, bubbling symptoms before painting; proper prep matters.
- Test for lead-based paint with approved kits and local guidelines before disturbance.
- Moisture control is key; fix leaks and condensation before repaint to prevent issues.
- For stubborn problems, choose between DIY fixes and professional assessment options.
- Use compatible primers and paints; follow manufacturer instructions for surface prep.
- Wear PPE, dispose of hazardous materials properly, and follow local regulations.
Table of Contents
- Introduction
- Key takeaways
- Quick Overview: Why Paint Problems Matter
- Causes: What Creates Paint Problems
- Recognizing Signs: Visual and Sensory Checkpoints
- Testing and Diagnosis: How to Confirm the Cause Safely
- Fixes and Step-by-Step Repairs (DIY and Pro Options)
- Prevention, Maintenance, and Planning to Avoid Future Problems
- Costs, Common Mistakes, and Decision-Making
- Conclusion
- FAQ
Quick Overview: Why Paint Problems Matter
This article explains what can go wrong when painting concrete and why it matters for ongoing performance. You’ll learn the causes, how to test for them, and practical fixes you can try. It also covers safety reminders and when to call a professional for tricky cases.
Readers include homeowners, renters, landlords, DIYers, and pros who want a practical, step by step view. You’ll see how surface prep, testing, and choosing the right primers and paints fit into a simple workflow. Stay mindful of safety and disposal guidelines as you work.
Common paint problem categories
Paint problems on concrete surfaces can manifest in various ways. Here are the most common issues you might face:
Peeling/Blistering: Paint lifting or bubbling from the surface, often due to poor adhesion or moisture.
Cracking/Chalking: Fine cracks or a powdery residue (chalking) on the paint’s surface, indicating wear and tear or improper curing.
Discoloration/Mold/Stain Growth: Changes in color or appearance of paint, often caused by moisture intrusion, mold, or mildew. Adhesion failure can also lead to these issues.
How to use this guide
This guide is structured to help you tackle paint problems on concrete step-by-step:
Diagnose Causes: We’ll start by identifying the root causes of common paint problems, helping you understand what’s happening.
Test and Inspect: Next, we’ll provide simple tests and visual cues to confirm your diagnosis and assess the severity of the issue.
DIY Fixes: Once you’ve identified the problem, we’ll offer practical solutions and step-by-step instructions for tackling it yourself.
When to Hire Pros: While many paint problems can be fixed by DIYers, some require professional help. We’ll guide you on when to call in the experts.

Causes: What Creates Paint Problems
Root causes fall into a few clear categories, with moisture and surface prep at the top. Knowing how these interact helps you diagnose symptoms as they appear. Environmental and material factors set the stage for what you see on the surface.
Common symptoms map to specific causes, like peeling from moisture or contamination, and chalking from UV exposure. You’ll also consider how the coating history and substrate age influence outcomes. Use this guide to plan practical fixes and product choices that address the root cause.
Surface and Substrate Issues
Poor surface preparation is a common cause of paint problems. If your surface wasn’t clean, dry, and free of contaminants, your paint won’t stick properly.
Incompatible primers or paints can also lead to issues. For example, using an oil-based primer under latex paint can cause peeling.
Old oil-based paint over latex can also cause problems. As the oil ages, it becomes more brittle and can crack or peel, taking your new paint with it.
Chalky surfaces are a sign of UV degradation, where sunlight has broken down the paint’s binder. Substrate movement, like settling or expansion due to temperature changes, can also cause cracking in your paint.
Moisture and Water-Related Causes
Water is the enemy of paint. Leaks, condensation, or high humidity can cause peeling, bubbling, or mold growth.
Rising damp in basements or ground floors can wreak havoc on your paint job. Hidden leaks behind walls can also cause staining and peeling as water finds its way to the surface.
If you suspect moisture intrusion, perform a moisture test using calcium chloride or a moisture meter. This will help confirm if water is the culprit.
Proper ventilation is key to controlling humidity levels. In bathrooms and kitchens, use exhaust fans to remove excess moisture from the air.
Environmental and Application Factors
Temperature plays a big role in paint application. Most paints have recommended temperature ranges for application and drying. Stick to these for best results.
Sunlight/UV exposure can degrade your paint over time, causing chalking or fading. Try to keep outdoor surfaces shaded during the hottest part of the day if possible.
Pollution can also affect your paint job. Dirt and grime in the air can settle on your surface and interfere with adhesion. Make sure your surface is clean before painting.
Improper application conditions, like applying paint too thick or not giving it enough drying time, can lead to problems. Always follow the manufacturer’s instructions for application and drying times.
Recognizing Signs: Visual and Sensory Checkpoints
Start with a thorough visual survey for peeling, blistering, cracking, chalking, and staining. Note where damage concentrates and whether it spans old and new paint layers. Location clues help point to likely causes.
Moisture indicators and odor signals alert you to problems behind the surface. Document symptoms with photos and simple tests, and be ready to involve a pro if lead or mold risk is suspected. Safety notes and PPE are part of every inspection.
Visual symptoms and what they mean
Use this checklist to identify common paint problems and their causes.
- Peeling: Check edges, corners, and joints. Causes: Poor prep, moisture, or old age.
- Blistering: Inspect for bubbling over concrete or damp patches. Causes: Moisture, high humidity, or poor ventilation.
- Cracking: Look for fine lines or deep fissures. Causes: Age, substrate movement, or improper application.
- Chalking: Wipe with a damp cloth to check for residue. Causes: Sun exposure, poor quality paint, or age.
- Efflorescence: Check for white, powdery deposits. Causes: Moisture through concrete or masonry.
- Staining: Inspect for discoloration or spots. Causes: Water marks, mold, or mildew.
- Color fading: Compare to original color. Causes: Sun exposure, age, or poor quality paint.
Quick rule: If you see any of these signs, don’t just repaint – find and fix the cause first.
Smells, stains, and health red flags
Use this checklist to identify potential hazards and when to test for them.
- Musty/earthy smell: Check for mold or mildew. Causes: Water damage, high humidity, or poor ventilation.
- Solvent/chemical odor: Inspect for improperly cured paint. Causes: Poor ventilation, off-gassing from new coatings.
- Ozone-like smell: Check for recently applied coatings. Causes: New paint or sealant off-gassing.
- Skin/eye irritation: Note duration and if symptoms abate after airing out. Causes: Chemical exposure, improper surface prep.
- Headaches/dizziness: Check for prolonged exposure to fumes. Causes: Improper ventilation, off-gassing from new coatings or spent paints.
Quick rule: If you smell something unusual or experience health symptoms, stop work immediately and test for hazards before proceeding.
Testing and Diagnosis: How to Confirm the Cause Safely
Use practical moisture checks on concrete, look for damp patches, and observe signs like efflorescence to triage temporarily vs sub-surface moisture. A quick, repeatable approach helps you decide on the next step. Keep notes on conditions during testing.
Adhesion tests and surface cleanliness checks guide whether you need re-priming or more extensive prep. Consider hazardous materials like lead or mold and follow safety precautions when screening. The results help you plan painting strategy and compatible coatings.
DIY tests and tools
Before you start painting, grab some simple tools to test your concrete surface. Here’s what you need:
- Tape pull test for adhesion: Use painter’s tape and a sharpie. Mark the area, apply tape, press firmly, let it sit 24 hours, then pull off quickly. If paint comes off, re-prime or prep surface.
- Moisture meter (optional, $30-$100): Press probe into concrete, read moisture content. Ideal for quick checks; rentals available.
- Water and blot tests: Dab water on surface with cloth. If it darkens or doesn’t dry quickly, you’ve got moisture issues.
- Visual inspection: Look for efflorescence (white powder), staining, or cracks. These could indicate moisture problems.
- Penetrating moisture meters (optional, $100-$300): Drill small holes, insert probe, read moisture levels deep within the concrete. Worth it for serious moisture checks.
Hazard testing: lead, asbestos, mold, and chemicals
Safety first! Before you test, wear gloves, goggles, and a mask. For serious hazards:
Lead-based paint (pre-1978 structures): Use certified labs or EPA-approved kits ($15-$20). If positive, hire pros for safe removal.
Mold testing: Look for visible mold, musty smells. For hidden mold, use DIY tests ($10-$30) or send samples to labs. If extensive, call pros.
For asbestos, suspect if you find old insulation, tiles, or textured paint. Don’t disturb! Hire certified pros for testing and removal.
When to call a professional inspector
DIY tests are great, but sometimes you need a pro. Here’s when:
Extensive damage: If your concrete has major cracks or crumbling, hire an engineer for structural assessment.
Structural moisture: If DIY tests show high moisture levels deep within the concrete, call pros to find the source and fix it.
Suspected toxic hazards: If you suspect lead, asbestos, or extensive mold, hire certified inspectors for safe testing and removal. They’ll provide a detailed report.
Rental/landlord disputes: If you can’t agree on who’s responsible for repairs, both parties might need to hire independent inspectors.
Fixes and Step-by-Step Repairs (DIY and Pro Options)
Use a clear decision path to choose DIY fixes or professional help based on problem type and safety concerns. Focus on one repair per plan and move to the next step only after the previous work is confirmed to be stable. This keeps the job organized and safer.
Follow prioritized workflows for common issues such as peeling, moisture, efflorescence, and adhesion problems. Prepare surfaces properly, select the right primers, and manage moisture before applying coatings. Use this as a practical toolbox rather than a one-shot fix.
Step-by-Step Repair Process
This section guides you through a clear, practical sequence of repairs for common concrete paint problems.
- Inspect the area: Identify the extent and type of damage. If structural or safety concerns arise, call a pro.
- Prep the surface: Clean, grind rough spots, and prime using an appropriate primer like acrylic or epoxy.
- Repair cracks/pits: Use a concrete patching compound to fill cracks and pits. Allow it to cure according to manufacturer’s instructions.
- Paint application: Apply paint in thin, even coats following the manufacturer’s guidelines for drying times.
- Final checks: Inspect your work after each step to ensure quality. If issues arise, troubleshoot or consult a pro.
Surface Prep and Repainting Fixes
Proper surface preparation is key to lasting paint repairs. Here’s how to clean, prime, and paint your concrete.
Start by cleaning the surface using a degreaser or concrete cleaner. Rinse thoroughly and allow it to dry. Lightly sand any rough spots with fine-grit sandpaper.
Apply an appropriate primer. For epoxy paints, use an epoxy primer. For acrylic, use an acrylic primer. Follow manufacturer’s instructions for application and drying times.
Select a paint compatible with your primer. Apply in thin, even coats following the manufacturer’s guidelines for drying times. Ensure proper ventilation during application and drying.
Moisture and Leak Remediation Before Painting
Before repainting, it’s crucial to address moisture issues to prevent recurrence. Here’s how:
First, diagnose the source of moisture. Check for leaks, condensation, or high humidity levels. If unsure, perform a simple moisture test using a hygrometer.
Fix any leaks and improve ventilation. For condensation, increase air circulation or insulate cold surfaces. Allow the area to dry thoroughly before painting. Use dehumidifiers if necessary.
Apply a moisture barrier primer or sealer before painting to further protect against moisture intrusion. Follow manufacturer’s instructions for application and drying times.
Hazard-specific Remediation (Lead, Mold)
If your concrete contains lead or mold, safety is paramount. Here’s how to handle these hazards:
For lead, assume all paint is contaminated until tested. Wear protective clothing and a respirator. Contain the area using plastic sheeting. Remove loose paint carefully and dispose of it as hazardous waste.
For mold, wear gloves, goggles, and a respirator. Contain the area and remove moldy materials. If mold covers more than 10 square feet, hire a certified abatement professional. Follow local guidelines for disposal.
After remediation, test again to ensure safety before painting. Consult local resources for costs and legal responsibilities related to lead and mold abatement.
Prevention, Maintenance, and Planning to Avoid Future Problems
Seasonal maintenance tasks help you catch issues early and keep surfaces in good shape. Check for cracks, efflorescence, and peeling paint while planning cleaning before seasonal shifts. Regular checks prevent surprises down the line.
Choose compatible materials and manage the environment to resist moisture and temperature swings. A preventative painting schedule with documentation helps track coatings, conditions, and weather windows for proper curing.
Material and finish selection guide
Choosing the right materials for your concrete surfaces is crucial to ensure a long-lasting, durable paint job. The wrong choice can lead to cracking, staining, or weak bond.
- Interior Concrete: Acrylic Latex Paint – Moisture-resistant, flexible, and easy to clean. Look for high-solids content (40%+) and mildew resistance.
- Exterior Concrete: Elastomeric Coatings – Highly elastic, can bridge hairline cracks, and suitable for exterior exposure. Choose 100% acrylic with good adhesion and UV protection.
- Basement Concrete: Epoxy Paint – Excellent moisture resistance, durability, and chemical resistance. Opt for 100% solids epoxy with a high gloss finish.
- Concrete Primers: Bonding Primers – Improve adhesion, seal porosity, and promote better paint performance. Select one that’s compatible with your chosen topcoat.
- Sealers: Silane/Siloxane Sealers – Deep-penetrating, water-repellent sealers that protect against moisture intrusion. Use before painting for added protection.
Climate and home-care tips
Maintaining a suitable climate inside your home is key to extending the life of your painted concrete surfaces. High humidity, poor ventilation, and moisture intrusion can lead to paint failures.
Control Humidity: Use dehumidifiers in damp areas, ensure proper ventilation in bathrooms and kitchens, and maintain a consistent indoor temperature.
Regularly inspect and maintain your roof, gutters, and downspouts to prevent water damage. Keep landscaping away from the home’s foundation to discourage moisture intrusion.
Inside, avoid activities that generate excessive moisture (e.g., boiling large pots of water) and ensure proper ventilation when using humidifiers or steam cleaners.
Costs, Common Mistakes, and Decision-Making
Understand typical cost considerations for DIY work versus hiring pros, and how project scope changes pricing. We’ll contrast quick fixes with longer-lasting solutions and what each approach entails. Use this to plan a sensible budget and timeline.
Compare material choices and their trade-offs, and learn which mistakes tend to drive up costs or reduce durability. Quick checks for lead paint, moisture, and scope complexity help guide whether to DIY or hire a pro, plus a simple contractor selection checklist for reliability.
Typical cost factors and budgeting tips
The price of a paint job varies based on several line items. Here’s what to consider when budgeting.
Preparation: Surface prep, including cleaning, sanding, and patching, can add $0.50 – $2 per square foot. It’s crucial for a lasting finish but often skipped by DIYers, leading to costly re-dos.
Primer: A good primer can cost around $15 – $30 per gallon and helps paint adhere better, reducing the need for extra coats. Skipping it may lead to peeling or poor coverage.
Materials: Paint prices vary by type: latex ($15 – $40 per gallon), oil/alkyd ($20 – $60). Specialty paints like mold/mildew resistant coatings can cost up to $50 per gallon. Consider surface conditions when choosing materials.
Common diagnostic and repair mistakes to avoid
Certain missteps can drive up costs or reduce durability. Here are some common pitfalls:
- Skipping surface prep: This leaves a poor base for paint, leading to peeling, cracking, or uneven coverage.
- Painting over active moisture/mold: Without proper remediation, your paint job will fail quickly and may cause health issues.
- Misidentifying causes: Incorrectly diagnosing problems leads to ineffective fixes. Always test first (see Testing and Diagnosis).
- Using incompatible products: Applying the wrong paint for a given surface can result in poor adhesion, peeling, or discoloration.
Taking shortcuts may seem cost-effective initially but often leads to more expensive re-dos down the line. Always address underlying issues before painting.
Checklist before you start a repair or hire help
Before diving into any paint job, consult this pre-work checklist to ensure success and safety.
- Testing: Confirm moisture levels are safe (less than 16% relative humidity), test for hazards like lead paint, and assess surface conditions.
- Permits/Regulations: Check if your project requires permits. Follow local regulations regarding waste disposal and safety standards.
- Materials/Tools: Gather all necessary supplies, including paint, primer, brushes, rollers, sandpaper, drop cloths, etc.
- Timeline: Plan your project to ensure enough time for proper curing and drying between coats.
- Safety Plans: Have a plan for protecting yourself (respirators, gloves) and others (signage, ventilation).
Quick rule: Always test first, gather all materials, and plan your project thoroughly before starting any paint job.
Conclusion
Paint problems threaten durability, appearance, and safety. By testing properly, choosing the right fix, and planning for maintenance, you protect the work and your investment.
Check in this order: inspect for obvious signs, test a small area to confirm the cause, choose a repair path (DIY quick fixes or professional help for the hard spots), then recoat and seal with proper prep. Keep the area clear, follow the product labels, and document what you did so future projects follow the same safe, proven steps.
Common mistakes to avoid are skipping the small test area, ignoring surface preparation, and rushing repairs without proper drying or ventilation. Always wear proper safety gear, ventilate, remove or protect nearby surfaces, and don’t mix products unless the labels allow it. If a problem looks unusual, or if moisture, structural damage, or coating failure repeats after a fix, pause and reassess rather than pushing ahead.
If the issue involves persistent moisture, major substrate damage, or complex coating systems, call a professional rather than improvising. When in doubt, step back, test again, and plan a careful repair with a clear timeline. Stick to the plan, and you’ll finish with a durable, good-looking result you can trust.
FAQ
What causes peeling or bubbling paint and how do I fix it?
Peeling and bubbling happen when the surface isn’t prepared, moisture gets behind the coating, or the old paint is incompatible with the new layer. Start by identifying moisture sources, removing loose paint, and priming with a suitable primer before re painting. If you’re unsure about the repair steps, check the product labels or manufacturer instructions for surface prep and compatible primers.
How can I test for lead-based paint safely?
Look for old paint in homes built before the 1970s and use a consumer lead test kit or hire a qualified tester. Follow the kit instructions exactly and wear gloves and a mask as recommended. If a test comes back positive, stop sanding or heat work and consult local guidelines for safe abatement options.
What safety steps should I take when dealing with old paint?
Wear eye protection, a dust mask or respirator, and gloves. Keep the area well ventilated and contain the work space to prevent dust spread. If you’re unsure about hazards or containment, pause and ask for guidance before proceeding.
How can I prevent future paint problems through prep and maintenance?
Clean and dry the surface before painting, repair cracks, and use compatible primers. Control moisture and humidity around the area, and choose products labeled for the surface you’re treating. Regular checkups after painting help catch issues before they become big problems.