
Introduction
Best concrete paints are coatings that bond well to concrete, resist wear, and keep color under foot traffic. Their performance depends on concrete condition, surface prep, and choosing the right type for indoor or outdoor use. Always check the product label and manufacturer instructions for surface prep, cure times, and compatibility before you buy.
Common causes of poor paint performance include dirty, dusty, or oily surfaces, old flaking paint, and inadequate priming. A simple adhesion check is to lightly scratch a small area and see if the new coat sticks, then follow with proper cleaning and suitable surface treatment as needed. Fixes are hands-on and practical: clean thoroughly, fix cracks if needed, apply a compatible primer, and use multiple thin coats rather than one thick coat.
Key takeaways
- Verify surface moisture levels before painting to avoid peeling later.
- Clean and etch or roughen glossy concrete to boost adhesion.
- Prime properly with a compatible concrete primer for best results.
- Test small area after coating dries to catch issues early.
- Use ventilation and PPE; avoid fumes and skin contact during work.
- Always follow manufacturer instructions; never mix paints with incompatible products or solvents.
Table of Contents
- Introduction
- Key takeaways
- Why Concrete Paint Fails: Common Causes
- How to Choose the Best Paint for Your Concrete
- Prepping Concrete for Painting: Step-by-Step
- Testing Concrete Before Painting
- Fixes and Remediation Strategies
- Application Best Practices and Tools Checklist
- Maintenance, Longevity, and When to Repaint
- Product Recommendations and Comparison Criteria
- Conclusion
- FAQ
Why Concrete Paint Fails: Common Causes
Moisture behind the coating is a frequent killer. Alkalinity from the concrete can attack the bond over time, especially with the wrong primer or paint. Poor surface prep and using the wrong paint type for the substrate are common culprits as well.
Visible signs like peeling, bubbling, or efflorescence point to ongoing movement or moisture issues. Substrate movement and improper compatibility between coatings can lead to early failure and maintenance headaches. Always check product labels and manufacturer instructions for compatibility with concrete and color coats.
Moisture and Hydrostatic Pressure
Concrete’s porous nature traps moisture. When paint is applied over wet concrete, it can’t adhere properly. This leads to peeling and blistering.
Rising damp pushes water up through the concrete, causing similar issues. You’ll see efflorescence – a white, chalky deposit – where this happens.
Hydrostatic pressure builds up when there’s too much moisture behind the paint. It forces the paint off the wall, resulting in severe peeling and failure.
High Alkalinity and Chemical Incompatibility
Concrete is alkaline by nature. This can react with some paints, preventing them from sticking or causing them to break down over time.
Latex paints are generally more tolerant of alkalinity but may still fail if the concrete’s too fresh or the alkalinity’s too high. Epoxy paints, on the other hand, are designed to withstand harsh chemical environments.
Pro tip: Always test your paint on a small area first. If it bubbles up or peels off quickly, it’s not compatible with your concrete’s alkalinity.
Surface Contamination and Poor Preparation
Dirt, oils, curing compounds, and laitance (a weak cement paste) on the surface prevent paint from bonding properly. This leads to premature peeling.
Inadequate cleaning or profiling – making the surface rough for better adhesion – is a common mistake. It’s crucial to clean the concrete thoroughly and profile it if necessary before painting.
Remember: Preparation is key in concrete painting. Skimping on this step will lead to paint failure, no matter how good your paint is.
How to Choose the Best Paint for Your Concrete
Start by distinguishing interior versus exterior use and the expected traffic level. Consider exposure factors such as sunlight, freeze–thaw cycles, and moisture conditions in your space. This helps narrow the chemistry and finish you should target.
Use the location and conditions to guide your decision between epoxy, acrylic, or water- or solvent-based options. Verify the paint’s label or data sheet for suitability on concrete and for any required primers or sealers. If in doubt, consult the manufacturer instructions before purchasing.
Step-by-Step Process
Follow these practical steps to choose and apply the best paint for your concrete project.
- Preparation: Check safety, gather tools (gloves, goggles, drop cloths), and ensure good ventilation. Why: Safety first, and proper setup saves time.
- Inspect surface: Check for moisture, cracks, or contaminants. Why: A clean, dry surface ensures paint adhesion.
- Prepare surface: Clean with a degreaser, let it dry, then use a concrete primer to seal the surface. Why: Priming helps paint bond and prevents moisture issues.
- Choose your paint: Select appropriate type (see below) based on location, traffic, exposure, and moisture conditions. Why: Right paint for the job lasts longer.
- Apply paint: Follow manufacturer’s instructions for application (roller, brush, or spray). Let it cure as directed. Why: Correct application ensures durability and prevents premature failure.
- Final check: Inspect your work after curing. Touch up if needed. Why: A final check ensures a quality job.
Paint types and pros/cons
Understand the common concrete paint types to choose the best for your project:
Acrylic: Durable, breathable, easy to apply. Ideal for interior walls with low traffic.
Epoxy: Highly durable, resistant to chemicals and abrasion. Complex application but ideal for garage floors and heavy-duty areas.
Polyurethane: Excellent UV resistance, good durability. Suitable for exterior surfaces exposed to sunlight.
Elastomeric: Flexible, can bridge minor cracks. Good for exterior walls with some movement or cracking.
Surface-specific recommendations
Tailor your paint choice to the specific surface and environment:
Basement walls: Use acrylic or elastomeric paints. They’re breathable, preventing moisture buildup in damp areas.
Garage floors: Opt for epoxy paints. They withstand heavy traffic, chemicals, and abrasion from vehicles.
Patios: Choose polyurethane or elastomeric paints. They resist UV damage and can handle some foot traffic and weathering.
Environmental and safety considerations
Consider these factors for a safe, code-compliant paint job:
VOC levels: Choose low-VOC or zero-VOC paints to minimize emissions. Check local codes for VOC limits.
Ventilation: Ensure adequate ventilation during application and curing to prevent fume buildup.
Cure times: Follow manufacturer’s cure time guidelines to allow paint to fully set before use or exposure to moisture.
Prepping Concrete for Painting: Step-by-Step
Begin with a thorough inspection to identify cracks, spalling, oil, or sealers that need addressing. Clean the surface to remove dust, grease, and loose material using the method you prefer. Note any repairs or profile changes needed before coating.
Profile the surface as directed, neutralize if required, and apply the recommended primer or bonding agent. Allow the surface to dry according to the product instructions, and confirm the tested surface is ready before you start painting. Keep the sequence in mind to maximize adhesion and longevity.
Step-by-Step Process
Now that you’ve got your surface prepared, let’s dive into the step-by-step process of prepping concrete for painting. This sequence will ensure a smooth, durable finish.
- Inspect and Tape: Check for any new cracks or damage since your initial prep. Use painter’s tape to mask off areas you don’t want painted. Why? It ensures clean lines and protects adjacent surfaces. Check by running a finger along the edge – it should feel smooth.
- Apply Concrete Primer: Roll on a coat of concrete primer, following manufacturer instructions. This seals the surface and improves paint adhesion. Wait for 1-2 hours (check product label) before proceeding. Why? It prevents paint from peeling off later.
- Lightly Sand: Using fine-grit sandpaper (120-220), lightly sand the surface to create a ‘bite’ for the paint. Wipe clean with a damp cloth. Why? This helps paint stick better. Check by feeling the surface – it should be slightly rough.
- Wash and Clean: Thoroughly wash off any dust or debris with clean water. Allow to dry completely (at least 24 hours). Why? A clean surface ensures good paint adhesion. Check for any remaining residue by running a hand over the surface.
- Apply Paint: Using a roller or sprayer, apply your first coat of concrete paint. Follow manufacturer instructions for coverage and drying times. Why? This gives you even coverage and allows for proper curing. Check for any missed spots or uneven application.
- Lightly Sand Between Coats (if needed): If using multiple coats, lightly sand between each with fine-grit sandpaper to remove any raised grain. Wipe clean. Why? This ensures a smooth finish. Check by feeling the surface – it should be even.
- Apply Final Coat: Apply your final coat of paint, following manufacturer instructions for drying and curing times. Why? This gives you a durable, long-lasting finish. Check for any missed spots or uneven application.
Pro tip: Always follow the ‘rule of thumb’ – if it feels wrong, stop and recheck your work. Better safe than sorry!
Inspection and visual checkpoints
Before you grab your paintbrush, use this checklist to inspect your concrete surface. It’s crucial to identify any issues now to avoid costly rework later.
- Cracks: Inspect for hairline cracks or larger ones. Tap them with a hammer; if it sounds hollow, it needs repair.
- Spalling: Look for flaking or peeling concrete. Press on it; if it feels loose, replace it.
- Efflorescence: Check for white powdery deposits. If present, clean with a wire brush and muriatic acid (follow safety guidelines).
- Previous coatings: Inspect for old paint or sealers. Remove any loose material.
- Moisture check: Test for moisture using a simple moisture meter. Concrete should be dry before painting.
- Concrete age: Check when the concrete was poured. Newer concrete may need additional curing time.
- Weathering: Inspect for signs of weathering like pitting or discoloration. Sandblast or grind if necessary.
- Contaminants: Check for grease, oil, or other contaminants. Clean with a suitable solvent before painting.
Quick rule: Always remember: a concrete surface should be clean, dry, and free of any defects before painting. Skipping these checks can lead to paint peeling, bubbling, or even total failure.
Cleaning and surface profile methods
Before you grab your paintbrush, you’ve got to get that concrete clean. Here’s how:
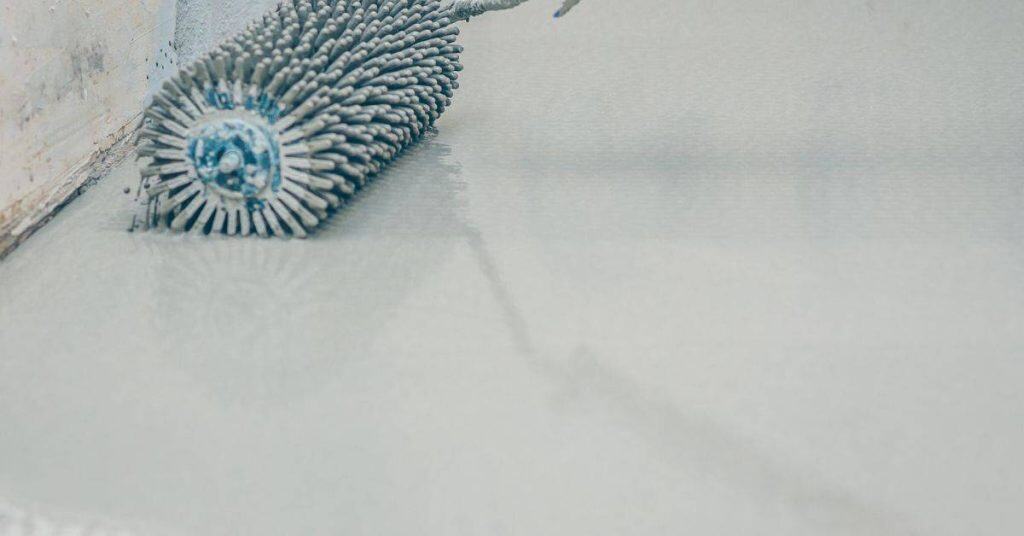
Pressure washing is your go-to for most jobs. It’s quick and effective. Use around 1200-1500 PSI, holding the wand at a 45-degree angle, about 6 inches from the surface. Be careful not to damage the concrete.
For tougher grime, use a chemical cleaner. Follow the product’s instructions, but usually, you’ll apply it with a stiff-bristle brush, let it sit, then rinse off. For oil stains, use a degreaser, again following the label.
For really rough surfaces or to remove old paint, consider shot blasting or acid etching. These are tough jobs that can be dangerous if you’re not experienced. If you’re unsure, hire a pro. Always wear proper PPE when handling chemicals.
Repairing cracks, spalls, and delamination
Before you grab your paintbrush, you’ve got to fix any damage on your concrete. Here’s how:
First, inspect your concrete, like you did in the beginning. Look for cracks, spalls (chipped or broken pieces), and delamination (peeling layers).
For cracks less than 1/4 inch wide, use a crack filler. For wider ones or spalls, you’ll need a concrete patching compound. Check product labels to ensure they’re suitable for your specific concrete type and damage.
To apply, clean the area (you’ve done this before), then moisten the repair area slightly. Follow the manufacturer’s instructions for mixing and application. Tool it smooth with a trowel or putty knife. Let it dry according to the product’s recommendations, usually 24-72 hours.
Testing Concrete Before Painting
Perform moisture testing to gauge vapor drive and surface dampness. Check the pH or alkalinity level to anticipate potential chemical reactions with coatings. These tests guide whether you need remediation before painting.
Conduct an adhesion pull test to confirm the substrate will hold a coating. Look for signs of salt or efflorescence and address any buildup first. Use the test results to decide on the paint choice or necessary surface treatments by referring to product documentation.
Moisture tests (plastic sheet, moisture meter)
Before painting concrete, it’s crucial to check for moisture. Here’s how:
Plastic Sheet Test: Tape a plastic sheet to the wall, leaving no gaps. Check after 24 hours. If condensation forms on the inner side, there’s too much moisture.
Moisture Meter: Use a non-invasive meter. readings below 15% are safe for painting. Above that, wait or remediate.
pH and efflorescence testing
Test your concrete’s pH to ensure it won’t damage paint. Here’s how:
pH Test: Use litmus paper or a pH meter. Acceptable range is 6-8. Above 8, treat with a suitable acid wash.
Efflorescence Check: Look for white powdery deposits (soluble salts). If present, clean and seal before painting.
Adhesion and pull tests
Ensure your concrete surface is sound and will bond with paint. Here’s how:
Simple Adhesion Check: Stick a piece of duct tape on the wall, press firmly, then pull off quickly. If paint comes off, adhesion is poor.
Pull-Off Test: For thorough checking, hire a professional to perform a pull-off test. They’ll use specialized equipment to measure bond strength.
Fixes and Remediation Strategies
Moisture mitigation options include sealing, moisture barriers, or addressing drainage and grading around the area. For salt issues, wipe or scrub efflorescence and apply a suitable primer or sealer as directed. Re-profile surfaces that are uneven or cracked to create a solid base.
Consider waterproofing or utilizing a corrective coating designed for your conditions. Select a coating system that targets the root cause—moisture, salts, or surface texture—to restore performance. Always verify remediation steps with product labels and manufacturer guidelines.
Controlling moisture and waterproofing options
Chronic moisture problems can ruin your concrete paint job. Here’s how to tackle them:
Drainage: Ensure water drains away from the concrete. Sloped grading around the perimeter helps.
Vapor barriers: Install a vapor barrier on the warm side of the slab to prevent moisture migration.
Waterproof coatings: Apply waterproof coatings like epoxy or polyurethane after proper surface preparation and priming.
Treating salts and efflorescence
Salts and efflorescence can cause paint to peel. Here’s how to deal with them:
Desalination: Use a desalinating solution or muriatic acid to remove salt deposits.
Cleaning: Thoroughly clean the surface after desalination to remove any residue.
Salt-tolerant primers/breathable coatings: Apply a salt-tolerant primer or breathable coating to allow moisture and salts to escape while preventing further damage.
Recoating vs. full removal: decision guide
When deciding between spot repairs and full stripping, consider these factors:
Extent of failure: If the damage is extensive or widespread, full removal might be necessary.
Adhesion test results: Poor adhesion test results indicate a need for full removal. Refer to the Testing Concrete Before Painting section for details.
Remaining coating type: Some coatings, like lead-based paints, should be fully removed due to health hazards. Always check local regulations before proceeding.
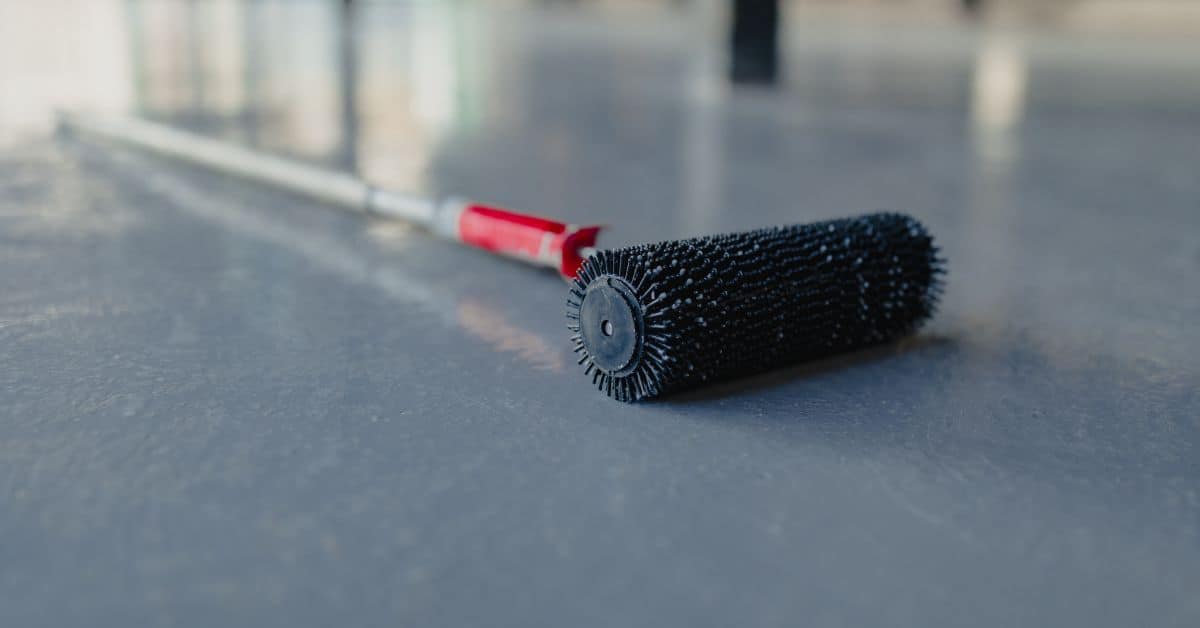
Application Best Practices and Tools Checklist
Gather essential tools such as brushes, rollers, a squeegee, and a compatible roller frame. Wear proper safety gear like gloves, eye protection, and a respirator if the coating requires it. Follow mixing and application techniques exactly as directed by the product instructions.
Control environmental conditions such as temperature and humidity as recommended. Avoid applying in rain, extreme heat, or when the surface is not dry. Be mindful of common mistakes like over-rolling or applying too thick a coat by sticking to the manufacturer’s guidance.
Tools and materials checklist
Before you start painting, make sure you have all the right tools and materials. This list covers essentials for various paint types.
- Rollers: Choose 9-inch rollers with 3/8-inch or 1/2-inch nap cover for most paints.
- Brushes: Have 2- to 4-inch angled brushes for edges and details. Synthetic bristles work best with latex paints.
- Sprayers: For large areas, consider a paint sprayer. Airless sprayers are versatile but require proper thinning.
- Primers: Use a primer suitable for your paint type and substrate condition. Latex primers work well with most paints.
- Mixers: A drill-powered mixer ensures even paint consistency. For small quantities, use a stir stick.
- Grinders: If repairing concrete, use a grinder to prepare the surface. Diamond cups are ideal for concrete.
- PPE (Personal Protective Equipment): Wear safety glasses, gloves, and a respirator when sanding or spraying paint.
- Tape: Use painter’s tape to protect adjacent surfaces from overspray or drips.
Quick rule: Always check your paint can for specific tool recommendations before starting.
Application techniques and cure times
Proper application ensures even coverage and optimal paint performance. Follow these guidelines:
- Spreading rate: Aim for 80-120 square feet per gallon. Thicker paints may require fewer coats.
- Overlap: Overlap each stroke by about half the roller’s width to ensure even coverage and avoid lap marks.
- Coats: Most paints require two coats for full coverage. Allow the first coat to dry according to manufacturer’s instructions before applying the second.
- Pot life: Once you open a paint can, use it within the recommended time frame (usually 24-72 hours) to prevent skinning or drying out.
- Tack time: Allow enough time between coats for the paint to ‘tack’ – this is when the surface feels dry but still slightly tacky. This ensures good adhesion of the next coat.
- Cure time: Allow the final coat to cure according to manufacturer’s instructions before exposing it to heavy foot traffic or harsh weather conditions.
Quick rule: Always follow the manufacturer’s guidelines for application and curing. These are specific to each paint type.
Weather and timing considerations
Timing your concrete painting project right ensures better adhesion, coverage, and longevity of the paint job.
- Temperature: Paint when temperatures are between 50°F (10°C) and 90°F (32°C). Extreme heat or cold can affect curing and adhesion.
- Humidity: Avoid painting in high humidity conditions (>85%). This can lead to poor paint adhesion and mildew growth.
- Avoid rain: Do not paint before rain is forecast. Rain can wash away the paint or cause it to peel off.
- Avoid freeze: Do not apply paint if temperatures are expected to drop below freezing within 24 hours of application. This can prevent proper curing.
- Substrate drying: Allow freshly poured or repaired concrete to dry for at least 7 days before painting. For existing concrete, ensure it’s completely dry before applying paint.
Quick rule: Always check the weather forecast and allow enough time for proper curing before painting.
Maintenance, Longevity, and When to Repaint
Establish a routine to clean the surface and inspect for early signs of wear or damage. Recoat timing should align with the coating’s guidance rather than a fixed calendar interval. Monitor for peeling, cracking, or dullness that signals refreshment is due.
Expect coating life to vary by paint type and exposure, and plan for patch repairs as needed. Use proper cleaning and surface preparation before refinishing to extend the coating’s life. Check product labels for maintenance recommendations and compatibility with any previously applied layers.
Cleaning and Minor Repairs
Regular cleaning is key to maintaining your concrete paint. Use a mild detergent and soft-bristle brush every 6-12 months, depending on traffic.
For touch-ups, use the same paint and technique as originally applied. For chips or cracks, clean the area first, then apply a small amount of paint with a brush or touch-up pen.
Don’t wait for major damage – fix minor issues promptly to prevent them from worsening.
Expected Lifespan and Warranty Considerations
The lifespan of concrete paint varies by type. Expect 10-20 years for epoxy, 5-10 years for acrylic, and 2-5 years for latex.
Factors affecting longevity include climate, foot traffic, and maintenance. Harsh winters, heavy use, and neglect can shorten lifespan.
Manufacturer warranties range from 1 to 10 years. Read spec sheets carefully – some warranties require specific application methods or maintenance schedules.
Product Recommendations and Comparison Criteria
Think in terms of a reproducible comparison matrix that you can reuse across projects. Focus on chemistry, VOC content, recoat time, abrasion resistance, and breathability. This helps you prioritize what matters most for your space and conditions.
Explain how to weigh these specs for interior versus exterior use, high-traffic areas, or moisture-prone surfaces. Refer to label instructions and data sheets to confirm suitability and any required primers or surface preparations before choosing a coating system.
How to Read Datasheets and Specs
Concrete paint datasheets can be a goldmine of info. Here’s what matters:
Adhesion: How well it sticks. Look for high values (e.g., 10+ N/mm²).
Tensile Strength: Flexibility without cracking. Higher is better (e.g., 2+ MPa).
Permeance: Breathability. Lower means more breathable (e.g., <1 perm).
VOC: Volatile Organic Compounds. Lower means less harmful fumes (e.g., <50 g/L).
Solids Content: How much paint is actually on your walls. Higher is more coverage (e.g., >30%).
Budget vs. Performance Trade-offs
Concrete paints vary in price, but so does quality and longevity.
Cheaper options (<$20/gal) might lack durability or fade quickly. They’re fine for short-term projects or low-traffic areas.
Mid-range ($25-$40/gal) offers better performance. Expect longer lifespan, improved adhesion, and better resistance to weathering.
Premium options (>$40/gal) provide top-notch performance: superior abrasion resistance, excellent breathability, and outstanding longevity. They’re worth considering for high-traffic or exposed areas.
Conclusion
Getting a durable, good-looking concrete finish starts with planning and safety. If you test first in a small area, choose the right paint type, and prep properly, you cut the risk of peeling, peeling, and costly rework.
To move forward, keep this practical sequence in mind: assess the surface and moisture, scrub and repair as needed, prime if the product calls for it, apply in thin, even coats with the right tools, let each coat dry fully, and finish with the recommended maintenance routine. Always test a patch, then proceed in stages and follow manufacturer directions for drying times and recoat windows.
A few mistakes to avoid are skipping moisture testing, skipping or delaying proper prep, and rushing the painting or coating over damp or dirty concrete. Stay safe by wearing eye and skin protection, ventilating work areas, and stopping if you see bubbling, strange odors, or excessive fumes. If you’re unsure about moisture levels, substrate compatibility, or the right primer, pause and revisit the product guidance rather than forcing a fix.
If the patch is large, or the concrete is badly cracked, or moisture issues persist after remediation, consider a pro’s help. The goal is a lasting finish that stays put and looks right. With careful steps and steady work, you’ll have a solid, durable result you can be proud of.
FAQ
Is my concrete ready for painting, or do I need more prep work first?
Look for a clean, dry surface with no dust or debris. If you see oil, grease, or old paint peeling, you’ll need to scrub, degrease, and repair first. Always check the paint label for surface prep requirements and follow local rules or manufacturer instructions.
How can I tell if moisture will ruin the paint job before I start?
Test for moisture by checking for damp spots after a few dry days, or use a simple dampness test on the surface. If you see dampness or white efflorescence, address it first and consult the paint label for basement or slab guidance. If in doubt, don’t guess—verify with the product instructions.
What should I do if the paint starts peeling or blistering after application?
Peeling usually means moisture, contamination, or improper adhesion. Scrape away loose paint, clean the area, and re-prime before repainting. Use the same manufacturer’s instructions or product label to choose a compatible primer and topcoat.
How do I choose a paint over an existing coated surface?
Check if the existing coating is compatible with your new paint. If in doubt, do a small test area and read the new product’s instructions. If you can’t confirm compatibility, consider a proper primer or seek guidance from the manufacturer or local rules.