
Introduction
Choosing a garage floor topcoat means selecting a durable, glossy protective finish and planning how and when you can recoat. Think about how much traffic, spills, and chemical exposure your space sees, and match that to a finish type and cure time. Consider how soon you’d like to apply another coat and how comfortable you are with maintenance.
Check the manufacturer’s guidance for durability, gloss level, and recoat windows, and compare it to your climate and garage use. Always read labels for recommended surface prep and ventilation needs, and ask in-store staff if you’re unsure. If you’re unsure about a spec, stick to safer ranges and plan for test patches.
Key takeaways
- Choose a garage floor topcoat based on anticipated traffic and chemical exposure.
- Match gloss and sheen to garage lighting, visibility, and owner’s maintenance plan.
- Durability factors depend on substrate prep, coating chemistry, and proper curing.
- Follow recoat windows and cure times from the manufacturer for readiness.
- Wear gloves, eye protection, and ventilation; avoid skin contact with solvents.
- Surface prep, proper roller technique, and inspection ensure long-lasting, smooth results.
Table of Contents
- Introduction
- Key takeaways
- Quick Primer: What a Topcoat Does and Why It Matters
- Main Topcoat Chemistries and How They Compare
- Durability Factors: What Actually Determines Lifespan
- Gloss, Sheen, and Appearance Choices
- Recoat Windows and Cure Times — Planning for Readiness
- Surface Preparation, Tools, and Materials Checklist
- Application Best Practices and Visual Checkpoints
- Testing, Inspection, and Acceptance Criteria
- Conclusion
- FAQ
Quick Primer: What a Topcoat Does and Why It Matters
A topcoat sits over the repaired or primed garage floor to seal, protect, and finish the surface. It influences durability, gloss, and how long you can wait between coats or reapplications. It’s a must when you’re protecting concrete from oil, salt, and moisture rather than using decorative-only coatings.
Think about how the topcoat will perform with your environment, traffic, and maintenance routine. Consider substrate compatibility and how environmental conditions can affect cure and adhesion. Decide if a topcoat is necessary for your project or if a decorative option would be sufficient.
Function vs. finish
A topcoat’s job is twofold: protect and please the eye.
Protective performance means it stands up to chemicals and abrasion. It’s your first line of defense against oil spills, salt, and everyday wear and tear.
Gloss and color retention are what make it pleasing. Gloss gives that ‘wow’ factor when you walk into your garage. Color retention keeps your floor looking fresh over time.
When to use a topcoat in multi-layer systems
A topcoat is the final layer in most garage floor systems. It goes on top of your primer and body coat.
In epoxy systems, it’s usually a clear or colored topcoat that seals in the epoxy and enhances its gloss. In polyurethane or polyaspartic systems, it might be a clear sealer to protect the underlying layers.
Remember, a topcoat isn’t always necessary for decorative-only coatings. But if you want durability and longevity, it’s usually worth the extra effort.
Main Topcoat Chemistries and How They Compare
Common garage topcoats include epoxy, polyurethane, polyaspartic, and acrylic sealers. Each brings different durability and gloss retention, so your choice should match the expected wear and cleaning needs. In practice, you’ll trade ease of application for long-term performance and resistance to chemicals.
When sizing up options, verify label guidance, data sheets, or manufacturer instructions for cure times and UV stability. Look for notes on yellowing resistance and compatibility with existing coatings. If you’re unsure, check the product’s official documentation or ask a professional for clarification.
Epoxy topcoats
Epoxies are a popular choice for garage floors due to their strong bond and excellent chemical resistance. They’re great at protecting against common garage chemicals like oil, gas, and antifreeze.
Pro tip: Epoxies are sensitive to UV light though, so they might not be the best fit if your garage gets direct sunlight. They’ll yellow over time with prolonged exposure.
Epoxies are typically two-part systems that cure quickly, meaning you can usually recoat within 24 hours. But remember, proper surface preparation is key for a good bond.
Polyurethane and polyaspartic topcoats
Urethanes and polyaspartics are top choices if you want a glossy, durable finish that won’t fade or lose its shine under UV light. They’re also resistant to gasoline and other garage chemicals.
Pro tip: These topcoats have longer pot lives compared to epoxies, giving you more time to apply them evenly. But they might need a bit of extra care when recoating – follow the manufacturer’s guidelines for best results.
Polyaspartics are a type of polyurethane that cure quickly, often within hours, making them ideal for DIYers who want to get back into their garage fast.
Acrylics and other sealers
Acrylic sealers are a budget-friendly option that’s easy to apply. They provide decent protection against moisture and minor chemicals, making them a good temporary solution or for light-duty garages.
Pro tip: Acrylics aren’t as durable or long-lasting as high-performance chemistries like epoxies or urethanes. They might not hold up well to heavy use or harsh chemicals over time.
Water-based sealers are another option, offering easy clean-up and low VOC emissions. But they’re typically the least durable of all topcoat options, so consider your garage’s needs before choosing.
Durability Factors: What Actually Determines Lifespan
Abrasion from vehicle tires and foot traffic wears down the film over time. Chemical exposure from gasoline, oil, cleaners, and deicers can soften or delaminate coatings. Substrate movement and poor adhesion also shorten life and can cause cracks or peeling.
Environmental factors like UV exposure and moisture play a role in degradation. Evaluate how the coating adheres to the concrete and whether the system accommodates movement. Use product data and local guidance to gauge expected longevity.
Mechanical wear and abrasion resistance
The first thing to consider is how your garage floor will be used. Heavy vehicles, frequent traffic, or exposure to gritty materials like salt or sand will put more stress on the topcoat.
Check product literature for abrasion resistance ratings. These are usually given as a number, with higher numbers indicating better resistance. Make sure it matches your garage’s needs.
For example, if you park heavy trucks or work with abrasive materials, look for topcoats rated 5-6 on the Taber Abrasion Test scale. Light vehicle traffic and no exposure to gritty materials? A rating of 3-4 should suffice.
Chemical and stain resistance
Garage floors see a lot of chemicals – fuels, motor oil, cleaners, even deicing salts. These can stain or damage your topcoat if it’s not up to the task.
Look for chemical resistance claims in product literature. Topcoats should resist common garage chemicals like gasoline, oil, and cleaning agents.
Also, check if the topcoat is deicing salt resistant. This is important if you live where roads are salted in winter. Some topcoats can be damaged by salt exposure.
Adhesion and substrate integrity
The condition of your concrete floor is crucial for a topcoat’s longevity. It needs to stick well, and the concrete needs to be stable.
First, assess your concrete’s condition. It should be clean, dry, and free of cracks wider than 1/8 inch. If not, repair it before applying a topcoat.
Next, check for moisture. Too much can prevent the topcoat from adhering properly. Use a moisture test kit to be sure your concrete is dry enough.
Finally, make sure the floor has been properly prepared. This usually involves cleaning, grinding, and sometimes applying a primer or sealant to improve adhesion.
Gloss, Sheen, and Appearance Choices
Gloss level choices range from high-gloss to satin or matte, affecting aesthetics and perceived cleanliness. Higher gloss often shows imperfections more readily but can be easier to wipe clean. Gloss retention data helps you anticipate how the surface will look over time.
Balance appearance with function: a shinier surface may feel more slippery when wet and can highlight repairs. Check manufacturer data for gloss retention and slip resistance to choose the right option for your garage use and maintenance routine.
How gloss affects slip and cleaning
Glossier topcoats reflect light, making your garage floor look cleaner. But they can be slippery when wet.
Higher gloss means: Easier to clean. More reflective. But more slippery when wet. Unless you add texture.
Matte or satin finishes are safer for garages with heavy foot traffic. They’re less slippery, but they show dirt more.
UV and yellowing concerns for gloss retention
Sunlight can make your garage floor topcoat turn yellow over time. This is called ‘yellowing’.
Some chemistries are more susceptible: Epoxies, acrylics. UV exposure speeds up yellowing.
Use UV-stable topcoats or additives to prevent this. They’re especially important for garages with lots of natural light.
Choosing a finish for your garage use-case
The right gloss level depends on how you use your garage. Here’s what to consider:
Vehicle storage: Glossier topcoats show tire marks and scuffs less. But they’re slipperier when wet.
Workshop: Satin or matte finishes hide dirt better. They’re safer for heavy foot traffic and dropped tools.
Heavy traffic: Consider a textured finish to improve grip. It hides dirt well, too.

Recoat Windows and Cure Times — Planning for Readiness
Recoat windows define when a second coat can be applied for optimal bonding. Recoating too early can trap solvents or prevent proper curing; waiting too long may reduce adhesion between coats. Read your product’s guidance carefully before proceeding.
Remember that cure times depend on temperature, humidity, and airflow. Always rely on the product TDS and environmental conditions to schedule recoats and full cure. If anything is unclear, verify with the manufacturer instructions or label notes.
What “recoat window” means and why it matters
The recoat window is the time frame during which you can safely apply a second coat of topcoat without compromising adhesion or final performance. It’s crucial because applying too early can lead to poor intercoat adhesion, while waiting too long may result in reduced durability.
Topcoats need time to cure and build strength before another layer is applied. This process involves chemical reactions that transform the liquid coating into a solid film. If you recoat too soon, these reactions are still ongoing, leading to weak bonds between coats.
Too early: Poor intercoat adhesion, peeling, or flaking. Too late: Reduced durability and gloss retention.
Environmental influences: temperature, humidity, and ventilation
Jobsite conditions play a significant role in how quickly your topcoat cures. Temperature, humidity, and airflow all impact the chemical reactions happening during curing.
Temperature: Warmer temperatures speed up curing, while cooler temps slow it down. Follow manufacturer guidelines for ideal application temperatures.
Humidity: High humidity can interfere with curing by preventing proper evaporation of solvents. Low humidity may cause the topcoat to cure too quickly, leading to poor film formation.
Ventilation: Good airflow helps solvent evaporation and prevents condensation, which can hinder curing. Ensure your garage has adequate ventilation during application and curing.
Practical timeline examples and safe checks
Manufacturer guidelines provide general recoat windows, but actual times can vary based on conditions. Here are some practical ways to confirm your topcoat is ready for a second coat:
1. Tack test: Gently touch the surface with a clean, gloved finger. If it feels sticky or leaves residue, it’s not ready. If it’s dry and no residue is left, it might be ready.
2. Hardness check: Use a hard object like a plastic tool handle to gently scratch the surface. If it’s cured properly, there should be no mark or only slight marring.
3. Manufacturer guidelines: Always refer to the Technical Data Sheet (TDS) for specific recoat windows and recommended conditions. Some products may require 24 hours, while others might need up to a week.
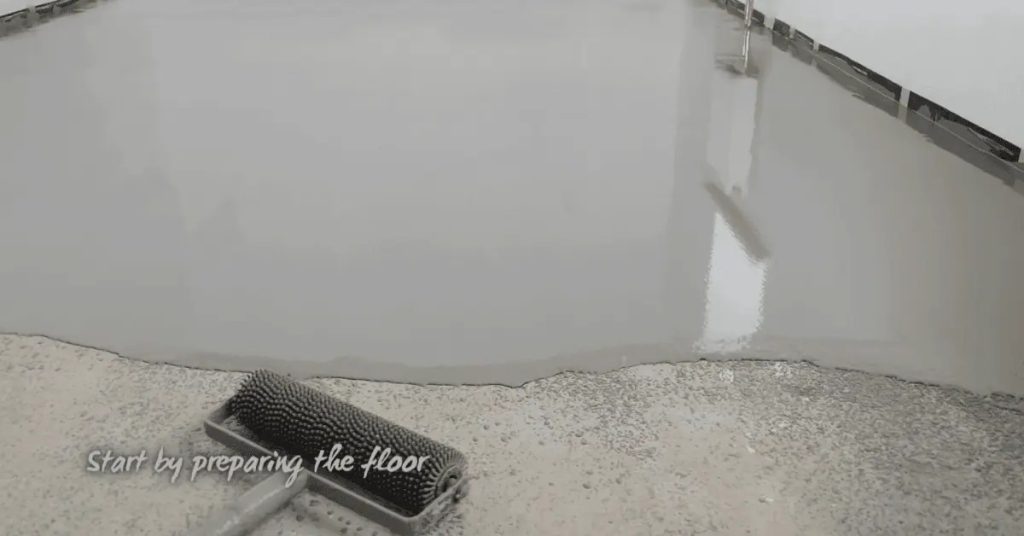
Surface Preparation, Tools, and Materials Checklist
Prep tasks include repairing cracks or spalling, and removing previous coatings where needed. Grinding or shot-blasting creates a profile for good adhesion. A moisture test helps you decide if the concrete is ready for coating.
Assemble a DIY-friendly tools and materials list: grinders, sander or shot-blaster, rollers, brushes, rollers, and PPE. Include items for mixing, cleaning, and masking, and verify compatibility with your chosen topcoat. If in doubt, consult the product instructions or local building guidelines for requirements.
Concrete assessment and repairs before topcoating
Before applying a garage floor topcoat, it’s crucial to assess the concrete surface for any defects. This ensures your topcoat adheres properly and lasts.
- Cracks: Inspect for hairline to wide cracks. Fill with an epoxy crack filler.
- Spalls: Remove loose concrete using a chisel or grinder. Repair with a spall repair product.
- Laitance: Remove this weak, powdery layer using a grinder to expose sound concrete.
- Delamination: Check for peeling or flaking concrete. Grind off the delaminated area and repair.
- Uneven surfaces: Level out high spots with a grinder to ensure even topcoat application.
- Contaminants: Remove any oil, grease, or other contaminants using a degreaser.
Quick rule: Always repair defects before applying a topcoat. Skipping this can lead to premature failure of your topcoat.
Profile generation and cleanliness
Creating a surface profile and ensuring cleanliness are vital for proper topcoat adhesion.
- Mechanical grinding: Use a concrete grinder to create a uniform, open texture. Aim for a minimum of 2-3 mils (0.002-0.003 inches) profile depth.
- Shot-blasting: For a more aggressive profile, use shot-blasting. This removes laitance and exposes sound concrete.
- Dust removal: Thoroughly clean the surface using a shop vacuum or broom to remove dust created by grinding/blasting.
- Degreasing: Clean the floor with a degreaser to remove any residual contaminants that could hinder adhesion.
Quick rule: A clean, profiled surface ensures optimal topcoat adhesion and longevity.
Tools and materials checklist
Having the right tools and materials ensures a smooth garage floor topcoating job. Here’s what you’ll need:
- Safety gear: Include safety glasses, gloves, ear protection, and a dust mask.
- Concrete grinder: Rent or purchase a walk-behind or handheld grinder for profiling the surface.
- Shot blaster (optional): For a more aggressive profile, consider renting a shot blasting machine.
- Shop vacuum: Clean up dust and debris with a powerful shop vacuum.
- Degreaser: Choose an eco-friendly degreaser to clean the floor surface.
- Moisture test kit: Test for moisture using a calcium chloride-based kit before applying the topcoat.
- Rollers and squeegees: Have rollers and squeegees ready for applying and spreading the topcoat evenly.
Quick rule: Having the right tools ensures a smooth, efficient job with minimal rework.
Application Best Practices and Visual Checkpoints
Apply in uniform coats to achieve even gloss and adhesion. Maintain a consistent pace and watch for puddling, holidays, or lap marks. Proper ventilation and following the label directions help you avoid problems.
Use visual checkpoints to confirm coverage and film thickness, and inspect for pinholes or scuffs as you go. After each coat, look for a uniform appearance and the absence of shows of wet spots. If defects appear, consult the product instructions for correction steps.
Mixing, Working Time, and Application Technique
Before you start applying your garage floor topcoat, ensure you’re mixing and applying it correctly to achieve a uniform gloss and adhesion.
-
- Mix thoroughly: Follow the manufacturer’s ratio. Agitate the product well using a drill mixer for at least 2 minutes to ensure consistency.
- Check working time: Topcoats have a limited pot life. Start application as soon as mixing is complete to avoid premature curing in the container.
- Apply with even strokes: Use a long-handled, short-nap roller or a squeegee for even coverage. Work in manageable sections to prevent overworking the material.
Quick rule: Mixing and application technique directly impact film uniformity and gloss. Follow manufacturer guidelines closely.
Wet Film Thickness and Uniformity Cues
During application, check the wet film thickness to avoid holidays (uncovered spots), puddling, or thin spots.
-
- Use a wet film gauge: Check film thickness at various points. Aim for 2-4 mils (50-100 microns) for most topcoats.
- Inspect for puddles: Look out for excessive material buildup, which can lead to sags and poor adhesion.
- Check for thin spots: Ensure no areas are left with insufficient product, leading to inadequate protection and reduced gloss.
Quick rule: Regularly check wet film thickness during application to ensure even coverage and optimal performance.
Visual Checkpoints Post-Application
After applying your garage floor topcoat, perform these visual checks at different cure stages to ensure a defect-free result.
-
- Immediately after application: Inspect for sags, puddles, or missed spots. Address any issues promptly.
- After initial curing (1-2 hours): Check for orange peel texture or blush (hazy appearance). These may indicate inadequate film thickness or improper application technique.
- After full cure (as per manufacturer’s guidelines): Inspect the floor for any signs of delamination, pinholes, or other defects. Address any issues immediately.
Quick rule: Regular visual checks post-application help identify and address potential issues early, ensuring a durable, glossy finish.
Testing, Inspection, and Acceptance Criteria
Objective tests like pull-off adhesion or moisture considerations help verify the system’s integrity. Slip resistance testing provides a practical safety check for the finished floor. Document results for future maintenance planning.
Set practical acceptance criteria based on durability and safety goals, then compare them to your product data and local rules. If results don’t meet expectations, review the manufacturer guidance and consider retesting or a different coating approach.
Moisture and pH testing before coating
Before applying any topcoat, test your concrete floor for moisture vapor emission and pH levels to ensure a successful application.
- Check moisture content: Use a calcium chloride test or a relative humidity (RH) probe. Excessive moisture can cause delamination.
- Acceptable RH range: 75-85% for most coatings. If higher, consider using a moisture-tolerant coating or address the source of excess moisture.
- Test pH level: Concrete should have a pH between 6 and 10. High pH can cause efflorescence and affect adhesion.
- Acceptable pH range: 7-9 for most coatings. If out of range, consider using a coating designed for high or low pH environments.
Quick rule: Always test moisture and pH before applying any topcoat to avoid costly failures.
Adhesion testing and what to require
Ensure your chosen topcoat adheres well to the concrete surface with these adhesion tests.
- Pull-off test: Use a pull-off tester to measure adhesion strength. Aim for at least 200 psi (1.4 MPa).
- Cross-cut test: Score the surface, apply tape, and pull. No coating should peel off.
- After repairs: Retest adhesion if you’ve made repairs to ensure the topcoat adheres well to the patched area.
Quick rule: Always test adhesion before and after any repairs to guarantee a strong bond between your concrete and topcoat.
Slip resistance and gloss measurement
Measure slip resistance and gloss retention to ensure safety and longevity of your garage floor topcoat.
- Gloss meter: Measure gloss at 60° using a gloss meter. Retention should be above 70% for most coatings.
- Pendulum test: Use a pendulum tester in high-risk areas (e.g., ramps, stairs) to ensure adequate slip resistance.
- Coefficient of friction (COF): Measure COF using a tribometer. Aim for at least 0.60 in dry conditions and 0.50 in wet.
Quick rule: Regularly check slip resistance and gloss retention to maintain a safe, durable garage floor topcoat.
Conclusion
Protecting your concrete floor with the right topcoat is about safety, durability, and a finish you can live with for years. Get the prep and timing right, pick a compatible chemistry, and you’ll avoid costly mistakes and ugly failures.
Run your test patch, check environmental limits, and then proceed with a clear plan: verify surface moisture and cleanliness, select the right topcoat for the job, allow the correct cure window, apply in steady coats with even coverage, and inspect every square foot as you go. Plan your order of operations, gather the exact tools and materials, and respect cure times before loading the floor with traffic or equipment.
Common mistakes to avoid are rushing the prep, skipping a test area, and ignoring recoat windows or cure times. Never skip safety steps—ventilate well, wear a mask if solvents are involved, and protect adjacent surfaces. Keep the area dry during application and testing, and don’t mix products unless the manufacturer approves it.
If the area is large, if humidity or temperature falls outside the recommended range, or if the existing surface is badly delaminated or cracked, it makes sense to bring in a pro. For most home jobs, a careful plan, disciplined steps, and patience will deliver a durable, good-looking floor. Stay practical, stay safe, and you’ll finish confident and ready for the next project.
FAQ
How do I choose a topcoat for garage floor based on durability and traffic?
Look at the product label for abrasion resistance and UV stability. Match the coating to your expected foot and vehicle traffic. If in doubt, compare options by what the manufacturer recommends for garage floors and read the notes on the label.
Can I apply a second coat or recoat on a surface that’s not fully dry?
No. Apply only when the surface is dry to the touch and the previous coat has had time to set as instructed by the label. If you’re unsure, check the product instructions or contact the manufacturer before proceeding.
What substrate prep is non-negotiable before topcoat?
Clean the floor thoroughly and let it dry. Repair any cracks or damaged spots and remove oil or grease. Follow the product’s prep steps, such as etching or profiling if required, and re-check for dust before coating.
How do I know when it’s time to recoat or replace the topcoat?
Look for peeling, dullness, yellowing, or chips. If the coating shows wear beyond a simple touch-up, follow the manufacturer’s recoat window and cure guidance. If you’re unsure, consult the product instructions or reach out to support for guidance.