
Introduction
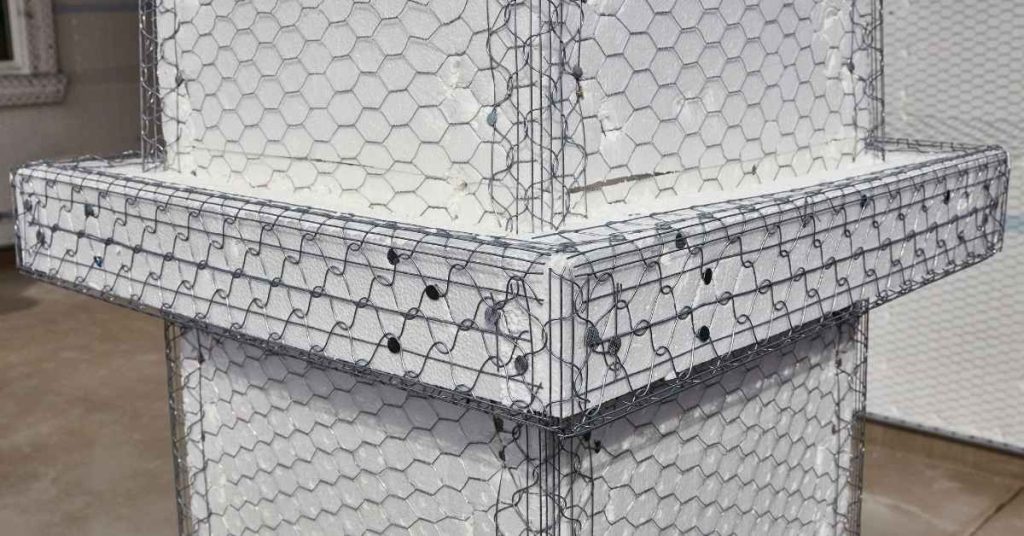
Reinforcement details inside a corner of stucco help prevent cracks from redeveloping. This article gives practical, home-friendly ways to strengthen the joint as you repair. Think of it as a light rebuilding of the corner so movement from framing or temperature doesn’t keep tearing at the surface.
Start by inspecting the crack and removing loose material so the new reinforcement has a solid base. Use a compatible patching compound and, where appropriate, embed fiberglass mesh or thin metal reinforces along the corner, pressing it in as you work. Feather the edges, let it cure per the label, and avoid forcing movement until it hardens; check local rules or manufacturer tips if unsure.
Key takeaways
- Inspect all inside corners for hairline cracks and moisture before reinforcement.
- Use continuous backer rod and mesh lath per manufacturer guidance to reduce crack transfer.
- Embed corner beads and flexible reinforcement to accommodate seasonal movement without tearing.
- Select materials compatible with stucco resin and climate; check labels for flex.
- Plan movement joints and transition details during layout to prevent embedded cracks.
- Wear eye protection and gloves; clean work area to avoid contamination.
Table of Contents
- Introduction
- Key takeaways
- Why Inside Corners Crack — Root Causes and Mechanics
- Reinforcement Principles That Prevent Repeat Cracking
- Reinforcement Materials and Material Selection Explained
- Step-by-Step Reinforcement Technique for Inside Corners
- Movement Joints, Control Joints, and Transition Details
- Inspection Checklist and Diagnosing Repeat Cracking
- Environmental, Curing, and Maintenance Practices to Reduce Recurrence
- Tools, Materials Checklist, and Project Sequencing for DIY and Pros
- Conclusion
- FAQ
Why Inside Corners Crack — Root Causes and Mechanics
Inside corners concentrate stress because of geometry and movement of the wall and siding. The corner acts like a hinge where differential movement shows up as crack initiation. Substrate issues, previous repairs, and poor adhesion can all contribute to crack formation here.
Cracks often start where the finished coat bends around the corner, then propagate with seasonal movement and moisture changes. Look for places where substrate flex, framing shrinkage, or lath issues may be letting the corner deflect. When in doubt, verify substrate condition and any relevant product guidance before proceeding.
Stress concentration and corner geometry
Inside corners are trouble spots for stucco. They create a high-stress area where forces concentrate.
The angle in the corner causes bending forces. This is like when you bend a ruler – it wants to snap at the point of highest curvature. Same thing happens here, but with your stucco.
There’s also shear force at work. Imagine pushing two walls together from opposite sides. The stucco at the corner takes that push and wants to slide apart. That’s shear force.
Substrate movement and differential deflection
Your walls aren’t static. They move, ever so slightly. This is normal, but it can cause cracks at inside corners.
Framing might shift, sheathing might warp, or supports might not be level. Any of these can cause your walls to deflect differently in different spots. That’s differential deflection.
At the corner, where two walls meet, this movement is amplified. It’s like a seesaw – one side goes up, the other goes down. The stucco at that point gets stretched or compressed, and cracks happen.
Moisture, adhesion loss, and environmental contributors
Water’s a big player in stucco cracking. It gets into tiny cracks, freezes, expands, and makes those cracks bigger.
Then there’s thermal cycling. Heat causes expansion, cold causes contraction. Over time, this wears down the bond between your stucco and its substrate.
All these environmental factors work together to weaken the adhesion of your stucco. Once that happens, it’s easier for cracks to form and re-form at inside corners.
Reinforcement Principles That Prevent Repeat Cracking
The core design goal is to move stress away from the plane of the finished coat and allow controlled movement across the corner. Reinforcement should bridge the corner without creating a rigid, highly stressed strip. This helps prevent new cracks from opening in the coat.
Long-term bond matters, so use materials compatible with the base coat and follow manufacturer instructions. Check labels or data sheets for compatibility and suggested application methods before starting any work.
Stress redistribution and load path continuity
Reinforcement’s main job is to create a continuous load path, spreading stresses away from the inside corner tip. This reduces stress concentration and prevents cracking.
Imagine your reinforcement as a bridge. It carries loads from one side of the corner to the other, preventing them from piling up at the tip.
Use steel or fiberglass mesh, embedded in the scratch coat. This creates a strong bond with the substrate, helping distribute stresses evenly.
Accommodating movement vs. rigid restraint
Inside corners move. Reinforcement should allow this while preventing cracking. It’s a balancing act.
Allow movement with expansion joints or flexible details where corners meet walls or other structures. This lets the stucco breathe and move without stressing the reinforcement.
Provide rigidity with reinforcement in areas prone to high stress, like inside corners. Here, you want your mesh to hold everything together, preventing movement that could cause cracking.
Bond and compatibility fundamentals
Strong bond between reinforcement and substrate is key. Here’s how:
Use compatible materials. Stucco, mesh, and substrate should all play nice together. Incompatibility can lead to adhesion loss.
Proper surface prep. Clean, dry, and primed surfaces ensure good bond. Remove any contaminants that could hinder adhesion.
Correct embedment. Reinforcement should be fully embedded in the scratch coat. This creates a mechanical bond, locking everything together.
Reinforcement Materials and Material Selection Explained
Common reinforcements include fiberglass mesh, corner beads made of stainless or galvanized metal, and lath options designed for corners. Each type has different bendability, strength, and corrosion resistance. The choice should suit the substrate and climate you’re working in.
Prioritize bond strength, flexibility, and corrosion resistance, and ensure the material matches the base coat system. Always verify performance attributes on the product data sheet or instructions before purchasing or applying.
Mesh types and characteristics
When it comes to reinforcing your stucco corners, you’ve got options with mesh. Let’s break down a few:
Woven vs Unwoven Fiberglass Mesh: Woven mesh is stronger due to its interlaced design. It’s great for high-traffic areas or where extra strength is needed. Unwoven, on the other hand, is lighter and more flexible, making it easier to install but less resistant to stress.
Self-Bonding Mesh: This mesh has an adhesive backing that sticks directly to your substrate. It’s a time-saver as you don’t need to apply a separate layer of scratch coat first. However, it might not be suitable for all substrates or climates.
Higher-Tenacity Products: For areas with high stress or movement, consider higher-tenacity mesh. These are made from thicker fibers and can withstand more strain before failing.
Metal bead and angle options
Metal corner beads and angles add a rigid barrier to your stucco corners, helping prevent cracking. Here’s what you need to know:
Corrosion Resistance: Choose stainless steel or galvanized metal for your beads and angles. These won’t rust like regular steel, ensuring your reinforcement lasts as long as your stucco.
Profile Shape: Beads come in different profiles – L-shape, T-shape, or even custom designs. The shape you need depends on the corner geometry and desired aesthetic.
Remember, metal beads are best used where corners aren’t subject to much movement. They’re rigid, so they can’t accommodate much substrate deflection without cracking themselves.
Fasteners, adhesives, and compatible substrates
To ensure your reinforcement stays put, you’ll need the right fasteners, adhesives, and a suitable substrate. Here’s how:
Fasteners: Use appropriate screws or nails to attach your mesh or metal beads. Stainless steel is best for corrosion resistance. Make sure they’re long enough to penetrate into the framing but not so long they poke through the stucco.
Adhesives: For self-bonding mesh, follow the manufacturer’s instructions. If using a separate adhesive, ensure it’s compatible with your substrate and reinforcement material.
Compatible Substrates: Reinforcement works best on stable substrates. That means no major movement or deflection. Check your walls before installing. If they’re not solid, address those issues first to prevent repeat cracking.
Step-by-Step Reinforcement Technique for Inside Corners
Start with a clean, dry substrate and remove loose material from the corner. Apply the chosen reinforcement to the inside corner following the manufacturer’s seating and embedment guidance. Secure the edge and ensure it sits flush to prevent voids in the finish.
Then bridge the corner into the adjacent planes and integrate with the base coat substrate per instructions. Allow for proper curing and check transitions to adjacent surfaces so they don’t create new stress risers. If instructions vary, defer to the product label or data sheet for specifics.
Step-by-Step Process
This section guides you through the practical steps to reinforce inside corners and minimize repeat cracking.
- Inspect the area: Check for any signs of damage, rot, or loose lath before starting. If unsure, consult a pro.
- Prepare the site: Ensure safety by clearing the work area, wearing appropriate PPE, and setting up proper scaffolding if needed.
- Remove damaged material: Use a chisel or oscillating tool to carefully remove cracked or damaged stucco (see next step for details).
- Clean and prep substrate: Thoroughly clean the surface, remove any loose debris, and ensure it’s dry before applying new material.
- Install corner reinforcement: Embed mesh or metal bead correctly, ensuring proper overlap and anchoring (detailed in following steps).
- Apply base coat: Mix and apply the first layer of stucco, embedding the reinforcement as you go. Ensure even coverage and thickness.
- Feather edges: Use a trowel to feather the edges of the base coat, avoiding abrupt thickness changes that cause cracking (detailed in later steps).
- Apply finish coats: Apply subsequent layers of stucco, allowing each to cure properly before applying the next. Ensure even application and proper curing time.
- Final inspection: Once fully cured, inspect the work for any signs of cracking or other issues. Address any problems promptly.
Substrate prep and removal of failed material
Proper substrate preparation is key to a successful repair. Removing damaged material correctly ensures a strong bond for the new stucco.
- Removing damaged stucco: Use a chisel or oscillating tool with a wood blade to carefully remove cracked or damaged stucco. Be cautious not to damage the underlying lath.
- Cleaning the substrate: Thoroughly clean the surface using a wire brush, vacuum, or damp cloth to remove all dust and debris. Ensure the substrate is dry before applying new material.
- Checking for rot or damage: Inspect the exposed lath and substrate for any signs of rot, water damage, or loose lath. If found, repair or replace these areas before proceeding.
- Avoiding common mistakes: Do not try to fill cracks with new stucco without removing the damaged material first. This will only lead to further cracking and a weak bond.
- Preparing for new application: Ensure the substrate is sound, dry, and free of any contaminants that could affect adhesion.
Installing corner reinforcement correctly
Proper installation of corner reinforcement is crucial to prevent repeat cracking. Here’s how to do it right:
First, ensure your chosen reinforcement (mesh or metal bead) is compatible with your stucco system and meets the required ratings.
Placing and overlapping mesh/metal bead: Position the reinforcement along the inside corner, ensuring proper overlap at the edges. This helps distribute stress evenly across the corner.
Anchoring methods: Secure the reinforcement in place using appropriate fasteners or adhesives. Follow the manufacturer’s instructions for best results. Ensure fasteners a