
Introduction
Laitance is a thin, weak surface layer of cement and fines on concrete that can ruin coatings if it isn’t removed. It often feels powdery or dusty and looks lighter or different from the surrounding concrete. If you leave laitance, coatings can fail early and moisture or dirt may trap under the finish.
Removal options include mechanical abrasion to expose solid aggregate beneath and, where appropriate, acid etching following the product instructions. After treatment, clean the surface and profile it so coatings have something to grab onto, and always check moisture content before applying anything. Always verify product labels and local rules for acceptable methods, and tailor the approach to your concrete and environment.
Key takeaways
- Identify laitance by chalky powdery film that easily dusts off.
- Mechanically remove laitance with careful light grinding or sanding, avoiding deep grooves.
- Test moisture before coating; ensure surface paintability and check manufacturer guidelines.
- Confirm surface is clean, dry, and profiled with uniform roughness for adhesion.
- Wear eye protection and respirator when grinding or solvent cleaning.
- Document plan, test results, and post-removal verification to avoid coating failures.
Table of Contents
- Introduction
- Key takeaways
- What Is Concrete Laitance and Why It Matters
- How to Identify Laitance — Visual, Tactile, and Simple Field Checks
- Essential Diagnostic Testing Before Coating
- Methods to Remove Laitance — Pros, Cons, and Selection Criteria
- Cleaning and Profiling to Achieve the Required Surface for Coating
- Repairing and Leveling After Laitance Removal
- Safety, Environmental Controls, and Standards to Follow
- Project Planning, Common Mistakes, Cost Drivers, and Final Validation
- Conclusion
- FAQ
What Is Concrete Laitance and Why It Matters
Laitance is a thin, weak layer on the surface of cured concrete. It sits above the healthy, solid substrate and can feel powdery or chalky to the touch. Its typical presence is most obvious on slabs and floors where finishing practices or fast drying occurred.
Understanding laitance helps you protect coating performance and longevity. It undermines adhesion by presenting a brittle, inconsistent bond that surprises coatings with early failures. Assessing its presence guides your prep choices and documentation for project specs.
Definition and formation mechanisms
Laitance is a weak, cement-rich surface layer that forms on concrete during curing. It’s different from the healthy hardened concrete beneath, typically ranging between 1/16 to 1/4 inch thick.
Over-wet mixes, improper finishing techniques like over-troweling, and rapid evaporation can cause laitance. Here’s how:
Over-wet mix: Too much water in the concrete causes excess cement to rise to the surface as it settles.
Improper finishing: Over-troweling forces bleed water (water that separates from the concrete mix) to the surface, creating laitance.
Rapid evaporation: Quick drying can cause a weak, powdery layer to form.
Effects on coatings and common failure modes
Laitance undermines coating adhesion and longevity. Here’s why:
Poor bond: The weak, powdery surface of laitance can’t sustain mechanical or chemical adhesion, leading to inadequate bonding with coatings.
Delamination: Over time, the weak layer may separate from the concrete beneath, causing coatings to peel off.
Early coating failure: Premature wear and tear on coatings due to poor adhesion.
Blistering is another common issue. Moisture trapped under laitance can cause coatings to bubble up and eventually fail.
Typical sources and risk factors
Several construction, curing, and environmental practices increase the chance of laitance:
Construction practices: Over-watering concrete during mixing or finishing, improper troweling techniques, and inadequate curing can all lead to laitance.
Curing conditions: Rapid evaporation due to high temperatures or low humidity can cause laitance to form quickly.
Environmental factors: Windy conditions can also speed up evaporation and contribute to laitance.
Proper concrete mixing, finishing, and curing practices can help minimize the risk of laitance. Always follow manufacturer recommendations for your specific concrete mix.
How to Identify Laitance — Visual, Tactile, and Simple Field Checks
Start with a clear definition and contrast laitance from sound concrete and other surface defects. This prevents misdiagnosis on site. Visual cues often point the way before you probe deeper.
Use simple tests to feel and verify the surface: a light scratch, a dry-dusting check, and a damp wipe can reveal powdery release or absorbency differences. Quick on-site checks help decide if mechanical profiling is needed before coating.
Step-by-Step Process
Follow these practical steps to identify laitance on your concrete surface. This process ensures you cover all bases, from preparation to final checks.
- Safety first: Wear gloves, safety glasses, and a dust mask. Have a broom and dustpan ready for cleanup.
- Visual inspection: Look for powdery white film, chalky finish, glossy patches, or uneven sheen. These are common signs of laitance.
- Tactile test: Gently run your fingers over the surface. Laitance feels loose and gritty compared to normal concrete.
- Light scratch test: Use a coin or nail to lightly scratch the surface. If it leaves a white mark, you’ve found laitance.
- Water test: Sprinkle water on the surface. Laitance will bead up instead of being absorbed.
- Scrub test (optional): Use a damp cloth to scrub the surface. If it turns white and powdery, laitance is present.
- Tape pull (optional): Stick tape on the surface, press down, then pull off quickly. If it pulls off white particles, you’ve confirmed laitance.
- Final check: Inspect your findings with a pro if unsure. They can provide expert advice and confirm your diagnosis.
Visual and Tactile Symptoms to Look For
Laitance often presents as a white, powdery film on the concrete surface. This is due to the weak, cement-rich layer that forms during curing.
Color: Laitance appears white or light gray, contrasting with the usual dark gray of normal concrete.
Powdering: When brushed or touched, laitance feels gritty and leaves a powdery residue on your hands. This is because it’s composed of loose particles that can be easily dislodged.
Sheen: Laitance can have an uneven sheen, appearing glossier than the rest of the surface. This is due to the smooth, unabsorbed cement layer.
Quick Field Tests (Scrub, Tape, and Hardness Checks)
These simple on-site tests can help confirm the presence of laitance. They’re quick, easy, and require minimal equipment.
The scrub test involves wetting a cloth and scrubbing the surface. If it turns white and powdery, you’ve likely found laitance.
The tape pull test uses adhesive tape to lift off loose particles. Stick the tape on the surface, press down, then pull off quickly. If it pulls off white particles, laitance is present.
The hardness test involves lightly scratching the surface with a coin or nail. If it leaves a white mark, you’ve found laitance. This test works because laitance is softer than normal concrete.
When to Suspect Hidden or Intermittent Laitance
Sometimes, laitance isn’t immediately obvious. In these cases, further testing is necessary to confirm its presence.
Patchy powdering: If you notice small patches of white powder on an otherwise normal surface, suspect laitance. It might not be visible in other areas, but it could still be present.
Recent over-wet finishing: If the concrete was finished while still too wet, it may have developed laitance that’s now hidden under a thin layer of normal concrete. Be wary of this if the surface feels unusually smooth or slippery.
Unexplained coating failure: If your coatings are peeling or flaking for no apparent reason, suspect laitance. It could be causing adhesion issues even if it’s not visible on the surface.
Essential Diagnostic Testing Before Coating
Plan tests that focus on moisture status and laitance contamination, and decide what can be done non-destructively versus destructively. Map test areas so results guide the prep steps. Keep the plan aligned with coating specs.
Non-destructive tests include moisture and surface durability checks, while destructive tests provide definitive data on bond and thickness. Use these results to choose grinding, profiling, or specialty prep methods consistent with manufacturer guidance.
Moisture and vapor testing (when and which tests to use)
Before applying any coating, test for moisture. It’s the number one enemy of coatings.
Start with non-destructive tests:
– Use a non-invasive moisture meter on the surface.
– Insert RH probes (ASTM F2170) into drilled holes to check sub-surface moisture.
– Scan for capillary moisture using a simple visual inspection or hygrometer.
Pull-off adhesion and surface strength tests
After suspect material is removed, test the concrete’s soundness with pull-off tests.
Here’s how:
– Apply a suitable adhesive to the surface.
– Attach a steel pull-off disc.
– Pull until failure using a calibrated machine (ASTM D4541).
– Check the remaining concrete for strength and integrity.
Contamination screening (pH, salts, oils)
Laitance isn’t the only contaminant. Check for these too:
– pH: Use litmus paper to check for high pH (alkaline) conditions.
– Salts: Look for white deposits or use a simple salt test kit.
– Oils: Perform a simple soap and water test – if it bubbles, oil’s present.
Methods to Remove Laitance — Pros, Cons, and Selection Criteria
Understand the three broad removal categories: mechanical, abrasive, and hydro methods, with common sub-methods for each. Each option has different effects on surface profile and cleanliness. Your choice should fit the thickness and cure state of the laitance.
Weigh the trade-offs for each path: depth of removal, dust and VOC control, and potential for micro-cracking. Use a practical workflow to select a method and plan contingencies for rework if needed.
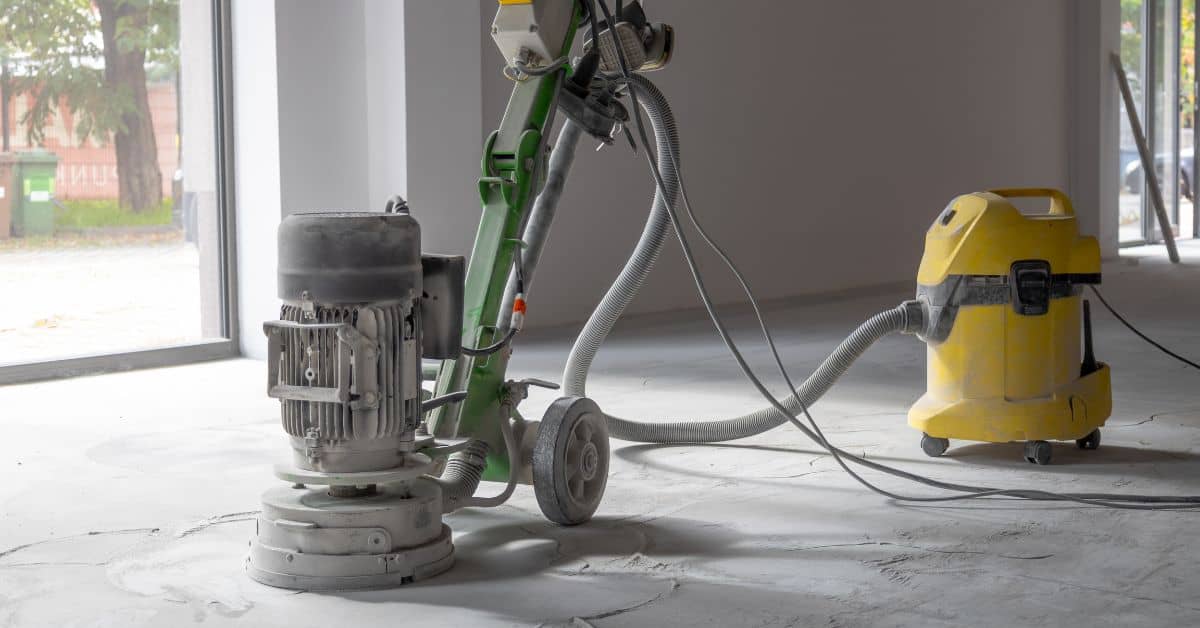
Mechanical abrasion: grinding, scarifying, and diamond tools
Mechanical methods use rotating tools to physically remove laitance. They’re great for thin layers and provide good profile control.
- Light Milling: Uses a grinder with a coarse disc to remove thin laitance. It’s dusty, so keep the area well-ventilated. Rentable grinders start around $50/day.
- Scarification: A more aggressive method using a scarifier tool. It removes laitance and creates a rough profile for better coating adhesion. Expect some dust and vibration.
- Diamond Tools: For tougher concrete, use diamond-impregnated blades or cups. They last longer than standard tools but cost around $100 each.
- Planetary Grinders: These spin in two directions for faster removal and better profiling. They’re pricier to rent, starting at $200/day.
- Vacuum-Assisted Tools: Some grinders come with dust collection systems. They help keep the area clean but add complexity and cost.
Abrasive blasting types: dry, wet, and vacuum-assisted
Blasting uses high-velocity abrasives to remove laitance. It’s fast but can be messy.
Dry Blasting: Uses compressed air to propel abrasives like sand or shot. It’s quick but produces a lot of dust and residue.
Wet Blasting: Submerges the abrasive in water before blasting. This reduces dust but leaves a wet residue that needs cleaning.
Vacuum-Assisted: Combines dry or wet blasting with vacuum recovery to contain debris. It’s cleaner but more complex and costly.
High-pressure water, hydrodemolition, and combined techniques
Water methods use high-pressure jets to remove laitance. They’re great for thicker layers but can increase substrate moisture.
High-Pressure Water Jetting: Uses water at 10,000-40,000 psi to remove laitance. It’s dust-free but can cause micro-cracking if not done right.
Hydrodemolition: Similar to high-pressure jetting but uses special equipment and techniques for thicker layers. It’s expensive, starting at $500/day for rentals.
Combined Techniques: Some jobs use a combination of methods. For example, blasting might be used first to remove thick laitance, followed by water jetting to clean the surface and remove any remaining residue.
Cleaning and Profiling to Achieve the Required Surface for Coating
Cleanliness and surface profile must align with coating requirements, without compromising adhesion. Poor alignment leads to bond failures down the line. Plan the sequence to preserve the intended adhesion surface.
Outline contaminant removal steps and profile verification, including moisture considerations. A practical workflow guides assessment, containment, removal, drying, and final inspection to satisfy coating specs.
Achieving and measuring the correct surface profile (ICRI CSP, manufacturer specs)
The coating’s adhesion relies on a suitable surface profile. Target the roughness specified by the coating manufacturer or follow ICRI CSP standards.
Use a profilometer to measure the surface profile. Compare results with the manufacturer’s specs. If you don’t have a profilometer, use a white sheet of paper. Hold it against the surface. If light reflects evenly, the profile is right.
Remember: Too smooth or too rough profiles can compromise adhesion.
Removing residues and preventing re-contamination
After profiling, vacuum the surface to remove dust and debris. Use a wet-dry vacuum for best results.
Rinse the surface with clean water. Let it dry naturally or use heaters if time is short. Ensure no residue remains.
Prevent re-contamination: Keep the area isolated until coating. Cover equipment and materials to avoid dust pickup.
Sequencing cleaning, profiling, and repairs
The order of operations matters. First, clean the surface thoroughly to remove contaminants like laitance, oils, and dust.
Next, profile the surface according to specs. This step might create new debris, so clean again.
Now, make any necessary repairs. After all steps are complete, inspect the surface one last time before coating.
Repairing and Leveling After Laitance Removal
Post-removal, inspect for remaining laitance pockets, hardness, and moisture signs that could affect adhesion. Document issues to guide repairs. Ensure the substrate remains sound before coating.
Choose patch materials compatible with the chosen coating system and plan repairs from large to small areas. Address leveling, feathering, and curing requirements to prevent future failure points.
Choosing repair materials compatible with coatings
The right patch mortars and primers ensure your coating system bonds well, lasts long, and looks good. Here’s what to consider:
- Thermal expansion: Match the thermal expansion of your concrete substrate and chosen coating to prevent cracking due to temperature changes.
- Chemical compatibility: Ensure patch materials don’t react with or degrade your chosen coating. Check manufacturer specs for compatibility.
- Adhesion strength: Look for high bond strength ratings. Weak adhesion leads to delamination and coating failure.
- Avoid cement-based patches: For epoxy, polyurethane, or other resin-based coatings, use epoxy or latex-based patch materials for better compatibility.
- Cure time: Consider cure times of both patch materials and the final coating to plan your project timeline effectively.
Feathering, grinding tolerances, and blending repaired areas
Smooth transitions between patched and original surfaces are crucial for consistent coating adhesion and appearance.
Feather edges: Gradually reduce the thickness of your patch material towards the existing surface to create a smooth transition. This prevents sharp lines that can cause stress points and delamination.
Grind and blend: Use a grinding tool with appropriate grit size to level any remaining high spots and blend patched areas into the surrounding substrate. Be careful not to grind too deep, creating low spots or damaging the surface.
Consistent profile: Maintain a consistent surface profile across patched and original areas to ensure even coating application and adhesion. Use pull-off tests or CSPI/ASTM standards as guides.
Curing, re-testing, and pre-coating inspection
Before applying your final coating, follow this checklist to ensure your repaired surface is ready:
- Moisture content: Confirm moisture levels are within acceptable ranges for your chosen coating using appropriate testing methods.
- Surface hardness: Check that patch materials have cured and achieved sufficient hardness for coating application.
- Adhesion test: Perform pull-off adhesion tests to confirm strong bond between patch materials and the concrete substrate.
- Cleanliness: Ensure the surface is free of dust, debris, and any contamination that could impede coating adhesion.
- Surface profile: Verify that the required surface profile (CSP or manufacturer specs) has been achieved.
- Contamination check: Screen for pH, salts, oils, or other contaminants that could affect coating performance.
- Edge containment: Inspect edges to ensure proper slope and containment for the final coating application.
- Curing duration: Allow sufficient curing time for patch materials before applying the final coating.
- Primer suitability: Confirm that your chosen surface primer is compatible with both the repaired zones and the final topcoat system.
Quick rule: Never rush this final inspection. Skipping checks can lead to premature coating failure and costly rework.
Safety, Environmental Controls, and Standards to Follow
Define PPE per task, including respirators and eye protection, and implement a training plan. Fit testing and ongoing reminders help keep workers safe. Keep the jobsite organized to minimize risk.
Contain dust and manage wash water, waste, and spill response. Reference applicable standards and local rules to ensure compliance and long-term coating performance.
Dust control, silica exposure, and required PPE/controls
Silica dust from concrete laitance is a serious health hazard. Here’s how to protect yourself:
Respiratory Protection: Wear a NIOSH-certified respirator with an N95 or P100 filter to protect against silica dust. Fit-test and train your team.
Local Exhaust Ventilation (LEV): Use LEV systems, enclosures, or HEPA filtration to minimize airborne dust. Maintain negative pressure in work areas.
Regularly monitor silica levels and ensure proper use of PPE to keep exposure below the permissible exposure limit (PEL).
Containment, wastewater, and abrasive disposal
Proper containment and disposal of waste are crucial to protect the environment:
Slurry/Runoff Containment: Use barriers, tarps, or other methods to contain slurry and runoff. Collect wash water for reuse where feasible.
Abrasive Disposal: Segregate spent abrasives from other waste. Dewater and solidify before disposal. Follow local regulations for recycling or disposal streams.
Have a spill response plan ready, including cleanup procedures to prevent contamination.
Reference standards and specification documents
Consult these standards to ensure compliance and long-term coating performance:
OSHA: Follow OSHA’s silica rules (29 CFR 1926.1153, 29 CFR 1910) for worker safety.
Surface Preparation: Align with SSPC-SP 13/NACE 6 standards for surface preparation before coatings application.
ASTM Standards: Refer to ASTM standards (e.g., C672, D4540) for concrete testing and quality control. Match project specs with manufacturer requirements for coating compatibility.
Project Planning, Common Mistakes, Cost Drivers, and Final Validation
Clarify the project scope by identifying concrete type, suspected laitance depth, moisture status, and intended coating system. Set practical acceptance criteria early. Document expectations for the prep work.
Walk through a testing and prep plan that includes moisture checks, profile verification, and bond tests. Schedule, budget drivers, and common pitfalls to avoid help protect the coating from early failures.
Scheduling, crew qualifications, and risk mitigation
Plan your concrete laitance removal project with a realistic timeline. Rushing prep work leads to coating failures.
Crew: Hire skilled workers experienced in laitance removal and surface preparation. They know how to handle equipment safely and achieve the right profile.
Risk mitigation: Allow for contingencies – weather delays, equipment breakdowns. Have backup plans ready. Keep your project on track without compromising quality.
Cost drivers and what to check in contractor quotes
Before hiring, understand the cost breakdown and verify scope. Don’t rely on headline prices alone.
- Method: Ask about their laitance removal technique (grinding, blasting). Cheaper isn’t always better.
- Containment: Ensure they plan to control dust and contain debris. Silica exposure is a health risk.
- Access: Check if they account for difficult access areas. Extra time = extra cost.
- Repairs: Verify they include prep work (crack filling, leveling). Incomplete prep causes coating failure.
- Waste handling: Ask about abrasive disposal and containment waste management. Non-compliance can add hidden costs.
- Testing: Ensure they plan moisture-in-situ tests, surface profile verification, and adhesion tests. Skipping these risks coating failure.
- Scope changes: Clarify change order procedures. Unplanned scope changes hike costs.
- Safety: Check if they follow safety standards (OSHA, local regulations). Safety lapses can lead to accidents and fines.
Quick rule: The lowest bid isn’t always the best. Choose based on thoroughness, experience, and compliance with your project needs.
Final quality checks, documentation, and acceptance criteria
Before applying coatings, conduct final sign-off activities to ensure a successful project.
Visual inspection: Check for any missed laitance, contaminants, or damage. A thorough visual check prevents costly rework.
Adhesion test results: Verify pull-off adhesion tests meet manufacturer specs and industry standards (ICRI). Low adhesion leads to coating delamination.
Moisture verification: Confirm moisture-in-situ tests pass before coating application. Excess moisture causes coating failure.
Documentation: Photograph the prepared surface for warranty purposes and QA records. Good documentation protects your investment.
Conclusion
Identifying and removing laitance is about protecting safety, durability, and how your coating will look for years. Handle it right now to prevent delamination, cracks, and costly callbacks.
Make this a practical checklist: confirm laitance with simple field checks and any diagnostic tests you deem necessary, pick a removal method that fits your surface and coating goals, test the method on a small area first, then clean and profile the surface to the coating’s spec, and finally repair or level as needed and validate the result before coating.
Common mistakes to watch for include rushing the removal, using the wrong method for the concrete type or coating, and skipping small-area tests or surface profiling. Safety first means using proper PPE, keeping away from dust and wet areas, and turning off power tools when not in use. Always perform tests in a controlled, small area before committing to the full plane, and follow the project plan and environmental controls to avoid damage and mess.
If the concrete is severely laitance or the coating system demands strict tolerances, don’t push beyond your comfort zone. When in doubt, call a professional to confirm the plan and execution. Stay steady, follow the steps, and you’ll land a solid, long-lasting coating that first-time effort can be proud of.
FAQ
How can I identify laitance on a concrete surface before coating?
Look for a thin, chalky or powdery layer that wipes off easily. It may feel slick or dusty and can be lighter in color than the underlying concrete. If unsure, perform a simple rub test with a stiff brush—if the surface continues to shed dust, laitance is present.
What are practical methods to remove laitance, and which should I choose?
Mechanical abrasion uses grinders or trial blades to roughen the surface and remove laitance. Acid etching can help loosen loose surface material, but it requires careful handling and proper neutralization. Choose based on surface condition, coating compatibility, and manufacturer instructions; never guess when coating compatibility is on the line.
How do I clean and profile the surface after laitance removal?
Vacuum and wipe to remove all dust and debris. Rinse and dry thoroughly to a uniformly dry surface; dampness will ruin coating adhesion. Profile the concrete enough to hold the coating use, but avoid over-roughening that creates new defects.
How do I test moisture content and ensure the surface is ready for coating?
Use the method described by your coating manufacturer or a trusted test kit to check moisture. Follow the instructions on the label for acceptance criteria and curing state. If in doubt, delay coating and re-test after additional drying time.
What repair steps should I plan if I find defects after laitance removal?
Fill high spots and fill voids with an appropriate repair product following the product label. Trowel smooth and let cures as directed before coating. If you see static cracking, assess substrate movement and choose a compatible repair and coating system.