

Introduction
Slab curling at edges happens when the outer parts dry or cool faster than the center, causing the edges to lift.
Understanding this helps you prevent issues with fit, finish, and performance in real-world projects.
The guide walks through practical cues and tips to reduce curling, including moisture management, substrate considerations, and realistic expectations for material behavior.
Key takeaways
- Edge curl results primarily from moisture loss and restraint mismatch during curing.
- Use proper slump, w/cm, and air- entraining admixtures to control shrinkage.
- Place and cure slabs with gradual moisture to minimize edge differential drying.
- Control temperature differential between ambient and concrete to reduce curling.
- For high-risk projects, consider thicker edges or insulation during curing.
- Inspect joints, formwork, and reinforcement alignment before pouring to prevent curling.
Table of Contents
- Introduction
- Key takeaways
- What is slab curling and why it matters
- Primary causes of edge curling
- Mix design and material choices to reduce curling
- Placement, finishing, and curing practices that prevent curling
- Site controls and environmental mitigation
- Advanced solutions for high-risk applications
- Repairing existing edge curling and long-term monitoring
- Planning, cost implications, and avoiding common mistakes
- Conclusion
- FAQ
What is slab curling and why it matters
Slab curling is when the edges of a concrete slab lift or warp at the perimeter, creating a visible edge and a rhythm of unevenness that an untrained eye might misread as simple surface texture. The term “curling” is the everyday way people describe edge lift, while “warping” is the technical word for the more uniform or differential deformation along the edges and corners, which can appear milder but still affect performance.
This matters because edge lift or warping can create trip hazards, affect how flat the surface is, and drive longer-term finish problems and maintenance costs, especially if you plan overlays, vapor barriers, or other treatments. Look for gaps at joints, misaligned doors or thresholds, and obvious edge curl when you view the slab from a corner, and use simple checks like walking the surface slowly or placing a straight edge along suspected high spots to gauge flatness—if you see gaps, gaps opening, or high spots, it’s a sign you’ll want to address moisture movement, curing, and joint planning in future work.
Curling vs warping — terminology and mechanics
You might hear folks talk about ‘curling’ when they see edges lifting on a slab. But in the trade, we use ‘warping’. Here’s why:
Warping is when your slab deforms along its edges due to differential shrinkage, moisture movement, or temperature changes. It can be uniform (same amount across the whole edge) or differential (more on one side than the other).
Now, ‘curling’ is a bit more general. It’s often used to describe any kind of edge lift, even if it’s just a minor warp. But for us to fix it, we need to understand the technical term and its causes.
Consequences for floors and structures
Warping isn’t just an eyesore. It can cause real problems:
Safety: Warped edges can create trip hazards, especially if they’re sharp or uneven.
Flatness and finish quality: Warping can make your floor anything but flat. That means doors won’t close right, thresholds will be uneven, and you might see cracks in your flooring.
Maintenance costs: Warped slabs put extra stress on joints. This can lead to cracking and increased maintenance over time. Plus, warping can make it tough to install overlays or vapor barriers properly.
Primary causes of edge curling
Edge curling comes from a few main root causes that bite at the slab edge: plastic shrinkage, drying shrinkage, differences in moisture or temperature between the edge and interior, inadequate control joints or design, and subgrade or subbase conditions. These factors often work together, with edge exposure to wind, sun, and faster drying making curling worse and moisture migrating toward joints.
For DIY homeowners, focus on indicators like edge moisture differences, early surface cracking, and whether joint spacing seems right for the slab size. Mitigation is practical: use proper curing, consider misting or covering to slow evaporation, place and time joints correctly, keep the mix and slump reasonable, and ensure solid subgrade prep and drainage. When several factors are in play, curling can escalate quickly, so target curing, joints, and site prep to stay ahead.
Moisture variation and rapid surface drying
The top of your slab dries faster than the bottom. This happens because the underside is protected by the ground, while the top is exposed to air and sun. As the surface loses moisture, it shrinks. But the bottom doesn’t shrink at the same rate. This creates a tensile strain at the top that pulls the edges upward, causing curling.
You’ll see this happening if you notice dryer edges compared to the interior of your slab. To reduce this, use proper curing methods like misting or covering the slab after placement.
Remember, proper moisture management is key here. Too much water can lead to excessive shrinkage, while too little can cause curling due to rapid drying.
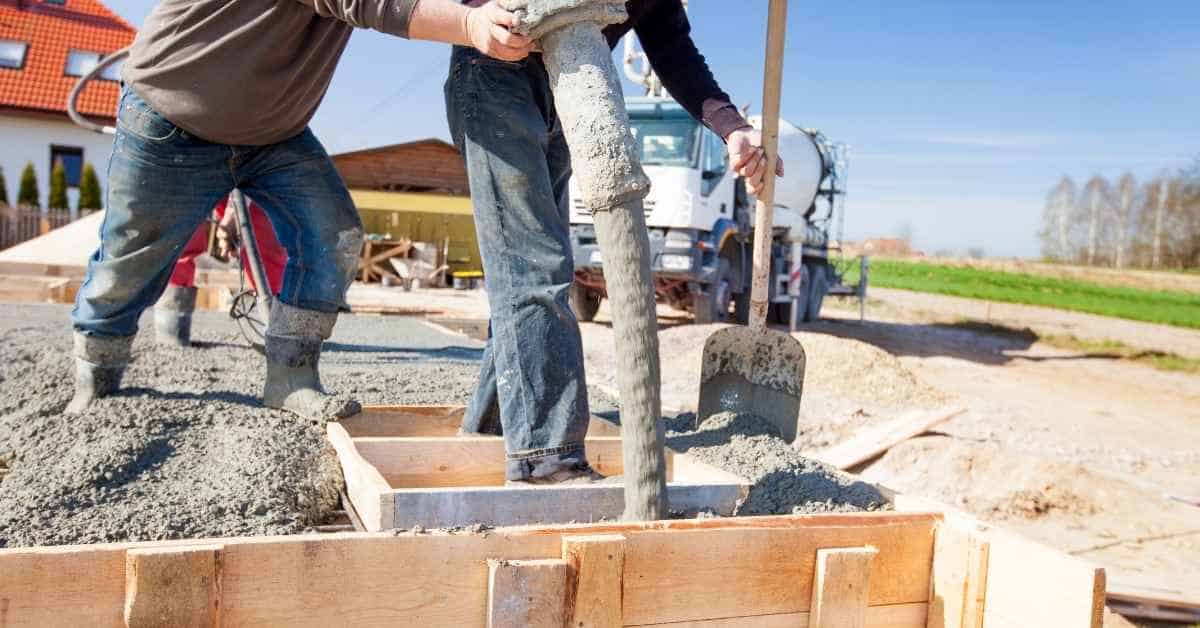
Bleeding water and placement on vapor retarders
When concrete is placed, water bleeds to the surface. If your slab is placed on an impermeable base like plastic sheeting, this water can’t escape into the ground. Instead, it concentrates at the surface, leading to faster drying and short-term curl.
You might notice excessive surface water and rapid drying around the edges of your slab. To mitigate this, ensure your subgrade is permeable and avoid using vapor retarders that don’t allow water to escape.
Also, consider timing your saw cuts. Make them when bleeding is minimal to prevent water from filling up the joints and causing curling.
Temperature differences and thermal gradients
Daytime heating and cooling cycles cause your slab to expand and contract. The top layer, exposed to air, experiences these temperature changes more than the bottom layer, which is insulated by the ground. This creates a thermal gradient that adds to curling.
You might see surface cracking patterns that follow daily temperature cycles. To reduce this, ensure your slab has adequate control joints to allow for expansion and contraction. Also, consider using shading materials to protect the slab from direct sunlight during hot days.
Keep in mind, these factors interact with each other. High temperatures combined with rapid drying can exacerbate curling. So, it’s important to manage all these factors on your job site.
Mix design and material choices to reduce curling
For curling control, keep the water-cement ratio in a practical DIY range and mind how water affects plastic shrinkage. Watch cement content to balance strength, creep, and shrinkage, and avoid high cement with poor aggregates or w/c misbalance. Use clean, well-graded aggregates with limited absorption and small max size to improve internal restraint and reduce curling tendencies.
Supplementary cementitious materials can help by lowering heat of hydration and shrinkage, but follow product labels for replacement guidance and compatibility. Use appropriate admixtures to improve workability, slow or accelerate set as needed, and add air-entraining agents if you see plastic cracking risk; always verify with the mix label and manufacturer instructions. Plan quick field checks—target slump, correct batching, moisture conditioning of aggregates, and small tests—to confirm the designed mix actually mitigates curling in practice and to guide curing plans.
Water content, workability, and admixtures
Keep water as low as practical to reduce plastic shrinkage and curling. Target a water-cement ratio between 0.45-0.55 for DIY slabs.
Use plasticizers/retarders to improve workability without adding excess water. They help maintain a consistent set time, reducing the risk of curling due to uneven curing.
If unsure about admixture dosages, check with your supplier or perform small-scale trials. Too much water or improper admixtures can increase curling risks.
Aggregate size and cementitious adjustments
Use larger coarse aggregates (up to 1.5″ or 38mm) to reduce shrinkage and long-term warping. They provide better internal restraint against curling.
Lower cement content (400-500 lb/yd³ or 600-750 kg/m³) helps balance strength, creep, and shrinkage. Too much cement increases the risk of curling if not paired with proper aggregates and water-cement ratio.
Replace some cement with fly ash/silica fume (15-30%). These supplementary cementitious materials reduce heat of hydration, shrinkage, and curling while improving long-term strength.
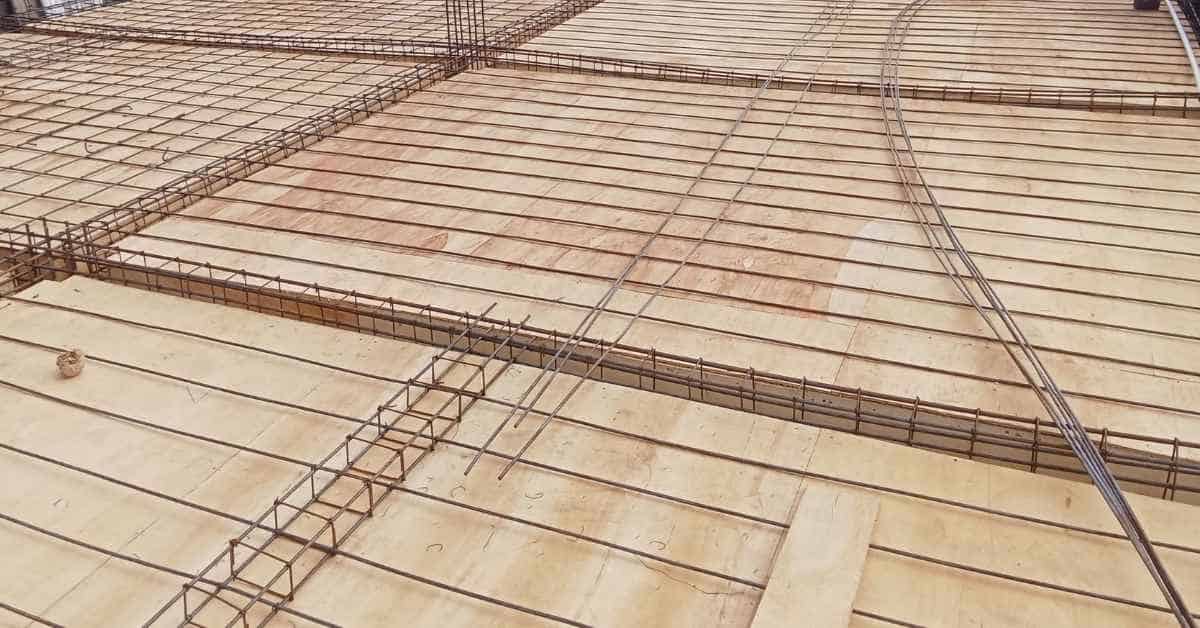
Reinforcement and fiber options
Properly place reinforcement (#4 rebar at 12″-18″ centers) to control upward/downward movement. It helps distribute loads evenly, reducing curling.
Consider using welded wire fabric or fibers (0.5-1% by volume). They improve crack resistance and help stabilize the slab, minimizing curling tendencies.
While reinforcement and fibers aid in controlling movement, they do not eliminate curling entirely. Proper mix design and curing remain crucial to minimize edge curling.
Placement, finishing, and curing practices that prevent curling
To keep curling down, line up base prep, formwork, moisture control, and curing so the slab dries evenly. From subgrade to edge sealing, use consistent placement, calm finishing, and proper curing to limit moisture and temperature differences that drive curling.
This matters because edge drying and temperature gaps show up as curled edges. By coordinating placement, finishing timing, and curing method, you give the slab a fair shot at staying flat. Keep an eye on edge protection and plan for steady humidity to avoid curling later.
Base preparation and moisture conditions
Proper base preparation is crucial to prevent slab curling. Start by understanding your subgrade’s moisture condition – it should be damp, not saturated or dry.
Damp subgrades allow for even moisture distribution into the slab, preventing rapid drying at edges. If it’s saturated, excess water can lead to curling and other issues. A dry subgrade may cause the slab to dry too quickly, leading to differential drying.
Ensure proper compaction of the subgrade to minimize moisture transfer and temperature gradients at the edges. Use clean, level forms to maintain consistent slab thickness, which helps prevent curling.
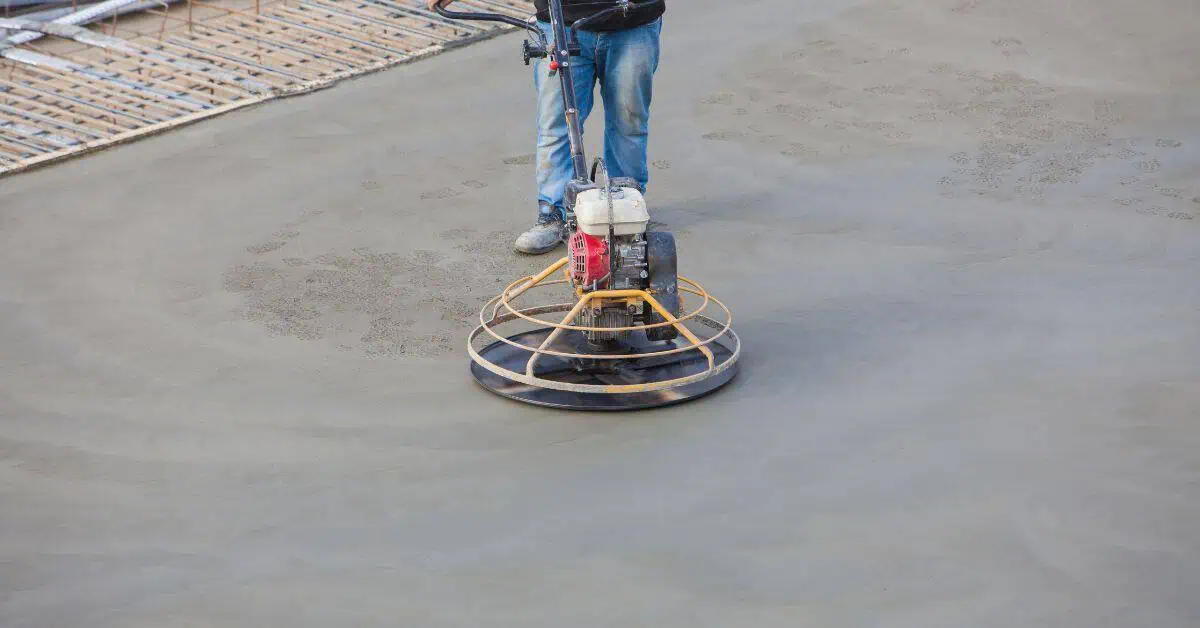
Finishing timing and techniques
Timing is key when it comes to finishing your concrete slab. Avoid overworking the surface by coordinating screed, bull float, and troweling passes.
Don’t add excessive water during finishing. This can lead to a wet surface that dries slower than the edges, causing curling. Keep an eye on those edges – use edge forms or protection to reduce drying influences.
Be mindful of your troweling technique. Long glazing or over-troweling can trap moisture at the edges, so keep your passes consistent and avoid lingering too long in one spot.
Curing methods and timing (practical options)
Proper curing is vital to prevent slab curling. Wet curing, using curing compounds, or applying plastic sheets can help maintain consistent moisture levels across the slab.
Wet curing involves keeping the surface moist for 7-14 days, depending on temperature and humidity. Curing compounds can be applied after initial set and left to cure for 3-5 days before washing off.
Plastic sheets or membranes should be laid soon after placement and removed once the slab has gained sufficient strength, usually around 3-7 days. Always check local recommendations and adjust curing durations based on weather conditions.
Site controls and environmental mitigation
On the pour day, establish windbreaks, shade, and enclosures to slow evaporation and reduce thermal gradients. We monitor air and surface temperatures and use cooling or insulation measures, scheduling placements for cooler periods or when wind is light.
Use plastic sheets, curing blankets, fogging, or curing compounds to keep moisture in and limit temperature swings. Plan the site layout to minimize sun exposure, stagger pours, and sequence forms to reduce differential drying. Check that coverings, fans, and misting systems are secure and that drainage is clear.
Windbreaks, shading, and scheduling pours
Set up wind screens around the slab to block strong winds. This reduces rapid surface evaporation and thermal gradients.
Use sun shades or enclosures to protect the slab from direct sunlight. The sun’s heat can cause rapid drying and temperature differences across the slab, leading to curling.
Schedule your pours wisely. Pour during cooler times of the day, like early morning or late evening. Also, consider pouring when wind speeds are lowest. This helps maintain a consistent temperature throughout the curing process.
Temporary humidification and temperature control
When extreme conditions threaten your slab, use temporary measures to control humidity and temperature. Misting systems can add moisture to the air around the slab, slowing down surface drying.
Curing blankets or insulated enclosures can help maintain a consistent temperature across the slab. They do this by trapping heat and preventing rapid cooling at night.
Use heated enclosures in extreme cold. These provide both heat and humidity to protect your slab from freezing temperatures.
Advanced solutions for high-risk applications
In high-risk applications, you’ll want advanced, higher-cost options to keep curl from happening. That means structural reinforcement, continuous edge detailing, and shrinkage-reducing or high-early-strength mixes, plus stricter curing and joint strategies.
These choices pay off by reducing risk and improving performance in critical spaces. They matter to DIY readers because good planning, moisture control, proper curing, and careful QA deliver predictable results and fewer headaches later. Always check product labels and manufacturer instructions to match your situation and local guidance.
Moisture-control membranes and modern vapor retarders
In high-risk applications, moisture control is crucial to prevent slab curling. Modern polyolefin vapor retarders have replaced old polyethylene ones due to their superior performance and durability.
Polyolefins create a robust barrier against moisture migration, reducing the risk of long-term curling caused by differential moisture loss. They’re ideal for critical floors where even small curl is unacceptable.
When to use: Install these membranes when you want to minimize long-term risks associated with moisture movement. They’re particularly useful in data centers, hospitals, and clean rooms.
Remember, while they help control moisture, proper curing and joint placement are still vital for optimal performance.
Structural approaches and load-transfer devices
For high-risk applications, structural enhancements can help minimize slab curling. Dowels, for instance, are used to transfer loads across joints, reducing the stress that causes curling.
Edge stiffening or thicker edge pours also help. They create a stronger, more rigid perimeter that resists curling forces. This is particularly useful in industrial floors subject to heavy loads and traffic.
Load Transfer Devices (LTDs): Dowels are the most common LTDs. They’re installed at joints to distribute loads evenly across the slab, reducing curling potential.
Edge Stiffening: Thicker edge pours or stiffening ribs create a stronger perimeter that resists curling forces. This is especially effective in large, flat slabs prone to curling due to their size and lack of internal support.
Repairing existing edge curling and long-term monitoring
Edge curling isn’t a single fix. Start by verifying how far the curl runs, which panels it affects, and what that means for trip hazards and load paths, then map out repair options from grinding or planing to under-slab leveling injections, epoxy or polyurethane repairs, or slab replacement in extreme cases, with a clear sense of when each approach is reasonable. Inspect moisture at the edge and subgrade, look for frost or soil movement indicators, and record the curled zones so you can decide on a practical sequence and what needs monitoring after work wraps up.
This matters because the wrong repair can fail again and waste time and material. A simple inspection routine, consistent measurements, and a photo log help you spot changes early, set thresholds for action, and keep a long-term plan on track, including who will monitor moisture, temperature, and edge integrity. Use proper surface preparation, moisture control, and compatible bonding or overlay materials, and document curing needs and thickness limits so future patches don’t trap movement or moisture and recurrence is less likely.
Common repair techniques and when they apply
When tackling edge curling, you’ve got a few options. The best one depends on the severity of the damage and the underlying cause.
Mudjacking is like a quick fix for minor issues. It involves pumping grout under the slab to lift it back into place. But remember, it’s only a temporary solution. If the base is unstable or poorly compacted, the problem will return.
For more serious cases, consider slab grinding. This involves removing a thin layer of concrete from the high spots to level the surface. It’s great for small areas and can be done quickly. But it won’t fix underlying issues like poor base compaction or soil settlement.
If you’ve got localized damage, localized patching might do the trick. Just remove the damaged concrete, prepare the surface, and pour new concrete. But again, this won’t fix underlying problems. And if the curl is due to moisture issues, the new patch will likely curl too.
The nuclear option is full replacement. This is when the damage is extensive or the base is severely compromised. It’s a big job, but it ensures the problem won’t return. Just remember, you’ll need to address the underlying cause to prevent new issues from cropping up.
Visual checkpoints and maintenance schedule
Use this checklist every 6 months to a year to ensure your concrete remains in good condition. Early detection of issues can prevent costly repairs.
- Check joints for proper spacing: Joints should be spaced at 1/4 to 1/3 the slab’s thickness (e.g., for a 6″ thick slab, joints should be every 1.5-2 inches). If they’re too far apart or missing, cracking can occur.
- Inspect edge lifts: Edges should have a slight slope away from the center to prevent water pooling. Check for any lifts or separations; if found, refer back to common repair techniques.
- Monitor crack propagation: Measure cracks every 6 months using a crack gauge. If they’re growing, consider sealing and monitoring closely to prevent further damage.
- Check for delamination: Tap the surface with a hammer; if it sounds hollow, there may be delamination (separation of the concrete layers).
- Inspect control joints: These should be tooled to a depth of 1/4 to 1/3 the slab’s thickness. If they’re not holding up, consider repairing or resealing.
- Check for signs of scaling: Gently brush the surface with a stiff broom; if pieces come off, it indicates scaling (concrete flaking).
- Ensure proper drainage: Check that all drains are clear and functioning. Standing water can cause damage over time.
- Inspect reinforcing steel: If the concrete is exposed, check for any rust or corrosion on the rebar. This could indicate a larger problem with the reinforcement.
Quick rule: Always address any issues promptly to prevent small problems from becoming big, expensive ones.
Planning, cost implications, and avoiding common mistakes
Planning upfront saves time and money. It covers a pre-construction checklist, design and material decisions, and the price drivers that affect edge performance. Get these decisions right before you order forms or mix.
That matters because it translates into fewer call-backs and a smoother pour. Do quick on-site checks and keep notes so you can justify the budget to yourself or a partner, and pay attention to sequencing and moisture control for long-term durability.
Pre-construction checklist and stakeholder coordination
Before you start, use this checklist to ensure your slab’s edges won’t curl. It’s best to go through it with your team and stakeholders.
- Subgrade assessment: Check soil compaction, moisture content, and any rock or debris. Skipping this can lead to weak base support.
- Mix specs: Choose a mix designed for your climate and load. Wrong mix can cause excessive curling.
- Curing plan: Plan how you’ll keep the slab moist during curing. Insufficient curing causes curling.
- Schedule: Sequence excavation, form setup, pour, and curing to preserve edge integrity.
- Vapor barrier: Decide if one’s needed. Skipping this can trap moisture in the slab.
- Reinforcement: Choose mesh or rebar based on load needs. Wrong reinforcement leads to cracking and curling.
- Joint placement: Plan control joints to manage shrinkage. Improper jointing causes random cracking.
- Insulation: Consider insulation for heated slabs. Skipping this can cause temperature-related curling.
- Stakeholder sign-off: Get approval from all parties involved in the planning process.
Quick rule: If you skip any of these, expect edge curling and other issues.
Cost vs benefit: budgeting prevention vs repair
Preventive measures often reduce lifecycle costs. Here’s why:
Upfront costs: Investing in proper preparation (compaction, form work, vapor barrier, insulation) and curing methods can seem expensive initially.
However, these upfront investments typically pay off over time by reducing the need for costly repairs. For instance, a well-compacted subgrade prevents slab settlement and curling-related damage.
Long-term savings: Proper edging and moisture control prevent issues like edge curling, which can lead to expensive repairs or even slab replacement down the line.
For example, repairing a curled edge might cost $500-$1000, while preventing it could cost around $200-$300. Over time, these savings add up.
Common mistakes that increase curling risk
Avoid these frequent errors to minimize edge curling:
- Excess water: Too much water in the mix weakens it, leading to curling. Always follow mix designs.
- Poor curing: Insufficient curing causes curling due to rapid moisture loss. Keep the slab moist for at least 7 days.
- Wrong base conditions: Poorly compacted or unstable subgrade leads to curling as loads shift. Always prepare your base properly.
- Improper finishing: Overworking or not allowing bleed water to rise can cause curling. Follow proper finishing techniques.
- Ignoring temperature effects: Extreme temperatures during pouring and curing can cause curling. Plan pours for mild weather if possible.
Each of these mistakes increases the risk of edge curling, so avoid them to keep your slab flat and strong.
Conclusion
Paragraph 1: Slab curling at the edges is a maintenance and safety issue. If you control mix, placement, curing, and environment, you keep edges flat, reduce cracking, and preserve both look and strength.
Paragraph 2: Do this now in order: confirm your mix and aggregates meet reasonable targets for your project, plan placement and finishing so water can drain and cure evenly, shield the slab from heat and moisture swings during curing, test a small area first and watch for edge movement, and follow a simple curing routine and environmental controls. If you see curling start, slow or halt work to adjust water, temperature, and cover more evenly, then recheck before proceeding. When repairing or monitoring, document conditions and schedule follow‑ups so you catch changes early.
Paragraph 3: Common mistakes to avoid are underestimating environmental exposure, skipping a proper cure, or rushing finishing and joint timing. Safety rules are simple: never work on wet, unstable forms or rework while concrete is still soft, wear eye and skin protection, and keep kids and pets away from curing slabs. If you’re unsure about mix choices, placement order, or curing methods, pause and re-evaluate rather than forcing progress.
Paragraph 4: If edge curling is persistent or the slab is large, call a professional for a targeted assessment and long‑term monitoring plan. With careful planning, proper materials, and disciplined execution, you can reduce curling risk, protect your investment, and finish with a solid, smooth surface you can rely on. Stay practical, stay safe, and keep this project moving forward.
FAQ
Why do slabs curl at the edges?
Moisture moves in and out of the concrete. Wind, sun, and drying time pull the edges differently from the center. Improper curing and uneven finishing make it worse.
How can I reduce curling when pouring or finishing a slab?
Keep moisture uniform across the slab. Follow the proper curing methods and use proper jointing. Use the right reinforcement and finalize edges cleanly to avoid gaps that trap water.
What should I avoid that makes curling worse?
Avoid rapid drying, heat, or wind blowing directly on the surface. Do not skip control joints or skip proper screeding and edging. Poor drainage and uneven thickness also lead to more curl.
When should I call a professional?
If the curl is severe or keeps worsening after initial curing, get a pro to assess. Talk to a concrete contractor about fixes like proper joints, reinforcement, or resurfacing. A wrong fix can cause more damage and cost more later.