
Introduction
For small patios and walks, tooled joints generally provide tighter seams and greater durability than sawed joints.
You’ll learn how to weigh appearance, maintenance, and installation considerations, and the guide walks you through practical tips for choosing and applying the method.
Key takeaways
- Tooled joints resist uplift on mortar-less patios but require consistent jointing
- Sawed joints are quicker to install but vulnerable to erosion without sealing
- Inspect substrate flatness before selection to prevent cracking regardless of method
- Durability favors proper drainage, edging, and timely maintenance for both approaches
- Tools vary: tooling requires resharpening and compression tools; sawed uses blades
- Check local permits and setback rules before starting any patio project
Table of Contents
- Introduction
- Key takeaways
- Quick comparison and when this matters
- Advantages of tooled joints
- Advantages of sawed joints
- Disadvantages and trade-offs of each method
- Tools and materials checklist (tooled vs sawed)
- Durability, maintenance, and long-term costs
- Visual checkpoints and common mistakes to avoid
- Safety, permits, and site planning for DIYers
- Conclusion
- FAQ
Quick comparison and when this matters
Small patios and walks pose space, traffic, and budget constraints. This section orients you to tooled joints versus sawed joints with a clear decision framework. You’ll see how each method approaches purpose, installation, and typical joint widths.
Key criteria to weigh include durability under freeze-thaw, cracking control, water management, installation speed, and the tools or skill required. A practical matrix helps you spot which method suits aesthetics, shrinkage control, or quick retrofits. Keep a simple checklist in mind as you plan based on patio size, slab thickness, and material compatibility.
What “tooled” and “sawed” mean in hardscape/joinery terms
A tool joint is hand-formed, giving a more natural look. A sawed joint is mechanically cut, offering precision.
- Tooled Joints: Hand-formed using trowels and combs. Inexpensive but labor-intensive. Ideal for decorative patterns.
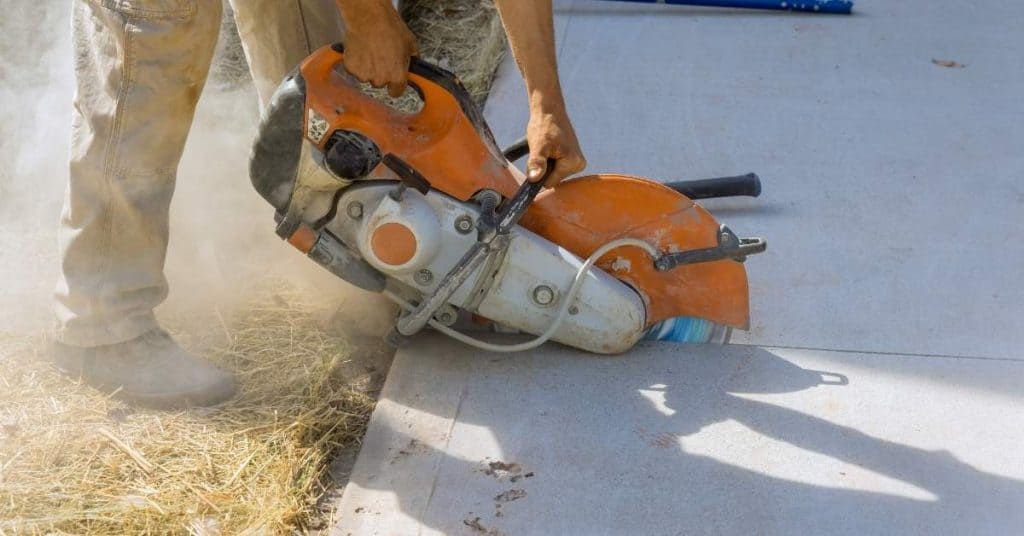
- Sawed Joints: Mechanically cut with a concrete saw. Precise, fast, but more expensive. Great for straight lines and retrofits.
- Routed/Tooled Profiles: Use power tools to create decorative profiles. Requires rentable equipment.
- Saw-Cut Mechanical Joints: Use a concrete saw with a diamond blade. Fast, precise, but blade costs around $100.
Typical applications on small patios and walkways
Tool joints are great for small patios with decorative patterns. Sawed joints work well in mixed materials or retrofits.
Paver gaps: Tooling can create tight, decorative joints between pavers. Sawing is faster but may leave wider gaps.
Stone edging: Both methods work, but tooling allows for better control over joint width with stone edging.
Timber borders: Sawed joints provide clean lines against timber borders. Tooling can create a more rustic look.

Advantages of tooled joints
Tooled joints are defined by hand tooling that follows the concrete while it’s workable. You’ll typically use hand tools, form inserts, or molds, depending on the look you want. This section covers how tooling differs from saw-cut joints and what to expect in materials.
Fit benefits include tighter tolerances that yield a cleaner joint and reduced trip hazards on small patios. Water shedding improvements come from curved or profiled joints that help runoff and drainage if the slope allows. Aesthetically, tooled joints offer texture and shadow lines that work with irregular materials like natural stone or reclaimed pavers.
Better fit and surface finish
Tooled joints are created using hand tools like jointing saws, routers, or even chisels. Unlike saw-cut joints, tooling allows for a more tailored fit on irregular materials.
Hand-tooling or routed profiling lets you fine-tune each joint to match the unique shape and size of natural stone pieces or reused wood. This results in tighter tolerances, reducing gaps and overlaps.
The finished surface is cleaner and more uniform, with less variation in joint width. Plus, it’s smoother underfoot, minimizing trip hazards on small patios.
Aesthetics and customization
Tooled joints offer unmatched control over the final look of your hardscape. You can create custom profiles – curved, raked, or chamfered – to complement your design.
With tooled joints, you can blend edges with landscaping features like planting beds or retaining walls. The joint’s profile and width influence texture, color perception, and shadow lines.
For example, a narrow, straight joint in dark sanded grout can make light-colored stone pavers appear larger and more uniform. Conversely, a wide, curved joint filled with bright white mortar can highlight the natural beauty of irregularly shaped stones.
On-site adaptability and low-tech fixes
Tooled joints are ideal for DIY projects because they allow for adjustments on-site. If a stone is too thick or thin, you can fine-tune the joint right there without needing heavy cutting equipment.
With tooled joints, you’re not locked into precise measurements like with saw-cut joints. This flexibility lets you work around minor imperfections in your materials or layout.
For instance, if a paver is slightly off-level, you can tool the joint to accommodate it, preventing water from pooling and causing damage. Just remember, too much adjustment can compromise joint integrity, so keep it minimal.
Advantages of sawed joints
Sawed joints rely on mechanical cuts for consistency and repeatability. They’re faster to implement on multiple slabs or runs and lend themselves to scalable patterns. The process is well-suited for standard, uniform projects.
Tools like masonry saws or tile saws, plus scoring blades, enable clean, repeatable joint widths and clean edge definition. Sawed joints typically provide predictable crack control and easier maintenance or repointing over time. When irregular shapes or unique patterns are required, hand tooling may still have an edge.
Faster fabrication and consistent repeatability
Power-sawed joints are a boon when you’re working with repeat elements like coping stones, sleepers, or planks. Here’s why:
Speed: Sawing cuts time by half compared to hand tooling. A masonry saw can chew through multiple slabs in no time.
Consistency: Each cut is identical, ensuring uniform joint widths, alignment, and spacing across your patio or walkway. No more worrying about wonky lines.
This consistency also means less waste – if you need to replace a slab down the line, it’ll blend right in with its neighbors.
Lower skill barrier for basic cuts
Sawed joints are beginner-friendly. Here’s why:
Straightforward technique: With a jig or guide, even a novice can make straight, clean cuts. No fancy tooling techniques required.
Just line up your blade, press down, and let the saw do its job. Easy peasy.
Common tools: You don’t need specialized equipment. A basic masonry or tile saw will get the job done. Most home improvement stores rent these out.
Integration with prefabricated materials
Sawed joints play nice with factory-milled materials and modular patio systems. Here’s how:
- Concrete pavers: Look for ones marked ‘interlocking’ or ‘tongue-and-groove’. They’ll snap together perfectly.
- Composite decking: Choose boards with pre-cut grooves. No need to measure and mark each one.
- Stone slabs: Opt for those with consistent thickness. Sawed joints ensure they fit snugly together.
- Avoid: Thin stone veneer: It’s too fragile for saw cuts. Stick to hand-tooled joints here.
- Tip: Pre-sealing: Before installation, seal the edges of your materials. This prevents moisture from getting in and causing cracks at the joints over time.
Disadvantages and trade-offs of each method
Time and cure considerations differ between tooled and sawed joints, including any extra steps such as sealing or grinding. Budgeting must account for tool rental or purchase and potential finish work. Minor delays can influence small projects more noticeably.
Skill demands and tolerance control vary, with the risk of mistakes impacting appearance or durability. Joint width consistency and surface performance can suffer if substrate irregularities aren’t managed. Weigh long-term maintenance and crack control against upfront speed when planning.
Tooled Joint Downsides
While tooled joints offer many benefits, they also come with their own set of challenges.
- Time investment: Initial setup and cure times can be longer. Sharpening tools regularly adds to the time spent.
- Skill requirement: Achieving consistent results demands a high level of craftsmanship. Poor execution can lead to inconsistent joint widths and finishes.
- Tool maintenance: Regular sharpening is crucial for maintaining tool quality. Expect to spend around $50-$100 per year on sharpening services or tools.
- Substrate movement: Tooled joints are more susceptible to substrate movement, which can lead to cracking or misalignment over time.
- Weather sensitivity: Tooled joints require careful timing. Rain or extreme temperatures during curing can affect the final outcome.
Sawed Joint Downsides
Sawed joints, while efficient and consistent, also have their drawbacks.
Water management: Saw-cut joints can trap water, leading to potential freeze-thaw damage. Ensure proper sloping and drainage to mitigate this risk.
Aesthetics: The harsh lines of sawed joints may not appeal to everyone. They lack the softness and customization possible with tooled joints.
Equipment needs: Saw-cutting requires powered tools, which can be expensive to purchase or rent. Expect to spend around $50-$100 per day on rental fees for a quality saw. Additionally, dust management is crucial when using power tools, adding another layer of work.
Jigs and guides: For consistent cuts, jigs or guides are necessary. These can be homemade or purchased, with prices ranging from $20 to $100+ depending on complexity.

Tools and materials checklist (tooled vs sawed)
Understand the core differences between tooled and sawed joints for small patios and walks, along with quick pros and cons. This helps you assemble the right toolkit for the job. A practical checklist keeps your plan grounded as you gather materials.
Tools and materials are grouped by approach: for tooled joints, consider hand tools, molds, and sealers; for sawed joints, include saw blades, groovers, joint spacers, and dust control. A step-by-step setup and safety checklist tailor the process to tight outdoor spaces.
Tooled-joint tools and consumables
Use this checklist when preparing to create tooled joints on your small patio or walkway.
- Hand planes: For smoothing and shaping. Check they’re in good condition, no dull edges.
- Chisels: For cutting control joints. Ensure they’re sharp and the right size for your joint width.
- Files & rasps: For fine-tuning edges. Confirm they match the profile you want.
- Router with hand profiles: For custom shapes. Make sure it’s in working order and has the right bit.
- Sharpening gear: To keep tools sharp. Pack includes stones, oil, and honing guide.
- Safety glasses: Protect eyes from debris. Check they fit well and aren’t cracked.
- Dust mask & gloves: For protection against dust and cuts. Ensure they’re in good condition and fit properly.
- Knee pads: For comfort during long hours of work. Try them on to ensure a good fit.
Quick rule: Always check your tools before starting. Dull or broken tools can ruin joints and cause injuries.
Sawed-joint tools and consumables
Use this checklist when setting up to create sawed joints on your small patio or walkway.
- Circular saw: For straight cuts. Ensure it’s in good working order, blades are sharp.
- Miter saw: For angled cuts. Check it’s calibrated correctly and blade is secure.
- Table saw/jigsaw: For complex cuts. Confirm they’re stable, blades are suitable for masonry.
- Masonry saws (wet/dry): For stone cutting. Make sure they’re in good condition, have the right blade.
- Guides/jigs: For consistent joint width. Check they fit your saw and are adjustable.
- Blades: Ensure they’re designed for masonry, match your saw type, and are sharp.
- Joint spacers: For maintaining even joint widths. Try them with your materials to ensure a good fit.
- Ear protection & long sleeves: Protect from noise and debris. Check they’re in good condition and fit well.
Quick rule: Always use the right blade for the job. Wrong blades can cause kickback, ruin cuts, or damage tools.
Materials and material-specific notes
Use this checklist when selecting materials for your small patio or walkway project.
- Pavers: Choose from concrete, clay, or natural stone. Check they’re frost-resistant, match desired finish.
- Natural stone: Select slabs or tiles. Ensure they’re suitable for outdoor use, have consistent thickness.
- Hardwood sleepers: For timber decks. Confirm they’re treated for outdoor use, fit your design.
- Composite planks: For low-maintenance decks. Check they’re durable, match desired color/finish.
- Fasteners: Use stainless steel or galvanized hardware. Ensure they’re the right size and type for your materials.
- Adhesives: Choose a suitable mortar or thinset. Confirm it’s compatible with your materials, climate.
- Joint fillers: Select sand, polymeric sand, or grout. Ensure they match your joint width, are suitable for your materials.
- Sealer (optional): For protecting joints and surfaces. Check it’s compatible with your materials, provides desired protection.
Quick rule: Always check material compatibility. Using the wrong materials or adhesives can cause failures, costly repairs.
Durability, maintenance, and long-term costs
Forecasting lifespan and maintenance for tooled versus sawed joints helps you budget over time. Consider daily use, freeze-thaw exposure, and UV impact on concrete joints for small patios. Joint design will influence durability and maintenance needs.
Maintenance covers cleaning, crack monitoring, resealing frequency, and how joint depth or width affects moisture management and weed intrusion. Climate and usage quick-criteria guide you toward one method for long-term performance.
Water, Freeze-Thaw, and Settling Performance
Joints in concrete are crucial for controlling cracking. But they also influence how water moves through your slab. Here’s what you need to know:
First, check joint spacing. Too wide, and your slab can crack; too narrow, and water has nowhere to go. Aim for 10-15 feet apart for typical residential slabs.
Next, consider joint type. Expansion joints let your slab move with temperature changes. Control joints help direct where cracks will form. Both are essential. But remember, contraction joints don’t work in reverse – they won’t stop water from coming in.
Now, design for freeze-thaw. In cold climates, water can freeze and thaw, causing your joints to open and close. This cycle can lead to spalling (flaking) of the concrete surface. Use air-entraining admixtures during mixing to help resist this. Also, ensure proper joint sealing.
Lastly, mitigate settling issues. Poor base compaction or soil instability can cause your slab to settle over time. This can open joints and lead to cracking. So, always check base compaction before pouring.
Maintenance routines and repairability
Concrete is durable, but it ain’t immortal. Here’s what you need to do to keep it in tip-top shape:
Sealing is your first line of defense against water and freeze-thaw damage. Slab sealers are cheap and easy to apply. Check the label for application frequency, but once every 2-3 years should suffice.
Now, joints. They’re the weak points where concrete can crack or leak. Here’s how you maintain ’em:
Sawcutting is a must before pouring to control cracks. Check your local codes for sawcut spacing, but it’s usually every 10-20 feet.
After that, it’s all about repointing, resealing, and resanding. Joints can be repaired in place, but some types are easier than others:
– Sawcut joints: Easy to repair. Just clean out the old material, fill with new, and seal.
– Formed joints: Trickier. You might need to chisel out the old grout, fill, and seal.
Pro tip: Always check your concrete’s base compaction before you start. If it’s bad, no amount of maintenance will help.
Cost considerations and material efficiency
Choosing the right materials for your concrete project can save you money and time in the long run. Here’s what to consider when picking up supplies at the store.
- Type N mortar: Used for most masonry work, including laying bricks and blocks. Look for ASTM C270 rating. It’s versatile but not ideal for high-strength applications. Working time is around 3 hours.
- Type S mortar: For high-strength, low-shrinkage projects like retaining walls or foundations. Needs ASTM C1385 rating. More expensive but lasts longer. Working time is about 2-3 hours.
- Concrete mix (ready-mix): Choose based on required strength (PSI) and job needs. Common strengths are 2500, 3000, 3500 PSI. Cheaper mixes can cause cracking later. Hire a concrete pump if you don’t have one.
- Concrete additives: Accelerators (e.g., calcium chloride) speed up setting time but can cause rapid strength loss in cold weather. Retarders extend working time, useful for large pours or hot days. Check manufacturer’s instructions before use.
- Fiber reinforcement: Adds tensile strength to concrete, reducing cracking and improving durability. Look for ASTM D7472 rating. More expensive but can eliminate need for rebar in some cases.
- Concrete sealers: Protects against moisture, stains, and freeze-thaw damage. Silane-based or siloxane-based are best. Cheap acrylic sealers wear off quickly. Apply after concrete has cured (28 days).
- Concrete stain/colorant: For decorative finishes. Look for UV-stable, low-VOC products. Cheap stains can fade or discolor over time. Follow manufacturer’s instructions for application.
Pro tip: Buy materials in quantities that match your project needs to minimize waste. Store cement and aggregates properly to maintain quality. When mixing, follow the “water-cement ratio” recommended on the bag (usually 0.45-0.6) for best results.
Visual checkpoints and common mistakes to avoid
Well-formed joints show depth, width, and uniformity with crisp edges against guides. Look for consistent profile across the patio or walk and a finished surface free of chipping. These indicators help you catch issues early.
Common mistakes include over-cutting or under-cutting joints, leaving unsupported edges, and incomplete removal of dust. Tools and technique reminders keep joints true, and workflow checkpoints ensure clean, dry joints before fill.
Visual checkpoints for installation quality
Before you sign off on your concrete work, use this checklist to ensure a high-quality finish. Perform these checks after the concrete has cured and any formwork or bracing has been removed.
- Check joints for proper fit: Ensure all control joints are cleanly cut and align with expansion joints. Check that they’re spaced evenly (typically every 10-24 feet) to control cracking.
- Inspect gaps between slabs: Measure gaps between adjacent slabs; they should be consistent (usually around 3/8″ to 1/2″) and even. Irregular gaps can lead to tripping hazards or water pooling.
- Verify proper slope for drainage: Use a level or laser level to ensure the concrete has been properly sloped away from buildings or other structures (usually 1/4″ per foot). Incorrect slope can cause water damage and pooling.
- Check alignment of profiles: Ensure all edges, corners, and curves align correctly. Misaligned profiles can make your concrete look unprofessional and may require costly repairs.
- Inspect for proper curing: Check that the entire slab has been cured evenly. Inadequate curing can lead to weak concrete and increased susceptibility to cracking or scaling.
- Look for signs of settling: Check for any dips, depressions, or high spots in the surface. Settlement issues may indicate poor subgrade preparation or inadequate compaction.
- Examine finish quality: Inspect the surface for any blemishes, voids, or other defects. A poor finish can detract from the overall appearance and may require additional finishing work.
- Check reinforcement visibility: If using reinforced concrete, ensure that no reinforcing bars are exposed or too close to the surface (typically at least 2″ cover). Exposed rebar can cause rust stains and weaken the structure.
Quick rule: Always check your work in both daylight and under artificial light. Some defects may only be visible under certain lighting conditions.
Common cutting and fitting mistakes
Before you start cutting or fitting your concrete, use this checklist to avoid common pitfalls that can lead to costly rework.
- Overcutting: Too much cut can weaken the concrete. Check by measuring the depth of cuts with a tape measure and comparing it to your design plans.
- Poor layout: Inaccurate marking out can result in misaligned pieces. Use a straight edge and level to ensure your layout lines are accurate before cutting.
- Neglecting water slope: Incorrect slope can cause water pooling, leading to cracking or other damage. Verify the slope with a level during installation.
- Misaligned joint profiles: Misaligned joints can weaken the concrete and allow for excessive movement. Check that joint profiles align properly before fitting pieces together.
- Wrong blade/profile for material: Using incorrect tools can damage the concrete or result in poor cuts. Always check your blade type and profile against the manufacturer’s recommendations for your specific concrete mix.
- Ignoring expansion joints: Skipping these can cause cracking due to temperature changes. Make sure to include them in your layout and cut them accurately.
- Not checking moisture content: Too much or too little water can affect the concrete’s strength and durability. Check the moisture content of the subgrade before pouring, following manufacturer guidelines for acceptable ranges.
- Rushing curing process: Premature exposure to traffic or stress can cause damage. Follow the recommended curing time and protect the concrete from unnecessary stress during this period.
Quick rule: Always double-check your measurements, layout, and cuts before proceeding with installation. A few extra minutes spent checking can save you hours of rework later on.
Safety, permits, and site planning for DIYers
Safety for hand and power tools starts with PPE, tool checks, correct grip and stance, and proper storage to prevent accidents. Plan a risk-minimized workflow that suits your site’s flow and access. Your setup should reduce trips and falls during work.
Dust and silica control are essential, using wet cutting when possible and dust collection or vacuuming. Also cover utilities and permits: call before you dig, locate underground lines, and verify local permit requirements or HOA rules that may apply.
Tool-specific safety tips
Know your tools before you start. Here’s how to use them safely.
- Circular saws: Keep blade guard on, maintain a steady grip, and let the blade do the work.
- Masonry saws: Secure blade guard, keep hands behind the blade, and go slow.
- Routers: Use both hands, keep the base flat, and avoid over-tightening bits.
- Chisels: Hold firmly at 45°, strike with a mallet, not hammer.
- PPE: Wear safety glasses, work gloves, steel-toed boots, and hearing protection for power tools.
Site prep and quick planning checklist
Before you start digging or cutting, run through this checklist to ensure a smooth job.
- Locate utilities: Call 811, mark lines clearly before excavating.
- Check slope/drainage: Ensure water flows away from structures, adjust if needed.
- Measure materials: Calculate quantities accurately to minimize waste.
- Plan waste disposal: Arrange for dumpster or recycling pick-up before you start.
- Check soil stability: Test soil compaction, add gravel if needed.
- Mark out dimensions: Use stakes and string lines to outline patio/walk dimensions.
- Establish clean staging areas: Keep tools, materials, and waste organized to prevent trips.
- Check local permit requirements: Confirm with city/county clerk or HOA before starting work.
Quick rule: Always prioritize safety over speed. Take your time to plan properly.

Conclusion
One practical rule: pick the joint method that keeps water out, stays durable for years, and still looks right after the first season. If you lock in the plan now, you’ll avoid costly fixes later and keep the project moving safely.
If you’re going with tooled joints, check that you have good surface prep, the right depth and width for your joint, proper backer material, a compatible sealant, and a clear cure window with dry weather ahead, then test a small section first before scaling up. If you’re sawing, verify solid forms, accurate straight lines, stable edging, proper saw-cut depth, and sealing or grouting steps after the cut, again validating a small area before committing to the full run, and always wear eye and hand protection during cutting.
Common mistakes to avoid are rushing the layout, skipping drainage considerations, and underestimating the cure or sealant times, which can lead to cracks or lifting; never rough-house a joint to save time, and always plan for permits or site planning where required. Safety rules are simple: keep the work area clear, use the right tool for the job, test small patches first, and don’t work when conditions threaten joint performance or your own safety.
If the project starts to feel beyond your scope—especially when it comes to structural support, drainage, or code compliance—calling a professional is wise. With solid planning, clear steps, and safe habits, you’ll finish with joints that look good, perform well, and last. Stay steady, follow the plan, and you’ll have a small patio that works as hard as you do.
FAQ
What is a tooled joint?
Tooled joints are made with a jointing tool that compresses the sand and shapes a clean edge. They look neat and stay tight as the patio settles. For small patios, they hide gaps and weeds better than rough cuts.
What is a sawed joint?
Sawed joints are straight cuts that expose the sand and paver edges. They dry quickly and are simple to do. On small patios, they show more gaps and can drift with temperature changes.
Which joint is better for small patios and walks?
Tooled joints are usually the safer bet for tight spaces. They resist crumbling and stay looking good longer with weather changes. If you want a clean, low-maintenance look, go with tooled.
How do I maintain either joint type?
Keep joints filled with the right polymeric sand and sweep away debris regularly. Refill as needed to prevent weed growth and erosion. Avoid overwatering and pressure washing directly at the joints.