
Introduction
You can reset uneven color after a wash by carefully rebalancing the surface without making it worse.
This guide walks through practical steps, common pitfalls to avoid, and general tips you can apply to restore an even look.
Key takeaways
- Assess underlying causes of color inconsistency before attempting remedies.
- Clean surfaces with mild, compatible cleaners and allow thorough drying before rework.
- Test a small area to gauge blending and avoid new streaks.
- Use compatible primer to improve adhesion and even out porosity.
- Feather edges when recoloring to minimize transition lines and halos.
- Label steps and cure times to plan progress and avoid overlaps.
Table of Contents
- Introduction
- Key takeaways
- Diagnose the Problem: Identifying Causes of Uneven Color
- Clean and Prepare: Methods to Clean the Surface Properly
- Reset Without Damage: Tools and Techniques to Blend and Recondition the Surface
- Priming and Sealing: Choosing the Right Primer/Sealer
- Recoloring and Touch-Up Techniques: Paint and Dye Solutions
- Tools and Materials Checklist
- Common Mistakes and How to Avoid Them
- Cost, Time Estimates, and When to Hire a Professional
- Conclusion
- FAQ
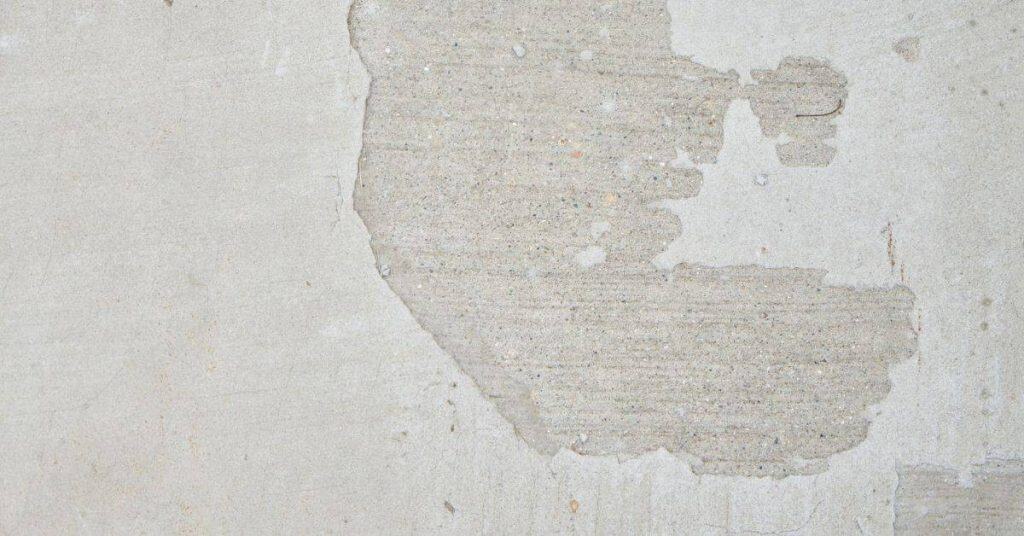
Diagnose the Problem: Identifying Causes of Uneven Color
Start by approaching the surface as a system with several possible culprits. The goal is to determine if uneven color comes from dye or paint loss, residue, water spots, oxidation, or uneven fading. Use a simple decision path to classify what you find across the area you’re treating.
Begin with quick tests: wipe the surface to check for removable films, or rinse and observe whether color returns after drying. A light, side-angle inspection helps reveal surface irregularities versus deeply faded patches. If feasible, make a small controlled test swatch to compare before and after results. Document findings with notes or photos, then limit cleaning attempts to two conservative passes before escalating. Call in a pro if color mismatch persists after tests or if you suspect chemical staining, structural issues, or sealer problems that go beyond surface care.
Visual and Tactile Inspection Steps
Before you start any treatment, follow this checklist to identify the cause of uneven color.
- Check for streaks: Water spots or residue can leave visible lines. Wipe gently with a damp cloth to confirm.
- Look for patchiness: Dye/paint loss shows as spotty, too-light patches. Compare to unaffected areas.
- Inspect sheen differences: Oxidation or residue can dull or change the surface gloss. Check under different light angles.
- Feel for texture changes: Residue or oxidation can create rough patches. Run your hand over the surface.
- Check for mineral halos: Water spots often leave behind mineral deposits, creating small halos around streaks.
- Observe fading consistency: Uneven fading shows as inconsistent color across the surface. Compare different areas.
- Note any film or soap/oil buildup: Residue can appear as a thin, visible layer. Gently wipe to confirm.
- Document findings: Take notes and photos of each issue for treatment planning.
Quick rule: Skipping this step may lead to wrong treatments and wasted effort.
Quick Tests to Pinpoint Causes
Perform these safe, in-place tests to confirm your suspicions about the cause of uneven color.
Wipe or rinse test: Use a damp cloth to wipe a small, hidden area. If residue comes off, you’ve found the culprit. If not, move on.
Water drop or bead test: Place a few drops of water on the surface. Hydrophobic residues will cause the water to bead up. If it spreads evenly, residue is likely not the issue.
Raking light or angle-of-view inspection: Inspect the surface from different angles. This can reveal surface-level issues like residue or oxidation, or deeper problems like fading or dye/paint loss.
When Underlying Substrate or Fabric Damage is the Real Issue
Sometimes, uneven color is a sign of deeper problems. Here’s what to look for:
Fiber weakening: In fabrics, this shows as fraying edges or threads coming loose. Gently tug at fibers to check.
Delamination: This occurs when the surface layer separates from the underlying substrate. Tap the surface; a hollow sound indicates delamination.
If you find these issues, repair options may include professional intervention or replacing the affected area entirely.
Clean and Prepare: Methods to Clean the Surface Properly
Outline surface-specific cleaning steps first, then decide what applies to concrete remnants or washes. For painted walls, wood trim, fabric, metal, and concrete surfaces, tailor cleaners and methods to avoid washing out color or lifting coatings. Use a clear decision tree to choose gentler cleaners first and escalate if needed.
List approved cleaners for each surface, with dilution guidance, contact times, and whether agitation is needed to prevent dulling or color loss. Include a quick spot test and a moisture check to ensure the surface stays dry. Define drying times and environmental conditions, noting that ventilation and airflow help speed safe drying. Emphasize safety: PPE, masking, and avoiding cross-contamination between different surface types. If in doubt, verify product labels, manufacturer instructions, or local rules before proceeding.
Choosing the right cleaner and pre-cleaning sequence
Start by removing any loose dirt or dust with a soft brush. This prevents clogging your cleaning solution.
For painted surfaces: Use a mild dish soap diluted in water (1:5 ratio). Avoid abrasive cleaners that can dull the finish. For tough stains, consider a TSP substitute like Krud Kutter.
For wood trim: Gentle soap and water is usually sufficient. For grease or wax buildup, use a degreasing cleaner like Simple Green. Avoid harsh chemicals that can damage the wood.
Surface drying and moisture control
After cleaning, let surfaces dry naturally in a well-ventilated area. Do not use heat sources to speed up drying as it can cause warping or cracking.
Monitor humidity: Keep the environment between 40-50% relative humidity for optimal drying and stain absorption. Use a hygrometer if needed.
Avoid re-staining: Ensure surfaces are completely dry before applying any sealants or paints. A quick test is to place a small piece of tissue on the surface; if it sticks, there’s still moisture present.
Visual checkpoints after cleaning
Before moving on to sealing or repainting, use this checklist to ensure your surfaces are clean and ready:
- Uniform sheen: Check for consistent gloss or matte finish across the entire surface.
- No residue: Wipe a damp cloth over the surface. If it comes away dirty, you’ve missed some dirt or cleaner.
- Consistent absorbency: Drip water onto the surface. It should spread evenly and be absorbed at the same rate across the entire area.
- No discoloration: Check for any remaining stains or color variations.
- No mildew/mold: Look for signs of growth, especially in damp areas.
- No flaking/chipping: Gently scrape the surface with a nail. If paint or material comes off, you need to address this before proceeding.
- Sealant compatibility: Ensure any existing sealants are not peeling or cracking, and are compatible with your new finish.
- No dust/debris: Wipe the surface with a damp cloth. If it’s still dirty, you need to clean again.
Quick rule: If any of these checks fail, re-clean and re-check before proceeding.
Reset Without Damage: Tools and Techniques to Blend and Recondition the Surface
Set clear goals for what counts as an even color after a wash, and what level of finish is realistic without harming the surface. The aim is a blended result that looks uniform under typical lighting conditions. Keep expectations grounded to avoid overworking the surface.
Catalog safe techniques with clear use-cases: light sanding or scuffing, gentle abrasion, glazing, feathering, and resurfacing options. Note when each method helps achieve color uniformity, matching sheen, or edge blending. Plan a small test patch, document the color change, and scale gradually to the full area without overdoing it. Use compatible abrasives, glazing products, and sealers, and follow safety steps like ventilation and surface protection. If problems arise, avoid over-sanding or mismatched sheen, and have quick remedies ready to prevent a worse patchwork. Aftercare includes a final cleaning, standard curing or drying times, and a simple lighting check to confirm even appearance.
Abrasive vs. non-abrasive approaches
When evening out color, you’ve got two main paths: abrasive and non-abrasive. Both have their uses.
Abrasives, like sandpaper or scuff pads, physically remove a thin layer to expose fresh material. Start with fine grit (220-320) to minimize visible damage. Sand gently, following the grain. Deglazing sponges can also help, but be careful not to scrub too hard.
Non-abrasives, like chemical deglossers, soften and remove existing finish without sanding. They’re great for small touch-ups or when you want to preserve the surface’s integrity. But they won’t fix deep color variations caused by sun damage or improper washing.
Feathering and blending painted edges
Hard lines where old paint meets new are your enemy. Here’s how to blend them away.
Use a good quality brush or roller with soft bristles/naps. Dip it in the new paint, then offload excess onto a rag. Gently touch the edge of the old paint, working from one end to the other. Use long, smooth strokes, following the grain if you’re working on wood.
For tough spots, try ‘feathering’ – load your brush with both old and new paint, then stroke lightly along the edge. This creates a gradual transition between the two colors. Let it dry, then inspect and touch up as needed.
Reconditioning finishes (waxes, restorers, color enhancers)
Waxes, restorers, and color enhancers can breathe new life into tired surfaces. But they’re not magic potions.
Use them on wood, metal, or other porous materials that have lost their luster. Waxes add protection and sheen, while restorers and enhancers can darken or enrich the color. Always test first in an inconspicuous spot to ensure compatibility.
Apply with a soft cloth or brush, following the grain if you’re working on wood. Let it sit, then buff off any excess. Be patient – reconditioning takes time and gentle touch.
Priming and Sealing: Choosing the Right Primer/Sealer
Describe the roles of primers and sealers in color reset, including how they block stains and improve topcoat adhesion on concrete post-wash. Explain how these products help even out color before the final finish. Set expectations that primers are part of a system, not a standalone fix.
Discuss substrate and finish considerations to guide selection: porosity, moisture, previous coatings, and whether the surface is fresh, patched, or already sealed. Outline a logical choice framework based on substrate type and anticipated topcoat, with an emphasis on compatibility to prevent show-through or flashing. Provide application tips to avoid flaws, such as correct dwelling and recoat timing, proper coverage targets, and thinning guidance if specified. Include recommended spot checks and lighting tests to prevent moisture entrapment, plus troubleshooting for patchy results, flashing, or over-sealing. When uncertainty remains, verify by consulting manufacturer instructions or local code requirements before proceeding.
Primer types and when to use them
A primer’s job is to prepare the surface for the topcoat. Here are some common primers and their uses:
Stain-blocking primers are great for sealing in old stains before applying a new coat. Use them on surfaces with water rings, rust, or tannin stains.
Bonding primers help improve adhesion between the concrete and your topcoat. They’re useful when you’re painting over a previously painted surface or a surface with low porosity.
Shellac primers, oil-based primers, and acrylic primers each have their own benefits. Shellac dries fast, oil-based provides good coverage, and acrylic is water-based and low-odor. Choose based on your specific needs and the topcoat you’re using.
Application best practices for even coverage
Applying primer correctly is key to getting an even finish. Here are some tips:
Apply thin coats. Thick coats can lead to drips and uneven drying.
Let each coat dry completely before applying the next. This usually takes 24-48 hours, but check your product’s instructions.
Lightly sand between coats with fine-grit sandpaper. This helps remove any raised grain and ensures good adhesion for the next coat.
Use a roller or sprayer for even coverage. Brushes can leave streaks and miss spots.
Spot-priming vs. full-surface priming decisions
Deciding whether to prime just the problem areas or the whole surface depends on a few factors:
Spot-prime if you’re only dealing with small stains or patches. This saves time and product.
Full-surface prime when you want to ensure even color and sheen across the entire surface. This is especially important if your topcoat has strong coloring agents or if the substrate is inconsistent in porosity or previous coatings.
Also, consider the topcoat’s coverage. If it’s full-coverage, spot-priming might be enough. But if it’s semi-transparent, you’ll likely need to prime the whole surface for even color.
Remember, it’s always easier to add more primer than to fix a mistake. So, if you’re unsure, it’s better to err on the side of full-surface priming.

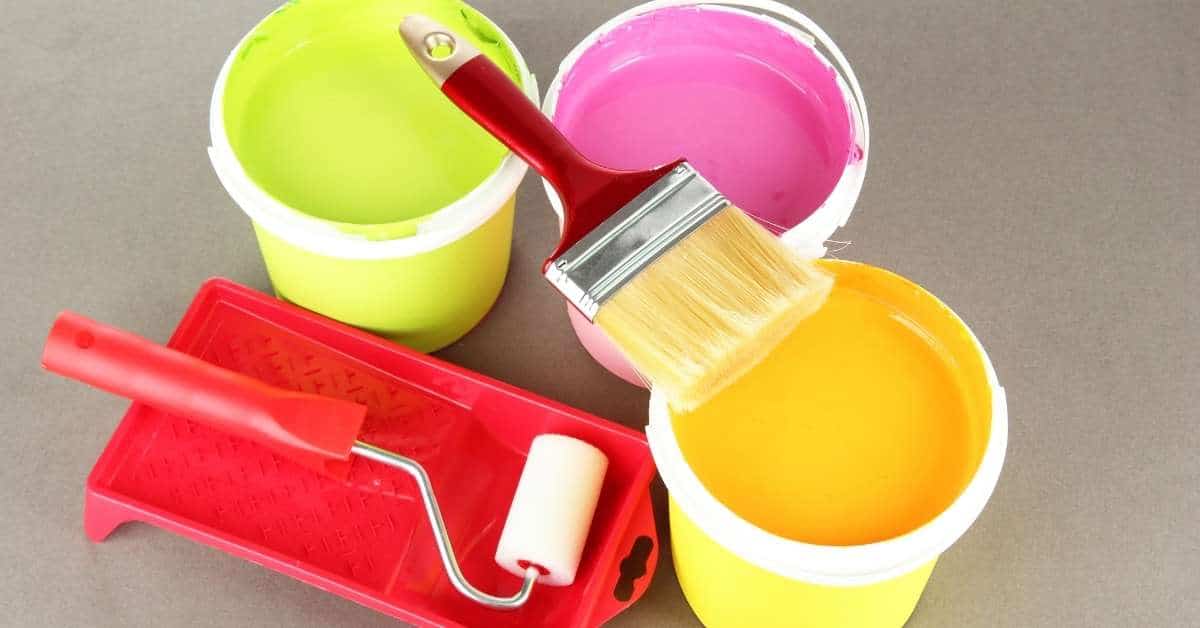
Recoloring and Touch-Up Techniques: Paint and Dye Solutions
Explain when to use paint versus dye on concrete surfaces, and weigh pros and cons for durability across textures like polished, broomed, or stamped finishes. Provide guidance on when color refresh is appropriate and what each option delivers in terms of coverage and longevity. Maintain realistic expectations for how each method blends with existing color.
Walk through a color-matching workflow: collect samples, use color-mantle swatches, test patches, and document exact mixes or dye concentrations to achieve seamless blending. Cover surface preparation and compatibility checks, including cleaning, profiling, porosity consistency, and selecting compatible primers or sealers to minimize streaking. Describe blending and transitions with edge feathering, layering sequences, and tool choices to maintain uniform texture. Suggest product options by material and budget, including UV resistance, and note drying and recoat windows. End with testing and maintenance steps to extend color longevity through proper sealers and routine cleaning, while verifying readiness under light and shadow.
Accurate color matching strategies
Matching the existing color of your concrete surface can be tricky, but it’s crucial for a seamless look. Here are some steps to help you achieve that.
Collecting samples: Start by collecting small chips or dust from areas that match the desired color. If that’s not possible, use a color-matching app on your phone with a photo of the area.
Using color-mantle swatches: Take these samples to your local hardware store and ask them to create custom tints using their tinting mediums. Test these in small patches on an inconspicuous area to see how they look under different lighting conditions.
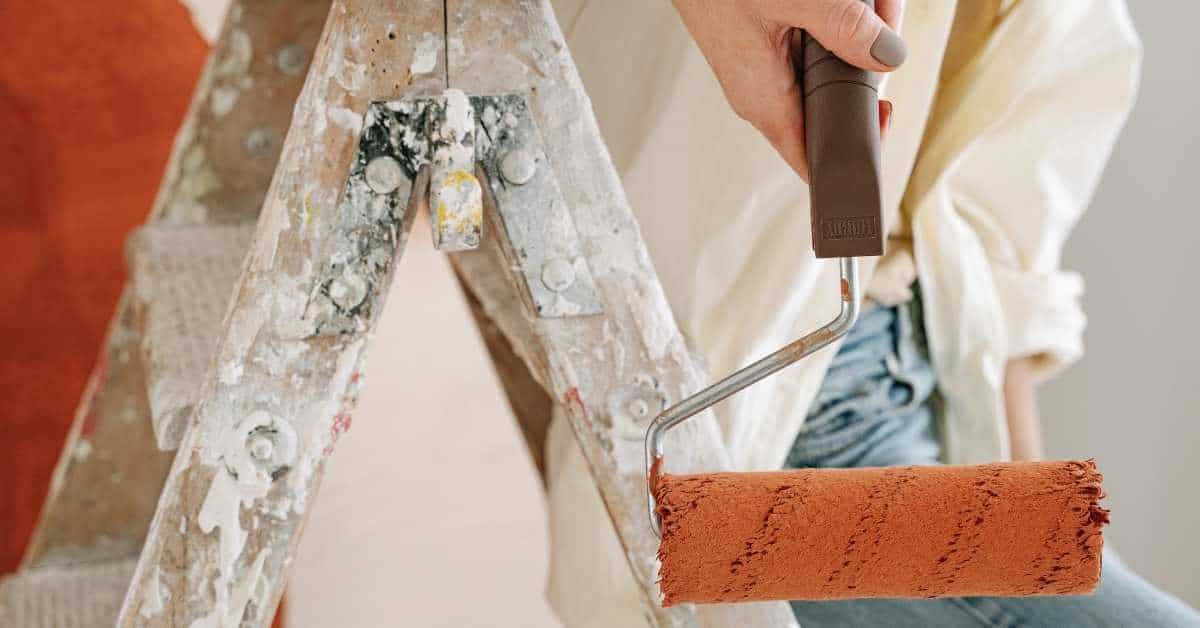
Application tools and methods for invisible repairs
The right tools can make all the difference in achieving a seamless blend. Here are some options:
- Brushes: For detailed work, use angled sash brushes or trim brushes. Synthetic bristles work well with most paints and dyes.
- Rollers: For larger areas, use a medium nap roller for better coverage. Choose one with synthetic or lambswool cover for better durability.
- Spray equipment: For even application over large areas, consider renting a paint sprayer. These can be expensive to buy but are affordable to rent.
- Dab techniques: For touch-ups or small repairs, use a foam applicator pad for a smooth, even finish.
- Optional tools: Consider using a paint grid for your roller tray to minimize drips and ensure even coverage. These are inexpensive and can be reused.
Drying and curing considerations to avoid further inconsistencies
Proper drying and curing is vital for a consistent, long-lasting finish. Here are some common mistakes to avoid:
- Temperature extremes: Avoid applying paint or dye in temperatures below 50°F (10°C) or above 90°F (32°C). This can cause the product to dry too quickly or not at all.
- High humidity: High moisture levels in the air can affect how your product dries and cures. Try to apply when humidity is below 75%.
- Recoat times: Always follow the manufacturer’s recommendations for recoat times. Applying too soon can lead to peeling or uneven color.
Remember, patience is key in this process. Allowing your surface to dry and cure properly will ensure a consistent, durable finish that lasts.
Tools and Materials Checklist
Offer a concise, categorized list of essential tools and application gear for a color-reset job. Include items like trowels, margin floats, stiff brushes, rollers, spray equipment, masking supplies, drop cloths, and a dedicated mixing bucket. Emphasize keeping these organized to prevent cross-contamination.
Then cover cleaning and surface prep supplies, including appropriate cleaners and etchants, scrub brushes, rags, and a moisture meter to confirm dryness before coatings. List primers and sealers suitable for color reset, with notes on compatibility to avoid pooling or adhesion problems. Include color products such as waterborne stains, epoxy or acrylic paints, and specialty color-release products, plus color swatches and test patches with label notes. Finish with safety gear and a short workflow to verify dryness and even coverage—perform a small patch, track mixing ratios, and plan for re-coats if needed before final sealing.
Basic toolkit for DIY fixes
Before you start, make sure you have these essential tools and consumables to ensure a smooth reset job.
- Trowels: For applying primers, sealers, and touch-ups. Skip this and you’ll struggle with even application.
- Margin float: Helps level out surfaces and remove excess material. Without it, you might end up with uneven spots.
- Stiff-bristle brush: For scrubbing dirt and old residue off the surface. Neglect this step and your new color won’t stick properly.
- Paint rollers/convertible roller frames: For easy, even application of primers, sealers, and paints. Don’t skip this for a smooth finish.
- Spray bottle or pump sprayer: To mist surfaces with water during the reset process. Without it, you risk drying out the surface too quickly.
- Masking tape: Protects areas from overspray and ensures clean lines. Skip this and you’ll end up with a messy job.
- Drop cloths: Covers nearby surfaces to prevent staining. Don’t skip this, or you might have extra cleaning to do later.
- Clean bucket: For mixing cleaners, primers, or paints. Without it, you’ll struggle with proper mixing and application.
- Sandpaper (120-grit): Lightly scuffs the surface to improve adhesion. Skip this and your new color might peel off.
- Scuff pads: For easy, quick scuffing of large areas. Don’t skip this for a consistent finish.
- Fine-grit brushes (for touch-ups): Helps apply small amounts of primer or paint precisely. Without it, you might end up with drips and runs.
- Masks: Protects your face from dust and debris during sanding. Don’t skip this for safety reasons.
Quick rule: Always check your tools before starting to avoid delays or poor results.
Recommended products and safe alternatives
Choose the right products for a successful reset job, keeping safety in mind.
- Concrete cleaner/degreaser: Removes dirt, grease, and old residue. Skip this and your new color won’t adhere properly.
- Etching or pH-neutral cleaner (as appropriate): Prepares the surface for primer application. Don’t skip this to ensure proper adhesion.
- Stain- or color-appropriate concrete primers: Provides a base for new colors and improves adhesion. Skip this and your new color might not last.
- Bonding agents (if needed): Enhances adhesion on difficult surfaces. Don’t skip this if you’re working with old or porous concrete.
- Compatible sealer/topcoat: Protects the surface and accepts color products without pooling. Skip this and your new color might not last or look right.
- Waterborne concrete stains, epoxy/acrylic paints, or specialty color-release products: Choose based on desired effect and compatibility with your surface. Don’t skip checking labels for the best match.
- Color swatches and test patches: Ensures accurate color matching and adhesion testing. Skip this and you might end up with unexpected results.
- Low-VOC primers and sealers: Reduces harmful emissions during application. Don’t skip checking labels for a safer job.
- pH-neutral cleaners (if possible): Gentle on surfaces and reduces the risk of damage. Don’t skip checking labels for compatibility with your surface.
Quick rule: Always check product labels to ensure compatibility and safety before starting.
Personal protective equipment and ventilation
Safety first! Here’s what you need to protect yourself during the reset job, especially for indoor work.
- NIOSH/CDC-compliant respirator or mask: Protects against harmful dust and chemicals. Don’t skip this for your safety.
- Chemical-resistant gloves: Shields hands from harsh cleaners, primers, and sealers. Skip this and you might end up with skin irritation.
- Safety goggles: Protects eyes from debris and splashes. Don’t skip this to avoid eye injuries.
- Knee pads: Provides comfort during long hours of work, especially when kneeling or sitting on hard surfaces. Don’t skip this for a more comfortable job.
- Ventilation plan (for indoor work): Ensures proper airflow to reduce the risk of harmful fumes. Don’t skip this for safety reasons.
- Disposal bags for waste and rinse water: Helps contain and dispose of hazardous materials properly. Skip this and you might cause environmental harm.
Quick rule: Always prioritize safety gear to protect yourself during the reset job.
Common Mistakes and How to Avoid Them
Highlight frequent missteps when resetting color after washing, including over-sanding the sheen, picking the wrong primer or sealer, and failing to match finish levels. Explain how these issues show up in the final look and how to prevent them. Use practical, jobsite-tested tips rather than abstract rules.
Discuss the impact of inadequate drying time and moisture entrapment, which can cause blotchy color, peeling, or mismatches. Provide simple tests to verify readiness, such as moisture checks or tack-free surfaces, and describe how to adjust the plan if moisture remains. Address substrate prep errors like unaddressed efflorescence or poor profiling, and warn about uneven mechanical abrasion. Cover primer and sealer selection pitfalls and the consequences of skipping bonding agents on problematic patches. Outline the right sequencing for repairs and finish applications, plus quick checks to maintain consistency across edges, corners, and high-traffic zones. End with lightweight preventive measures: discreet test patches, consistent application thickness, and documenting color recipes to avoid drift on future work.
Overworking the surface
When resetting a concrete surface, it’s tempting to keep sanding or scrubbing until you think it’s perfect. But remember, too much is worse than not enough. Over-sanding can remove too much material, leaving patches that look different from the rest.
Here’s when to stop:
- When you’ve removed all visible imperfections and the surface feels smooth and even.
- Before you start seeing bare concrete or exposing aggregate.
If you’re unsure, step back, look at it from different angles, and reassess. It’s better to stop early than to overwork the surface.
Ignoring substrate issues or using wrong products
Skipping primer or using incompatible paint/cleaner combinations can lead to major problems. Here’s what can happen:
- Without a proper primer, your topcoat won’t stick well, leading to peeling and flaking.
- Using wrong cleaners or incompatible paints can cause discoloration, blotchiness, or even chemical reactions that damage the surface.
Always use a concrete-specific primer. Test any new products on a small patch first to ensure they’re compatible with your surface and each other.
Rushing drying and cure times
Concrete needs time to dry and cure properly. Rushing this process can lead to inconsistent results, including color blotchiness, poor adhesion, or even damage.
Follow these guidelines:
- Allow at least 24 hours of drying time between coats and before applying a sealer.
- Let the final topcoat cure for at least 7 days in ideal conditions (70-90°F, 50-70% humidity) before exposing it to heavy traffic or moisture.
Use fans or heaters if needed to maintain consistent temperature and humidity. But remember, patience is key for a lasting, even finish.
Cost, Time Estimates, and When to Hire a Professional
Provide a practical overview of typical cost ranges for common steps such as surface prep, patching, color refresh, sealing, and any equipment or disposal fees. Separate considerations for DIY versus professional services rather than listing exact numbers. Emphasize that final costs depend on scope and local factors. Use a framework readers can adapt to their project size.
Offer realistic labor estimates and timelines, noting that drying and curing intervals can vary with weather and surface condition. Explain when signs point to professional restoration, such as extensive color reset on large areas, underlying concrete damage, moisture or efflorescence, hazardous coatings, or the need for specialized equipment. Include a simple DIY-vs-hire decision aid with yes/no questions, plus practical budgeting tips like avoiding scope creep and batching tasks. Conclude with a quick pre-job homeowner checklist: surface assessment, cleaning/etching needs, moisture testing, and a list of questions to ask contractors for estimates.
Typical DIY material and time breakdowns
Choosing the right materials is key to a successful color reset. Here’s a breakdown of costs and time estimates for common steps.
- Surface Prep: $0.50 – $2.00/sq ft, 1-4 hours/sq ft
- Patching: $0.30 – $1.50/sq ft, 1-3 hours/sq ft
- Color Refresh (Stain or Paint): $0.80 – $2.50/sq ft, 2-6 hours/sq ft
- Sealing/Topcoat: $0.50 – $1.50/sq ft, 1-3 hours/sq ft
- Equipment Rental/Disposal Fees: $50 – $200, varies by equipment and duration
When to call a pro and what to expect
While DIY is great for small touch-ups, some jobs require professional help. Here’s when to consider hiring a pro.
Extensive color reset on large areas: Pros have the equipment and experience to handle big jobs quickly and efficiently.
Underlying concrete damage: If your concrete has cracks, crumbling, or other structural issues, it’s best to leave it to the pros.
When hiring, ask about their process, timeline, materials they use, and any warranties. Get multiple quotes for comparison.
Long-term planning to prevent future inconsistencies
Maintaining your concrete’s color and consistency requires regular care. Here are some tips to keep it looking great for years.
Regular Cleaning: Wash your concrete every 6-12 months to remove dirt, stains, and mildew. Use a mild detergent and avoid harsh chemicals.
Sealing: Apply a quality sealant every 2-5 years to protect against moisture and stains.
Environmental Controls: Keep your concrete away from sources of acid or other harmful substances, and protect it from extreme temperature changes.
Conclusion
Fixing uneven color is about controlled steps, steady hands, and guarding the surface so you don’t make it worse. Stay safe, test first, and progress one area at a time until the result is even and durable.
Next, proceed with a simple, practical check: confirm you know the cause, clean and prepare properly, blend without overworking the surface, choose the right primer or sealer, and apply color in thin, even coats. Start in a small, inconspicuous spot to verify color match and adhesion, then move in stages across the project area, keeping techniques steady and within the product’s instructions.
Avoid these common missteps: rushing the process, skipping a proper test area, or using too much product at once that can lift or smear color. Keep safety front and center—protect surrounding surfaces, ventilate, wear goggles and gloves, and let each layer dry fully before another pass. If the surface shows severe damage, or you’re unsure about primers, sealer, or dye compatibility, don’t push past reasonable limits. Rule of thumb: if results look off after two attempts, call a professional for a fast, reliable save.
When to call in a pro is clear: if you encounter persistent staining, major color drift, or unfamiliar materials, or if time or budget pressures rise, it’s wise to get an expert involved. Otherwise, use these steps as a concrete plan, stay deliberate, and you’ll restore the surface with confidence and control.
FAQ
What counts as uneven color after a wash?
Uneven color shows as blotches, streaks, or patches that don’t match the rest of the surface. It can happen from uneven cleaner, rinse, or drying. Don’t guess—pinpoint the spots that look off and start there.
Should I scrub or repaint to fix it?
No hard scrubbing. That can lift the finish and make it worse. Repaint is a last resort; try gentler restoration first and test a small area.
How do I test color evenness safely?
Check in a shaded area, not under direct sun. Compare several spots with the same lighting. If the color matches in most areas but not a few patches, focus on those patches first.
What steps reset the surface without causing more trouble?
Rinse thoroughly to remove cleaner residue. Apply a compatible finish or sealer evenly, following the product directions. Let it dry fully and recheck in good light before moving on. If it still looks off, stop and reassess.