
Introduction
Concrete stain blotchiness is when the color looks uneven because the slab soaks up stain at different rates. It happens because porosity varies across the surface from finishing, curing, contaminants, or patchwork. You can reduce it by cleaning, profiling, and using appropriate primers or application methods—check product labels and manufacturer instructions for compatibility.
For a DIY fix, start with a test area, strip contaminants, and roughen smooth spots so the slab accepts stain more uniformly. If problems persist, consider a pre-stain base coat or a different stain type and follow the maker’s prep and application guidance to get an even look.
Key takeaways
- Check porosity first with water absorption test and note blotch patterns carefully.
- Use a compatible pre-stain base coat before color stain to even porosity.
- Clean and etch or mechanically profile high-porosity areas prior to staining.
- Apply penetrating stain in thin, even coats to reduce blotching risk.
- Test stain results on a sample area and adjust technique before full coverage.
- Wear eye and skin protection; follow product labels and local code rules.
Table of Contents
- Introduction
- Key takeaways
- Understanding Blotchy Concrete Stains: What It Is and Why It Matters
- Why Porosity Changes in Concrete: Material and Environmental Causes
- Testing and Diagnosing Porosity Before You Stain
- Preparing Concrete to Reduce Porosity Variation
- Treatments and Techniques to Even Out Blotchy Stains
- Application Best Practices and Tools for Consistent Results
- Choosing Products and a Practical Cost Comparison
- Long-Term Maintenance, Prevention, and Common Mistakes
- Conclusion
- FAQ
Understanding Blotchy Concrete Stains: What It Is and Why It Matters
Blotchiness is uneven color or tone after staining where some areas absorb more or less stain than others, producing patchy color, ghosting, or halo effects that stand out visually. It can come from natural porosity variation in the slab or from application errors—knowing which is which changes your approach.
The visual issues matter beyond looks: uneven staining can mask microcracks, hide surface irregularities, or create high-contrast patches that accelerate perceived wear and raise maintenance needs. Start with simple home checks—water bead tests, small dye swatches, and a moisture check—and consult product labels or manufacturer instructions when test results are unclear; these steps let you decide whether to treat with leveling primers, adjust application technique, or call a pro.
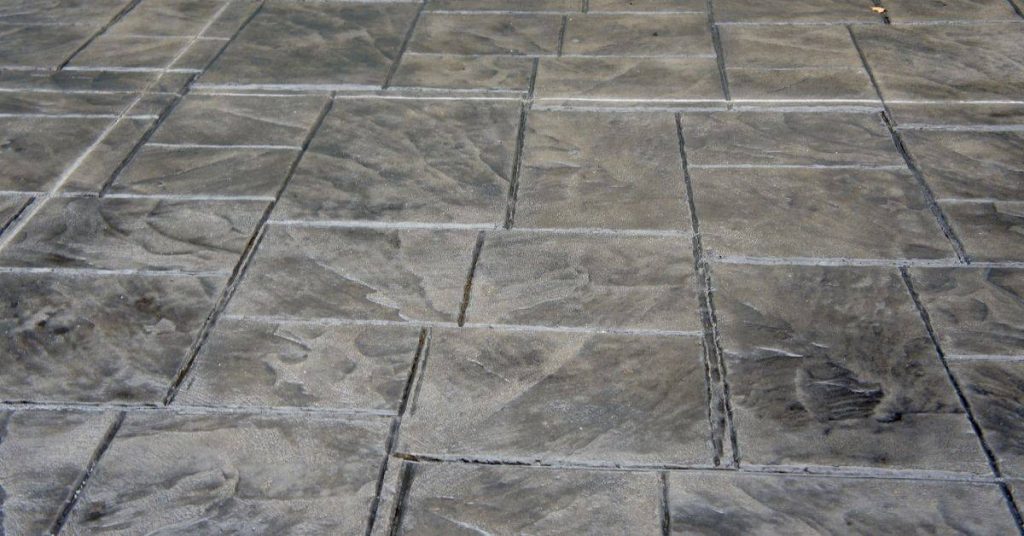
Visual characteristics of blotchy stains
Blotchiness in concrete staining appears as uneven color patches, often with dark and light areas side by side. These aren’t just surface discolorations; they’re caused by inconsistent stain absorption.
Look for these patterns:
- Dark or light splotches scattered across the surface.
- Haloing: rings of different colors around one spot.
Tip: Blotchiness can mimic efflorescence, but unlike efflorescence, it won’t flake off.
How uneven absorption causes the problem
Concrete’s natural porosity varies across its surface. When you apply stain, it absorbs differently in these varied areas.
The basic optics are simple: where pores are larger or more numerous, stain penetrates deeper and appears darker. Conversely, where pores are smaller or fewer, stain sits on the surface and looks lighter.
This variation in pore structure leads to uneven penetration and color intensity, resulting in blotchy stains.
Why Porosity Changes in Concrete: Material and Environmental Causes
Porosity shifts because of material choices and jobsite conditions: mix water content, aggregate grading, air entrainment, finishing and curing all affect the near-surface paste and how it later soaks up stain. Surface problems like laitance, variable finishing pressure, or existing coatings also change absorption between pours or within the same slab.
Environmental factors—temperature swings, humidity, wind, and sun exposure during curing or after—interact with the mix to produce picture-frame effects, ghosting, or efflorescence that show as blotches when stained. To diagnose, inspect surface profile, run moisture and porosity checks in multiple spots, and review any curing or finishing history; if results are inconsistent, verify procedures against manufacturer guidance and consider remedial profiling or different sealer choices.
Mix, placement, and curing factors
The water-cement ratio is key. Too much water makes concrete porous. Less water means less absorption.
Additives like fly ash or silica fume can alter porosity. Finishing techniques – troweling, floating – affect surface pores.
Curing matters too. Inadequate curing lets moisture escape, opening pores. Proper curing keeps them tight.
Surface conditions and contaminants
Dirt, oils on the surface block pores, causing blotchiness. Previous sealers can do the same if not removed properly.
Laitance, that weak top layer, needs to go before sealing. Salts from efflorescence clog pores too.
Clean surfaces thoroughly before staining. Remove laitance with a grinder or acid wash.
Weathering and mechanical wear
Freeze-thaw cycles open pores, letting water in. Abrasion from traffic or equipment can do the same.
Sun exposure dries out concrete, closing pores. This creates inconsistent absorption across the surface.
Protect your concrete from these elements to maintain even porosity.
Testing and Diagnosing Porosity Before You Stain
Begin with simple field tests: place water droplets in several locations and time absorption, observe lingering damp spots after a known interval, and apply a small test stain patch to watch capillary action and color uptake. Photograph each test location, note conditions, and compare results so you can map fast-absorbing versus slow-absorbing zones.
Different porosity drivers require different responses—surface porosity, substrate porosity, and trapped moisture affect stain behavior differently—so use a moisture meter if available and make a porosity grid. If field tests conflict or suggest moisture intrusion or unusual substrate ingredients, follow up with lab analysis or manufacturer tech support before full application and document recommended pre-treatments on your map.
Quick field checks (water droplet, spray, and tape tests)
Before you start staining your concrete, perform these quick and easy field tests to gauge its porosity. This helps predict how it’ll react to the stain.
Water Droplet Test: Place a few drops of water on the surface. If they absorb quickly, the concrete is porous. If they bead up and don’t absorb, it’s less porous.
Spray Test: Lightly mist the surface with water from a spray bottle. Watch how fast it absorbs or evaporates. Faster absorption means higher porosity.
Tape Test: Apply painter’s tape to the surface, let it sit for 24 hours, then remove it. If there are damp spots underneath, that area is more porous and may stain differently.
Professional and instrument tests
For critical projects or when field tests aren’t conclusive, consider these professional options:
Surface Absorption Tests: These measure how much water a surface absorbs in a given time. They’re more accurate than field tests but require specialized equipment.
Moisture Meters: These devices measure the moisture content in concrete. They can help identify areas with high moisture that might stain differently or cause issues during application.
Lab Analysis: For complex situations, send samples to a lab for analysis. This can reveal unusual substrate compositions or moisture intrusion issues not apparent through field tests alone.
Mapping and documenting problem areas
Create a visual map of your concrete surface to plan targeted prep work and test patches. This helps ensure even staining and minimizes blotchiness.
Use a grid system or divide the area into zones based on your field tests. Mark high-porosity zones (where stain may absorb quickly) and low-porosity zones (where stain may not absorb evenly).
Take photos of each zone, noting any unique characteristics or issues. This helps you track progress and make informed decisions during the staining process.
Based on your map and notes, plan targeted prep work and test patches for each zone. This ensures you’re addressing porosity differences before applying the stain, helping to minimize blotchiness.
Preparing Concrete to Reduce Porosity Variation
Start by identifying the defect: laitance, dust, grease, or areas with different finishing will behave differently when stained, so establish a baseline test area to reveal uptake differences. Clean using approved concrete cleaners, allow proper dwell and thorough rinsing, and neutralize residues per the product label to avoid leaving salts or films that change absorption.
Choose mechanical profiling to suit the problem: light grinding for thin surface layers, shot blasting for deeper texture, or wire brushing for spot work—control dust and follow safety guidance. Repair pinholes and craters with compatible patch materials and feather edges; confirm uniform texture and moisture targets with a simple porosity check before proceeding to stain.
Cleaning and contaminant removal
Before you start staining, your concrete needs a clean slate. Contaminants like grease, efflorescence, or old sealers can block pores and cause blotchiness.
Degreasing: Use a degreaser to remove oils and greases. Apply, let it dwell for 10-15 minutes, then rinse thoroughly.
Efflorescence removal: Efflorescence is that white powdery stuff on your concrete. Remove it with an acid-based cleaner. Follow the manufacturer’s instructions for dwell time and safety precautions. Neutralize with a base after rinsing.
Sealer stripping: If you’re removing old sealers, use a stripper designed for the sealer type. Apply, let it dwell, then scrub and rinse. Always test on a small area first.
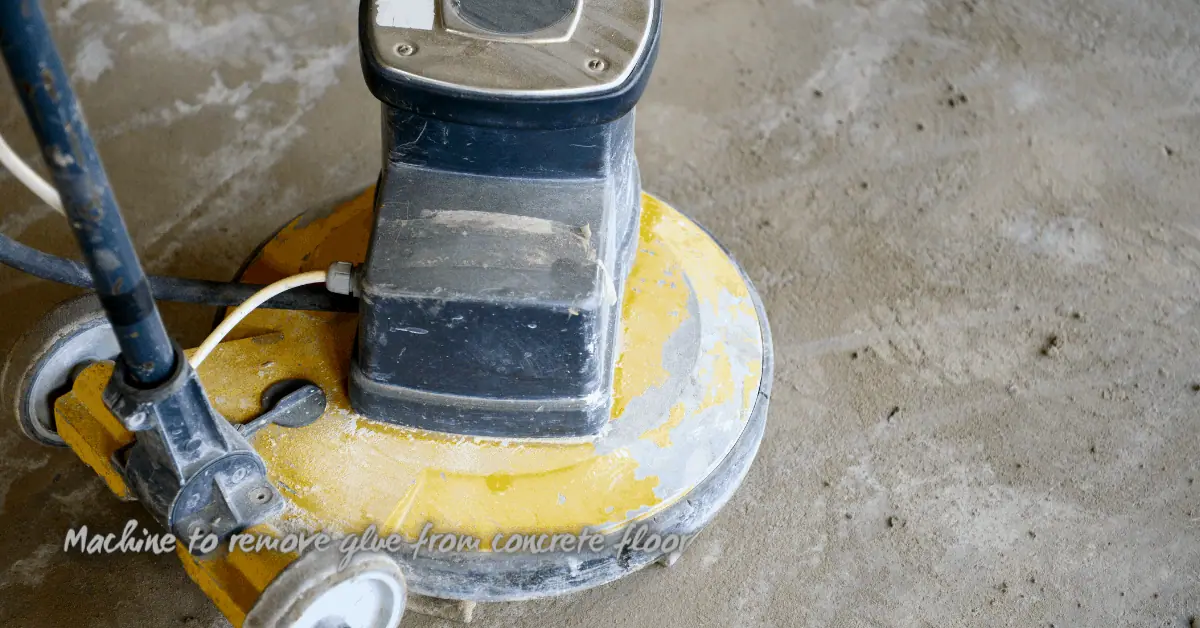
Mechanical profiling: grinding, shot blasting, and acid etch
Mechanical profiling opens up concrete pores for even stain absorption. Here’s how to choose the right method:
Light grinding: For smooth surfaces with minor variations, use a light grind with a concrete grinder. It removes a thin layer, evening out the surface.
Shot blasting: Shot blasting is great for rough surfaces or removing heavy laitance. It’s aggressive, so it’s best for exterior slabs or when you want to expose aggregates.
Acid etch: For interior slabs with light laitance or a smooth surface, acid etching might be enough. It opens pores and removes a thin layer without being too harsh. Always wear protective gear and follow safety guidelines when handling acids.
Repairing cracks, spalls, and localized defects
Cracks, spalls, and other defects can absorb stain differently. Here’s how to repair them for even staining:
Crack repairs: Use a flexible concrete crack filler. Apply according to the manufacturer’s instructions, feathering out at the edges to blend with the surrounding slab.
Spall repairs: For larger defects, use a concrete patch material. Trowel it in, leveling it with the surrounding surface. Feather the edges for a smooth transition.
Curing: After repairs, cure them properly to match the surrounding slab’s moisture content. Use a curing compound or wet burlap, and follow the manufacturer’s instructions for dwell time.
Treatments and Techniques to Even Out Blotchy Stains
Create a decision approach based on porosity and exposure: use pre-sealers or primers to lock down very porous patches, penetrating stains for natural look on uniform porosity, tinted sealers when slight color adjustment and protection are needed, and topical coatings when hiding severe variability is the priority. Always test compatibility with the existing slab and read product data sheets for sequence and recoat windows.
Perform patch tests in representative zones, apply chosen treatments in the recommended sequence, and work in manageable sections using consistent application techniques—back-brushing or cross-hatching where needed—to avoid pooling. If blotches appear after the first coat, consider neutral cleaning, light abrasion, re-priming, or switching to a different system following manufacturer instructions rather than guessing.
Pre-stain sealers and primers to equalize absorption
Before applying any stain, it’s crucial to even out the concrete’s absorption. This is where pre-stain sealers and primers come in.
Pore-filling primers contain fine particles that fill microscopic pores on the surface, evening out absorption. Apply them when the surface is clean and dry, following the manufacturer’s instructions.
Some jobs might need a penetrating stabilizer. These sealers soak into the concrete, stabilizing it and reducing water absorption. They’re great for older or more porous surfaces. Always test patch first to ensure compatibility with your stain.
Choosing between penetrating stains, tinted sealers, and coatings
Each staining option has its pros and cons. Here’s how to choose the right one for your job.
Penetrating stains soak into the concrete, providing a natural look with subtle color variation. They’re great for even surfaces but can accentuate blotches on varied porosity. Use them when you want a natural, earthy tone and have done a good job evening out absorption.
Tinted sealers sit on top of the surface, blending unevenness with their semi-transparent color. They’re ideal for hiding minor imperfections but may not be suitable for major blotching or when you want a deeper color.
Cementitious/topical coatings provide full coverage, hiding most imperfections. They’re perfect for heavily worn or blotchy surfaces but can look artificial if not applied correctly. Use them when you need to mask significant issues and want a uniform color.
Blending and repair techniques for existing blotchiness
If your concrete has existing blotchiness, don’t despair. Here are some practical fixes to help you blend those problem areas.
For refresh coats, lightly sand the blotchy area, clean it, then apply a thin coat of stain or sealer. This can help even out color but won’t fix major issues.
Toners are semi-transparent stains used to adjust color. Apply them to problem areas, working them in with a brush or roller, and blending with the surrounding surface.
For targeted application, use a small brush or sponge to apply stain directly to blotchy areas. Work it in, then blend with the surrounding surface using a larger brush or roller. For severe cases, consider feathering methods. This involves applying multiple thin coats of stain, each time working outwards from the blotch to blend the color.
Application Best Practices and Tools for Consistent Results
Plan the work: confirm surface readiness with your test patch, measure moisture, and pick a weather window with stable temperature and low humidity to prevent rapid or uneven drying. Stage the slab into workable zones, mask edges, and maintain a wet edge to avoid stops and starts that show as absorption seams.
Select tools that match the product and surface—pump sprayer for penetrating stains on large flat areas, low-nap roller for tinted sealers, and brushes for edges—and use consistent passes and overlap patterns. Record settings and techniques so touch-ups or future reseals match the initial application and reduce the chance of reintroducing blotchy areas.
Environmental and Timing Considerations
Temperature, humidity, and substrate moisture play a big role in how concrete stain absorbs. Too hot, too humid, or too wet can cause blotching.
Moderate temperature: Apply when temps are between 50°F to 90°F (10°C to 32°C).
Low humidity: Keep humidity below 70% to prevent rapid drying that amplifies blotchiness.
No rain: Avoid applying when rain’s expected within 24 hours. Follow manufacturer guidance and test patches to fine-tune timing.
Tools, Materials Checklist, and Mixing Tips
Before you start, check off this list. It’ll save you time and trouble later.
- Stain: Make sure it’s compatible with your concrete type and the desired finish.
- Sealer or primer: Have it ready to apply after staining.
- Application tools: Roller, brush, or sprayer? Choose based on job size and complexity.
- Protective gear: Safety glasses, gloves, and old clothes. Stain’s messy!
- Cleaning supplies: Etching solution, scrub brush, and a way to rinse (hose or bucket).
- Tape and drop cloths: For masking edges and protecting areas not being stained.
- Agitator: To mix stain thoroughly. A drill with a paint mixer works well.
- Measuring cups/spoons: For accurate mixing ratios.
- Timer: Keep track of drying times between coats.
Quick rule: Always mix small batches. It’s easier to match colors and prevents waste.
Application and Blending Techniques
How you apply stain makes a big difference in how it looks. Here are some tips:
Back-rolling: Roll over applied stain with a nearly dry roller to even out absorption.
Cross-coating: Apply stain in one direction, then go perpendicular for the next pass. This helps blend edges and prevent streaks.
Overlap strategy: Work in small sections, overlapping each pass by about 50%. This helps maintain a consistent look.
Controlled sections: Divide your slab into manageable zones. Work one section at a time without letting stain dry unevenly between passes.
Choosing Products and a Practical Cost Comparison
Match product features to the problem: primers and pre-sealers can level extreme porosity, penetrating stains provide depth with minimal film, tinted sealers add color plus protection, and topical coatings hide surface variability but change texture and future maintenance. Verify product compatibility and coverage on the label or data sheet, and consider how many coats each system requires before you buy.
Think qualitative cost versus longevity: higher upfront material and labor can reduce rework and maintenance over time, while cheaper, thin systems may need earlier replacement. Compare expected coverage, number of coats, and intended lifespan to choose a path that balances appearance goals and ongoing maintenance—test representative panels to confirm expected results before committing to full coverage.
What to look for on product labels and data sheets
When selecting your concrete stain, primer, or sealer, don’t just pick the cheapest option. Check these key items:
Compatibility: Ensure it’s suitable for your substrate type (concrete, cement board, etc.).
Recommended Profile: Make sure it matches your surface preparation method (grinding, acid etching, etc.).
VOCs: Check the volatile organic compounds content for environmental and safety reasons.
Cost and durability trade-offs
Different products offer varying upfront costs, longevity, and maintenance needs. Here’s a quick comparison:
Penetrating Stains: Low cost, good longevity with minimal maintenance. They don’t form a film, so they’re less prone to peeling or chipping.
Tinted Sealers: Moderate cost, moderate longevity. They provide some protection but may require more frequent reapplication than penetrating stains.
Full Coatings: Highest upfront cost, longest lifespan with regular maintenance. They offer the most protection but can be more prone to wear in high-traffic areas.
Recommended product types for common scenarios
Different situations call for different products. Here are some recommendations:
New Concrete: Use a penetrating stain or a tinted sealer to enhance the natural look of fresh concrete while providing protection.
Weathered Slabs: Opt for a full coating system that can fill minor cracks and provide a uniform appearance. Always test first to ensure compatibility with existing sealers.
High-Traffic Areas: Choose a durable, high-quality sealer or coating designed for heavy foot traffic. Regular maintenance will be crucial.
Test Patch: Always do a test patch before applying any product to the entire surface to ensure compatibility and desired results.
Long-Term Maintenance, Prevention, and Common Mistakes
Set maintenance goals to keep color uniformity and prevent blotch reappearance: schedule cleaning, monitor exposed areas for fading or increased blotchiness, and plan reseal windows based on conditions and the product instructions. Use gentle cleaners and avoid aggressive detergents or acidic products that can change surface porosity or strip finishes.
Common mistakes include using incompatible products, applying in poor temperatures or humidity, over-coating without proper prep, and skipping test patches—these lead to new blotchy areas. Keep records of products, application conditions, and dates so future work repeats successful methods and you can troubleshoot any reoccurrence with clear data.
Maintenance schedule and re-coating cues
Regular maintenance is key to preserving your concrete stain’s color uniformity. Inspect your surface periodically for signs that it’s time to reapply sealer or touch up the stain.
Fading color, increased blotchiness, or loss of definition are all indicators that a recoat might be necessary. Environmental factors like UV exposure, foot traffic, and weathering can accelerate this process.
To plan your routine inspections, mark them on your calendar every 6 to 12 months, depending on your climate and the surface’s usage. In high-traffic areas or harsh climates, consider inspecting more frequently.
Common mistakes and how to avoid them
Even with careful planning, mistakes can happen. Here are some frequent errors and practical steps to prevent them:
- Insufficient prep: Skipping proper cleaning and etching can lead to blotchy stains. Always prepare your surface according to the manufacturer’s guidelines.
- Skipping test patches: Applying stain directly to a large area without testing first can result in unexpected colors or absorption rates. Always do test patches to ensure you’re happy with the outcome.
- Wrong product choice: Using incompatible products or applying them incorrectly can cause blotchiness. Always choose products designed for your specific surface type and follow application instructions carefully.
By avoiding these common mistakes, you’ll help maintain a uniform, long-lasting stain job.
Safety, disposal, and environmental precautions
Handling concrete stains and sealers requires careful consideration for safety and the environment. Always wear appropriate personal protective equipment (PPE), including gloves, goggles, and a respirator if necessary.
Ensure proper ventilation in your work area to avoid inhaling harmful fumes. Follow manufacturer guidelines for disposal of leftover materials, typically involving local hazardous waste facilities. Never pour chemicals down drains or into the ground.
Before starting any project, review the safety data sheet (SDS) provided with your products and familiarize yourself with local regulations regarding chemical handling and disposal.
Conclusion
The 핵 idea is simple: porosity drives blotchiness, and controlled testing, prep, and follow-through protect safety, durability, and appearance. Start with a small test area, confirm the concrete can take stain, and then scale up with a steady, repeatable process.
To keep you moving, consider this practical flow: first test porosity in a hidden spot and note results, then clean and surface-prepare to even out variations, choose products that suit your porosity findings and follow label instructions, apply in predictable sections with consistent tool use and timing, and monitor temperature and humidity while protecting yourself with the right PPE. If any step feels off, pause and reassess before continuing. Safety first and steady progress win over rushed, guesswork.
Common mistakes to avoid include skipping the porosity test, rushing prep or surface patching, choosing products not compatible with your concrete, applying when moisture is present, and ignoring rework needs after a test patch. Always keep the area dry, test a small area again if conditions change, and follow manufacturer guidelines. These simple safety rules help prevent costly damage and uneven results.
If the project scope or conditions feel outside your comfort zone—large areas, complex stains, or stubborn blotchiness—consider bringing in a pro. A clear plan, careful testing, and strict adherence to safety will keep you on track and satisfied with the finish. Keep at it, and you’ll see a durable, even look come together without risking the job.
FAQ
What causes blotchy stains in concrete?
Blotches come from uneven porosity and moisture that moves stain unevenly. Extra slick or closed areas repel stain more than open pores. Contaminants or previous coatings can also trap color in spots.
How can I prevent and treat blotchy stains?
Test porosity in a few spots before you stain. Use a penetrating stain with a compatible pre-stain base coat if recommended by the manufacturer. Always follow product instructions and local rules for surface prep and sealing.
What are the benefits of using pre-stain base coats and penetrating stains?
Pre-stain base coats help even out porosity so color goes down more uniformly. Penetrating stains soak in rather than sit on top, reducing surface blotchiness when applied correctly. Check labels for compatibility with your concrete and sealer needs.
What surface prep techniques help achieve consistent staining?
Clean the surface thoroughly and remove curing compounds or sealers if needed. Roughen or etch only if the product calls for it, and rinse fully. Always test a small area and follow the product’s instructions for drying times and application method.