
Introduction
Microcement over tile is a system that coats existing tile with a cement-based finish after proper prep. This approach hinges on solid surface prep, compatible primers, and careful application to stay durable and look even.
Base coats and layering are key, and you should follow the product instructions and check for compatibility with tile and grout. Sealer choices affect appearance, slip resistance, and cleaning, so pick a sealer suitable for your space and expected use. In DIY work, take your time with prep, test a small area first, and follow safety and manufacturer guidance for best results.
Key takeaways
- Thoroughly clean and degrease tile; ensure sound adhesion before microcement base coats.
- Patch/repair grout lines and edges; dull glaze to improve mechanical key.
- Use compatible primer and thin base coats; allow proper curing per manufacturer.
- Sealers protect; choose based on moisture exposure and cleaning routine.
- Wear PPE and ventilate; stop work if dust or fumes irritate eyes or throat.
- Test adhesion on an inconspicuous area before full application.
Table of Contents
- Introduction
- Key takeaways
- Why Choose Microcement over Existing Tile — Benefits and Cost Comparison
- Planning, Permits, and Safety — a Project Checklist
- Tools, Materials, and Compatibility — What You Need and Why
- Surface Preparation for Applying Microcement over Tiles
- Base Coats and Layering Technique — Mixing, Thickness, and Curing
- Sealer Choices and Finish Options — Protection and Maintenance
- Step-by-Step Application over Tiles — Walls, Floors and Bathrooms
- DIY Success Factors, Common Mistakes and Visual Checkpoints
- Conclusion
- FAQ
Why Choose Microcement over Existing Tile — Benefits and Cost Comparison
Microcement over tile offers a seamless, grout-free surface with consistent color and texture options. It also helps create smoother transitions between wet and dry areas. You can achieve a unified look without removing existing tiles.
Functional benefits include improved water resistance and easier cleaning, with fewer hidden tile issues to chase. Look at environmental factors and cost drivers like removal, substrate prep, and labor when deciding between covering and replacing. Check label directions and manufacturer instructions for any specifics on your setup.
Aesthetic and performance benefits
Microcement offers a seamless finish, unlike tiles that have grout lines. This creates a smooth, uninterrupted surface that’s easier to clean and maintain.
With microcement, you can achieve consistent color and texture throughout the space. It’s perfect for creating transitions between wet and dry areas without breaking the visual flow.
Waterproofing is another key advantage. Microcement forms a continuous membrane that prevents water from penetrating, making it ideal for bathrooms, kitchens, and other wet areas.
Durability-wise, microcement can last up to 25 years with proper maintenance. It’s resistant to cracks, stains, and impact, reducing the need for frequent repairs compared to tiles.
Cost comparison — microcement vs tiling
The upfront cost of microcement is often lower than tiling due to reduced material and labor requirements. You won’t need to buy tiles, grout, or thinset mortar.
Labor costs can also be less with microcement as it’s applied directly onto the existing tile surface, eliminating the need for demolition and substrate preparation (in most cases).
Waste disposal is another cost factor. Removing old tiles generates waste that needs to be disposed of, adding to your project costs.
To estimate savings, consider these factors: local labor rates, kit coverage (microcement typically covers 15-20 sq.m per kit), and the cost of tile removal and disposal. Always check local prices for a realistic budget.
When to cover tiles vs remove them
Covering existing tiles with microcement is only suitable if the tiles are in good condition, well-adhered, and have no signs of movement or lippage (uneven surfaces).
Check for substrate stability. If the tiles are loose, cracked, or the underlying surface is damaged, it’s safer to remove them before applying microcement.
Also, consider the expected lifespan and warranty implications. Covering tiles with microcement may void tile warranties but can extend the overall lifespan of the floor by providing a durable, waterproof top layer.
If you’re unsure about the condition of your tiles or substrate, consult a professional before proceeding with any work.
Planning, Permits, and Safety — a Project Checklist
Define the project scope and objectives early. Identify areas to cover, surface conditions, and expected finish to set clear success criteria. Note any exceptions or substrate incompatibilities.
Review permits, licensing needs, HOA rules, and building-code constraints as applicable. Build a high-level timeline with prep, base coats, sealing windows, and cure periods. Verify access, site logistics, and safety requirements before you start.
Project scope, timeline, and budgeting checklist
Before you start, use this checklist to ensure your project runs smoothly. It helps you measure surfaces, plan stages, account for drying times, and consider required trades.
- Measure surface areas: Accurately measure floors and walls to calculate microcement needed. Inaccurate measurements lead to waste or running out mid-project.
- Plan staging: Determine which areas to work on first, considering drying times and access needs. Rushing can cause mistakes or damage.
- Account for drying times: Plan for 24-72 hours of cure time between coats and after sealing. Rushing drying times weakens the final finish.
- Consider required trades: If hiring help, plan their involvement early. Last-minute hires can delay your project.
- Check tile condition: Inspect tiles for damage or instability. Poor tile condition may require removal before microcement application.
- Plan access needs: Consider how you’ll move materials and equipment around. Blocked paths cause delays.
- Account for moisture-prone areas: Plan extra protection or ventilation for damp spaces to prevent mold growth under the microcement.
- Consider high-traffic areas: Plan for heavier application in high-traffic zones. Inadequate preparation leads to quicker wear and tear.
Quick rule: Regularly review your checklist throughout the project to stay on track.
Safety, ventilation, and PPE
Your safety is paramount. Use this checklist to ensure you’re protected from dust, chemicals, and other hazards.
- Ventilation: Ensure the area is well-ventilated during sanding, priming, and application. Poor ventilation leads to increased dust inhalation and solvent exposure.
- Dust control: Use damp rags or HEPA vacuums to minimize dust. Uncontrolled dust can cause respiratory issues.
- Gloves: Wear gloves when handling chemicals to prevent skin irritation. Bare hands increase the risk of chemical burns.
- Eye protection: Use safety glasses or goggles during sanding, priming, and application. Eye injuries can occur from flying debris or splashes.
- Respirator: Wear a respirator with a P100 filter when sanding or handling solvents. Inadequate respiratory protection increases the risk of lung irritation.
- Solvent safety: Always use solvents in well-ventilated areas and away from heat sources. Improper solvent handling can cause fires or explosions.
- Electrical safety: Inspect electrical tools before use and never use them near water. Electrical accidents can cause serious injury or death.
- Emergency procedures: Know first aid and have an emergency plan in case of accidents. Lack of preparation can worsen injuries.
Quick rule: Always check product safety data sheets (SDS) for specific handling instructions.
Tools, Materials, and Compatibility — What You Need and Why
Prepare a concise tools list for mixing, applying, and protecting the work area. Include a quick readiness check to confirm tools are clean and in good condition. Gather protection gear and cleanup supplies before you mix anything.
Organize materials by category—primers, base coats, top coats/sealers—and note how tile porosity, glaze, and grout affect selection. Consider substrate compatibility and document the plan for adhesion and curing. Always verify product data sheets and manufacturer guidance for your tiles.
Tools and materials checklist
Before you start, make sure you have all the necessary tools and materials to ensure a smooth microcement application over your existing tiles.
- Electric Drill: For mixing and applying microcement. Don’t skip this; wrong mix can lead to weak bond.
- Trowels/Steel Floats (3-4 sizes): Different sizes for different stages – base coats, reinforcement, topcoat. Missing one might cause uneven finish.
- Sander/Ginder: For preparing tile surface. Skipping this can result in poor adhesion.
- Mixing Paddle: Essential for consistent microcement mix. Wrong paddle can lead to lumps and weak spots.
- Rollers (2-3 sizes): For applying primer and sealers. Missing roller size might cause missed spots or overworking the material.
- Safety Gear: Gloves, goggles, mask for mixing and application. Safety first; no excuses.
- Measuring Tape/Level: For ensuring even coats and straight lines. Inconsistency can ruin the final look.
- Cleaning Supplies (sponge, bucket): Essential for cleaning tools and surface between coats. Skipping this can cause contamination and weak layers.
- Reinforcement Mesh/Flexible Additives: Optional but recommended for large areas or high traffic zones. Without it, microcement may crack under stress.
Quick rule: Check all tools and materials before starting each stage to avoid delays and poor results.
Choosing kits, primers, base mixes and reinforcement
Microcement comes in ready kits or separate components. Kits are convenient but may limit customization. Separate components allow for tailored mixes but require more planning.
Choose an adhesion primer specific to your tile type. The wrong primer can cause poor bonding, leading to delamination over time.
Use reinforcing mesh or flexible additives in areas with high stress or movement. Skipping this can result in cracks and damage under pressure.
Pro tip: Always do a small test patch before committing to the entire area. This helps ensure compatibility and allows you to fine-tune your mix.
Material compatibility with common tile types
The choice of microcement materials greatly affects the final result when applied over tiles. Here’s what you need to know about different tile types.
- Glazed Ceramic/Porcelain: These tiles have a smooth, non-porous surface. Use a primer designed for glazed surfaces and ensure thorough mechanical abrasion before application. Skip this step and risk weak bond.
- Unglazed Ceramic/Porcelain: These are porous and absorb moisture. Choose a primer that promotes adhesion to porous surfaces. Without it, microcement may not stick properly.
- Natural Stone: Porous and prone to staining if not sealed properly. Use a stain-blocking primer and seal the stone before applying microcement. Skip this and risk permanent stains.
- Large-Format Tiles: These can be more prone to cracking under stress. Use reinforcing mesh or flexible additives in your mix to prevent this. Without it, cracks may form over time.
- Existing Grout: If grout is in good condition, you can apply microcement directly over it. If not, remove and replace before applying microcement. Poor grout can cause delamination.
Surface Preparation for Applying Microcement over Tiles
Explain why surface prep on tile is critical for long-term adhesion and movement control. Include substrate compatibility, crack prevention, and joint consideration in your plan. Outline the steps you will follow to start strong.
Assess tile condition and plan for grout removal, cleaning, and priming. Document the surface profile and priming approach to ensure a solid bond with the microcement system. Check label or manufacturer instructions for specific prep requirements.
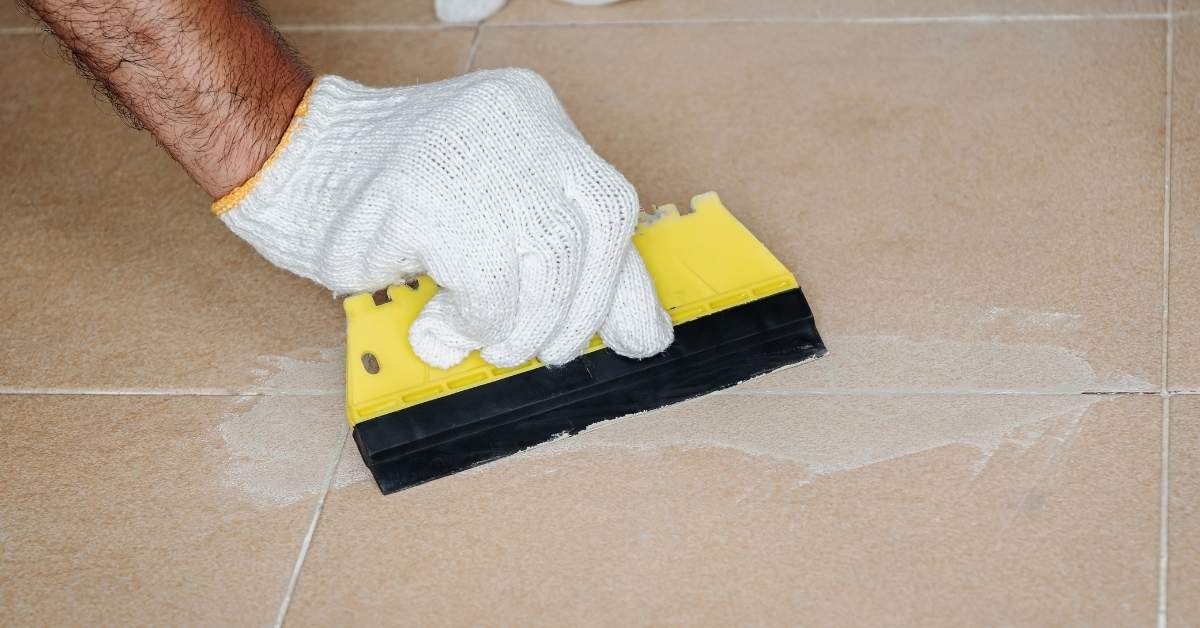
Cleaning, Degreasing and Grout Repair
Before applying microcement, your tiles need a thorough clean. Grease, wax, cleaner residues, and grout haze can all hinder adhesion.
Degrease using a suitable cleaning solution or a mixture of water and detergent. Scrub well, then rinse with clean water. Let it dry.
Check your grout lines. If they’re cracked or crumbling, fill them with a grout repair compound. For minor issues, use a grout sealer to stabilize. Let it cure as per the manufacturer’s instructions.
Profiling Tiles and Adhesion Testing
Microcement needs a mechanical key to grip onto. You can create this by lightly grinding or scoring the tile surface with a diamond pad, or using a bonding primer.
Choose your method based on your tile type. Porcelain and ceramic may need mechanical profiling, while natural stone might require a primer.
Before full application, perform an adhesion test. Apply some microcement to a small, hidden area. Let it cure, then try to scratch or peel it off. If it sticks well, you’re good to go.
Leveling, Lippage and Substrate Flattening
Uneven tiles can cause issues. Lippage, where some tiles are higher than others, needs addressing.
For minor lippage, use a feather finish compound to level out high spots. For larger gaps or low spots, apply a skim coat. If your tiles are severely uneven, you might need to install a full leveling screed.
Remember, microcement is thin and won’t hide major imperfections. So, take the time to flatten your substrate as much as possible before applying.
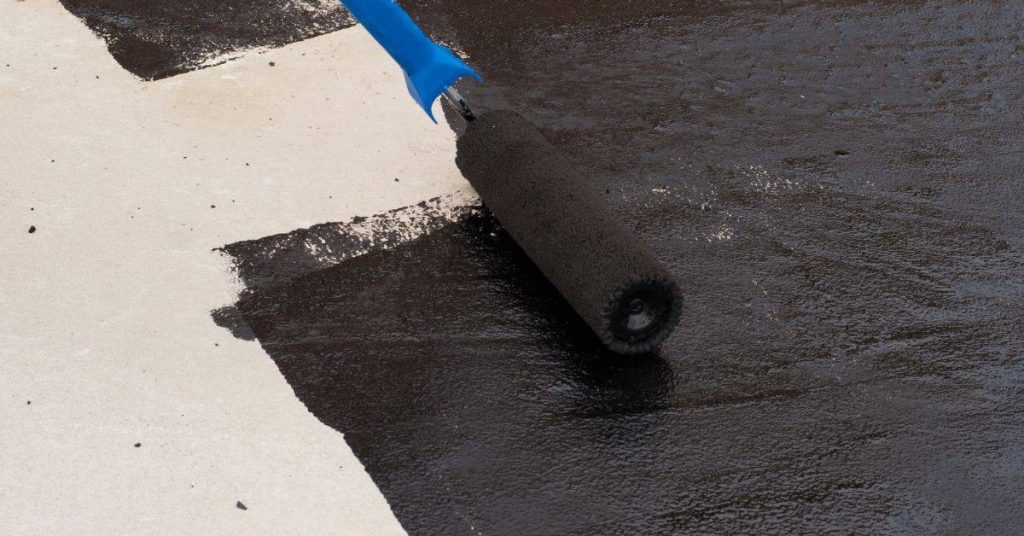
Base Coats and Layering Technique — Mixing, Thickness, and Curing
Describe the purpose of base coats in promoting adhesion and evenness. Emphasize working in small batches and using a compatible cementitious mix with modifiers. Keep your work within manageable, consistent batches.
Explain layering order, target approximate thicknesses, and how to achieve uniform build without overloading the tile. Include curing steps, environmental considerations, and steps to avoid pinholes and cracks through proper technique.
Mixing, batch size and recommended thickness ranges
Base coats in microcement over tile serve a crucial purpose. They promote adhesion, ensure evenness, and prevent cracks. To achieve this, mix small batches using compatible mixes with polymer modifiers at consistent ratios as per the manufacturer’s instructions.
Working with small batches gives you better control and a longer open time. Aim for total system thickness around 2–4 mm, but check product specs for exact values. Too thick can lead to cracking, too thin won’t provide adequate protection.
Key: Follow manufacturer’s mixing ratios. Small batches give you more control. Total thickness should be around 2–4 mm.
Application technique — trowel, feathering and layer sequencing
Use a 6-8mm notched trowel at a 45° angle for base coats. Apply pressure evenly to achieve the desired thickness of roughly 0.3–0.7 mm per coat. Feather edges to avoid ridges.
The typical sequence is: base coat, intermediate coats (1-2), and finishing coats. Allow each coat to dry according to product instructions before applying the next one. This ensures a uniform build without overloading the tile substrate.
Tip: Feather edges to avoid ridges. Follow the sequence: base, intermediate, finish coats. Let each coat dry as per product instructions.
Curing, sanding between coats and crack prevention
Lightly sand or abrade between coats to remove any imperfections. This promotes better adhesion of the next coat. Follow product instructions for cure times between coats, typically 12-24 hours.
Minimize shrinkage or movement cracks by protecting your work from rapid moisture loss. Keep the area at ideal temperature and humidity ranges (around 70°F/21°C and 50% RH) during curing. If microcracking appears, assess substrate preparation and application technique.
Remember: Sand between coats for better adhesion. Follow cure times. Protect from rapid moisture loss. Check substrate prep if cracks appear.
Sealer Choices and Finish Options — Protection and Maintenance
Define common sealer types and how they interact with microcement over tile, including stain resistance and VOC considerations. Compare penetrating versus film-forming options and note any odor concerns during cure. Verify product data to confirm compatibility with your surface.
Discuss finish options like matte, satin, or gloss and how they influence appearance and maintenance. Address safety for food- or water-contact areas and re-sealing needs. Check manufacturer guidance for cure times and reapplication intervals.
Water‑based acrylic, solvent PU and epoxy — pros and cons
Each sealer type has its own strengths and weaknesses. Here’s a quick rundown to help you choose the right one for your microcement over tile project.
Pros of Water-based Acrylic Sealers
- Low VOC emissions, making them eco-friendly and safer to use indoors.
- Quick drying time, allowing for faster application and curing.
- Good stain resistance, protecting against common household spills.
- UV stable, maintaining color and gloss over time.
Cons of Water-based Acrylic Sealers
- Less durable than solvent-based or epoxy sealers, making them less suitable for high-traffic areas.
- May not provide adequate protection against harsh chemicals or extreme heat.
- Requires more coats to achieve desired durability and protection.
Use water-based acrylic sealers in low-traffic areas with minimal exposure to harsh chemicals, like bedrooms or hallways.
Pros of Solvent-based PU Sealers
- High durability and resistance to abrasion, scratches, and impact.
- Excellent chemical resistance, making them suitable for areas exposed to cleaning agents or chemicals.
- Good slip resistance, reducing the risk of accidents in wet areas.
- Available in a range of gloss levels to suit different design preferences.
Cons of Solvent-based PU Sealers
- Higher VOC emissions, requiring proper ventilation during application and curing.
- Longer drying time compared to water-based sealers.
- May yellow over time when exposed to UV light, making them less suitable for outdoor or well-lit areas without UV protection.
Opt for solvent-based PU sealers in high-traffic areas like kitchens and bathrooms, where durability and chemical resistance are crucial.
Pros of Epoxy Sealers
- Excellent chemical resistance, making them ideal for areas exposed to harsh chemicals or cleaning agents.
- High resistance to abrasion, scratches, and impact, providing long-lasting protection in high-traffic areas.
- Good UV stability, maintaining color and gloss over time even in well-lit or outdoor areas.
- Available in a range of colors and effects, allowing for creative design options.
Cons of Epoxy Sealers
- Higher VOC emissions compared to water-based sealers, requiring proper ventilation during application and curing.
- Longer drying time and cure time, which can impact project timelines.
- May have a strong odor that lingers after application, making them less suitable for indoor use without adequate ventilation.
Epoxy sealers are ideal for areas with high chemical exposure or heavy foot traffic, like industrial settings, garages, or commercial kitchens. However, their strong odor and longer cure times may make them less suitable for residential projects.
Application method, coats and maintenance schedule
Applying sealer to your microcement over tile surface is a straightforward process. Here’s how to do it right:
Application Method: Use a high-quality roller or brush for even coverage. Spray application can also be used, but it requires more skill and proper ventilation.
Number of Coats: Most sealers require 2-3 coats to achieve optimal protection. Always follow the manufacturer’s recommendations for your specific product.
Maintenance Schedule: Regular cleaning is key to maintaining your sealed microcement surface. Use a mild detergent and warm water, avoiding abrasive materials that can scratch or damage the sealant. Re-seal every 2-3 years, or as needed based on traffic and wear patterns.
To preserve the finish, address any spills promptly, keep the surface clean, and avoid using harsh chemicals or abrasive materials during cleaning.
Food-safety, waterproofing and wet-area considerations
When choosing a sealer for areas where food preparation or water exposure is present, safety and suitability are paramount.
Food-Safety: For surfaces that come into contact with food, ensure the sealer has appropriate certifications, such as NSF/ANSI 51 or CONEG. These certifications confirm the product’s safety for use in food-preparation areas.
Waterproofing and Wet-Areas: In wet areas like showers or bathroom walls, choose a sealer with excellent water resistance and slip resistance to prevent accidents. Some sealers may require additional primers or base coats to ensure proper adhesion and waterproofing in these areas.
Always check the manufacturer’s guidelines for specific use-cases and follow their recommendations for application, cure times, and re-sealing intervals. If the surface will be exposed to oils or acidic spills, consider using a sealer with enhanced chemical resistance.
Step-by-Step Application over Tiles — Walls, Floors and Bathrooms
Outline distinct sequences for walls, floors, and wet areas from prep to finish. Highlight where steps diverge, such as vertical surfaces versus floors with drainage. Keep the plan practical for DIY execution.
Detail substrate prep, priming, base coats, and feathering techniques. Include wet-zone considerations, waterproofing needs, and movement joints to prevent cracking. Check guidelines for edge treatment and transitions in each area.
General step-by-step workflow (condensed)
This section outlines a concise sequence from prep to finish, ensuring your microcement application over tiles goes smoothly.
- Inspect and test the tile surface for adhesion. If it’s sound, proceed; if not, call a pro.
- Clean and degrease the tiles. Remove any dirt or grease that could hinder adhesion.
- Repair grout lines or damaged areas. Ensure your base is solid before applying microcement.
- Profile and prime the tiles. This helps with adhesion and seals the surface.
- Apply base coats, aiming for 1-2mm thickness each. Let them dry according to manufacturer’s guidelines (usually 24 hours).
- Apply intermediate coats, feathering edges to avoid buildup. Again, let them dry as directed.
- Apply finish coats, ensuring they’re smooth and even. Allow drying time before moving on.
- Seal the surface with a suitable sealer. Test-spot first to ensure compatibility with your microcement.
Bathrooms and shower areas — waterproofing junctions and drains
Wet zones require extra care to prevent moisture issues. Here’s how to handle them during microcement application.
Before applying microcement, install a waterproof membrane or liquid-applied barrier in shower areas and around baths. This provides an additional layer of protection against moisture.
Seal transitions at drains and joinery using a flexible sealant. This prevents water from getting behind your microcement and causing damage.
Note: In showers, consider applying a second coat of sealer or using a shower-specific coating for added protection against moisture and mold.
Floors and high-traffic areas — joints, reinforcement and slip-resistance
High-traffic floors need extra attention to ensure safety and longevity. Here’s how to handle them during microcement application.
Before applying microcement, install expansion joint strips in the appropriate places to accommodate movement and prevent cracking.
In areas with heavy foot traffic or where impact resistance is needed, consider adding a flexible additive or mesh reinforcement to your microcement mix. This helps distribute stress evenly and prevents damage.
Note: For slip-resistant surfaces, you can add anti-slip particles to your microcement mix or apply an anti-slip coating after the final seal. Always test for slip resistance before use.
DIY Success Factors, Common Mistakes and Visual Checkpoints
Identify essential factors for DIY success, including surface prep quality, base coat selection, and sealer compatibility. Emphasize following steps in the correct order for reliable results. Use these anchors to guide your progress.
Highlight high-risk mistakes with quick fixes and stage-by-stage visual checkpoints. Provide a practical QA checklist covering cleanliness, adhesion tests, and uniformity before sealing. Include guidance on pinholes, fisheyes, and when to seek professional help if needed.
Common mistakes and how to avoid them
Before you start applying microcement over tile, run through this checklist to prevent common DIY blunders.
- Insufficient cleaning: Dirt, grease, or residue can hinder adhesion. Use a degreaser and clean thoroughly.
- Over-thick coats: Thick layers can crack or peel. Stick to recommended thickness ranges.
- Skipping priming: Primer promotes adhesion and seals pores. Don’t skip this step.
- No adhesion tests: Test primer adhesion before applying microcement. Scrape with a razor blade after drying.
- Ignoring tile condition: Cracked or loose tiles need repair before proceeding.
- Over-thinning mixtures: Thin coats lack durability. Follow mix ratios carefully.
- Moisture behind coatings: Trapped moisture can cause delamination. Ensure surfaces are dry.
- Inconsistent troweling: Uneven application leads to inconsistent results. Practice your technique.
Quick rule: If in doubt, redo or seek advice before moving on.
Visual checkpoints and simple tests (adhesion, cure, waterproofing)
Before proceeding to the next stage, perform these quick checks to ensure a successful microcement application.
- Post-grind/etch: Inspect for clean, exposed pores. If not, redo grinding/etching.
- Primer adhesion test: Scrape with a razor blade after drying. Primer should stick firmly.
- Base coat coverage: Check for consistent coverage and no missed spots.
- Microcement layer thickness: Measure with a trowel or ruler to ensure target thickness is met.
- Surface uniformity: Inspect for fisheyes, pinholes, or other defects before sealing.
- Adhesion tape test: Apply and remove adhesive tape. No microcement should peel off.
- Water beading: Sprinkle water on surface. Beads indicate proper waterproofing.
- Surface hardness: Gently press with a fingernail. Surface should feel firm, not soft or mushy.
Quick rule: If tests fail, redo the stage before proceeding.
When to call a professional
Certain situations require expert help. Here are red flags to watch out for.
- Structural movement: Cracks in walls or floors may indicate structural issues. Hire an engineer first.
- Extensive tile damage: Large areas of cracked, loose, or missing tiles need professional repair.
- Complex substrates: Unusual surfaces like metal, glass, or highly textured tiles may require pro help.
- Waterproofing requirements: Wet areas like showers or pools need expert waterproofing to prevent leaks.
- Unsure about DIY: If you’re unsure about any stage, it’s better to hire a pro than risk costly mistakes.
- Time constraints: Tight deadlines may warrant hiring help to ensure the job is done on time.
Quick rule: When in doubt, err on the side of caution and call a professional.
Conclusion
Finish with confidence by locking in a solid prep, correct base coats, and the right sealer. When done right, you get a durable, seamless look that stands up to moisture and wear without ripping out tile again.
To move forward, confirm the surface is clean and sound, patch any cracks, apply your base coats in the recommended thickness, cure fully, and choose a sealer and finish that match the room. Start small if you can, test a corner first, and follow the order: prep, base coats, curing, sealer, and maintenance checks.
Common mistakes to avoid are skipping proper surface prep, applying too thick a coat, and rushing curing or sealing times. Use PPE, work in a dry, ventilated area, and verify compatibility of each product before use. Test a small area first, and never mix products not designed to work together.
If you encounter structural issues, tiles that firmly refuse to take a new coat, or large areas with irregularities, call a professional rather than forcing a DIY fix. Stay practical, stay safe, and you’ll finish with a job that looks good and lasts long. You can do this, one careful step at a time.
FAQ
Surface prep for microcement over tile
Test the tile for glaze and bond. If the surface is slick or glossy, abrade or etch it to create a key, then clean thoroughly and let it dry. Check the tile manufacturer’s instructions for any special prep needs or primers.
Step-by-step application sequence over tile
Apply a compatible primer or bonding agent as directed. Then lay the base coat evenly, allow it to set, and proceed with subsequent coats per the product instructions. Finish with the top sealer once the final coat has cured.
Base coats and layering techniques
Use the recommended base coats in the proper order, mixing only as instructed and applying within the window of workability. Keep thickness controlled and don’t rush curing between coats. If a coat looks uneven, lightly sand or re-apply as allowed by the product guidelines.
Sealer choices and final finishing process
Choose a sealer that fits your floor or wall use and maintenance needs. Follow the label for number of coats, curing time, and cleaning before and after sealing. If unsure, check manufacturer instructions or local rules for compatibility with the microcement system.
Troubleshooting common issues during installation
Look for peeling, blistering, or uneven texture and address root causes—adhesion, contamination, or improper curing. Corrective steps usually involve re-prepping the affected area, reapplying the appropriate coats, and ensuring proper ventilation and drying conditions. When in doubt, consult the product label or maker’s instructions for safe fixes.