
Introduction
It’s a practical guide to understanding why a high-traffic tile floor fails and how to test and fix it.
You’ll learn common causes and plain-language steps you can take on a DIY basis.
We’ll cover simple checks you can do on the floor, what signs to look for, and how to plan a fix without a full renovation.
If you’re unsure about materials or methods, always check product labels, manufacturer instructions, or local rules.
The goal is practical, honest guidance you can apply with basic tools and patience.
Key takeaways
- Inspect grout lines and thinset cracking in high-traffic zones for root causes.
- Perform visual and tactile checks for hollow sounds or loose tiles before deeper work.
- Test moisture and adhesion with simple spacer, pull test, and chalk line.
- Wear PPE, de-energize nearby outlets, and isolate work area during grinding.
- Plan permanent fixes around substrate stabilization, proper mortar, and correct tile rating.
- Schedule preventive maintenance and use mats and area rugs in entry zones.
Table of Contents
- Introduction
- Key takeaways
- Common Causes of Tile Floor Problems in High Traffic Areas
- Visual and Tactile Signs to Inspect on Existing Floors
- Diagnostic Tests and Tools for Root-Cause Analysis
- Short-Term Repairs and Stopgap Fixes
- Permanent Fixes and Corrective Procedures
- Material Specs, Ratings & How to Choose Tiles for High Traffic
- Preventive Measures and Best Practices for Longevity
- Cost Estimates, Timeframes, and When to Call a Pro
- Conclusion
- FAQ
Common Causes of Tile Floor Problems in High Traffic Areas
High traffic zones place unusual stress on floors, and that stress often reveals itself as cracking, grout failure, or loose tiles. The root issues usually start under the surface, with substrate movement or improper installation or materials. Look for patterns tied to point loads, movement joints, or inadequate material choices.
Pay attention to how the floor reacted during use, not just at the time of install. Problems tend to accumulate where heavy loads repeatedly strike the same spots. Identifying the underlying cause helps you choose the right corrective path later on.
Substrate and Structural Movement
The foundation of your tile floor is crucial. Issues here can lead to cracked or loose tiles over time.
Joist deflection: If joists sag, they put pressure on the tiles above. You might see cracking at the grout lines where tiles meet walls or other fixed points.
Slab settlement: When a concrete slab settles unevenly, it can cause tiles to crack or lift. Look for diagonal cracks or tiles that are higher or lower than their neighbors.
Thermal movement: As temperatures change, materials expand and contract. If your substrate doesn’t allow for this, it can stress the tiles. Check for cracking around heating vents or other areas with temperature fluctuations.
Installation Errors and Workmanship
Proper installation is key to a long-lasting tile floor. Here are some mistakes to avoid:
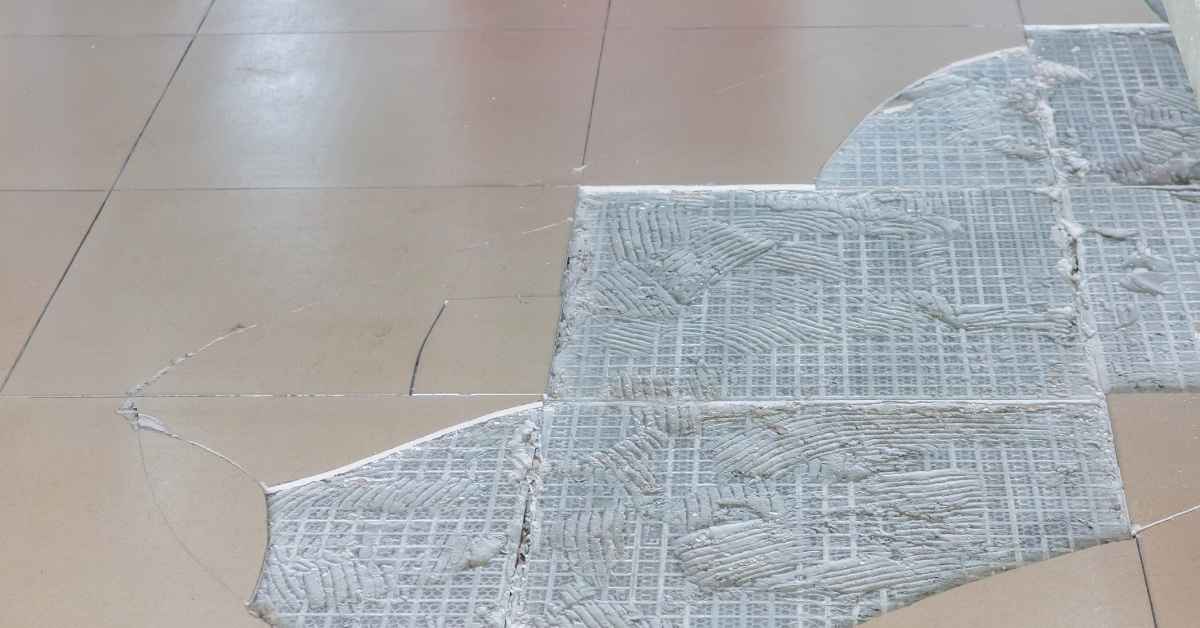
- Insufficient mortar coverage: Not using enough mortar can lead to weak bonds between the tile and substrate. Tiles may loosen over time.
- Poor trowel choice: Using the wrong type or size of trowel can result in inconsistent mortar thickness, causing tiles to be uneven.
- Wrong spacers: Incorrectly sized spacers can lead to grout lines that are too wide or narrow, affecting the overall look and durability of the floor.
- Inadequate curing time: Rushing the curing process can weaken the mortar and cause tiles to loosen or crack.
Always ensure your installer uses the right tools and follows best practices for installation.
Material Selection and Traffic Mismatch
The materials you choose for your tile floor can make a big difference in how well they hold up to heavy foot traffic.
- Tile type: Porcelain and ceramic tiles are generally more durable than natural stone or glass. For high-traffic areas, opt for these harder-wearing options.
- Tile body: Through-body tiles have color throughout the tile, making them less likely to show wear. Choose these for high-traffic zones.
- PEI rating: This scale rates tile durability from residential (light traffic) to heavy commercial use. For high-traffic areas, choose a tile with a PEI rating of 4 or higher.
- Grout choice: Choose a grout that’s suitable for the level of traffic your floor will see. Sanded grouts are more durable and can withstand heavier foot traffic.
Using inappropriate materials can lead to cracking, staining, or weak bonds between tiles and the substrate.
Visual and Tactile Signs to Inspect on Existing Floors
Start with a walk-through to spot obvious trouble: hairline cracks, hollow-sounding tiles, and visible grout gaps. Run a hand along borders and edge joints to feel for loose or uneven tiles. Color changes can indicate moisture or wear beneath the surface.
Look for wear patterns that match traffic flow, such as smoother patches or rounded edges on frequently used paths. Texture differences between tiles or grout can signal migration or debonding. Document anything that looks inconsistent for later testing.
Tap and Sound Tests
Grab a piece of wood or a rubber mallet. Tap on your tiles from the center out to the edges. Listen for different sounds:
Solid, clear sound: That’s good. It means your floor is solid and well-supported.
Hollow sound: That’s bad. It could mean your subfloor isn’t properly supported or there are voids under the tiles. Check base compaction and look for any signs of movement or soft spots.
Test every few feet, especially around edges, corners, and where heavy furniture sits. If you find hollow sounds, consider reinforcing or replacing the affected areas before they cause bigger problems.
Grout and joint inspection
Before you start any major work on your existing floor, use this checklist to inspect the grout and joints. This will help you identify potential issues early, saving you time and money.
- Check for grout shrinkage: Look for hairline cracks or gaps between tiles and grout. These are signs of shrinkage, which can happen due to improper curing or drying.
What goes wrong if you skip this: Shrinkage can lead to water intrusion, causing further damage and potentially leading to mold growth. - Inspect for staining: Check for discoloration or stains on the grout. This could indicate moisture issues or improper cleaning.
What goes wrong if you skip this: Stains can be difficult to remove and may require professional help, adding extra costs. - Measure joint width: Use a tile gauge or a ruler to check that joints are consistent across the floor. Ideal joint width is typically 1/8″ to 3/16″.
What goes wrong if you skip this: Inconsistent joint widths can lead to an unprofessional finish and may cause tiles to pop out over time. - Check joint depth: Ensure that grout is level with the tile surface. Grout that’s too low or high can indicate improper installation.
What goes wrong if you skip this: Incorrect grout depth can trap dirt, making cleaning difficult, and may cause tiles to pop out. - Feel for loose tiles: Gently press on each tile. If it feels spongy or moves, the tile might be loose due to failed grout adhesion.
What goes wrong if you skip this: Loose tiles can break off unexpectedly, causing injury and damage. - Look for missing pieces: Check that all joints are filled. Missing grout can lead to water intrusion and further damage.
What goes wrong if you skip this: Missing grout can cause water to seep behind tiles, leading to structural damage and mold growth. - Inspect high-traffic areas: Pay special attention to areas with heavy foot traffic. These are more likely to show signs of wear or damage.
What goes wrong if you skip this: High-traffic areas may require extra care or repair, which can be overlooked if not inspected properly. - Check for efflorescence: Look for a white, powdery substance on the surface of the grout. This is a sign of excess moisture.
What goes wrong if you skip this: Efflorescence indicates a moisture problem that needs to be addressed to prevent further damage.
Quick rule: If in doubt, always check with your local building codes and consult the tile manufacturer’s guidelines for specific installation and maintenance instructions.
Surface wear and slip concerns
Check your floor’s surface for signs of excessive wear. This is especially important in high-traffic areas like entryways and corridors.
Abrasion can cause the top layer to wear off, exposing the aggregate underneath. If you see this, it’s time for a refresh or repair.
Look out for glazed wear-through. This happens when the surface becomes smooth and shiny from heavy use, reducing slip resistance. It’s like walking on ice – dangerous!
To check slip resistance, do a simple test: sprinkle some water on the floor and walk across it. If you slip, it’s a sign your floor needs attention.
Diagnostic Tests and Tools for Root-Cause Analysis
Use simple moisture tests to check for elevated dampness beneath the tile or at the substrate. A deflection check helps gauge substrate stiffness by comparing visually flat areas to sagging spots. Check mortar coverage by inspecting corners and undercut areas for proper bedding.
Adhesive bond tests involve lifting a small tile to see if the mortar or adhesive remains intact. Note any debonding or powdery mortars, which point to improper installation or inappropriate products. Keep records of results to guide repairs.
Moisture tests (CM, RH, and surface)
Before you start any tile floor repair, check for moisture. It’s the number one enemy of your tiles.
Cement Moisture (CM) Test: Drill holes into the slab. Insert probes to measure moisture content in the concrete itself. This test is crucial before installing new tiles.
Relative Humidity (RH) In-Slab Test: Use a hygrometer to check moisture levels within the slab. It’s useful when CM tests are inconclusive or if you suspect interstitial moisture.
Surface Moisture Check: Use a simple surface moisture meter for quick, non-destructive checks before installing new tiles or replacing damaged ones.
Deflection and flatness checks
Flat is fantastic. Deflection is not. Check both to ensure your tile floor’s longevity.
Deflection: Use a straight edge and feeler gauges to measure deflection. Too much (more than L/360 for live loads) can cause tiles to crack or pop off.
Floor Flatness (FF) / Floor Levelness (FL): Measure with a 10′ straight edge. Ideal FF is FFI > 75, FLI > 45. If it’s lower, your tiles might not lay flat and could crack under traffic.
Adhesion and mortar coverage checks
Strong bond is key to a durable tile floor. Here’s how to check yours:
Pull Test: Glue a suction cup to the tile, pull hard. If it doesn’t budge, your adhesive is doing its job.
Spot-Removal Check: Remove a small tile in an inconspicuous area. Inspect the back for proper adhesion and coverage.
Thinset Coverage Inspection: Look for consistent, full coverage under your tiles. Inadequate or inconsistent coverage can lead to failures over time.
Short-Term Repairs and Stopgap Fixes
Prioritize safety by securing loose tiles and retooling grout gaps to reduce trip hazards. Temporary epoxy or mortar fillers can help stabilize small gaps but should be clearly labeled as provisional. If moisture is present, address the source before covering with a quick fix.
Choose reversible approaches when possible, so you can revert to proper repairs later. Use patches that won’t introduce new movement or sharp edges near doorways and high-traffic paths. Plan to remove and redo the area with proper layers when time and access permit.
Regrouting and sealers
If your tiles are still solid but the grout is cracked or discolored, regrouting can improve appearance. It won’t fix structural issues though.
Note: If tiles are loose, don’t just regrout. That’s like putting a band-aid on a broken bone.
Sealers can help protect grout and prevent moisture damage. But again, they’re no substitute for fixing underlying problems.
Local tile replacement and leveling compounds
If a few tiles are damaged or loose, replacing them can buy time. But it’s not a permanent fix.
Tip: Use a leveling compound to fill gaps before regrouting. It won’t hide major issues though.
Crack isolation membranes can help prevent water damage temporarily. But they’re no match for serious structural problems.
Adhesive injections and spot-bonding
If tiles are hollow-sounding, injecting adhesives or epoxies under them can help reattach them. But it’s a temporary fix.
Warning: Don’t inject if tiles are wobbly. You could make things worse.
Spot-bonding can also help reattach loose tiles. But again, it’s not a permanent solution.
Permanent Fixes and Corrective Procedures
Approach substrate remediation first if movement or detachment is evident, correcting any underlying leveling or wipe-out issues. Reinstall tiles when necessary, ensuring proper bed thickness, coverage, and joint spacing. Align procedures with the specific failure mode you’ve diagnosed.
Choose between repair or full replacement based on extent of damage, substrate condition, and expected load. Follow manufacturer instructions for adhesives, grouts, and seals, and verify you’re using products appropriate for high-traffic environments. Document decisions and rationale for future maintenance.
Substrate stabilization and reinforcement
Before you start any fix, check your substrate. It’s the base that’ll hold everything up.
Joist reinforcement: If joists are sagging or squeaking, sister them. Cut a new joist to match size, secure it alongside the existing one, and bolt ’em together. Check local codes for spacing and bolting patterns.
Slab repair: For cracked slabs, use an epoxy-based patching compound. Clean the crack, apply the epoxy, and pack it tight. Let it cure before walking on it. If it’s a big crack or slab settlement, consider underpinning or mudjacking.
Self-leveling underlayments: These are great for smoothing out uneven floors. But they won’t fix structural issues. Check the subfloor’s condition first. Follow manufacturer instructions for mixing and application. Use a leveling tool to ensure it’s even.
Crack isolation membranes: These go over cracks before you pour new concrete. They stop cracks from reappearing. Apply them according to the manufacturer’s instructions. Don’t skimp on coverage; get one that’s tough enough for your job.
Proper mortar systems and installation methods
Before you start slapping on that mortar, listen up. You wanna make sure your floor’s solid first. If not, check base compaction, stabilize it if needed. Don’t skimp on prep work, or you’ll regret it later.
Now, pick the right mortar. For high-traffic floors, use a Type N or Type S mortar. They’re strong and durable. Check the label, follow manufacturer instructions. Don’t go cheaper just ’cause it’s on sale. You get what you pay for.
When applying, don’t be lazy. Use both buttering and bedding techniques. Butter the base, then spread a layer of mortar over it. This gives your tiles something to grip onto. Use a notched trowel for even coverage. A 1/4″ or 3/8″ notch is usually good for floors.
Back-buttering’s important too. It’s like giving your tiles a little hug from behind, making sure they’re well-loved and secure. Don’t skip it. And remember to cure your floor properly. Keep it damp for at least three days. Cover it with plastic if you have to. This helps the mortar set right.
Full tile removal and replacement workflow
Before you start, check your tiles for any signs of damage or wear. If they’re beyond repair, it’s time to remove them. Here’s how:
1. Demolition: Start by scoring the grout lines with a utility knife to break the seal. Then, use a rubber mallet and a flathead screwdriver to gently pry off tiles. Work from one corner of the room, moving diagonally to avoid breaking tiles.
2. Substrate prep: Once all tiles are removed, check base compaction. If it’s soft or unstable, you’ll need to stabilize it before proceeding. Then, remove any remaining adhesive using a chisel and hammer, or a power tool designed for the job.
3. Moisture mitigation: Before laying new tiles, ensure your substrate is dry. Use a moisture meter to check; readings should be below 3% for most tile installations. If it’s higher, address the source of moisture before proceeding.
4. Layout: Start by marking the center point of the wall or floor. Snap chalk lines from this point to create a straight reference line for your tiles. Begin laying tiles at this center point, working outwards to avoid cutting too many tiles on the edges.
5. Setting: Mix your mortar according to manufacturer instructions. Apply it with a notched trowel, spreading it evenly and creating grooves with the notches. Press your tiles firmly into the mortar, using spacers to maintain even grout lines.
6. Grout: Once your tiles have set (check the mortar’s cure time), mix your grout according to instructions. Apply it with a rubber float, forcing it into the grout lines at a 45-degree angle. Let it set for about 15 minutes, then clean off excess grout with a damp sponge.
7. Final QA: After your grout has cured (check manufacturer’s recommended time), perform a final quality check. Ensure all tiles are securely adhered and that there are no missing or cracked pieces. If everything looks good, your tile replacement job is complete!
Material Specs, Ratings & How to Choose Tiles for High Traffic
Learn the key specs that matter: abrasion resistance, porosity, and slip ratings inform durability in busy areas. Compare body types and surface textures that resist wear without becoming slippery when wet. Match grout choices to tile and traffic conditions for long-term performance.
Use guidance from label data sheets or manufacturer instructions to verify ratings apply to indoor use and foot traffic levels. Consider PEI ratings and finish textures alongside mount and edge treatment. Ensure compatibility between tiles and grout with your planned cleaning regime.
Tile body types and durability indicators
When choosing tiles for high traffic areas, understanding the different tile bodies and their manufacturing processes is crucial. Porcelain and ceramic are the two main types.
Porcelain is denser and more durable due to its higher firing temperature. It’s less porous, making it resistant to moisture and stains. Rectified porcelain has sharp edges, reducing grout lines and increasing durability.
Ceramic tiles are generally less expensive but also less durable. Glazed ceramic has a protective layer that makes it more stain-resistant, while unglazed or semi-glazed options may require sealing for protection against moisture and stains.
Ratings and standards to check
Several ratings and standards help you choose suitable tiles for high traffic areas. Here are the key ones:
PEI (Porcelain Enamel Institute) Rating: This scale ranges from 0 (no foot traffic) to 5 (heavy commercial traffic). For residential use, aim for PEI 3 or above.
Water Absorption: Lower water absorption means the tile is denser and more resistant to moisture. Aim for tiles with less than 3% water absorption for high traffic areas.
MOHS Hardness Scale: This scale measures a material’s resistance to being scratched. Tiles with higher MOHS hardness ratings are more durable. For residential use, consider tiles with a rating of 5 or above.
Grout and sealer selection
Choosing the right grout and sealer is as important as selecting durable tiles. Here’s what to consider:
Grout Type: For high traffic areas, cement-based grouts are a good choice due to their durability and affordability. Epoxy grouts offer superior stain resistance but can be more expensive.
Consider using sanded grout for larger tile sizes or wider grout lines to increase strength and reduce cracking.
Sealer: Sealers protect tiles and grout from moisture, stains, and dirt. For high traffic areas, consider using a sealer with good stain resistance and durability. Apply the sealer after installation and according to the manufacturer’s instructions.
Preventive Measures and Best Practices for Longevity
Incorporate design choices that accommodate movement, such as proper expansion joints and backer boards. Plan construction sequencing to avoid mud and moisture lingering under tiles in high-traffic zones. Schedule preventive maintenance to catch minor issues before they grow.
Establish a routine for cleaning and sealing per manufacturer guidance, and document any changes to the floor over time. Train builders and cleaners on correct grout care and moisture management to extend life. Use consistent materials and installation methods across the area to avoid weak links.
Design and specification tips for project houses
The first step to a long-lasting tile floor is smart planning. Here’s what you should consider:
Control Joints: Plan for control joints every 8-12 feet to allow for natural expansion and contraction.
Substrate Design Limits: Ensure your substrate can handle the expected loads. For high-traffic areas, use a minimum of 3/4″ plywood or concrete with a PSI of at least 3000.
Transitions: Plan for transitions between materials to prevent tripping hazards and moisture issues.
Installation QA checklist for contractors
Use this checklist before and after installation to ensure a solid, long-lasting tile floor.
- Pre-installation: Check substrate flatness. It should not exceed 1/8″ in 10 feet.
- Moisture test: Conduct a moisture test on the substrate before installing. Excessive moisture can cause tiles to lift.
- Mortar coverage: Ensure full mortar coverage under each tile. Insufficient coverage leads to debonding.
- Curing times: Allow proper curing time for mortar and grout before exposing the floor to traffic.
- Documentation: Keep records of materials used, installation dates, and any special notes about the project.
- Post-installation: Check for levelness. No tile should wobble or feel loose.
- Grout lines: Ensure grout lines are filled evenly and completely to prevent moisture intrusion.
- Sealing: Apply sealer as recommended by the manufacturer to protect against stains and moisture.
Quick rule: Always follow the manufacturer’s recommendations for installation and care.
Routine maintenance and long-term care
Regular maintenance is key to preserving your tile floor’s integrity. Here’s a simple routine:
Cleaning: Regularly clean your tiles using a mild detergent or manufacturer-recommended cleaner. Avoid harsh chemicals that can damage the sealant.
Resealing: Reapply sealer every 2-3 years, or as recommended by the manufacturer, to maintain protection against moisture and stains.
Monitoring: Regularly inspect your tiles for any signs of cracking, lifting, or other damage. Address these issues promptly to prevent further problems.
Cost Estimates, Timeframes, and When to Call a Pro
Discuss rough ranges and timelines with the team or a contractor, but avoid committing to numbers here. Use local quotes to pin down exact costs for diagnostics, spot repair, or full replacement. Look for clear indicators that professional structural or tile remediation is required.
If you observe persistent movement, widespread debonding, or moisture problems, plan a pro assessment rather than DIY-only fixes. Verify professional licensing, insurance, and prior project references before proceeding.
Comparing DIY vs Professional Scope
Before you start, understand what you can handle and when to call a pro.
DIY: Competent homeowners can tackle diagnostics like checking for moisture, cracks, or loose tiles. Spot repairs are also feasible if the subfloor is sound.
Professional: Structural issues, like delamination or damaged substrate, need a pro’s eye. Licensed contractors or engineers should handle major repairs and full replacements to ensure safety and longevity.
Typical Project Timelines and Staging
Here’s a rough breakdown of how long each phase takes:
Diagnostics (1-2 days): Inspecting, testing for moisture, checking subfloor.
Repairs (1-5 days): Spot repairs or minor substrate work. Major repairs may take longer.
Installation (3-7 days): Laying tiles, applying mortar, and grouting. Curing time varies but expect 24-72 hours before traffic is allowed.
Conclusion
Safety, durability, and good appearance hinge on clear, deliberate action now. Focus on solid diagnostic work, careful testing, and fixes that respect the floor system and the traffic pattern over time.
Start by confirming the root cause with the simplest checks first: look for movement or cracks, test for high-resin grout gaps or loose tiles, and verify substrate flatness with a straightedge or a simple straight line. Move through your short-term stopgaps only after you’ve mapped out the problem, then plan permanent repairs with material choices sized for high traffic, and schedule the work in logical, non-overlapping steps so you don’t trap moisture or create new movement. If you find moisture, movement, or structural concern, document it and adjust your plan before applying any fixes.
Common mistakes to avoid include skipping a proper substrate check, using the wrong adhesive for the tile and environment, and rushing permanent fixes without confirming the cause or testing the result. Always test a small area first, follow product specs for cure times and temperatures, and keep a clean, dry work zone to prevent further damage. Safety rules to follow are simple: cut away risk zones, wear eye protection and gloves when grinding or cutting, keep children and pets out, and never mix incompatible products or force-wixes that mask a bigger problem.
When moisture, structural issues, or uncertain causes are present, or when tile movement recurs after a repair, call a pro rather than pushing ahead. A pro can verify substrate condition, select the right tile and fastener system, and perform long-lasting fixes with the correct timing and sequencing. With a cautious, methodical approach, you’ll restore floor performance and keep the high-traffic tile area looking and functioning well for years to come.
FAQ
What should I check first if high-traffic tiles feel loose or hollow?
Press on several tiles in different areas and listen for a click or feel a give. If many tiles move, there may be bond failure or substrate movement. Check the tile and grout labels for installation instructions and look for signs of debonding at the edges.
How do I confirm if the problem is the tile, the grout, or the subfloor?
Examine grout for cracking or missing sections; worn grout often masks deeper issues. Tap nearby tiles and listen for a dull thud indicating hollow spots. If you find movement or hollow areas, the culprit is likely subfloor or adhesive, not just the surface.
What safe short-term fixes can I do without tearing out the whole floor?
Remove loose grout and regrout the affected seams to seal them. Clean and re-adhere only the small loose sections with appropriate tile adhesive, keeping to manufacturer guidelines. For heavily worn areas, plan a permanent repair rather than a quick patch.
What should I check before choosing a permanent fix?
Review the substrate condition and ensure it’s solid and clean. Confirm the tile type and adhesive are rated for high-traffic areas and your subfloor. Always read labels, datasheets, and local guidance before committing to a method. If unsure, consult the product instructions or a pro for a proper assessment.