

Introduction
Replacing a broken tile means removing the damaged tile and installing a new one in its place.
This is a hands-on task that starts with assessing the surrounding tiles and preparing a clean work area. It helps to have the right tools and follow the tile type and adhesive directions from the label.
Stop points to watch for include avoiding damaging nearby tiles, not forcing a tile if it won’t seat, and letting adhesive cure per the manufacturer’s guidance. Check the substrate is sound, the grout lines are intact, and replace in a dry, level plane. If in doubt, verify product instructions, local rules, and safety practices before proceeding.
Key takeaways
- Assess substrate stability and surrounding grout before breaking the tile.
- Set up a clean work area with plastic to catch debris.
- Wear eye protection and gloves; shards can pop unexpectedly during removal.
- Use proper removal tools to minimize damage to surrounding tiles.
- Check substrate flatness after removal and before installing replacement tile.
- Allow appropriate curing or setting times per manufacturer instructions for adhesives and grout.
Table of Contents
- Introduction
- Key takeaways
- Quick Overview and When to Tackle This DIY
- Tools and Materials Checklist
- Safety and Prep: Stop Points Before You Start
- Step-by-Step Removal of the Broken Tile
- Assessing and Repairing the Substrate
- Installing the Replacement Tile
- Grouting and Finishing Touches
- Troubleshooting Common Problems and Fixes
- Conclusion
- FAQ
Quick Overview and When to Tackle This DIY
This article covers how to replace a broken tile from start to finish. It explains when a DIY fix is feasible and when to call a pro based on tile type and damage extent. You’ll also get a sense of the workload and a rough time range to gauge readiness.
Consider the condition of the subfloor and moisture exposure before deciding to DIY. Check the tile’s location and any potential risk to surrounding work. If you’re unsure, verify product labels, manufacturer instructions, or local rules before proceeding.
When a broken tile is a simple DIY
A single cracked or chipped tile, or one that’s loose but not crumbling, are usually straightforward fixes for the average homeowner.
These jobs typically don’t require special tools or skills. Just remember, safety first. Wear gloves and protect your eyes when handling broken pieces.
Risk factors like tiles near heat sources (stove, fireplace) or in high-traffic areas can make the job trickier. But with care, these are manageable DIY projects.
When to call a professional
Water damage behind tiles is a big red flag. It could indicate mold growth or structural issues that need pro attention.
Large areas of damaged tiles, especially if they’re specialty types (like hand-painted or mosaic), might be best left to the pros. They have access to matching materials and know-how to maintain patterns.
If you notice structural movement – like walls or floors shifting – don’t DIY. This could indicate serious underlying issues that require professional assessment.
Tools and Materials Checklist
Start with a prioritized list of tools like a basic set of hand tools, chisels, and spacers. Include a selection of consumables such as replacement tiles and appropriate adhesive. Note safer alternatives for renters or tight budgets, like rental tools or generic glue options where applicable.
Keep a box of safety gear handy and a small container for waste. Have a moisture meter or test method if you suspect water damage, and confirm compatible adhesives with the tile type and substrate. Always check labels, data sheets, or manufacturer instructions for specifics.
Essential tools
Before you start, make sure you have all the necessary tools on hand. This checklist will help you gather everything you need.
- Hammer: For tapping out broken pieces and setting tiles.
- Chisel: To remove old thinset and grout. Choose a width that matches your tile size.
- Notched trowel: For applying thin-set. A 1/4″ or 3/8″ notch works for most tiles.
- Grout saw: To cut new tiles to size if needed.
- Tile nippers: For making small cuts and shaping edges.
- Trowel: To spread thin-set and apply grout. A 6″ or 12″ trowel should suffice.
- Grout float: To press grout into tile joints. Choose one with a rubber edge for better control.
- Safety glasses: Protect your eyes from debris. Consider wearing a face shield or goggles for added protection.
Quick rule: Always prioritize safety when selecting tools. Rent or borrow if you can’t afford to buy.
Materials and replacement tile selection
Having the right materials ensures a successful repair job. Use this checklist to gather everything you need.
- Thinset or adhesive: Match the type used in your existing installation. Most tiles use a sanded, polymer-modified variety.
- Grout: Choose a color that matches your existing grout. Consider using a sealer to protect against stains.
- Backerboard or patch material: In case you need to repair the substrate before tiling.
- Spacers: Use plastic or rubber spacers to maintain even grout lines. Size them according to your tile and grout width.
- New tiles: Match the size, thickness, finish, and pattern of your existing tiles as closely as possible.
- Tile nippers or wet saw: To cut new tiles if needed. A wet saw is more accurate but requires more setup.
- Grout sealer (optional): To protect grout from stains and moisture. Apply after the grout has cured.
- Clean water: For mixing thinset, applying grout, and cleaning tools.
Quick rule: When in doubt, take a piece of your existing tile to the hardware store to ensure you’re getting an exact match.
Safety and Prep: Stop Points Before You Start
Begin with a quick safety check of the work area and equipment. Verify that the nearest water and electrical services are shut off if required. If anything seems uncertain, pause and confirm before proceeding.
Test the substrate soundness in the area around the damaged tile. If the subfloor or backing shows softness or crumble, stop and reassess the plan. Always consult the manufacturer instructions or local codes for any special prep requirements.
Personal protective equipment and workspace protection
Safety first, buddy. Protect yourself and your space before you start.
- Eye Protection: Wear safety glasses or goggles to keep debris out of your eyes. They’re cheap, so don’t skimp.
- Gloves: Use work gloves to protect your hands from cuts and scrapes. Leather or heavy-duty fabric gloves are best.
- Dust Mask: A simple dust mask will keep you breathing easy. For heavier duty, consider a respirator around $20-$30.
- Drop Cloths: Lay down drop cloths or old sheets to protect nearby surfaces and cabinets from falling debris.
- Plastic Sheeting: Use plastic sheeting to cover fixtures like sinks and toilets. It’s a few bucks at any hardware store.
Verifying substrate condition
Before you start tearing out tiles, make sure the surface underneath is solid as a rock. Here’s how to check:
Gently Tap: Use a wooden or plastic taping tool (around $5) and gently tap on the tiles around the broken one. Listen for hollow sounds. If you hear any, it might mean there’s damage under the surface.
Check for Soft Spots: Press firmly on the tiles with your hands. If any feel soft or give way, that’s a sign of trouble. You might need to repair the substrate before replacing the tile.
Look for Cracks and Holes: Inspect the area closely for any cracks, holes, or other signs of damage. If you see any, you’ll need to address those first.
Step-by-Step Removal of the Broken Tile
Score the grout around the damaged tile to isolate it. Use a putty knife or grout saw to open up the joints without prying nearby tiles. Gently break the tile, working from the center outward to minimize damage.
Check progress after each small step to ensure adjacent tiles remain intact. If you encounter hard spots or suspect adhesive failure, pause and reassess. Reference product labels or instructions if you need a specific removal method for your tile brand.
Step-by-Step Cleaning Process
This sequence guides you through safely removing the broken tile, ensuring minimal damage and a clean workspace.
- Put on your safety gear: gloves, goggles, and ear protection. Clear the area below to catch falling debris.
- Score the grout around the tile using a grout saw or oscillating tool to prevent chipping adjacent tiles. Stop if you feel resistance to avoid damaging surrounding tiles.
- Gently tap the tile with a hammer and chisel to create cracks, starting from one corner and working your way around. Stop if the tile doesn’t crack easily; it might be too strong for DIY removal.
- Use a flathead screwdriver or pry bar to carefully lift the cracked pieces off the substrate. Work slowly to avoid breaking the tile into smaller, harder-to-remove pieces.
- Clean up the area by sweeping and vacuuming to remove all debris. Inspect the adhesive bed and substrate for any damage before proceeding with replacement.
Removing grout and loosening the tile
Start by scoring the grout around the broken tile using a grout saw or oscillating tool. This helps prevent chipping adjacent tiles when you remove the tile.
Be careful not to apply too much pressure, which could cause the surrounding tiles to crack. If you feel resistance, stop and adjust your technique.
Once the grout is scored, use a flathead screwdriver or pry bar to gently lift one corner of the tile. This should break the seal between the tile and the adhesive bed. Work slowly and carefully to avoid breaking the tile into smaller pieces.
Extracting tile shards and cleaning the void
After loosening the tile, use a hammer and chisel to carefully break it into smaller pieces. Work from one corner towards the center, stopping if you encounter resistance to avoid damaging the substrate.
Be cautious when prying out the broken pieces with a flathead screwdriver or pry bar. Lift slowly and steadily to prevent further cracking or damage to surrounding tiles.
Once all tile shards are removed, use a wire brush or scraper to clean the adhesive bed and substrate. Inspect for any damage or weak spots before proceeding with the replacement process. If you find significant damage, consider calling a professional to assess the situation.
Assessing and Repairing the Substrate
Inspect the substrate for cracks, softness, or water damage. If you find loose or crumbling backing, plan for repair before continuing. Treat any substrate issues as a gatekeeper before moving on to tile replacement.
Decide whether you need to patch thinset, replace a section of backerboard, or address moisture concerns. If you’re unsure about the extent, stop and verify with the substrate manufacturer guidance or local building rules. Keep notes to guide repairs if you need to involve a pro later.
Small patch repairs
If your substrate has minor dips or shallow depressions, you can fix them using patching compounds. These fillers are designed to level out surfaces and create a smooth base for new tiles.
First, clean the area thoroughly. Then, apply the compound with a trowel, following the manufacturer’s instructions for thickness. Use a straight edge to scrape off excess material and ensure a flat surface.
Allow the patch to cure as directed by the product label. This typically takes 24-72 hours. Check for flatness before proceeding with tile installation.
When to replace backerboard or address rot
Sometimes, the damage goes beyond simple patching. If your substrate feels soft or spongy, shows signs of mold, or has widespread damage, it’s time to replace the backerboard.
Softness indicates water damage, which can compromise the structural integrity of your wall or floor. Mold growth suggests moisture issues that could lead to further problems if left untreated. Widespread damage means there are too many patches needed, making replacement more practical.
If you find any of these issues, stop work immediately. Water damage and mold require professional assessment and remediation. Once the area is dry and safe, replace the affected backerboard with new, following proper installation techniques to prevent future problems.
Installing the Replacement Tile
Choose the adhesive that matches your tile and substrate. Apply and back-butter or butter the tile as needed to achieve even coverage. Align the tile carefully with spacers to maintain a consistent grid height.
Check the tile height relative to surrounding tiles and ensure levelness across the plane. If you spot potential alignment or adhesion issues, pause and verify the instructions from the adhesive or tile manufacturer. Recheck labeling and local code requirements before final setting.
Adhesive application and setting technique
First, choose the right adhesive. For most jobs, thin-set mortar is your best bet. It’s strong, flexible, and water-resistant. Mastic might be fine for light-duty areas like backsplashes, but avoid it on floors.
Use a notched trowel to apply the adhesive. The size of the notch depends on tile size: 1/4″ for tiles up to 6×6″, 3/8″ for larger ones. Spread it out with the smooth side of the trowel, then comb through with the notched side.
Press the tile firmly into the adhesive, wiggling it slightly to ensure full contact. Hold it there for a few seconds to let the bond set.
Leveling, spacing, and temporary cure checks
Use spacers between tiles to maintain even grout lines. The standard size is 1/8″, but you can adjust based on your tile’s size and desired look.
Check for lippage – where one tile is higher than another. Tap down any high spots with a rubber mallet. You want all tiles level with each other.
Before grouting, let the adhesive cure. Follow the manufacturer’s instructions, but typically this takes 24-72 hours. Once cured, do a light test by gently tapping on the tile with a coin. If it sounds solid, you’re good to go.
Grouting and Finishing Touches
Mix and apply grout per the manufacturer’s guidance, working in small sections. Tool the joints to the correct shape and wipe away excess grout as you go. Allow a partial cure window before full cleanup to improve finish and color alignment.
Finish by removing haze and sealing grout if recommended for your material. If grout cracking or improper setup appears, pause and assess the need for rework or professional help. Always verify grout specifications with product data sheets or instructions.
Grout selection and application tips
First off, you’ve got two types of grout: sanded and unsanded. Check your tile type – if they’re small or have a textured surface, go for sanded grout. It’s tougher and hides imperfections better. For larger tiles with smooth surfaces, use unsanded grout.
Now, color matching. You want your grout to blend in with your tile, right? Well, don’t rely on memory – check the label. Manufacturers usually list a ‘matching’ shade. If you’re stuck, go a shade lighter than your tile.
Application time. Mix your grout according to the manufacturer’s instructions, not too thick, not too thin. Use a rubber float to spread it diagonally across the tiles, working in small sections. Press it firmly into the joints – you don’t want air pockets.
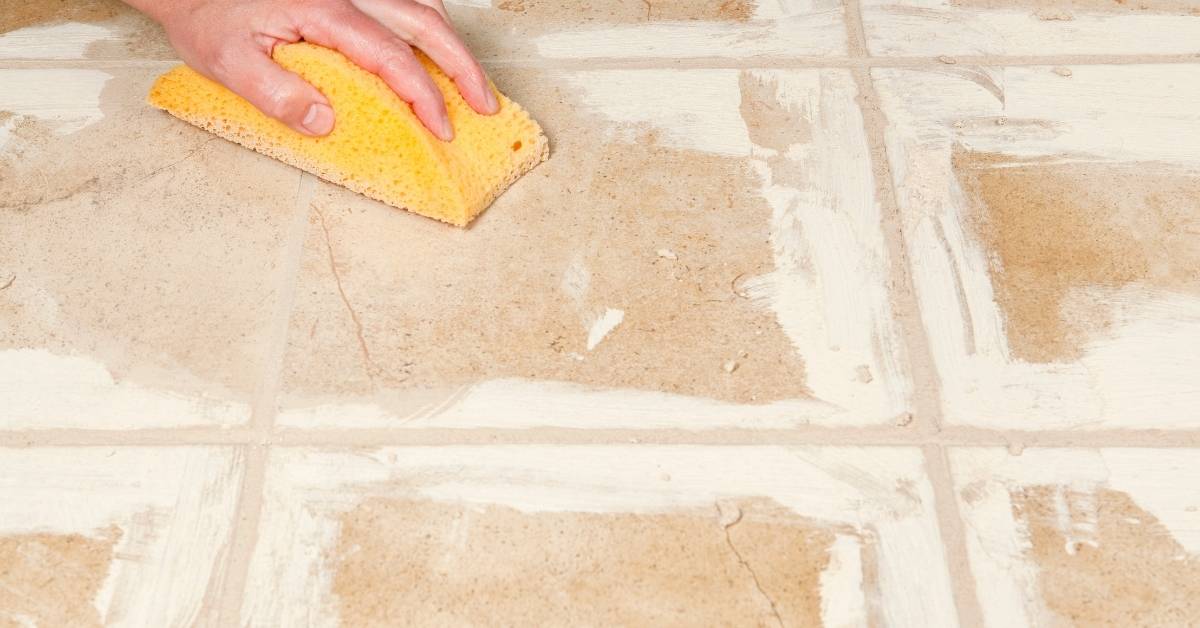
Smoothing out excess grout is a dance, mate. Wait about 15-20 minutes after applying, then use a damp sponge to wipe off the excess. Rinse and wring it out well between wipes. Be gentle, you don’t want to pull grout out of the joints. Let it cure for another 15-20 minutes, then repeat. Check the manufacturer’s recommendations for final curing times.
Sealing and final inspection
Before you declare your tiling job complete, it’s crucial to perform a thorough sealing and final inspection. This ensures that your hard work will last for years to come. Use this checklist once the grout has cured (check manufacturer instructions for specific times).
- Check grout lines: Ensure all grout lines are filled and level with the tile surface. Any low spots or gaps can trap dirt and moisture.
- Inspect edges: Check all tile edges for any loose pieces. Tap them gently; if they sound hollow, re-secure with thinset mortar.
- Check corners: Ensure all corner tiles are securely in place and the grout lines are filled properly. Corners take the most wear and tear.
- Look for cracks: Inspect each tile for hairline cracks or chips. Repair any defects to prevent water intrusion.
- Test shower pan: In showers, pour a bucket of water onto the pan to ensure proper drainage and no leaks.
- Check sealant joints: Ensure all expansion joint fillers are intact and sealed properly. Missing or damaged sealants can cause tiles to crack.
- Seal grout (if applicable): If using sanded grout, apply a grout sealer once the grout has cured (check manufacturer instructions for specific times). This protects against moisture and stains.
- Inspect behind fixtures: Check behind toilets, sinks, and other fixtures to ensure there are no gaps or voids that could trap water and cause damage.
Quick rule: Always perform a final inspection after grouting and sealing. It’s the last chance to catch any issues before they become big problems.
Troubleshooting Common Problems and Fixes
Address issues like loose tiles, cracking grout, or lippage with targeted fixes and rechecking alignment. Decide whether to redo the tile section or escalate to a pro based on the severity. Use practical, take-it-in-steps judgment to avoid repeating mistakes.
When color mismatch or unexpected movement occurs, compare options against your chosen tile and adhesive specifications. If in doubt, pause and verify guidance from the tile or adhesive maker, or consult local regulations for acceptable remediation steps.
Dealing with loose or hollow-sounding tiles
If your newly installed tile sounds hollow when tapped, it’s likely that there are voids underneath or the adhesive wasn’t applied properly. Here’s how to fix this:
Check for voids: Tap the tile gently. If it sounds hollow, use a screwdriver to poke small holes in the grout lines until you find the void.
Inject adhesive: Once you’ve located the void, inject thinset or construction adhesive into the hole using a caulking gun with a nozzle attachment. This will fill the void and secure the tile.
If injecting adhesive doesn’t work, or if the tile is still loose, it’s best to remove and reinstall the tile properly. See our earlier section on ‘Installing the Replacement Tile’ for detailed steps.
Fixing grout cracks, stains, or mismatches
Grout can crack over time due to movement in the substrate, or it might stain or mismatch with your existing grout. Here’s how to fix these issues:
Cracks: If the grout has cracked, you’ll need to regrout. First, remove the old grout using a grout saw or oscillating tool. Then, clean the area and apply new grout.
Stains: For stains, try cleaning the grout with a mixture of water and bleach (1 part bleach to 3 parts water). If that doesn’t work, you might need to recolor or seal the grout. See our earlier section on ‘Grout selection and application tips’ for more information.
Mismatches: To blend mismatched grout, try cleaning the old grout with a mixture of water and muriatic acid (follow safety guidelines). Then, apply a grout colorant to match your existing grout. If the mismatch is significant, it might be best to regrout the entire area.
Conclusion
Replacing a broken tile is within reach, but the payoff comes from doing it right—you protect against leaks, keep the look clean, and avoid costly fixes down the line. Stay focused on safety, and don’t rush the job.
First shut off water and power as required, inspect the substrate for cracks or damage, gather exact tools and materials, remove the broken tile without harming the surrounding surface, clean and dry the area, install the replacement tile with proper spacing and bedding, then grout and finish, and finally test for movement and leaks before you call it complete.
Avoid common missteps: don’t hurry the removal or pry aggressively, don’t skip moisture barriers or substrate repair, and don’t mix or apply materials in a way that leaves gaps or uneven weight. Wear safety glasses and gloves, keep your work area dry, and double-check every step before you move on to the next one.
If you see loose or cracked substrate, persistent moisture behind the wall, or tiles that won’t seat flat, it’s time to call a professional instead of pushing on. Stay deliberate, stay safe, and you’ll finish with a durable, good-looking repair you can trust. You’ve got this.
FAQ
What’s the best time to replace a broken tile in a live project area?
Choose a time when you can isolate the area and keep foot traffic away. If possible, do the work during a single session to avoid exposed gaps overnight. Check for nearby utilities or fixtures that could be disturbed and plan around them.
How do I know the substrate is ready for a replacement tile?
You should confirm the substrate is clean, flat, and sound. If you see loose mortar or uneven spots, fix those first. If you’re unsure, test one spot by pressing lightly with a straight edge and inspecting for movement.
What should I do if the replacement tile doesn’t match the existing grout line?
Match the grout line by measuring the surrounding joints and using a tile of similar size. If you can’t find an exact match, choose a slightly wider or thinner grout line and adjust with practiced trowel technique. Always test a small area before full grout work.
How long should the new grout cure before heavy use?
Let the grout set according to the manufacturer’s label but plan for a minimal period before exposure to cleaners or heavy traffic. Keep the area dry and protected as instructed by the product you use. If in doubt, check the label for cure indicators and safe-use timing.