
Introduction
Cement tile floor DIY steps are a practical, hands-on process for installing a concrete tile surface and planning where to pause. You’ll prep the space, set the tiles, and check alignment as you go. This guide keeps the focus on what to do at key points and when to stop for adjustments.
Stop points are places to verify level, adhesion, and clean grout lines before moving on. Check labels and instructions from products you use, and follow local rules if any apply. If something seems off, pause, reassess, and consult the manufacturer or a pro before proceeding.
Key takeaways
- Inspect subfloor for levelness and clean debris before tile layout begins.
- Plan pattern and layout with dry-run tiles in center rooms to gauge cuts.
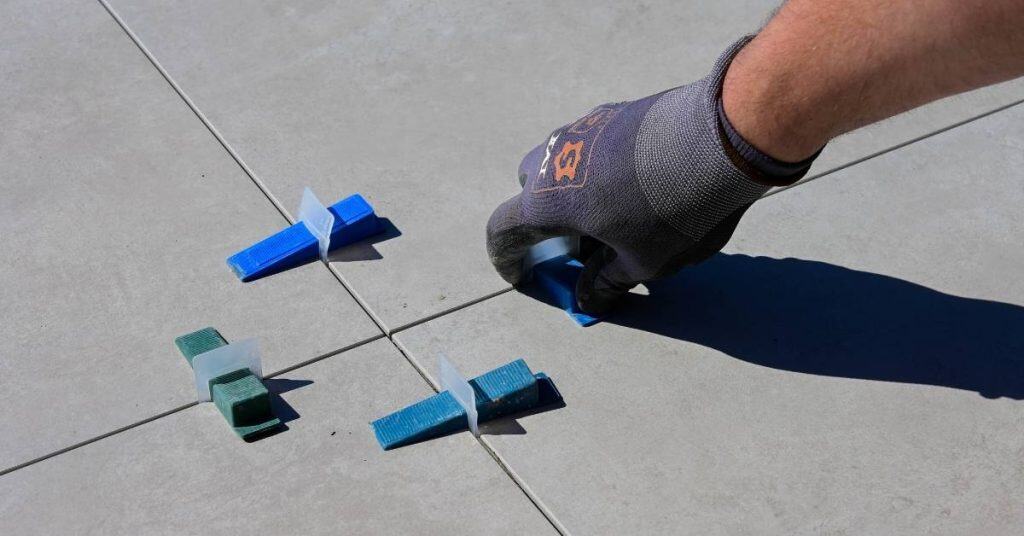
- Use a straight edge and spacers to keep uniform joints throughout setting.
- Allow adhesives to cure per manufacturer instructions before foot traffic.
- Grout joints evenly and wipe excess to avoid staining the tile surface.
- Wear eye protection and gloves when mixing or adjusting tiles or grout.
Table of Contents
- Introduction
- Key takeaways
- Project Overview and Key Stop Points
- Tools and Materials Checklist
- Site Assessment and Surface Preparation
- Planning Layout, Pattern, and Visual Checkpoints
- Setting the Tiles — Step-by-Step Procedure
- Grouting, Joint Finishing, and Immediate Stop Points
- Sealing, Curing, and Traffic Readiness
- Maintenance, Repairs, and Troubleshooting
- Conclusion
- FAQ
Project Overview and Key Stop Points
This section lays out what you’re getting into with a cement tile floor project. You’ll see the major steps, the rough time frame, and where your decisions will shape the result. It also highlights safety checks and when to bring in a pro for a second opinion.
Look for the critical moments that affect the outcome, such as substrate readiness and curing considerations. Use this overview to set expectations for cost, labor, and potential delays. If a step feels uncertain, pause and verify guidelines in the product literature or with a qualified tradesperson.
When to DIY vs hire a professional
Before you start, ask yourself: Can I handle this job? Here’s what to consider:
DIY: If you’re comfortable with basic tools, have some tiling experience, and your subfloor is in good condition. You’ll save money and gain satisfaction.
Hire a pro: If the room’s complex (like multiple levels or curves), you’ve never tiled before, or your subfloor needs major work. Safety and quality are at stake here.
Predefined stop points during the project
Pause at these stages to inspect your work, make adjustments, or prevent costly rework:
After substrate prep, check for level and proper adhesion. Fix any issues before moving on.
Before laying out tiles, ensure you’ve got the pattern right and all cuts are planned.
After installation, let the thinset cure as directed, then check for level and proper adhesion again. Fix any issues before grouting.
Before final sealing, clean the tiles thoroughly to remove any residue that could interfere with the sealer’s bond.
Tools and Materials Checklist
Start with a complete list of hand and power tools you’ll need, plus the consumables. Prioritize what to borrow from a neighbor or rental shop versus what to buy for long-term use. Check tool condition and compatibility before you begin.
Verify tile adhesive, grout, sealers, spacers, and sealant compatibility with your tile type and substrate. Inspect product labels or datasheets for any mixing or curing requirements. Keep a small stash of spare tools handy for quick swaps during the job.
Essential tools and optional upgrades
Before you start your concrete project, make sure you have all the necessary tools and materials. Use this checklist to ensure you’re well-prepared.
- Concrete Trowel (48″ – 72″): Check it’s straight and not warped. A good trowel ensures a smooth finish.
- Level (4′ – 6′): Verify it’s accurate using a straight edge. A level helps maintain consistent slab thickness.
- Concrete Spacers (1/2″ – 3/4″): Ensure they’re clean and undamaged. Spacers maintain proper joint width for expansion and contraction.
- Wet Saw or Alternative: If using an alternative like a circular saw with a diamond blade, check it’s in good condition. A wet saw or suitable alternative is crucial for cutting control joints.
- Concrete Edger (optional): Check if you have one that matches your slab size. An edger helps create clean, sharp edges.
- Concrete Vibrator (optional): Ensure it’s in working order. A vibrator removes air pockets and ensures a dense, strong slab.
- Wheelbarrow: Check the tires are inflated and the wheel spins freely. A wheelbarrow is essential for mixing and transporting concrete.
- Shovel (square-nosed): Verify it’s in good condition. A shovel helps mix, place, and finish concrete.
Quick rule: Always check your tools before starting work to avoid unexpected delays or poor results.
Materials, specs, and standards explained
Before you start your tiling project, use this checklist to ensure you have the right materials. Check these details when picking up supplies at the store or before starting work.
- Cement Tiles: Check product labels for tile type (e.g., quarry, field, or border), size, and thickness. Ensure they match your project’s needs. Wrong size can lead to wasted tiles and improper spacing.
- Adhesives: Look for thinset mortar with the ANSI 118.4 standard. Check the bag for recommended uses (e.g., wall or floor). Ensure it’s suitable for your tile type and substrate. Wrong adhesive can cause tiles to fall off.
- Grouts: Choose a sanded or unsanded grout based on joint size (sanded for joints larger than 1/8″). Check the package for color options and stain resistance claims. Incorrect grout type can lead to cracking or discoloration.
- Sealers: Select a sealer suitable for your tile type (e.g., natural stone, ceramic). Check if it’s penetrating or surface-applied. Ensure it provides the required protection (e.g., waterproofing, stain resistance). Skipping sealant can result in damaged tiles.
- Backerboard: For walls, check backerboard is moisture-resistant and suitable for tile installation. For floors, ensure it’s cement board or another suitable underlayment. Wrong backerboard can lead to warping or delamination.
- Membranes & Barriers: Ensure you have the right membranes (e.g., vapor barrier) and barriers (e.g., crack isolation) for your project’s needs. Check they meet local building codes. Skipping these can cause moisture issues or cracking.
- Hardware & Accessories: Ensure you have spacers, trowels (notched and straight), grout float, rubber grout gloves, and a tile nippers/cutter. Check they’re in good condition before starting. Missing or damaged tools can cause poor results.
- Cleaning Supplies: Have a sponge, soft cloths, and a bucket for cleaning tiles during installation. Ensure you have the right cleaner for your tile type (e.g., acid-based for natural stone). Using the wrong cleaner can damage tiles.
Quick rule: Always check product labels and manufacturer instructions to ensure you’re using the right materials for your specific project. This simple step can save you from costly mistakes and rework.
Site Assessment and Surface Preparation
Assess the existing floor for flatness, damage, and substrate stability. Look for moisture sources and structural signs that could undermine tile adhesion. Make a plan to address any issues before laying tile.
Prepare the surface by cleaning thoroughly and repairing defects as needed. Ensure the base is dry, level, and free of contaminants that could affect bonding. If unsure about moisture or substrate strength, check manufacturer guidelines or local building rules before proceeding.
Identifying and fixing substrate issues
Before you start tiling, it’s crucial to check your floor for any underlying problems. Cracks, movement, or weak patches can cause tiles to crack or lift over time.
Cracks wider than a credit card should be filled with an appropriate repair mortar before proceeding.
Movement indicates structural issues that need addressing by a professional before tiling. Weak patches should be reinforced using a suitable patching compound.
Moisture and level checks — what to inspect
Proper moisture and level checks ensure your cement tiles adhere well and last. Here’s what to look for:
Moisture: Use a simple moisture meter or perform the plastic sheet test. If moisture levels are high, postpone work until the area dries out.
Level: Check flatness using a 2m straight edge and feeler gauges. High spots should be ground down, low spots built up with leveling compound. Target a tolerance of +/-3mm over 2m.
Planning Layout, Pattern, and Visual Checkpoints
Design the tile layout to minimize cuts and create balanced borders. Mark reference lines to guide placement and maintain straight rows. Identify focal points and arrange tiles to satisfy the chosen pattern.
Mark and re-check alignment as you go to catch deviations early. Dry-lay tiles to preview how the pattern will read and adjust as needed. Use layout plans or manufacturer recommendations to stay within supported patterns and tolerances.
Dry-laying and test grids
Before you start gluing tiles, dry-lay them to ensure your pattern, grout lines, and edge cuts are right.
- Check tile spacing: Ensure consistent grout lines by using spacers. Inconsistent gaps can make your floor look unprofessional.
- Verify pattern at corners: Check if your pattern looks good at the corners and edges. Some patterns may need adjustments here.
- Check for full tiles: Make sure you have enough full tiles around the perimeter to maintain a balanced border.
- Confirm edge cuts: Dry-fit edge cuts to ensure they fit properly and look good.
- Test layout with large tiles: If using large format tiles, dry-lay them to check for any scale issues or necessary adjustments.
- Check for obstacles: Ensure no pipes, wires, or other obstructions will interfere with your layout.
- Mark tile locations: Mark the location of each tile on the floor using a pencil or chalk line to guide you during installation.
- Test your layout in different lighting: Check how your pattern looks under different light sources to ensure it’s what you want.
Quick rule: If it doesn’t look right dry, it won’t look right wet. Take the time to get this step right.
Establishing reference lines and control points
Setting straight lines or grid references at the start helps maintain accuracy throughout your project.
- Find your starting point: Choose a wall or fixed point to start your layout. This ensures consistency across the room.
- Snap chalk lines: Use a chalk line and snap a straight line from your starting point to create a reference for your first row of tiles.
- Create a grid (if needed): If using a large format tile or complex pattern, consider creating a grid on the floor using chalk lines. This helps maintain consistency throughout the room.
- Mark control points: Mark key points in your layout where tiles will meet or intersect to ensure accuracy as you work.
- Check line accuracy: Use a level or laser level to ensure your reference lines are straight and true. A crooked line can throw off your entire layout.
- Confirm tile size: Double-check that all tiles are the same size before starting. Even small variations can cause issues as you work.
- Check for obstructions under lines: Ensure there are no pipes, wires, or other obstacles under your reference lines that could interfere with your layout.
- Re-check lines periodically: As you work, re-check your reference lines to ensure they remain accurate. Tiles can shift slightly during installation, throwing off your layout.
Quick rule: Straight lines make for a straight floor. Keep your references visible and accurate throughout the project.

Setting the Tiles — Step-by-Step Procedure
Follow a clear sequence for mixing adhesives, spreading mortar, and bedding tiles. Use spacers consistently to achieve uniform joints. Keep tiles pressed and aligned while the mortar holds setting.
Respect the open time and working window specified by the adhesive and tile manufacturer. Work in manageable sections and periodically check grid lines. Always refer to the product instructions for mixing ratios and cure cues.
Step-by-Step Process
This section guides you through the practical steps of setting your cement tiles, from prep to finish.
- Check safety: Wear gloves and goggles. Ensure good ventilation.
- Prepare surface: Ensure it’s clean, dry, level, and primed (if needed).
- Mix adhesive: Follow product instructions. Use a drill with paddle attachment for consistency.
- Apply mortar: Spread and comb the adhesive using the correct trowel size. Work in small sections.
- Bedding tiles: Press tiles firmly into the mortar, ensuring full contact. Tap gently to remove air.
- Use spacers: Place them between tiles for consistent grout lines. Check alignment regularly.
- Check open time: Keep track of how long your adhesive stays workable. Re-wet if needed.
- Clean up: Remove excess mortar, clean tools, and wash hands thoroughly.
Adhesive selection and mixing basics
Choosing the right adhesive is crucial for a successful tile installation. Here’s what to consider:
Select an adhesive suitable for cement tiles and your substrate. Check manufacturer recommendations.
Mixing: Follow label instructions. Use clean water, mix thoroughly, and let it rest before use. Consistency should be like peanut butter.
Always check the open time, setting time, and coverage rate on the label to plan your work efficiently.
Tile placement technique and avoiding common mistakes
Proper tile placement prevents issues like lippage and ensures a professional finish.
- Trowel technique: Use the right trowel size. Spread, comb, and press firmly to remove air.
- Tapping: Gently tap tiles to ensure full mortar contact and remove air pockets.
- Checking lippage: Regularly check for high or low spots using a level or straight edge.
- Pattern continuity: Keep track of your pattern. Use a dry-fit layout as a guide.
Regular checks and consistent technique will help you avoid these common mistakes.
Grouting, Joint Finishing, and Immediate Stop Points
Choose grout based on color, strength, and stain resistance, and plan timing around tile set times. Apply grout with proper tooling to fill joints fully and wipe excess material promptly. Avoid leaving grout haze on the tile surface.
Stop to inspect joints for uniform depth and clean surfaces before grout cures. Use appropriate cleaning methods to protect tile faces and ensure a good seal later. Check product directions for sealing timing and post-application care requirements.
Grout application and finishing tips
Apply grout consistently, working in small sections. Use a rubber float to pack the joints, holding it at a 45-degree angle.
Be gentle, don’t press too hard or you might damage the unsealed cement tiles.
Tool the joints diagonally to remove excess grout and create a smooth finish. Use a damp sponge to clean off any haze, rinsing it frequently in water.
Let the grout set for about 15-30 minutes before wiping again to remove any remaining haze.
When to inspect before proceeding to seal
Before sealing, inspect visually and tactilely for any issues. Check that joints are fully filled with grout.
Ensure tiles are properly aligned and level. Tap on them gently; if they sound hollow, they might not be fully set or securely adhered.
Let the grout cure for at least 72 hours before sealing. This allows it to harden and prevents any moisture from being trapped under the sealant.
After curing, wipe the surface clean of any dust or debris to ensure a good bond with the sealer.
Sealing, Curing, and Traffic Readiness
Explain the purpose of sealing cement tiles and how it affects stain resistance and maintenance. Choose a sealer that suits your tile and substrate type, and test on a hidden area first. Follow the manufacturer’s cure guidance for each product step.
Determine when the floor is safe for foot traffic by performing cure tests and observing shrinkage or discoloration cues. Document any patch tests and compare results to the product’s recommendations. When in doubt, verify timing with the product instructions or a pro.
Choosing and testing a sealer
First, decide between penetrating and topical sealers. Penetrating sealers soak into the tile for protection from within. Topical sealers sit on top, forming a protective layer.
Test both in small areas to see which works best with your tiles. Apply, let dry, then check for any discoloration or changes in appearance.
Perform performance tests too. Try spilling water and letting it sit. Check if the tile surface repels moisture as expected.
Curing times and phased re-entry stop points
Check your sealer’s manufacturer guidelines for cure times. These are estimates, so don’t rush.
Instead of guessing when to use the floor fully, follow a phased approach. Start with light traffic – maybe just walking around. Then gradually increase usage as cure time progresses.
This way, you’re not risking damage by putting too much weight on the floor too soon. It’s better safe than sorry.
Maintenance, Repairs, and Troubleshooting
Set up a routine cleaning plan that preserves color and texture without harming the grout or sealer. Schedule periodic resealing as recommended by the sealer manufacturer. Note any early signs of wear or movement to head off bigger problems.
Address chipped, stained, or loose tiles with appropriate DIY fixes or professional help as needed. Distinguish issues you can handle from those that require a tradesperson, and document maintenance steps for future reference.
Daily and periodic cleaning routines
Cement tiles are durable, but they need gentle care to keep them looking their best. Here’s how:
Daily: Use a soft-bristle broom or vacuum to remove dirt. Mop with warm water and a mild detergent designed for sealed tile surfaces.
Periodic (every 3-6 months): For tougher grime, use a solution of equal parts white vinegar and warm water. Apply, let it sit briefly, then scrub gently with a non-abrasive pad or soft brush. Rinse thoroughly.
Common problems and fixes
Cement tiles are tough, but they can face issues over time. Here’s how to diagnose and fix them:
Stains: If sealed properly, most stains won’t penetrate. For surface stains, use a mixture of baking soda and water, let it sit, then scrub gently.
Efflorescence (white powder): This is usually harmless salt deposits. Remove with a solution of muriatic acid diluted in water (follow safety guidelines).
Grout failure: If grout cracks or crumbles, remove the old grout, clean the area, and re-grout using fresh, properly mixed grout.
Loose tiles: If a tile wiggles, it might need re-adhering. Remove any loose grout, apply construction adhesive to the back of the tile, press it firmly in place, and let it cure before re-grouting. If multiple tiles are loose or the issue persists, call a pro.
Conclusion
Get it right and the floor will stay solid, look sharp, and hold up for years. Safety and a careful finish matter as much as speed or cost savings.
Start by confirming the substrate is solid and clean, then lay out the pattern and dry-fit a few tiles before committing. Next, mix and apply the correct thin-set, set the tiles in small sections, keep the joints consistent, and check alignment as you go. Allow proper curing, then grout and seal according to the plan, and finally test for traffic readiness before you call it done. plan, test, finish.
Common mistakes to avoid: skipping a small-area test or mock-up, rushing the setting or grouting, and neglecting joint finishing or proper sealing. Safety rules: wear eye protection and gloves, follow the product instructions for mixing and pot life, work in a well-ventilated area, and keep the workspace clean to avoid slips. Don’t walk on a tile or grout bed until the mortar and grout are fully set, and don’t skip curing time or skip sealing if required.
If you notice serious substrate issues, large uneven areas, persistent moisture, or patterns that won’t stay true, stop and call a professional. When in doubt, it’s better to get a quick expert check than to risk cracks or costly fixes later. You’ve got this—follow the plan, verify each step, and you’ll finish with a durable, great-looking floor.
FAQ
What should I check before starting the tile layout on a cement floor?
Make sure the concrete is clean, dry, and free of dust or oil. Look for high spots, cracks, or loose sections and fix them per manufacturer instructions. Check the surface for flatness and plan for proper expansion joints where required.
How do I avoid common tile lippage and uneven edges?
Use a level or straightedge to spot high spots and flatten them. Verify the substrate is uniform with a screed or leveling compound if needed, following the product’s install instructions. Keep a consistent tile thickness and use spacers to maintain even joints.
What are safe practices for mixing, applying, and curing cement tile mortar?
Mix mortar as directed by the product label and work in small batches. Apply only as much as you can set before it skins over. Follow the manufacturer’s cure times and keep traffic off the floor until it reaches a safe handling condition.
How do I handle grout and movement during curing?
Clean excess grout promptly to avoid staining. Use the recommended grout type and sealant if required, and follow the label for curing times. Plan for expansion joints if the area is large or will see temperature changes.