
Introduction
The best concrete for any project depends on how you plan to use it and the setting. Start with a mix that suits load, exposure, and work time. Always check label and local rules for suitability.
If you run into mix problems, start by checking water and aggregate balance and rework as directed. Keep notes on what you changed and follow label guidance for curing and finishing. If in doubt, check product labels and local rules to confirm safe practices.
Key takeaways
- Assess project requirements first: exposure, load, and setting determine concrete type.
- Match mix design to project needs using simple, non-jargon checks from labels.
- Prepare tools and materials checklist before pour to prevent delays.
- Visual checkpoints help: verify form alignment, clean edges, and proper consolidation.
- Identify common mix problems early; fix water, aggregate, and curing plan promptly.
- Cure and protect promptly; avoid premature loading and drastic temperature changes.
- Wear PPE during pours; high-visibility, gloves, eye protection at all times.
Table of Contents
- Introduction
- Key takeaways
- Types of Concrete and When to Use Them
- Matching Concrete to Your Project Requirements
- Mix Design Basics Without the Jargon
- Tools and Materials Checklist for Any Pour
- Visual Checkpoints and Placement Best Practices
- Common Mix Problems, Diagnosis, and Fixes
- Curing, Protection, and Long-Term Durability
- Environmental Impacts and Specialty Options
- Conclusion
- FAQ
Types of Concrete and When to Use Them
Begin with the standard Portland cement mix and its common variants. Consider high strength, lightweight, fiber reinforced, self leveling, decorative, and pervious mixes for specific jobs. Each type fits a different set of load, finish, and exposure needs.
Always check the product label or data sheet to confirm what the mix is designed to do. Manufacturer instructions will tell you the right uses and limitations for your project.
Common types explained
Concrete comes in various types, each suited to different jobs. Let’s break down the key ones.
Standard Portland mixes are your everyday concrete. They’re strong and versatile, used for slabs, driveways, and footings.
High-strength concretes pack more punch, ideal for heavy loads like bridge decks or high-rise buildings. They’re pricey but worth it where strength matters most.
Lightweight concretes are just that – lighter, with lower density. Great for roof decks or when you need to minimize dead load. But they’re not as strong as standard mixes.
Pros and cons by project type
Each concrete type has its pros and cons, depending on the job. Here’s a quick rundown:
Pros
- Slabs (driveways, patios): Standard mixes are affordable and durable.
- Walls (foundations, retaining walls): High-strength concretes provide excellent lateral support.
- Patios: Lightweight concretes allow for thinner slabs, saving material costs.
- Footings: Pervious concretes help manage water runoff, protecting your foundation.
Cons
- Slabs: High-strength concretes can be overkill and expensive.
- Walls: Lightweight concretes may not provide enough strength for load-bearing walls.
- Patios: Standard mixes can crack under heavy loads if not reinforced properly.
- Footings: Pervious concretes may allow weeds to grow through, requiring maintenance.
Choose the right concrete based on your project’s needs and budget. It’s about balance – strength, finishability, and cost.
Matching Concrete to Your Project Requirements
Think about structural load, desired finish, exposure conditions, and aesthetics. These factors guide your choice of mix and how you place it. Don’t skip the planning stage before you start mixing.
Use the manufacturer or product data to verify compatible placement methods and any special prep steps. If in doubt, ask for guidance from the supplier or a local code reference.
Structural vs. non-structural needs
The first thing you need to figure out is whether your project needs a structural concrete mix or not.
Structural mixes are designed to bear heavy loads and support the weight of buildings. They’re reinforced with steel bars and require proper curing to gain strength. You’ll find them in foundations, slabs, and beams.
Non-structural mixes, on the other hand, don’t need to support much weight. They’re used for things like sidewalks, driveways, and decorative elements. These mixes can be placed using simpler methods and may not require reinforcement.
Remember: Even if your project isn’t supporting a building, it might still need some structural strength to handle traffic or weathering.
Residential, commercial, and specialty projects
The expectations for concrete vary depending on the type of project you’re working on. Residential projects usually have more leeway with mix design and placement.
Commercial projects, however, often require higher performance standards. The concrete might need to be stronger, more durable, or have specific finish requirements. Expect closer inspection and quality control here.
Specialty projects are a whole different ball game. They could involve unique exposure conditions, like underwater or high-temperature environments. These projects demand specialty mixes and placement methods.
Tip: Always check local building codes and consult with a pro if you’re unsure about your project’s requirements.
Mix Design Basics Without the Jargon
A simple mix starts with cement type, aggregates, water, and any admixtures. Each component has a practical effect on performance. Keep the idea in mind as you lay out your project plan.
Understand how these parts influence strength, workability, and durability, then check the product label or data sheet for the exact proportions. When in doubt, follow the instructions provided by the manufacturer.
Water, workability, and strength trade-offs
The water-to-cement ratio is crucial for your concrete mix. More water makes the mix easier to pour (better workability), but it weakens the final product’s strength.
Check product info for recommended ratios. Too much water can lead to cracking and reduced lifespan.
Use just enough water to make the mix flow smoothly. You can add more water later if needed, but you can’t take it out.
Aggregates and grading
Aggregates (sand and gravel) make up most of your concrete. Larger aggregates give better stability, smaller ones improve finish.
Check aggregates visually: clean, well-graded materials work best. Too much dust or fines can weaken the mix.
For a smooth finish, use more sand relative to gravel. For strength and stability, use larger gravel.
Admixtures and additives
Admixtures are chemicals added to concrete to change its properties. They’re optional but can be helpful for specific projects.
Plasticizers make the mix more fluid, reducing water needed. This improves strength and reduces segregation.
Retarders slow down setting time, useful when pouring large slabs or in hot weather.
Air-entraining agents introduce tiny air bubbles, improving freeze-thaw resistance and workability.
Tools and Materials Checklist for Any Pour
Gather the basics: mixing container, shovel or drill mixer, screed, rakes, floats, and trowels. Add safety gear such as gloves, eye protection, and sturdy boots. Include a source for water and appropriate forms or barriers.
Prepare site prep materials like forms, release agents, and a plan for access and weather protection. Tailor the checklist to small or medium pours by confirming what your local rules and supplier guidance require.
Small DIY pours — must-haves
When tackling small concrete projects on your own, here’s a checklist of essential tools and safety gear to ensure a smooth pour.
- Wheelbarrow: For mixing and transporting concrete. A 6-cubic-foot capacity is usually sufficient for most DIY jobs.
- Shovel: To mix, load, and unload concrete. A square-nose shovel works best.
- Hoover float: For leveling and finishing the surface. Choose one with a 48-inch handle for better control.
- Edging tool: To create clean edges around forms. A straight, rigid edger works well for small pours.
- Trowel: For final smoothing and finishing. A 12-inch magnesium trowel is versatile for various finishes.
- Gloves: To protect your hands from concrete and sharp edges. Choose heavy-duty work gloves with good grip.
- Safety glasses: To shield your eyes from debris and splashes. Ensure they meet ANSI Z87.1 standards.
- Ear protection: If using power tools nearby, protect your hearing with earplugs or earmuffs.
- Knee pads: For comfort when working on your knees to finish the surface.
Quick rule: Always prioritize safety first. Wear appropriate PPE and follow manufacturer guidelines for tool usage.
Larger jobs or hiring a pro — what to prepare
When planning larger concrete projects or hiring professionals, ensure you’re ready with the following checklist to avoid delays and maintain a smooth workflow.
- Access: Clear a path for delivery trucks and equipment. Measure doorways and pathways to accommodate large materials.
- Formwork: Prepare temporary molds using plywood, OSB, or metal forms. Ensure they’re secure, level, and properly braced.
- Staging: Set up platforms or scaffolding for safe worker access during pouring and finishing.
- Water source: Have a nearby water supply to mix concrete and clean tools. A garden hose is usually sufficient.
- Electricity: Ensure there’s a power source for electric tools, such as mixers and saws. Use extension cords with proper gauge and length.
- Site preparation: Clear the area of debris, level the ground, and compact soil if necessary to provide a stable base for your concrete slab.
- Permits and inspections: Check local building codes and obtain any required permits. Schedule inspections with your city or county’s building department.
- Contractor communication: Clearly outline expectations, timelines, and payment terms with your chosen contractor before work begins.
Quick rule: Effective planning and preparation are key to successful concrete projects. Ensure you’re ready for both the big picture and small details.
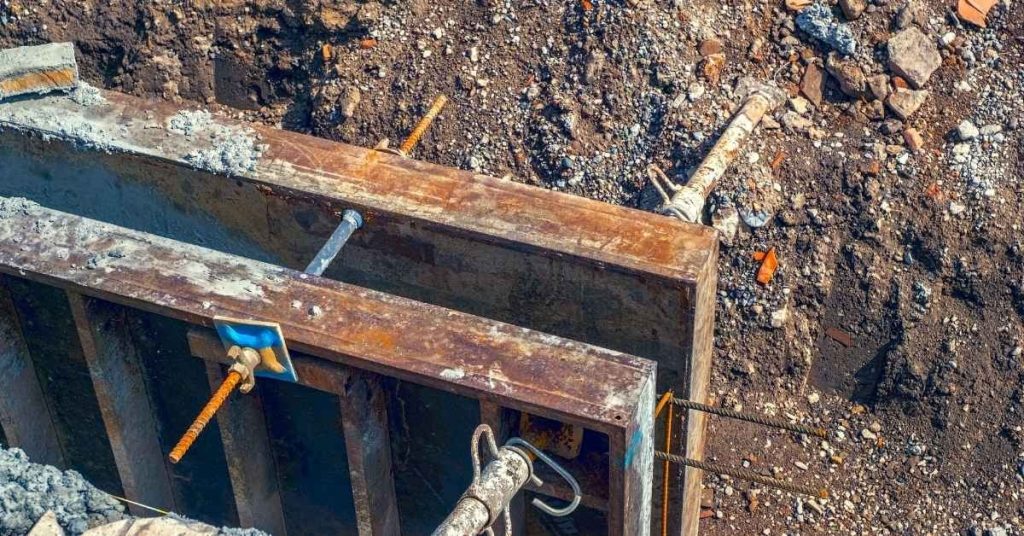
Visual Checkpoints and Placement Best Practices
Watch for even flow and steady placement from start to finish. Use controlled pours and keep the surface moving to avoid cold joints. Watch for edge lifting and inconsistent texture as you go.
Consolidate with proper vibration or poking as needed and finish with a gentle trowel touch. If you see surface voids or bare patches, plan a touch up after initial set according to instructions.
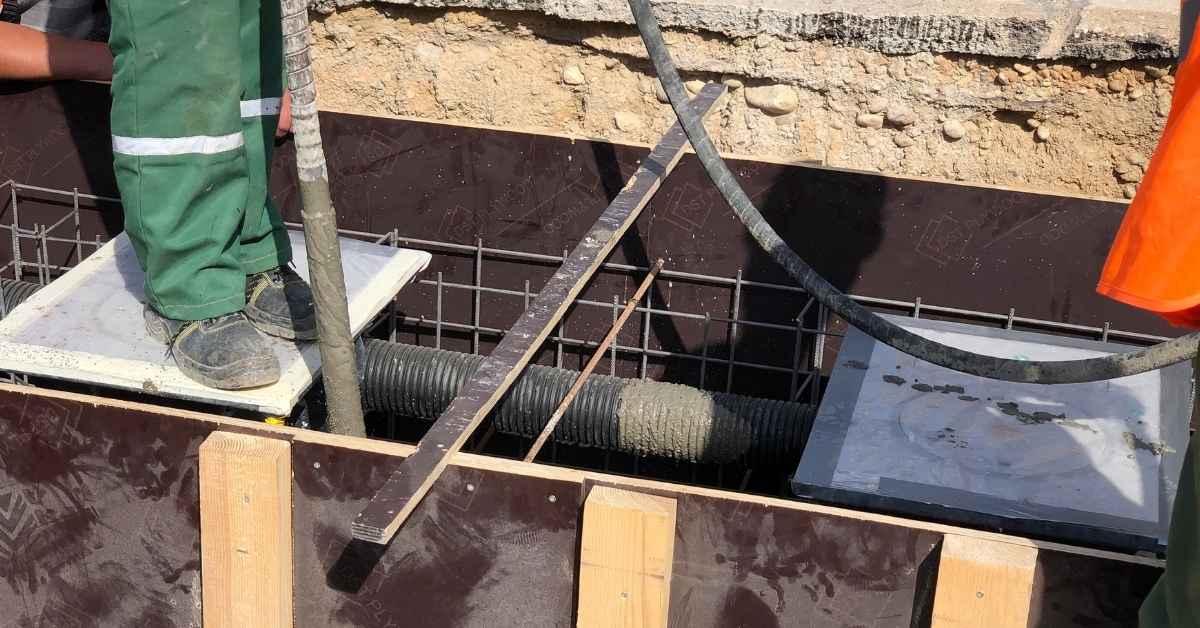
Pouring and consolidating without voids
Use this checklist during the pouring and consolidation process to avoid honeycombing, air pockets, and other integrity issues.
- Check flow: Ensure concrete flows easily from the chute. If it’s too stiff, add water.
- Monitor slump: Keep an eye on the slump test. Too dry or wet can cause problems.
- Avoid segregation: Watch for aggregates settling out. Stir if needed.
- Use proper placement: Pour from one side, allowing concrete to flow evenly.
- Vibrate correctly: Use a vibrator to remove air pockets. Don’t over-vibrate or cause segregation.
- Check for voids: Look for honeycombing or air pockets on the surface after vibrating.
- Top off properly: Finish pouring and level the surface before final consolidation.
- Consolidate well: Use a bullfloat to remove excess water and consolidate the surface.
Quick rule: Proper placement, vibration, and consolidation are key to avoiding voids.
Finishing stages and timing
Follow this checklist for proper finishing techniques at the right times to achieve desired textures and surfaces.
- Initial set: When concrete loses its gloss, start floating (around 15-20 minutes).
- Float properly: Use a magnesium float to remove laitance and level the surface.
- Check for bleed water: Ensure all bleed water has evaporated before troweling.
- Trowel lightly: Use a steel trowel to smooth the surface. Avoid over-troweling, which can cause scaling.
- Final set: When concrete is firm but still slightly plastic (around 3-6 hours), broom or texture as desired.
- Cure properly: Keep the surface moist and covered to promote curing.
Quick rule: Timing is crucial in finishing. Too early or too late can ruin the finish.
Common Mix Problems, Diagnosis, and Fixes
Bleeding and segregation show up as liquid on top or uneven aggregate distribution. Slump loss means the mix stiffens faster than expected. Cracking can appear after a rough finish or poor curing.
For fixes, use approved temporary remedies and follow safer workarounds. If the problem persists, refer to the product label or manufacturer guidance before proceeding.
Troubleshooting guide — symptoms to causes
Got a concrete mix issue? Let’s find the root cause quick. Here are common symptoms and what they usually mean:
Bleeding: Too much water in your mix. Water’s separating from the cement and aggregate, rising to the surface.
Segregation: Inconsistent mix. Fine particles settling at the bottom, coarser ones on top. Might be due to inadequate mixing or too high a slump.
Slump loss: Concrete’s losing its workability over time. Could be because of rapid cement hydration or not enough water in your mix.
On-site fixes vs. when to call a pro
Some concrete issues you can tackle yourself, others need professional help. Here’s how to tell the difference:
DIY fixes: Bleeding, segregation, slump loss. These are usually due to mix design errors or site conditions. Adjust your mix, improve mixing, or control temperature.
But if you’re seeing cracking, it’s serious. It could mean low strength, excessive shrinkage, or settlement. You might need an engineer to diagnose and fix it.
And if you’ve got low strength concrete, that’s a big red flag. Strength is crucial for structural integrity. Don’t mess around with this one — call a pro.
Curing, Protection, and Long-Term Durability
Curing preserves moisture and temperature for strength development. Safe curing methods help reduce cracking and dusting on the surface. Protection during early stages minimizes damage from weather or traffic.
Follow simple protection steps and check local recommendations for best practice. Always confirm cure guidance on the product data sheet or with the supplier before applying a cure method.
Practical Curing Methods
Curing is crucial for concrete’s long-term strength and durability. It allows the concrete to gain full strength by maintaining moisture during the initial setting process.
Wet curing is the most common method, using water sprays or ponding. But it’s not always practical on sloped surfaces or in hot, windy conditions.
Curing compounds are an alternative. They form a protective membrane over the concrete, slowing down moisture loss. Choose one that suits your site and weather conditions – some are better for cold or hot climates.
You can also use covers, like plastic sheets, to retain moisture. But they must be kept in place until the concrete has gained sufficient strength (usually 3-7 days).
Protecting Fresh and Aged Concrete
Concrete is at its weakest when it’s first poured, and it needs protection from heavy loads or harsh weather conditions.
For fresh concrete, keep vehicles and equipment off until it’s fully cured. Use temporary supports to distribute weight evenly if you must walk on it.
Regularly inspect for cracks as they form, especially in the first few weeks. Seal them promptly with a concrete crack filler to prevent water intrusion.
Aged concrete can be damaged by chemicals like de-icing salts or motor oil spills. Clean up spills immediately and consider applying a protective sealer every 2-3 years to enhance durability and resistance to such chemicals.
Environmental Impacts and Specialty Options
Low carbon and recycled aggregate options give options for greener pours. Pervious concrete and decorative finishes provide unique aesthetics and drainage benefits. Each choice may affect durability and cost.
Note that durability and performance trade offs can occur with specialty mixes. Verify with the manufacturer, label, or local rules to confirm suitability for your project and environment.
Sustainable mix options and trade-offs
When it comes to going green with concrete, you’ve got a few options. First up is low-carbon cement. It’s made by grinding down waste materials like slag or fly ash instead of mining raw materials. Check the supplier’s literature for the CO2 emissions reduction percentage.
Then there’s recycled aggregate. This is crushed-up concrete that’s been reused in new mixes. It’s great for reducing landfill waste, but verify it meets your project’s strength needs.
Remember, while these options are eco-friendly, they might affect durability and cost. Always balance sustainability with performance.
Specialty mixes (colored, stamped, pervious)
For a touch of style, consider colored concrete. It’s made by adding pigments to the mix. But beware, colors can fade over time and may cost more.
If you’re after that high-end look, go for stamped concrete. It mimics stone or brick patterns. Placement is critical here – ensure a level surface and use release agents to prevent stamps from sticking.
For water management, there’s pervious concrete. It lets water pass through, reducing runoff. But it’s not suitable for structural loads and can clog over time.
Conclusion
Choosing the right concrete and following the placement, curing, and protection steps now ensures safety, durability, and a clean look that lasts. Do the work with a clear plan, test small areas first, and avoid surprises that costly mistakes bring.
Start by confirming project requirements and the right concrete type, then confirm mix design basics in simple terms, gather tools and materials, prep forms and reinforcement, mix to the correct ratio and consistency, place with proper timing and slump, compact and finish in good weather, cure and protect, and finally check for durability and environmental considerations.
A few mistakes to avoid: never guess mix strength or water content, never rush the pour or skip proper curing, and never skip protective measures for weather and oversite. Always wear eye protection, gloves, and a respirator when mixing dust and fumes, keep kids and pets away, and test a small area first to verify that heat, cracking, or cure times match expectations before proceeding. If you see cracking that grows, unexpected color changes, or you’re unsure about the structural needs, stop and reassess safety and methods.
If the project involves structural elements, unusually large pours, complex forms, or uncertain site conditions, call a professional rather than pushing through. With careful planning and steady execution, you can get a solid, durable result that looks right and lasts long. Stay focused, stay safe, and finish strong.
FAQ
How do I choose the right concrete mix for a DIY project?
Start with what the project will bear, exposure, and the finish you want. Check the bag label for guidance, but rely on the manufacturer instructions and local conditions for actual use. If in doubt, ask the supplier or a local pro what they’ve seen work in your climate.
Can I fix a poor mix on the job?
If the batch looks off, don’t try to salvage it without guidance. The safe move is to halt, discard the suspect mix, and start fresh with a correct batch per the supplier’s instructions. For small concerns, call the mixer or read the label for approved adjustments.
What signs tell me I need to adjust water or additives?
Look for obvious symptoms like too wet or too dry texture, surface crazing, or quick set. Check the bag instructions and any approved admixtures from the manufacturer. If you’re unsure, stop and verify with the product label or local guidelines before pouring.
What should I do about curing and protecting after pour?
Keep the concrete from drying too fast and protect it from extreme temperatures per the product label. Use a curing method or compound as recommended, and shield from wind, sun, or freeze risks during the initial days. If unsure, follow the manufacturer’s curing directions and local best practices.