
Introduction
Pervious concrete patio is a porous surface that lets water pass through instead of pooling.
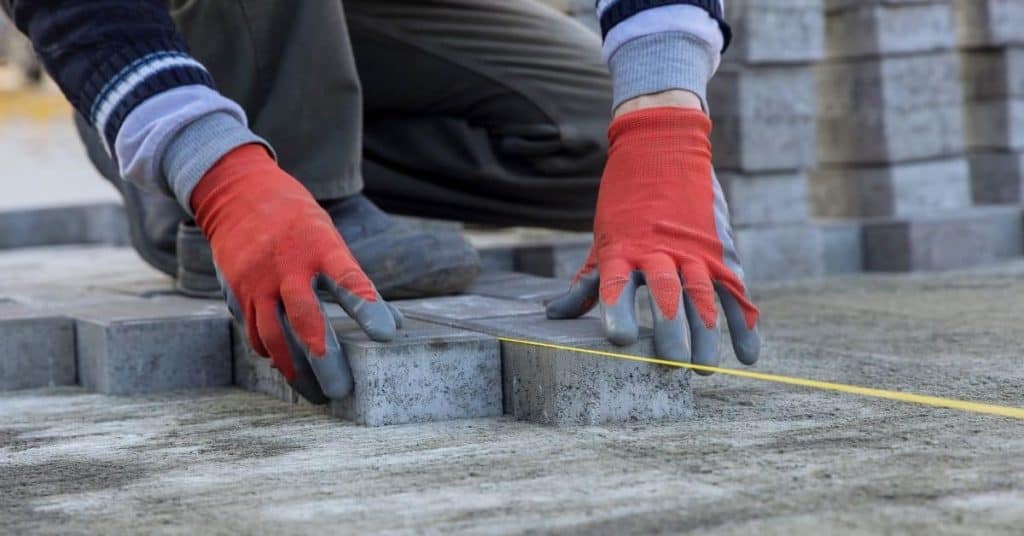
In DIY terms, you mix a low-slump concrete, place it in a single lift, and finish with a light broom or float to keep the voids open. Keep debris out of the mix and monitor for small surface cracks so the pores remain functional. Expect a hands-on process where you check for even coverage and proper surface texture as it cures.
Think about how water will move through the slab and into the soil or underdrains, and plan accordingly. Check the soil infiltration rate and consult local rules to guide slope, thickness, and drainage details, since exact specs vary. You’ll want to verify underdrain flow paths and plan for maintenance to prevent clogging over time.
Key takeaways
- Confirm hydrologic goals and underdrain capacity align with site conditions.
- Assess soil infiltration rate and adjust subbase depth or aggregate accordingly.
- Design structural support to meet load paths and porch/patio use.
- Monitor outflow rate through underdrains to prevent surface pooling during.
- Check soil infiltration tests and adjust maintenance to avoid clogging.
- Wear PPE and follow curing and sealing safety guidelines during placement.
Table of Contents
- Introduction
- Key takeaways
- Planning and Site Assessment
- Materials, Tools, and Specifications
- Pervious Concrete Mix Design
- Structural and Hydrologic Design Fundamentals
- Subbase Preparation and Placement Techniques
- Curing, Sealing, and Post-Pour Inspection
- Maintenance to Prevent Clogging and Extend Life
- Safety, Common Mistakes, and Troubleshooting
- Conclusion
- FAQ
Planning and Site Assessment
Start=”0″>Start by checking soil, slope, drainage, and sun to see if pervious concrete can perform here, and set clear expectations for performance and maintenance. Then map utilities and setback lines with a step-by-step approach to locate underground cables, pipes, property boundaries, and any easements or structural constraints. Check local rules and permit requirements early so you understand what paperwork, inspections, and timelines you’ll face before you lift a hammer.
Then cover how rainfall, infiltration, and watershed effects influence thickness, reinforcement needs, and maintenance planning, without guessing on numbers—always verify with label, datasheet, or local guidance. Build a practical pre-construction checklist that includes timelines, required inspections, and qualifications to avoid delays. Identify red flags like poor drainage, a rocky subgrade, or high groundwater and have clear mitigations or alternatives ready, including temporary stormwater measures if needed.
Site survey, setbacks, and pretreatment needs
Before you start, map your site. Sketch slopes, note high and low points. Check property lines, easements, and setbacks. Your local building department can provide these distances.
Pretreatment is key. Upstream, install filter strips or sump pits to trap debris and sediment. This protects your pervious concrete from clogging.
Verify isolation distances too. Some areas require space between structures and pervious surfaces to prevent flooding. Check local rules.
Soil infiltration testing and subgrade evaluation
Test your soil. Bore holes, 12″ deep, every 50-100 sq ft. Measure infiltration rate – time for water to disappear.
If rates are slow (< 1 inch/hour), consider geotextiles or aggregate layers. If results vary widely, call a geotechnical engineer.
Subgrade must be stable and compacted. Remove soft spots, rocks larger than 3″ before installing pervious concrete.
Drainage, overflow routes, and groundwater separation
Design for big storms. Ensure water flows away quickly, preventing ponding.
Plan overflow paths. Use swales or channels to direct excess water safely off-site.
Check vertical separation from seasonally high groundwater. Local rules may require a minimum distance to prevent flooding and freezing issues.
Materials, Tools, and Specifications
Identify acceptable reservoir-layer aggregates and stone for the subbase, focusing on angular, crush-resistant materials and checking gradation and absence of fines that could clog the system. List cement types suitable for pervious concrete and verify with product datasheets and local standards; emphasize Portland cement options and any supplementary cementitious materials allowed by code. Confirm compliance with ASTM/AASHTO material specs and obtain test reports from suppliers as part of your due diligence.
This matters because field conditions and material quality drive pore structure and long-term performance. Use a practical materials checklist, keep batch records and moisture notes, and verify acceptability before mixing; a simple check helps you avoid costly failures. Always check labels and datasheets, then compare them to local building or permitting standards to keep the project moving smoothly.
Material specs and standards explained
Choosing the right materials is crucial for a durable, functional pervious concrete patio. Here’s what to look for:
- Reservoir-layer aggregates: Use angular, crush-resistant materials like #57 or #67 stone. Check ASTM C33 and AASHTO M 96 specs for gradation and absence of fines.
- Subbase aggregates: Opt for clean, angular gravel meeting ASTM D448 or AASHTO M 107 standards. Avoid materials with excessive fines.
- Cement types: Use Portland cement (Type I or II) as per ASTM C150. Supplementary cementitious materials may be used, check local codes.
- Water: Use clean, potable water. Check with your local building department for any specific standards.
- Avoid: Materials with excessive fines or organic matter that can clog pores and weaken the mix.
Tools and materials checklist
Before you start, ensure you have all necessary tools and equipment for a smooth construction process:
- Mixers: A heavy-duty mixer to handle the concrete. Check it’s in good working order.
- Scales: Accurate scales to measure ingredients precisely.
- Tamps and screeds: To compact and level the concrete. Ensure they’re clean to avoid introducing fines.
- Safety gear: Hard hats, safety glasses, gloves, and steel-toed boots for protection.
- Cleaning/vacuum equipment: To keep the area clean and prevent contamination during construction and maintenance.
- Maintenance tools: Jointing tools, sealers, and cleaning supplies to keep your patio in top shape.
Quick rule: Always clean tools before use to avoid introducing fines that can clog the concrete’s pores.
Cost estimation and sourcing tips
Estimating quantities accurately is key to keeping costs down. Use online calculators or consult with a professional. Compare local suppliers for the best prices on materials.
Consider labor costs if you’re not doing it yourself. DIY can save money but may take longer and require more effort.
Request current quotes from suppliers and consider any delivery fees. Don’t forget to factor in maintenance costs, like periodic cleaning and sealing.
Pro tip: Buying materials in bulk or off-season can lead to significant savings.
Pervious Concrete Mix Design
Pervious mixes rely on coarse aggregate sizing and gradation to create open-cell voids that let water infiltrate, while cement content must bind without clogging those pores. Maintain enough cement for binding but avoid excess that reduces porosity, and manage water to prevent slurry and pore collapse. Keep moisture in aggregates in mind and follow manufacturer guidance for a workable balance and proper curing conditions.
A small-batch testing plan helps you preview workability, infiltration rate, and early strength before a full pour. Start with manufacturer guidance or lab-tested recipes, and use qualitative ranges to check if the mix is behaving as expected. If things look off, document observations and consult the label/datasheet or a pro, especially if climate or local materials require adjustments.
Mix components and proportion guidance
The heart of your pervious concrete mix lies in its components. Here’s what you need to know:
Coarse Aggregate: This makes up 60-75% of the mix. It creates those crucial open-cell voids for water infiltration. Too small, and it clogs; too large, and it weakens your patio.
Cement Paste: This binds everything together. Too much, and you’ll lose porosity; too little, and strength suffers. Stick to manufacturer’s ranges (usually 150-250 lbs per cubic yard).
Always validate proportions with product labels or lab results. Remember, every material is unique.
Admixtures, fibers, and additives
These can boost your mix’s performance:
Water-reducing admixtures: Improve workability without adding water. Use sparingly to prevent segregation.
Set retarders: Extend the working time of your mix, especially in hot weather. Check compatibility with your cement first.
Fibers: Enhance durability and crack resistance. Again, check compatibility and use according to manufacturer’s guidelines.
Field testing and batch adjustments
Before pouring that full patio, test your mix:
1. Slump Test: Check workability. Too runny? Add more aggregate or reduce water.
2. Infiltration Test: Measure how fast water drains through the mix. Too slow? Adjust aggregate size or cement content.
If performance is critical, send samples for compressive and porosity testing. Better safe than sorry!
Structural and Hydrologic Design Fundamentals
The coreSizing rule is simple: the thicker of the structural design (surface and base) or the hydrologic design (reservoir and infiltration) determines the final patio thickness. In practice that means you size the surface for the expected pedestrian or vehicle loads, then size the underlying base and subbase for those same loads, while also sizing the reservoir to store or infiltrate the runoff coming off the area. If one side is clearly stronger, use that thickness as the minimum working target and check the other side to stay balanced. Check the product labels and manufacturer instructions to confirm appropriate thickness ranges for your materials, and don’t guess when you’re dealing with load paths.
Why it matters is simple: getting the wrong thickness can cause premature cracking, erosion, or ponding that defeats the whole purpose of a permeable setup. This design approach helps you connect surface sizing, base conditioning, and storage needs so you don’t end up with a failure or a maintenance headache down the line. For DIY homeowners, treat drive-on or vehicular areas as a separate consideration and plan for heavier loads with professional guidance when needed. Use the label, a structural guide, or a licensed engineer to verify the plan for high-stress installations, and document the calculations and assumptions you used so you can justify your choices if questions arise.
Surface thickness, base compaction, and load considerations
The patio’s surface thickness depends on the heavier demand: structural (loads) or hydrologic (infiltration). For pedestrian use, 4-6 inches is common. Vehicles need 8-12 inches.
Base/subbase must be clean, well-compacted, and extend below frost line. Use a mix of coarse and fine aggregates, with gradation suitable for permeable pavement. Install underdrains to prevent waterlogging.
Key: Thicker surface for heavier loads; compact base/subbase properly; install underdrains to manage water.
Hydrologic sizing and underdrain planning
Size the reservoir based on design storm volume. Local rainfall stats help here. Infiltration rate (in/h) x area = volume needed.
If infiltration is slow, use underdrains to convey excess flow. Size pipes based on peak flow rates. Ensure they’re clean and well-supported.
Tip: Calculate volume first; then size underdrains for peak flows.
Designing for pollutant (nutrient and TSS) reduction
Pretreat water to remove coarse pollutants. Use a reservoir with media like sand or gravel to filter finer particles.
Organic contact time helps break down nutrients. Size the reservoir based on flow rate and desired contact time.
Note: Tailor design for specific pollutants; consult local standards for removal rates.
Subbase Preparation and Placement Techniques
Plan the subbase with a clear excavation scope and depth to preserve existing soil and avoid undermining nearby areas. Define trenching for drainage and check for utilities before any digging, then lay down a geotextile separator and create a clean aggregate reservoir. Keep the sequence tight: grading, geotextile, then aggregate, and guard the material from contamination during placement.
This matters because contaminated aggregate ruins functionality and can cause long delays. Use dedicated haul routes, clean fill sources, and procedures that stop soils or debris from mixing with the reservoir. Coordinate with weather and curing windows, and pause for safety checks when heavy equipment or change orders come up; check labels and manufacturer instructions for any equipment or material you use.
Preparing the subgrade and placing reservoir stone
The first step in subbase preparation is grading. You want a gentle slope away from your structure to prevent water pooling. Aim for a fall of about 1 inch per foot. Check local rules if unsure.
Next, compact the base. This is crucial to prevent settling later on. Use a plate compactor or vibrating roller. The goal is to achieve at least 90% Standard Proctor Density. Check your soil’s compaction properties and adjust as needed.
Consider using a geotextile or filter layer over the compacted base before placing reservoir stone. This helps prevent fines from clogging the aggregate and maintains void space for drainage. Follow manufacturer instructions to choose the right one.
Now, spread your reservoir stone (like #57 or #67) evenly at a depth of about 4-6 inches. Use a rake to distribute it uniformly. Then, compact it using a plate compactor. You want around 80% maximum dry density. Check the aggregate’s label for specific guidelines.
Mixing, pouring, screeding, and consolidation
Alright, listen up. You’ve prepped your subgrade and placed that reservoir stone like I told you earlier. Now let’s get this concrete in there.
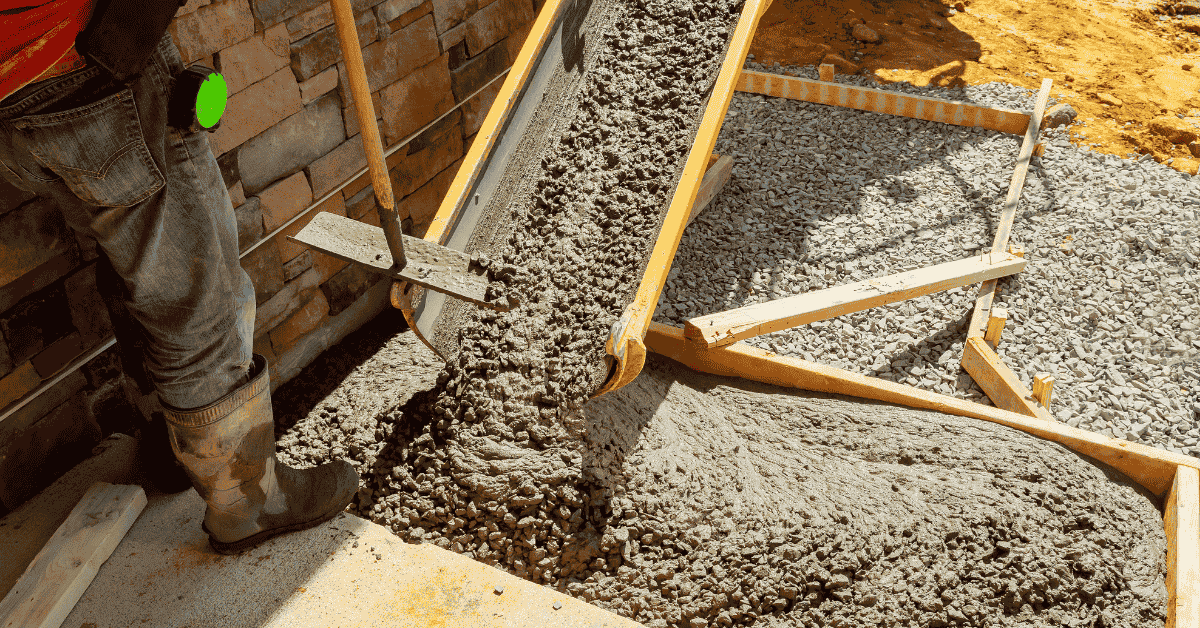
First off, mix your concrete right on the job site. Follow those manufacturer instructions to the letter. You want a slump of around 3-4 inches for most residential work. That’ll give you good workability without being too soupy.
Pouring: Start at one corner and work your way across. Pour in strips, not all at once. This helps keep the concrete from segregating. And don’t overfill your forms. You want a little headroom for screeding.
Screeding: Now grab that 2×4 and level it off. Pull it across the top of your forms, cutting off any excess concrete. Work in both directions to get a smooth surface. But don’t overdo it – you want some texture left for grip.
Consolidation: Time to vibrate that concrete. Rent a gas-powered vibrator if you can. It’ll do a better job than one of those electric ones. Run it through the concrete, breaking up any air pockets. But don’t overdo it – too much vibration can close off those little pores and mess with permeability.
Edge Restraints, Joints, and Transitions
First things first, you gotta keep your concrete where it belongs. That’s where edge restraints come in.
Durable Edge Restraints: Use rigid, durable materials like steel or high-density plastic for your edge restraints. They should be securely anchored to prevent movement. Check product labels for suitable options and follow manufacturer instructions for installation.
Now, let’s talk joints. They’re crucial for controlling cracking and allowing concrete to move naturally with temperature changes.
Control Joints: Cut control joints into your slab at regular intervals (every 10-15 feet is a good starting point). This helps direct where the concrete will crack, keeping it neat and manageable. Use a saw or a grooving tool to create these joints.
When you’re tying pervious concrete to impervious surfaces, you need a smooth transition. That’s where expansion joints come in handy.
Expansion Joints: Install these at transitions between different materials or structures. They allow for movement without causing damage. Check local building codes and manufacturer recommendations for specific requirements.
Curing, Sealing, and Post-Pour Inspection
Focus on proper curing of the pervious concrete patio, protect moisture, and follow temperature guidance and duration. Avoid rushing to seal; check the product label or datasheet for curing recommendations and don’t rely on fixed timelines. Plan for restrictions on foot and vehicle traffic during cure as advised by the manufacturer.
After pouring, know when sealers or repellents are appropriate and ensure they won’t clog pore structure or impede infiltration. Keep a simple post-pour inspection checklist: confirm drainage, joints, texture, and that no debris remains in the pores, then perform a basic infiltration check using your own criteria and the product guidance. Document products and dates, schedule re-checks, and always follow product-specific curing timelines rather than calendar-based guesses.
Curing methods and timing
After pouring, curing is crucial to ensure your pervious concrete patio gains the right strength and permeability. Use this checklist to guide you through.
- Protect from rain: Cover with plastic sheeting or tarp if rain threatens within 24 hours of pour.
- Keep moist: Spray water on surface for first 7 days, especially in hot, dry conditions. Lack of moisture can cause rapid drying and cracking.
- Avoid traffic: Restrict foot/vehicle traffic for at least 48 hours to prevent damage.
- Monitor temperature: Keep surface between 50°F – 70°F (10°C – 21°C) for optimal curing. Too hot or cold can slow down strength gain.
- Cure for at least 7 days: Follow manufacturer’s recommendations, but generally allow 7-14 days before sealing or heavy use.
- Avoid deicing salts: Do not use on surface during cure to prevent damage and contamination.
- Check for proper set: Gently press surface with a trowel after 24 hours. If no impression is left, it’s setting properly.
- Inspect edges: Ensure edges are well-cured and not dried out to prevent crumbling.
Quick rule: Always follow product-specific curing timelines rather than fixed calendars.
Sealers, repellents, and when to avoid them
While sealers can enhance durability, they must be used judiciously on pervious concrete. Here’s a guide to help you decide.
- Understand purpose: Sealers protect surface from staining, not water penetration (that’s what permeability is for).
- Test first: Apply sealer to a small, hidden area and test infiltration performance before full application.
- Avoid pore-clogging sealers: Stay clear of film-forming sealers that can reduce permeability. Opt for penetrating or impregnating sealers instead.
- Check compatibility: Ensure sealer is compatible with your concrete mix and admixtures to prevent discoloration or reduced performance.
- Consider climate: In areas with heavy foot traffic, snow, or deicing salts, a sealer can provide extra protection.
- Avoid in dry climates: In arid regions, sealers may not be necessary and could trap moisture, leading to efflorescence.
- Follow manufacturer’s guidelines: Always adhere to product-specific application instructions for best results.
- Re-apply every 2-5 years: Regular reapplication maintains surface protection and enhances longevity of your patio.
Quick rule: If in doubt, consult with a professional or test on a small area first to avoid compromising permeability.
Visual checkpoints and performance testing
Before using your new pervious concrete patio, perform these simple checks to ensure it’s ready.
- Inspect surface texture: Check for uniform appearance. Any variations could indicate improper mixing or placement.
- Check joints and edges: Ensure they’re well-formed and intact. Cracked or crumbling edges may need additional curing or repair.
- Verify slope/drainage: Confirm patio has proper slope (at least 1/8 inch per foot) for water to drain away from structures.
- Perform infiltration test: Pour water on surface and observe how quickly it disappears. If it takes more than a few minutes, there may be clogging or improper curing.
- Check for debris: Inspect pores visually or with a magnifying glass to ensure no clogging material remains.
- Look for efflorescence: White powdery deposits on surface indicate excess moisture, which could lead to reduced permeability over time.
- Inspect for discoloration: Any unusual colors or stains may indicate improper curing, sealing, or contamination.
Quick rule: If any issues arise during these checks, address them promptly to prevent further damage and ensure optimal performance.
Maintenance to Prevent Clogging and Extend Life
Keep the pores open with a practical maintenance cadence: monthly light vacuuming or soft brushing to remove loose dirt, and a quarterly deeper clean with low-pressure cleaning that won’t seal or compact the surface. Do routine inspections and gentle, non-invasive repairs as you go, and note any changes so you can act early.
Look for signs of permeability loss like pooled water after rain, slower infiltration, visible sediment in pores, algae or hairline cracks, or pavement settling. Do a quick test such as a bucket fill check or a simple infiltration pace check and document the results with dates and observations. When you spot issues, start with non-invasive fixes like rinsing out settled fines and using materials rated for permeability; avoid high-pressure washing and note when deeper work or a pro is needed.
Routine cleaning, vacuuming, and debris control
Your pervious concrete patio needs regular cleaning to keep its pores open. Here’s a simple maintenance plan:
Monthly: Lightly vacuum or power brush the surface using a low-pressure nozzle and soft brushes. This removes loose sediment, leaf litter, and other debris before it enters the pavement.
Quarterly: Perform a deep clean to remove any remaining buildup. Again, use a low-pressure nozzle and soft brushes to avoid sealing or compacting the pores.
Localized clogging repair and surface rejuvenation
Over time, some areas may clog up more than others. Here’s how to address this:
For spot vacuuming: Use a wet-dry vacuum to suck out settled fines from the pores.
For pressure washing: Use low pressure (around 500-1000 PSI) with a wide-angle nozzle to gently rinse out clogged areas. Avoid high-pressure washers that can compact the pores.
For joint recharging or surface removal: If clogging is severe, you may need to remove and replace small sections of the surface. Use appropriate pervious-repair materials to maintain permeability.
Winter care and deicing strategies
Proper winter care helps prevent clogging in spring:
Avoid sand: Sand can get into the pores, causing long-term clogging. Use alternative traction aids like sawdust or cat litter.
Use minimal deicers: Apply deicers sparingly to minimize residue buildup in spring. Prefer liquid deicers over solid ones as they leave less residue.
Spring clean-up: After snow melts, thoroughly remove any remaining abrasives using a low-pressure washer or vacuum. This prevents them from clogging the pores during the next rainy season.
Safety, Common Mistakes, and Troubleshooting
Safety first: wear the right PPE, including gloves, eye/face protection, and a respirator if dust is involved. Keep proper ventilation, watch the weather and temperature, and prevent slips and falls by keeping walkways clear and using stable footing. Handle bags and mixers carefully, do a quick risk check, and know emergency steps if something goes wrong.
This matters because DIY mistakes show up as cracking, poor finish, or uneven drainage, and those are hard to fix later. You’ll want a clear plan for troubleshooting: watch for surface issues, check for improper mixing or curing, and know when to pause and call in help. Document everything—mix ratios, tests, curing conditions, and warranties—so you can verify performance and timelines and defend against warranty questions if they arise.
Construction and Maintenance Safety Precautions
Safety is paramount when working with concrete. Here are the key precautions to take:
Personal Protective Equipment (PPE): Wear gloves, eye/face protection, and a respirator if dust levels are high.
Handling Materials: Be cautious when handling bags of cementitious materials. Use proper lifting techniques to prevent injuries.
Equipment Operation: Always follow the manufacturer’s guidelines for operating mixers and compaction equipment. Ensure proper ventilation, especially with power tools.
Common DIY Mistakes and How to Avoid Them
Even the most experienced DIYers can make mistakes. Here are some common pitfalls to avoid:
- Poor subbase preparation: Inadequate compaction or improper materials can lead to patio failure.
- Contaminated aggregate: Ensure your aggregates are clean and free of contaminants that could affect permeability.
- Improper curing: Allowing the concrete to dry out too quickly or not providing enough moisture can weaken the patio.
- Premature sealing: Applying sealants before the concrete has cured properly can trap moisture and cause issues.
Regularly inspect your work, follow manufacturer guidelines, and don’t rush the process to avoid these common mistakes.
Troubleshooting Guide and When to Call an Expert
Even with careful planning, issues can arise. Here’s a quick troubleshooting guide:
Puddling: If water is pooling on the surface, it could be due to excess fines or improper drainage. Adjust your mix or consult a professional if structural issues are suspected.
Cracking: Minor cracks can often be filled and sealed. However, if they’re extensive or worsening, contact an engineer for evaluation.
Rapid permeability loss: If the patio is clogging quickly, it might need flushing/flushing-out or resealing post-infiltration test. If drainage issues persist, consider professional help.
Conclusion
Keep safety, durability, and curb appeal at the front of every decision. A well built porous patio drains properly, looks right, and lasts with the least trouble only if you follow a solid plan and test as you go.
Run through a simple sequence in order: inspect the site and subbase readiness, verify the mix design and water/air balance, place and compact in workable lifts, protect with proper curing and sealing, and schedule routine maintenance to prevent clogging. Check drainage, measure base and subbase depth, verify forms and elevations, mix only what you can place per pass, and test a small area before full pour. Keep tools clean, wear protective gear, and document your checks so the steps stay clear as you work.
Common mistakes to avoid are skipping the subbase or using improper aggregate or water content, rushing cures, and neglecting post-pour inspection. Safety rules are simple: never work over an untried subbase, never delay curing in hot sun or freezing wind, and never seal visually clogged or slow-draining surfaces without diagnosing the cause. If anything feels uncertain or the site has complex drainage, stop and reassess before proceeding.
If the project needs more than basic planning, or the site has drainage or elevation challenges beyond your experience, call a pro for a quick check or guidance. Keep momentum with careful steps, and you’ll finish a sturdy, long lasting patio that stays clear and functional for years to come.
FAQ
How should I factor hydrologic design when planning a small pervious concrete patio?
Think about how water drains from the surface and where it goes next. Check underdrain options and ensure slopes and grading direct runoff to a safe outlet. Always follow manufacturer instructions and local rules for water movement and drainage.
What design criteria should guide structural support for a DIY pervious patio?
Know what loads the patio will carry and how the subbase and frame transfer them. Use the recommended subbase depth and materials, and compact properly. If in doubt, compare to the product label or instructions from the mix supplier and follow any local guidelines.
How can I understand or estimate outflow rate and volume through underdrains?
Don’t guess. Review the underdrain specs and any flow characteristics provided by the manufacturer. Make sure the drainage path, pipe sizing, and gravel reservoir are aligned with the design and local site conditions.
How do I test soil infiltration rate for my site?
Use a simple infiltration test method per the product or local extension guidance, noting rainfall handling and soil moisture. Record the time for water to infiltrate and compare to what your design assumes, then adjust plan if results vary widely.