
Introduction
Embarking on a DIY concrete project? Understanding the timeline of using shrinkage-reducing admixtures (SRAs) is crucial to ensure your driveways, pads, or countertops last. This guide walks you through the step-by-step process, from planning to curing, ensuring you stay on schedule and achieve optimal results.
Before we dive in, remember that SRAs are just one part of a comprehensive strategy to prevent cracking. Proper mix design, placement, and curing are equally important. Let’s get started!
For the full guide, see Shrinkage-Reducing Admixtures: When They Help on Driveways, Pads, and Countertops.
Step-by-Step Timeline: Incorporating Shrinkage-Reducing Admixtures
The timeline for using SRAs can be broken down into several key stages. Here’s a detailed step-by-step guide to help you stay on track:
- Planning and Preparation (1-3 days): Begin by assessing your project’s suitability for SRAs, checking local codes, and selecting the right product. Order materials and gather tools.
- Mix Design and SRA Addition (Day 1): Calculate your concrete mix design, ensuring it’s compatible with the chosen SRA. Follow manufacturer instructions to add the admixture at the correct dosage.
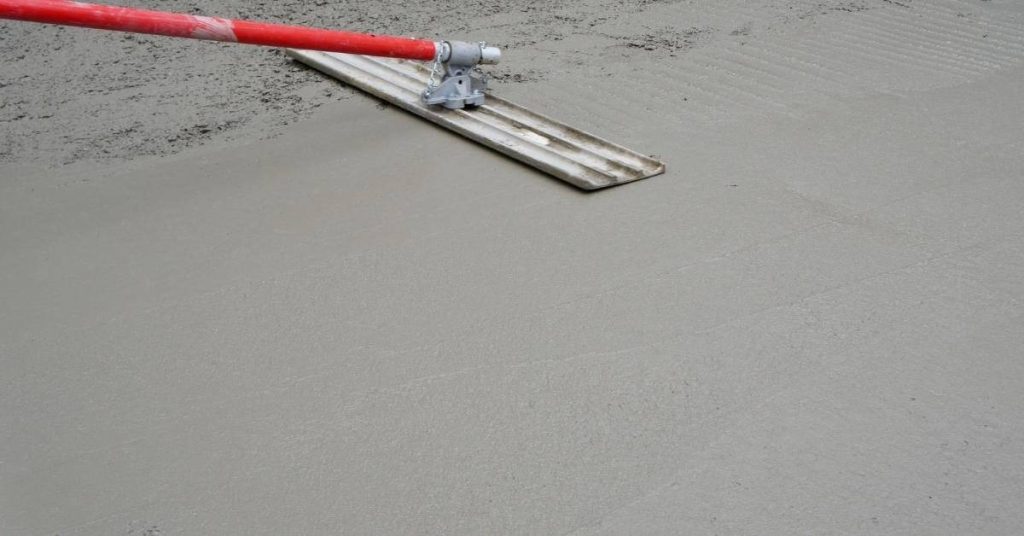
- Concrete Placement (Same day as mixing): Transport and place the concrete mixture promptly to prevent setting before placement is complete. Ensure proper consolidation and finishing techniques are used.
- Curing (7-28 days): Maintain consistent moisture levels in the concrete by covering it with plastic sheeting or keeping it wet using a sprinkler system. Monitor progress closely, as curing times can vary depending on weather conditions and concrete mix.
By following this timeline, you’ll ensure that your SRAs are effectively incorporated into your concrete project, helping to minimize shrinkage-related cracking and maximize durability.
Key takeaways
The planning stage is critical in determining the overall timeline of your project. Ensuring you have all necessary materials and understanding local regulations can save you valuable time and prevent delays down the line.
- Shrinkage occurs as concrete cures, causing cracks if not controlled.
- SRA admixtures can reduce early cracking in driveways and slabs when mixed correctly.
- Causes include drying shrinkage, temperature loss, and restrained movement during curing.
- Assess suitability before use; check substrate, finish, and local code requirements.
- Follow manufacturer instructions; batch, placement, and curing affect SRA performance.
- Safety: wear PPE, avoid prolonged exposure, and verify ventilation when using admixtures.
Table of Contents
- Introduction
- Key takeaways
- What Shrinkage-Reducing Admixtures (Sras) Are
- Causes and Types of Concrete Shrinkage
- When Sras Help — Applications and Suitability
- Benefits, Limitations, and Product Comparison
- Planning, Specifying, and Mix Design Considerations
- Application Best Practices and Common Mistakes
- Cost, Alternatives, and Return-on-Investment
- Practical Next Steps and Trusted Sources
- Conclusion
- FAQ
What Shrinkage-Reducing Admixtures (Sras) Are
Shrinkage-reducing admixtures (SRAs) are chemical additions put into concrete to lower capillary tension in the pore water, which reduces the driving force for shrinkage during drying and early-age changes. They are different from internal curing agents (which supply water) and from traditional water-reducing admixtures (which change workability at a given water content); check the product data sheet to confirm the claimed mechanism.
Their primary purpose on driveways, slabs, and countertops is to reduce overall volumetric change and early-age movement so flat surfaces stay dimensionally stable and show fewer hairline cracks. When considering SRAs, verify compatibility with your cement type, aggregate, finishing system, and any epoxy or overlay by reading the manufacturer instructions and running small test panels.
Types of SRAs
Shrinkage-reducing admixtures (SRAs) come in various forms and chemistries. Here’s a quick rundown:
Chemistry Classes: Common types include polyoxyalkylenes, modified polysaccharides, and synthetic polymers.
Product Forms: SRAs can be liquids or powders. Some are internal curing agents, which contain water to replace the lost moisture during hydration. Always check manufacturer data sheets for exact compositions.
How SRAs work (mechanism)
SRAs reduce shrinkage by interfering with cement hydration and altering the pore structure of concrete. Here’s how:
Hydration Interference: Some SRAs slow down or delay cement hydration, reducing early-age shrinkage.
Pore Structure Modification: Others increase the volume of small pores (gel pores) and decrease larger capillary pores. This changes the pore structure, making it less susceptible to shrinkage.
Internal Curing Agents: These SRAs release water slowly over time, replacing lost moisture and reducing long-term shrinkage.
Causes and Types of Concrete Shrinkage
Concrete shrinkage happens by several mechanisms: plastic shrinkage (loss of water while the mix is still fresh), drying shrinkage (moisture loss after setting), autogenous or chemical shrinkage (volume change from hydration in low water–cement mixes), and thermal shrinkage (temperature-driven expansion and contraction). Each shows up at different times and with different crack patterns, so identifying the timing and appearance on your driveway, pad, or countertop helps point to the right fix.
Use a diagnostic checklist: note when cracks appeared, surface moisture conditions, recent temperature swings, and finishing practices to distinguish causes; then choose remedies accordingly—SRAs, better curing, jointing, or mix changes. If unsure about which mechanism dominates, run small test pours and consult product literature or a local pro to match treatment to cause.
Plastic, Drying, and Autogenous Shrinkage Explained
The three main types of concrete shrinkage that cause cracking are plastic, drying, and autogenous. Understanding their timing and visual signs helps diagnose issues on your driveway, pads, or countertops.
Plastic shrinkage: This occurs within the first few hours after pouring when the concrete is still soft. It’s caused by rapid evaporation of water from the surface. You’ll see cracks that are narrow and deep, often with a wavy pattern.
Drying shrinkage: This happens over weeks to months as the concrete loses moisture after it has set. Cracks are usually wider and shallower than plastic shrinkage cracks, forming a map-like pattern on the surface.
Autogenous shrinkage: This is less common but can occur in low-water mixes where the concrete shrinks as it hydrates. It’s hard to spot early on, but over time, you might see hairline cracks or a slight depression in the surface.
Environmental and Mix Factors That Increase Shrinkage Risk
Before deciding on shrinkage-reducing admixtures (SRAs), check your project conditions. High water-cement ratio, rapid evaporation, wind, temperature extremes, low cement content, and fine aggregates all increase the risk of shrinkage.
High water-cement ratio: Too much water in your mix can lead to excessive bleeding and increased drying shrinkage.
Rapid evaporation: High temperatures, wind, or low humidity can cause water to evaporate quickly from the concrete surface, leading to plastic shrinkage.
Temperature extremes: Both high and low temperatures can affect concrete hydration and lead to increased shrinkage. Ensure your mix design accounts for these conditions.
When Sras Help — Applications and Suitability
SRA use makes sense where shrinkage-driven cracking risks are real: exposed driveways with long uninterrupted spans, thin countertops and overlays, decorative slabs with tight tolerances, and equipment pads where dimensional stability matters. Consider the exposure, slab thickness, finishing method, and whether other measures (joints, fibers, internal curing) are already addressing shrinkage before adding an SRA.
SRAs are often unnecessary for very thick pours, interior dry environments, or mixes with low cement content and robust jointing—those situations may get equal or better results from fibers, thicker sections, or strict curing. Always trial a production-like mix, monitor set and early strength, and read the supplier paperwork to confirm the SRA fits your application and other admixtures in the mix.
Outdoor concrete: driveways and equipment pads
Exterior slabs like driveways and equipment pads face harsh conditions. SRAs can help reduce early cracking.
- Heavy traffic/loads: SRAs boost resilience against cracking from heavy vehicles or machinery.
- Joint planning: Proper jointing reduces shrinkage-induced stress, but SRAs further minimize cracks at joints.
- Mix design: Resilient mixes with higher cement content benefit from SRAs to mitigate early-age cracking.
- Exposure conditions: SRAs help in areas with temperature extremes or frequent wetting/drying cycles.
- Finishing timing: Early finishing can induce stress, so SRAs help delay cracking until concrete gains strength.
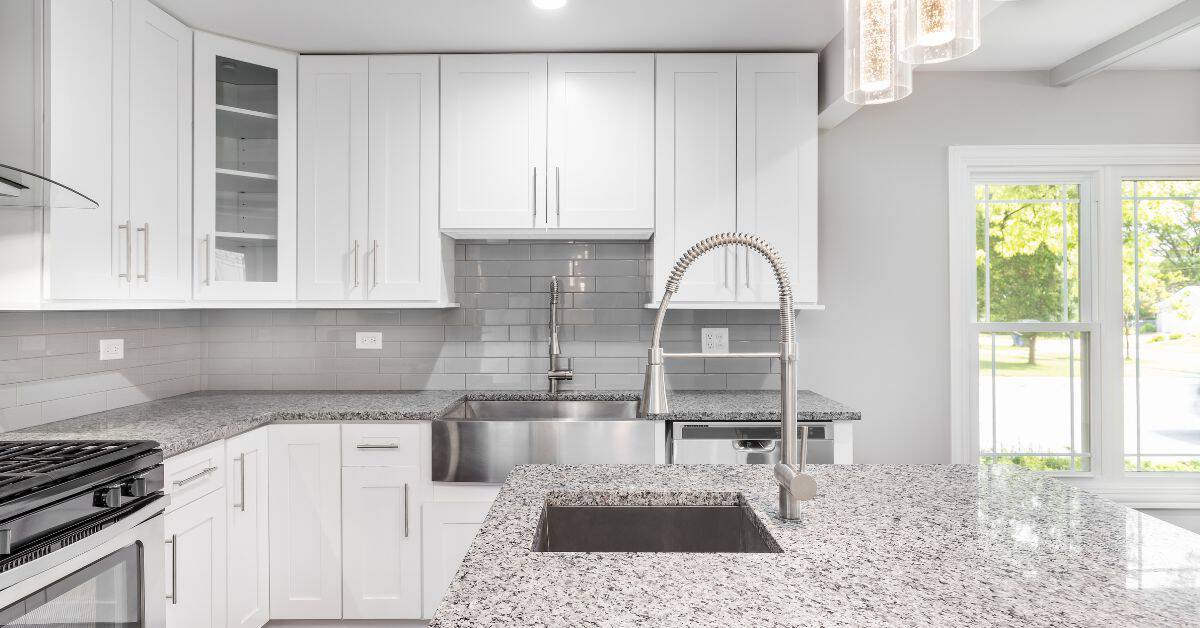
Indoor concrete: countertops, GFRC, and decorative slabs
Thin, restrained, or highly finished interior elements can crack due to shrinkage. SRAs are crucial here.
Countertops: Thin slabs with limited movement potential need SRAs to prevent cracking at cut edges or under sinks.
GFRC (Glass Fiber Reinforced Concrete) and decorative slabs often have intricate patterns or polished surfaces. SRAs help maintain these finishes by reducing shrinkage cracks.
Restrained elements: SRAs are vital for concrete that can’t move freely, like countertops attached to cabinets or walls.
Decorative finishes and patterns (examples)
SRAs won’t change the final look of your concrete but can help maintain decorative finishes. Here are a few examples:
Ashlar notched slate: SRAs ensure consistent, crack-free lines in this popular pattern.
Grand running bond: SRAs help maintain even joints and prevent cracking between bricks in this classic pattern.
Flagstone looks: SRAs keep cracks away from the natural stone-like edges, preserving the desired aesthetic.
Benefits, Limitations, and Product Comparison
The practical benefits of SRAs for DIY projects include reduced visible cracking, improved surface durability, and better aesthetics on large flat areas and decorative finishes when combined with good curing. Limitations to plan around include added material cost, possible effects on slump, finishing feel, and changes to set time—check the technical data sheet for expected impacts rather than assuming behavior.
Compare products by chemistry and intended performance, and run trial mixes to track slump, set time, air content, surface texture, and any change in early strength or compatibility with pigments and sealers. If you don’t have test results, ask suppliers for test-panel guidance and follow a simple lab-to-field test plan before committing to full-scale use.
Key Performance Benefits
Shrinkage-reducing admixtures (SRAs) can make a real difference to your DIY projects. Here’s what you’ll notice:
Reduced Cracking: SRAs minimize hairline cracks on large flat surfaces like driveways and countertops. This means less maintenance and better appearance over time.
Improved Durability: By reducing shrinkage, SRAs enhance the long-term durability of your concrete. This is especially important for outdoor applications where concrete faces weathering and temperature changes.
Aesthetic Improvements: In decorative finishes, SRAs can help maintain the intended pattern or design by preventing cracking that could distort the look. They also improve the overall surface integrity and smoothness.
Limitations, Trade-offs, and Testing Needs
Before you dive in, understand these potential impacts:
Cost: SRAs add to your material cost. Make sure it fits your budget.
Setting Time: Some SRAs can slow down setting time. This might affect your project schedule, so plan accordingly.
Finishing and Strength: SRAs may slightly reduce slump or affect finishability. They might also impact early-age strength. Always do trial batches and lab testing before full-scale use to ensure these trade-offs work for you.
Curing: Some SRAs require longer curing times. Make sure you can accommodate this in your project timeline.
How to Compare SRA Products
To make an informed decision, use this comparison method:
Create a chart with columns for Chemistry Type, Recommended Uses, Verified Performance Claims, and Where to Get Datasheets. List each SRA product in rows.
Rely on manufacturer data and independent test results. Look for products that match your project needs and have proven performance claims.
For example, if you’re doing a decorative countertop, look for SRAs that work well with pigments and don’t affect surface treatments. For driveways, focus on SRAs that enhance durability under outdoor conditions.
Planning, Specifying, and Mix Design Considerations
Decide on SRA use by assessing project scope: identify substrate, exposure, temperature range, and load expectations; set clear goals for shrinkage reduction to justify adding an SRA. Confirm the SRA form (liquid, powder, blend) and check compatibility with your cement, SCMs (fly ash, slag), aggregates, fibers, and other admixtures by reviewing manufacturer guidance and running representative trial batches.
Plan trial mixes that mirror field proportions, define what you will measure (slump, set time, shrinkage or strain, surface quality), and set acceptance criteria before scaling up. Also document batching order, mixing windows, placement timing, and QA steps so everyone on-site follows the same spec and change-control procedure during the pour.
Mix design interactions and verification testing
When using shrinkage-reducing admixtures (SRAs), it’s crucial to ensure they play nice with other mix components. Here’s what you need to check:
Compatibility with plasticizers: SRAs can interact with water reducers, superplasticizers, and other plasticizers. Make sure they’re compatible by running small-scale trials.
Air entrainment: SRAs won’t affect air content, but ensure your mix design maintains the desired level of entrained air for durability.
Fibers: SRAs can enhance fiber performance. Verify they don’t interfere with each other and maintain proper dispersion and orientation.
Don’t assume SRA performance based on lab results alone. Conduct field trials to confirm their effectiveness under real-world conditions.
Jointing, reinforcement, and curing coordination
SRAs are just one piece of the puzzle in controlling concrete shrinkage. Here’s how to coordinate other aspects:
Joint layout: Properly spaced joints help control cracking. Use a joint spacing calculator or consult with an engineer to determine optimal spacing.
Reinforcement and fibers: Reinforcement and fibers work together with SRAs to control shrinkage cracking. Ensure they’re properly placed, sized, and distributed throughout the concrete section.
Subgrade preparation: A well-prepared subgrade minimizes differential settlement, reducing stress on the concrete slab and helping prevent cracking.
Curing practices: Proper curing is essential for SRA effectiveness. Specify appropriate curing methods (e.g., wet curing, membrane curing) and durations to optimize performance.
Application Best Practices and Common Mistakes
Start with supplier specs and a small proof panel: verify dosage, mixing sequence, and expected effects on workability before the production pour. Prep the substrate, control wind and surface evaporation, and follow recommended mixing and addition order—these steps have more impact than the admixture alone.
During placement, stick to consistent mixing times, avoid overdosing or late additions, and don’t skip proper curing; those are common installer errors that wipe out any SRA benefit. Watch for specific mistakes—wrong dosage, poor substrate prep, premature sealing—and use simple checks on slump, set, and surface condition to catch problems early.
Best practices during mixing, placing, finishing, and curing
Follow these steps to ensure your concrete mix with shrinkage-reducing admixtures (SRA) performs as expected.
Dosing: Stick to manufacturer instructions. Too much SRA can cause delays in setting time, while too little may not effectively reduce shrinkage.
Mixing: Ensure thorough mixing to distribute the SRA evenly throughout the concrete. Follow your batch plant’s standard operating procedure for mixing times.
Finishing and Curing: Control evaporation during finishing by keeping the surface moist with a fine mist of water or covering it with plastic sheeting. For curing, use wet burlap, plastic sheeting, or cure-and-seal compounds to retain moisture and prevent rapid drying. Follow recommended curing durations for optimal results.
Frequent mistakes and how to avoid them
Here are some common installer errors and tips on how to prevent them:
- Incorrect dosage: Overdosing or underdosing SRA can lead to poor performance. Always follow manufacturer guidelines.
- Ignoring joint spacing: Properly spaced joints help control cracking. Don’t skip this step, even when using SRAs.
- Skipping trial mixes: Conduct small-scale trial mixes before pouring large slabs to ensure the SRA works well with your specific mix design.
- Treating SRAs as a cure-all: SRAs are not a substitute for proper subgrade preparation or adequate curing. Address these aspects to minimize shrinkage-related cracks.
By avoiding these common mistakes, you’ll maximize the benefits of using shrinkage-reducing admixtures in your concrete projects.
Cost, Alternatives, and Return-on-Investment
Weigh SRA cost against alternatives such as fibers, admixture blends, increased thickness, or stricter curing regimes using a total cost framework that includes materials, labor, and long-term maintenance. For aesthetic projects where hairline cracks are visible, an SRA can tilt value toward use; for heavy structural slabs or very thick pours, alternatives may give equal or better ROI.
Create simple scenarios for your project: compare upfront material plus labor and expected maintenance for SRA versus fiber or thicker slab options, then factor expected life and crack-repair costs. If unsure how to balance choices, run trial sections and use those results—plus supplier datasheets—to estimate long-term value before committing.
Cost implications and how to analyze ROI
Shrinkage-reducing admixtures (SRAs) add around $0.50 to $1 per cubic yard to your concrete mix, but labor and application costs can vary. Get quotes from suppliers that break down material and labor costs.
Calculate lifetime savings: Reduced cracking means less maintenance. If you avoid one crack repair every 5 years, you’ll save around $200 (materials + labor).
Consider time-to-crack avoidance: SRAs can delay cracks by 3-5 years compared to untreated concrete. Estimate your expected lifespan and maintenance reductions.
Alternatives and combined strategies
Consider synthetic fibers for crack control in driveways and pads. They add around $0.25 per cubic yard but don’t affect concrete’s surface finish.
For countertops, use internal curing via lightweight aggregates. It improves durability and reduces curling, adding about $1 to $2 per cubic yard.
Combine strategies for best results: SRAs with fibers or internal curing. This can enhance crack control and durability while keeping costs reasonable.
Practical Next Steps and Trusted Sources
Handle and store SRAs per the product label: keep them in compatible, labeled containers, control storage temperature and shelf life, and avoid contamination with other admixtures. Obtain and read the SDS/MSDS and product data sheet—focus on hazard statements, first-aid, exposure controls, and recommended PPE—and follow those instructions on-site.
Consult relevant standards and guidance (refer to ASTM/ACI documents listed by the supplier) when specifying dosages and testing protocols, and get supplier test data or independent test panels before large pours. If anything in the paperwork is unclear, ask the manufacturer or a local concrete pro for clarification before making a purchase or altering your mix.
Safety and handling precautions
Always prioritize safety when working with shrinkage-reducing admixtures (SRAs). Here’s what you need to know:
Personal Protective Equipment (PPE): Wear gloves, long sleeves, and eye protection. For mixing, use a respirator or work in a well-ventilated area.
Storage: Keep SRAs in their original containers, away from heat sources, and out of direct sunlight. Follow the manufacturer’s recommended temperature and shelf-life guidelines. Label containers clearly to prevent contamination or accidental mixing.
If you spill an SRA, clean it up immediately using absorbents like cat litter or sawdust. Then, dispose of the waste according to local regulations. Always consult the product’s Material Safety Data Sheet (MSDS) for specific hazards and first-aid steps.
Material specs, standards, and questions for contractors
The right SRA can make or break your project. Here’s how to ensure you’re choosing the best one:
- Check ASTM/ACI Standards: Look for SRAs that meet ASTM C494 or ACI 212.3R standards.
- Dosage Range: Ensure the SRA’s dosage range matches your mix design. Too little may not work, too much could cause issues.
- Cement Compatibility: Check if the SRA is compatible with your chosen cement type. Some SRAs don’t play nice with all cements.
- Aggregate Type: Make sure the SRA works well with your chosen aggregate. Some aggregates may react poorly with certain SRAs.
- Trial Results: Ask contractors about trial results using the same or similar materials in local conditions.
- Decorative Finishes: If you’re using decorative finishes, ensure the SRA won’t interfere with their performance.
- Warranty and Experience: Choose suppliers who offer warranties and have experience working with SRAs and decorative finishes.
Conclusion
Shrinkage-reducing admixtures can help if you plan, test, and cure properly; they’re about improving durability and appearance without throwing money away on guesswork.
Start with a clear check list: confirm the project type and suitability, read the product data, run a small test patch, lock in the correct dosage in your mix design, strictly follow the manufacturer’s instructions, control curing conditions, and document the results so you can compare performance before scaling up.
Common mistakes to avoid are over-dosing or using the wrong type of admixture for your concrete, skipping the small-test step, neglecting proper mixing sequence, and skipping adequate curing. Always wear the right PPE, work in a well-ventilated area, and never exceed the recommended dosage or alter the mix without rechecking the data sheet and test results.
For large slabs, structural elements, or if signs of cracking appear after testing, consider bringing in a pro to verify specifications and supervise the work. With careful testing and disciplined execution, you can reduce shrinkage risk and protect your driveway, pad, or countertop—and finish with solid results you can trust.
FAQ
What are common signs that shrinkage cracks are forming in a driveway, pad, or countertop?
Look for tight, shallow cracks that run across the surface or along joints. They often appear after the surface dries quickly or during a rapid change in temperature or moisture. If cracks form near edges or over joints, that’s a typical shrinkage pattern.
How can you prevent shrinkage cracks before they start?
Control moisture during curing and avoid rapid drying. Use plastic or curing blankets to slow moisture loss, and keep the surface shaded if possible. Proper aggregate and binder balance in the mix helps, along with consistent finishing and avoiding overworking the surface.
What types of crack-reducing admixtures might help, and how do you choose them?
There are several classes of admixtures that can help with shrinkage, but check the product label for suitability with your concrete mix and application. Look for instructions on compatibility with Portland cement, water-reducing properties, and recommended dosages. If in doubt, compare manufacturer instructions and talk to the supplier or a pro to confirm suitability for your project.
When and how should you apply shrinkage-reducing admixtures for best effect?
Follow the product’s timing guidance—often mixed in with the batch or added during initial mixing. Do not try to add them after the concrete has started to set. Always verify dosing against the label and ensure proper mixing to avoid segregations or uneven distribution.