

Introduction
Concrete countertop mix design for DIY means choosing aggregate size, fibers, and reinforcement so the slab is workable, strong, and resists cracking. Think coarse aggregate that fits the finished thickness, fibers or mesh to control cracking, and a reinforcement layout that supports spans—check product labels and local rules for exact specs. Keep the mix manageable for hand finishing and compatible with your casting method.
I’ll walk you through practical choices like selecting aggregate that won’t show through your surface, picking fiber type and quantity based on manufacturer instructions, and laying reinforcement where the slab bears load. This is a hands-on jobsite approach: plan your mix, test a small batch, and adjust for workability and finishability rather than chasing exact numbers without checking the materials you buy.
Key takeaways
- Choose aggregate size compatible with your mold and desired surface finish; avoid oversized.
- For fiber reinforcement, specify type and dose guidance per manufacturer instructions; verify compatibility.
- Plan reinforcement layout with continuous distribution and proper cover; stagger joints to reduce cracks.
- Mix design considerations: target workability, fugitive water control, and curing compatibility within limits.
- Use safe handling, PPE, and dust control during mixing, pouring, and finishing.
- Budget tips: source local materials, compare bags vs custom mixes, and plan for waste.
Table of Contents
- Introduction
- Key takeaways
- Project Goals, Performance Targets, and Design Constraints
- Mix Components and How to Set Target Proportions
- Aggregate Size Selection and Grading Principles
- Fiber Reinforcement Types and Dosing Guidance
- Structural Reinforcement Layout and Placement Strategies
- Mixing, Pouring, Finishing, Curing — Plus Safety Precautions
- Cost Comparison, Sourcing, and DIY Budget Tips
- Tools, Formwork, and Planning Checklist for DIY Pours
- Conclusion
- FAQ
Project Goals, Performance Targets, and Design Constraints
Start by defining the slab geometry and what it must do: note the intended slab thickness, supported spans, and any edge or overhang allowances so you can anchor structural and finish decisions to real dimensions. These geometry constraints directly determine reinforcement choices, maximum aggregate size, and whether fibers alone will suffice for crack control.
Next, establish the required performance: specify the level of compressive and flexural performance you need, the expected surface finish quality, and any exposure concerns like moisture or staining so the mix will be chosen to meet those demands. Finally, capture job constraints—budget, available formwork, schedule, and curing method—and balance those against desired outcomes so you can trade off aggregate, cement type, admixtures, and reinforcement in a controlled way; check product data sheets or local rules where precise values are needed.
Strength and thickness targets
The strength of your concrete countertop depends on its intended use, supported spans, and overhangs. Aim for a minimum compressive strength of 3000 psi to ensure durability.
Thickness plays a crucial role in strength and stability. For standard kitchen counters with no overhangs, aim for at least 1.5 inches thick. If you’re planning overhangs or larger spans, consider 2 inches or more.
Finer aggregates help achieve higher strengths but reduce workability. Balance strength needs with the practicality of mixing and placing concrete at home.
Aesthetic and edge/profile choices
The desired finish type – smooth, textured, or exposed aggregate – influences your mix design. Smooth finishes require a finer aggregate grading, while exposed aggregates need coarser ones.
Visible aggregates affect the look of your countertop. Larger aggregates create a rougher, more industrial feel, while smaller ones result in a sleeker, modern appearance.
Edge profiles – mitered, beveled, or rounded – impact workability and mix design. Mitered edges require precise cutting, so ensure your concrete is dense and strong. Rounded edges need careful formwork, which may affect curing time.
Mix Components and How to Set Target Proportions
List the primary ingredients—cement as the binder, aggregates for body and appearance, water for workability and hydration, admixtures to tune set and durability, and fibers for crack control—and understand the role each plays in the finished slab. Use supplier datasheets and labels for any specific material limitations or compatibility notes rather than assuming a one-size recipe.
To set proportions without fixed numbers, pick target performance first, then estimate component ranges and run small-batch trials to dial in workability and finishability. Adjust aggregate grading, water content, and admixture dosing through those tests, document the mix that meets your strength and finish goals, and cross-check each component’s technical data before scaling up.
Cement type and supplementary binders
The heart of your mix is the cement. Common types are Type I (general use) and Type II (moderate sulfate resistance). For durability, consider using pozzolans or slag as partial replacements.
Pozzolans, like fly ash or silica fume, improve long-term strength and reduce heat of hydration. They also help control color by diluting the cement’s inherent gray.
Slag offers similar benefits but has a lighter color. It’s great for achieving whiter countertops. Always check supplier datasheets to ensure compatibility with your chosen cement type.
Water, admixtures, and workability control
Water is crucial for workability. Too much makes a soupy mix; too little, a crumbly one. Aim for a water-to-cement ratio between 0.45 to 0.55 by weight.
Admixtures help fine-tune your mix. Set retarders extend cure time, useful when casting thick countertops. Superplasticizers improve workability and allow lower water content for higher strength. Always follow product tech sheets for safe dosages.
Air entraining agents introduce tiny bubbles that enhance durability by relieving internal stress from freezing/thawing cycles. They also make the mix more cohesive, improving finish quality.
Aggregate proportions (fine vs coarse)
Aggregates give your countertops texture and strength. Use a mix of fine (sand) and coarse (gravel or crushed stone) aggregates.
The fine-to-coarse ratio affects surface smoothness, consolidation, and strength. A higher fine content gives a smoother finish but may lead to lower strength. Conversely, more coarse aggregate means better strength but potentially rougher surfaces.
To find the best balance, conduct trial mixes. Start with a 60:40 or 70:30 ratio by volume and adjust based on your desired finish and strength targets. Remember, aggregates should be clean, angular, and well-graded for optimal results.
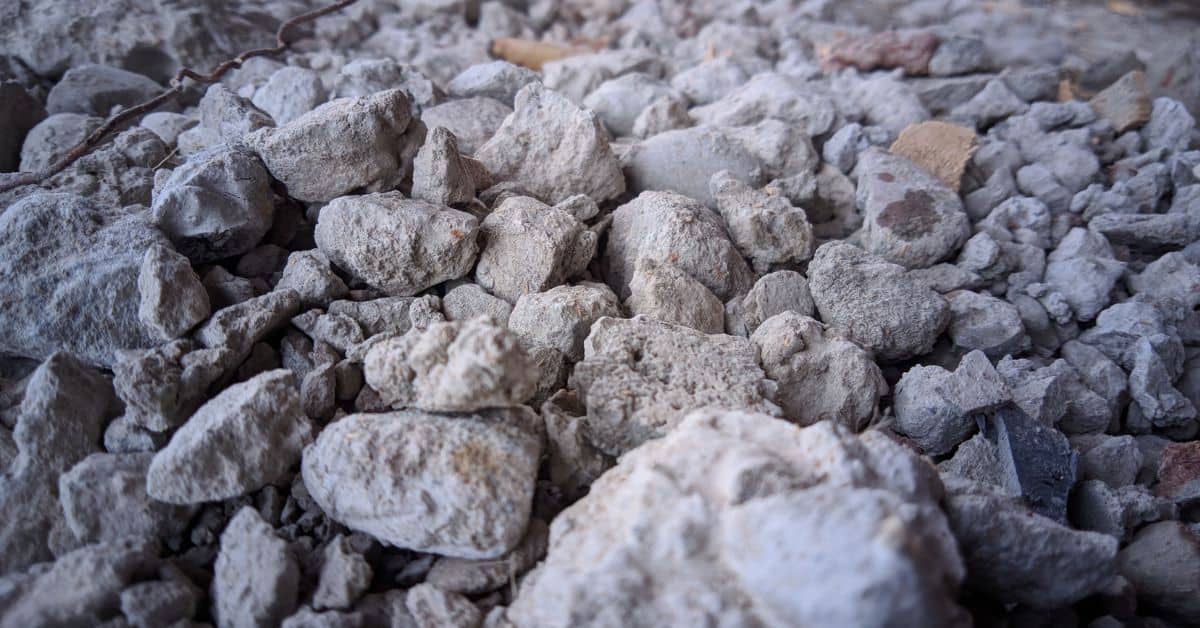
Aggregate Size Selection and Grading Principles
Choose maximum aggregate size with the slab thickness and desired surface look in mind: larger particles can reduce paste demand and increase strength but risk telegraphing and voids in thin sections, while finer blends smooth the surface and help polishing. Verify supplier grading curves to confirm the mix will work for your thickness and intended exposed‑aggregate effect.
A well-graded blend with a balance of fines, mid-range, and coarse fractions improves density, reduces voids, and helps control shrinkage and finishing behavior. During trial pours watch for segregation, check for spot-voids at the surface, and adjust grading or paste content until you consistently get the finishability and aggregate exposure appropriate for your design.
Maximum Aggregate Size Versus Slab Thickness
The max aggregate size should relate to your countertop’s thickness. A rule of thumb: the ratio shouldn’t exceed 1:4.
Why? Oversized aggregates can cause honeycombing in thin slabs, leading to weak spots and finish problems.
For instance, if your slab is 2″ thick, use max #8 (9.5mm) or smaller aggregate. For 3″ slabs, consider up to #4 (19mm).
Grading Curves and Blend Strategies
A well-graded blend combines fines, mid-range, and coarse fractions. This improves packing density, reducing paste demand.
Think of it like a puzzle: each size fills gaps left by others. More efficient use of materials means stronger, less porous concrete.
For countertops, aim for a grading curve with 40-50% fines (passing #200 sieve), 30-40% mid-range (#8 to #16), and 10-20% coarse (#4 to #8).
Decorative Inclusions and Placement
Glass, marble chips, or recycled aggregates can add visual appeal. But placement matters.
For a consistent look, spread them evenly before casting. To control placement, add them just after mixing, then pour and vibrate the concrete to settle them where you want.
Be mindful of reinforcement: avoid placing decorative elements directly over it. Also, ensure they’re fully embedded in the slab for durability.
Fiber Reinforcement Types and Dosing Guidance
Compare fiber types by how they control cracking and affect toughness: polypropylene and acrylic are commonly used for shrinkage/crack control with minimal visual impact, steel fibers add post-crack load capacity, and glass fibers have specific durability considerations—always check manufacturer guidance and MSDS for compatibility. Match fiber choice to your project’s priorities (early-age crack control, impact resistance, or polishability) rather than assuming one fiber fits all jobs.
Follow a practical approach to dosing and placement: use supplier dosing ranges as starting guidance, mix fibers in the order recommended, and run small batches to verify dispersion and surface behavior. Pay attention to fiber length and orientation, avoid clumping by proper mixing sequence and times, and confirm surface compatibility with final finishing and sealing products before full-scale pours.
Pros and cons of common fiber types
The choice between polypropylene, acrylic, steel, and glass fibers depends on your project’s needs. Each has its strengths and weaknesses.
Pros
- Polypropylene: Cost-effective, improves impact resistance, prevents early-age cracking.
- Acrylic: Enhances toughness, reduces long-term cracking, good for heavy-use areas.
- Steel: High strength, excellent for high-impact zones like around sinks or stovetops. Corrosion-resistant options available.
- Glass: Improves flexural strength, reduces hairline cracks, good for thin slabs and large spans.
Cons
- Polypropylene: Reduces long-term durability, may not be suitable for wet areas or heavy use.
- Acrylic: More expensive, can affect workability if overdosed.
- Steel: Corrosion risk, requires careful handling and compatible admixtures. May affect polishing outcomes.
- Glass: Higher cost, may cause slight reduction in compressive strength, can be more difficult to handle.
Choose based on your project’s needs – polypropylene for budget-conscious DIYers, acrylic or steel for heavy-use areas, glass for thin slabs and large spans.
Fiber dosage, dispersion, and mixing tips
Uniform fiber distribution is key to effective reinforcement. Follow these steps:
Dosing: Check manufacturer data for exact dosages. Generally, 0.5-1% by volume (or 2-4 lbs per cubic yard) of fibers is sufficient.
Dispersion: Add fibers gradually while mixing concrete to ensure even distribution. Avoid clumping by keeping the mixer’s speed consistent and not overloading it.
Mixing: For hand-placed countertops, mix fibers in a small batch at a time. For pumped concrete, pre-wet fibers before adding them to the mix to prevent air pockets. Always follow manufacturer guidelines for mixing times and methods.
Structural Reinforcement Layout and Placement Strategies
Assess reinforcement options—welded wire mesh, discrete bars or straps, FRP, and small rebar patterns—based on your countertop thickness and overhangs, noting that each has different handling, anchoring, and cover requirements. Review reinforcement supplier or design guidance for spacing and embedment depth instead of relying on a fixed rule of thumb.
Position reinforcement to stay within cover tolerances in shallow forms, use chairs or spacers to prevent sagging during the pour, and tie or secure discrete elements so they don’t float. For cantilevers and thin sections plan for adequate development and anchorage, integrate fibers to reduce cracking risk, and run a quick pre-pour checklist to inspect cover, ties, and embed alignment before placing concrete.
Choosing mesh, rebar, or FRP
When it comes to reinforcing your concrete countertops, you’ve got options. Let’s break down three common choices: welded wire mesh, rebar/strap, and fiber-reinforced polymer (FRP).
Welded Wire Mesh: This is like a grid of steel wires, easy to install, and great for thin slabs. It distributes stress evenly but can be more visible if your countertop is thin.
Rebar/Strap: These are steel bars or straps that you place individually. They’re strong, versatile, and good for thicker counters or supporting overhangs. But they take more time to install.
FRP: This is a non-metallic reinforcement made from fibers like glass or carbon. It’s corrosion-resistant, lightweight, and can be used in thin slabs without showing through. But it’s usually pricier than steel.
Placement strategies for thin slabs and cantilevers
Reinforcing thin concrete countertops and overhangs requires some strategic planning. Here are key placement principles to keep in mind.
Keep reinforcement near the tensile face: This is where the stress is highest, usually on the bottom of your slab. Place your mesh or bars here for maximum effect.
Support overhangs internally: For cantilevered sections, use internal supports like steel angles or brackets to prevent sagging and cracking at the overhang’s end.
Avoid thermal/curl stresses: Concrete can curl due to temperature changes. To minimize this, keep your reinforcement near the middle of the slab’s thickness, and use a consistent mix design throughout.
Mixing, Pouring, Finishing, Curing — Plus Safety Precautions
Follow a consistent batch sequence: add aggregates and cement, mix to a uniform dry blend, then add water and admixtures per the product instructions while observing workability windows during trial mixes. Use the right equipment for the batch size, keep tools clean, and time mixing so consolidation and finishing happen within the proper window called out by the admixture or cement data sheet.
Consolidate to remove air, perform finishing steps from initial strike-off through troweling and edge detailing, then select a curing approach (plastic, misting, curing compound) suited to your environment and the materials’ instructions to prevent rapid moisture loss. Always control dust and skin contact: wear respirator, gloves, and eye protection, ensure ventilation, follow MSDS directions for admixtures and fibers, and clean spills promptly to reduce health risks.
Mixing and Pouring Workflow
Start by wetting your aggregate. This helps prevent dust and improves workability. Add cement, then water, and finally any admixtures. Mix for a few minutes to ensure uniform dispersion.
Timing is key: Add fibers last, mixing just enough to disperse them evenly. Pour immediately after mixing to avoid segregation.
Pour the mix into your forms, using a vibrator to consolidate and release air bubbles. Work from one end of the form to the other, ensuring even distribution.
Finishing and Curing Methods
After pouring, use a trowel to level and smooth the surface. Let it sit for about 15-20 minutes, then perform a rough grind to remove any excess material.
Curing is crucial: Apply a curing compound or cover with plastic sheeting immediately after finishing. Keep the slab moist and out of direct sunlight for at least 7 days to allow proper curing.
After initial curing, you can apply a sealer to protect your countertop’s surface. Always follow manufacturer guidelines for application and drying times.
Safety, PPE, and Dust Control
Wear a respirator to protect against silica dust. Use gloves for handling cementitious materials and chemicals. Wear safety glasses or goggles to protect your eyes.
Ventilate your workspace to control dust. Keep your work area clean, sweeping up any spills immediately.
When handling admixtures and sealers, follow the manufacturer’s guidelines for safe handling and storage. Always dispose of materials responsibly, following local regulations.
Cost Comparison, Sourcing, and DIY Budget Tips
Compare cost drivers for preblended bag mixes, custom batch mixes, and GFRC by accounting for material unit cost, labor and skill required, tooling, and waste; each route shifts where expense and effort land on the project. Get exact price and lead‑time information from local suppliers or manufacturer quotes rather than assuming relative costs from other jobs.
Trim expenses by buying materials in sensible quantities, testing small samples before committing, and reusing or adapting formwork and tools where practical. Build a simple budget framework that separates material, tooling, labor, and contingency, prioritize performance items that affect durability, and shop regional suppliers or bulk options while verifying product datasheets for compatibility before purchase.
Preblended mixes vs custom batching
Preblended bag mixes offer convenience – just grab and go. But they’re pricier, with less control over mix design.
Custom batching, on the other hand, lets you fine-tune your mix for specific needs. It’s cheaper but requires more planning and effort.
Preblended mixes ensure consistency, while custom batches let you experiment. Weigh your time vs. cost trade-offs.
Sourcing aggregates, fibers, and admixtures
Start local – check nearby suppliers for aggregates. Verify specs match your needs before buying in bulk.
For fibers, consider regional or online suppliers. Buy sample quantities first to trial mix performance.
Admixtures can be sourced from chemical supply houses or concrete distributors. Again, buy samples to test before committing to large orders.
Tools, Formwork, and Planning Checklist for DIY Pours
Create a checklist that ties tools and formwork directly to the pour outcome: verify you have the right mixer, paddles, trowels, floats, screeds, and safety gear, and stage them so mixing and finishing flow without delays that can harm finish quality. Confirm specific tool sizes and capacities against the batch volumes you plan to mix and the manufacturer guidance for any admixtures or fibers.
Design and build forms to provide consistent cover, straight edges, and clean demolding—select form material and release agents suitable for your finish and plan for embeds, sinks, and conduits before casting. Prep the workspace—a level pour area, moisture barrier, power and water access, and dust control—and run through a step-by-step sequence from form assembly, reinforcement placement, and sink setting to final cure with sign-offs at each stage.
Tools and materials checklist
Before you start, ensure you have all the necessary tools and consumables for a successful DIY concrete countertop pour.
- Mixing: Wheelbarrow or bucket mixer, paddles
- Measuring: Level, tape measure, screed
- Finishing: Trowels, floats, rubber mallet
- Safety gear: Respirator, gloves, eye protection, knee pads
- Utility: Small utility knife, zip ties
- Vibration/compaction: Vibrating screed or poker (optional but recommended)
- Grinding/polishing: Diamond blades, polishing pads (for final finish)
- Chiseling: Chisel set (for edge detailing)
Quick rule: Missing tools can lead to improper mixing, finishing, or safety issues. Double-check your list before starting.
Formwork, embeds, and layout planning
Before you mix concrete, plan and prepare your formwork, embeds, and reinforcement layout to ensure a smooth pour.
- Form material: Choose plywood, melamine, or disposable forms; ensure they’re clean, flat, and free of defects
- Edge forms: Use straight, rigid edge forms for consistent countertop edges
- Corner bracing: Secure corners with braces to prevent form movement during pours
- Release agents: Apply release agents to prevent concrete from sticking to forms
- Sealants: Seal any gaps or joints in forms to prevent leaks and ensure consistent countertop surfaces
- Sink/embed layout: Pre-measure and mark sink cutouts, conduit passes, and embedded pieces on formwork
- Reinforcement layout: Plan wire mesh, fibers, or rebar placement; ensure proper spacing and alignment
- Vibration/compaction: Plan for vibration and compaction needs to avoid voids in your countertop
Quick rule: Poor formwork planning can result in leaks, inconsistent surfaces, or reinforcement misplacement. Take time to plan and prepare.
Conclusion
Finish with confidence by sticking to proven proportions, correct aggregate size, and proper reinforcement while keeping safety front and center. The work will pay off in durability, clean appearance, and fewer costly fixes.
Walk the plan in one smooth check: confirm your target proportions match your design constraints, verify the aggregate size grading for your form, ensure the chosen fiber or reinforcement layout is placed correctly, mix and pour in controlled steps, and finish and cure with proper timing and protection. Do a quick on-site read of the plan, confirm formwork is secure, confirm ventilation and lifting tools are ready, and confirm you have the right safety gear before you begin any stage.
Common mistakes to avoid are skipping tests on a small trial batch, ignoring curing time or moisture control, and rushing placement or finishing. Avoid these by validating mix targets with a small sample, maintaining consistent moisture during curing, and following the reinforcement layout exactly as planned. Prioritize safety and never compromise form integrity or edge detailing to save time.
If the project scale or access, or the required structural behavior feels uncertain, don’t push past what you know. When in doubt about load paths, form stability, or long-term performance, call in a professional. With careful planning and careful execution, you’ll finish strong and move on to the next job with confidence.
FAQ
What aggregate size should I use for a durable concrete countertop, and how does it affect finishability?
Smaller aggregates finish smoother and stain less, but you’ll need finer grading so it compacts evenly. Check the bag or supplier grading, and pick an aggregate that balances workability with a fine surface. If you’re unsure, ask for recommendations from the supplier and verify with the manufacturer’s instructions.
Which fiber types work best in DIY countertop mixes, and how much should I use?
Fibers help reduce cracking and improve toughness. Common DIY-friendly options include macro or micro fibers, but follow the product label for dosing guidance. If you’re unsure, check the manufacturer instructions and local rules to choose a fiber type and amount that matches your mix and formwork.
How should I lay out reinforcement for a countertop to maximize durability?
Place any reinforcement where it won’t be visible on the finished face and where it can do the most good against bending. Keep it at mid-depth of the slab and avoid crowding at edges or joints. If unsure, follow the reinforcement layout guidance on the product label or consult the manufacturer’s instructions.
What finish options are available, and how do they impact appearance and maintenance?
Different finishes range from plain exposed aggregate to sealed, glossy, or matte surfaces. Each finish changes texture and how easy it is to clean. Check the finish product specs and test a small area first to see how it looks once cured and sealed. If in doubt, ask for a sample or a manufacturer’s finish guide.