
Table of Contents
- What is recycled glass aggregate (cullet) and common sizes
- Health concerns: sharpness, cuts, and handling
- Inhalation risks and silica considerations
- Safe preparation and processing of recycled glass
- DIY crushing and safety protocols
- Sourcing recycled glass: municipal programs and suppliers
- Applications suitable for decorative recycled glass
- Installation best practices to minimize safety risks
- Binder and stabilization options (resin, polymer, sand mixes)
- Maintenance and long-term performance
- Environmental benefits and lifecycle impacts
- Cost comparison and budgeting
- Regulations, standards, and testing
- Liability, contractor disclosure, and warranties
- Common installation mistakes and remedies
- Visual and aesthetic guidance
- Testing, monitoring, and long-term health risk mitigation
- Case studies and real-world examples
- Quick start checklist for homeowners and contractors
- Further resources and where to get help
Introduction
Recycled glass can be used as decorative aggregate safely when proper handling and safety precautions are followed.
You’ll learn how to assess materials, mitigate sharp edges, and plan mixes or installations that reduce risks in indoor and outdoor settings.
The guide walks through practical tips, common pitfalls, and general guidelines to help you apply decorative glass aggregates with confidence.
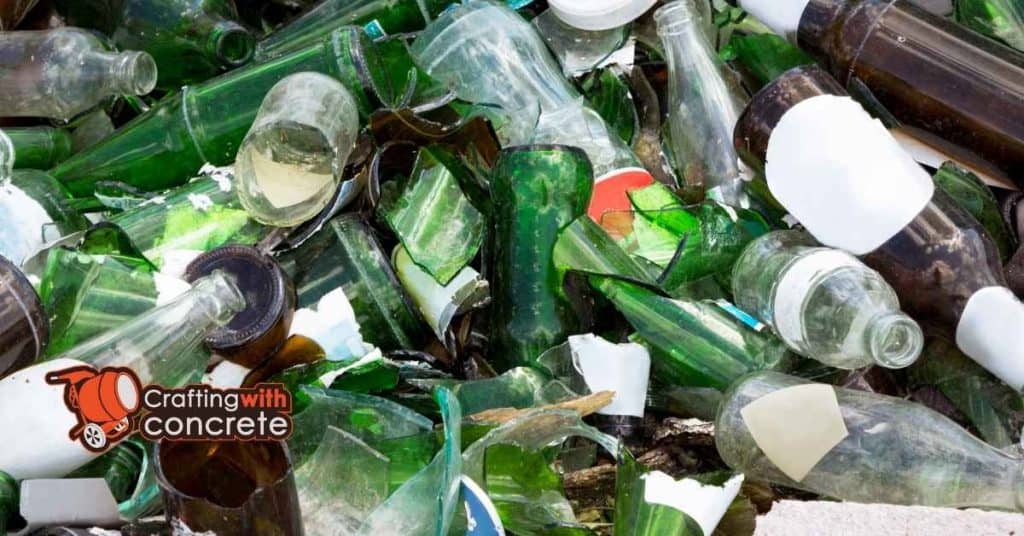
What is recycled glass aggregate (cullet) and common sizes
Cullet is recycled broken glass that may be processed into various sizes, while glass sand refers to finer, sand‑grade particles and decorative glass gravel covers larger, gravel‑sized chips; suppliers label these materials as cullet, glass sand, and decorative glass gravel, with typical ranges such as cullet and chips from roughly 2–8 mm (about 1/8–5/16 in), glass sand about 0.3–2 mm (roughly 0.01–0.08 in), and decorative gravel from 6–19 mm (1/4–3/4 in). These sizes are named and measured differently by suppliers, so expect listings to use metric or imperial equivalents along with descriptive terms like “fines,” “grit,” or “gravel.”
The size you choose affects appearance and performance: smaller grains blend more color evenly and reflect light differently, while larger pieces create sparkle, surface texture, and noticeable coverage that influences lighting in ambients and transparency in wet conditions. Size also drives compaction, drainage, and suitability for pathways, planters, xeriscaping, or bedding for pavers, so match the material to whether you need permeability and load support. For DIY and jobsite use, verify exact sizes and tolerances, confirm wash/clean labeling, and ensure the material fits your intended use, since mixed sizes and color variations can change both look and performance.
Terminology: cullet, glass sand, frit, and glass gravel
When you call suppliers, they’ll throw these words around. Cullet is the catch-all term for recycled broken glass. Expect them to then split that into finer products like glass sand or coarser products like glass gravel. Don’t let names confuse you — ask for the actual size or sieve number they sell.
Glass sand is the fine stuff used for pavers, sandblasting, or mixing into concrete. Frit is a processed glass powder used in glazes and coatings; it’s finer and often chemically treated. Glass gravel is the chunky, decorative or drainage-grade material you’d use in landscaping or as an aggregate substitute.
When sourcing, tell the supplier the job, the size range you need, and to check for contaminants — ceramics, metals, or green glass can wreck your mix. If they can’t give a gradation sheet or a simple size range, walk away. Get a sample before you buy a truckload.
Particle size chart and visual effects
Think of cullet like masonry aggregate: the size you pick changes how it looks and behaves. Very fine glass sand (about 0.1–0.5 mm / 0.004–0.02″) reads like colored dust — great for filling joints or creating a smooth, reflective finish, but it compacts and can wash away if you don’t check base compaction. Fine to coarse sand (0.5–2 mm / 0.02–0.08″) gives a satin, almost velvety surface that’s good between pavers or for subtle color blends.
Pea-size and small gravel (2–8 mm / 0.08–0.3″) reads like uniform ‘crushed glass’ — it sparkles, drains well, and resists migration. Use this for pathways and mulch replacements where you want sparkle without large bite-like chunks. Medium gravel (8–16 mm / 0.3–0.6″) gives a chunkier, decorative look that stands out from a distance; it’s heavier so it won’t shift as easily but can be hard on bare feet.
Larger pieces (16–40 mm / 0.6–1.6″) make bold accents or edging stones. They create contrast and show color from afar, but they’re not practical for walking surfaces. Whatever size you choose, check drainage, think about foot traffic, and don’t expect tiny glass particles to behave like organic mulch — they stay put only with a proper edge and compacted base.
Health concerns: sharpness, cuts, and handling
Crushed glass can present sharp edges, and risk depends on particle size, edge geometry, cleanliness, moisture, and whether surface coatings or glazing alter the texture of the fragments, so a simple blanket assessment is unreliable. In general, smaller, angular grains cut more easily and can penetrate skin, while smoother or well‑washed pieces are less aggressive, but even seemingly dull fragments can cause punctures if enough force is applied or if the material is dry and dusty. To minimize risk, perform a careful pre‑use inspection, wear protective PPE such as durable gloves, long sleeves, and eye protection, handle with non‑contact tools when possible, and pause work if you feel obvious jagged edges or if moisture or unknown contaminants are present.
Practical handling requires thoughtful storage, controlled pouring methods, spill containment, and separate containers for crushed glass versus other aggregates to reduce cross‑contamination and accidental contact, especially on DIY concrete projects. Follow standard safety guidelines and local regulations, and tailor precautions for children, pets, and public spaces, since injuries on home sites can have consequences beyond the project scope and increase cleanup time. Understanding these factors helps DIYers work more efficiently, select appropriate aggregate for the task, minimize exposure to sharp edges, and maintain a safer jobsite even when mixing, pouring, or setting decorative concrete in everyday environments.
Why crushed glass is usually not razor-sharp
Commercial crushing is a violent process, but it tends to make particles chip and then round off after repeated impacts. The result is a mix of angular bits and lots of worn faces. Studies that compare crushed glass to natural sand show the overall roundness is often similar once you look at the small fractions most people use around the house.
For practical work, the tiny grains are the least likely to cause serious cuts. Large flakes or shards are the real danger, and reputable suppliers screen those out. If you’re using glass for paths or mulch, focus on the product grading and where it’s intended to be used rather than assuming “glass equals razor blades.”
Do a quick field check before you buy or install: look for obvious large shards, run your gloved hand through a sample, and see how it compacts under foot (or a plate tamper). If you find many big jagged pieces, walk away or ask the seller for a finer grade. And wear shoes and gloves—don’t test sharpness with bare skin.
First-aid and handling best practices
If you get cut, stop the bleeding with firm pressure, rinse with clean water, remove obvious glass shards with tweezers if you can see them, then cover the wound. For deep cuts or anything that keeps bleeding, get stitches—don’t try to tough it out. Puncture wounds can hide glass and dirt; consider a tetanus shot if your vaccination isn’t up to date.
Always handle material with the right gear. Wear cut-resistant gloves, heavy-duty boots (preferably steel-toe or puncture-resistant soles), eye protection and long sleeves. Use shovels, scoops, wheelbarrows or tarps to move material. Don’t pick through it with bare hands or let kids and pets wander through the area.
Keep the site tidy and set simple controls: sweep frequently, cordon off hazardous spots, and keep a stocked first-aid kit and antiseptic nearby. Drop broken pieces straight into a rigid container or puncture-proof bag and label it. You can trust that crushed glass isn’t usually razor-sharp, but that’s not an excuse to skip basic protection and proper handling.
Inhalation risks and silica considerations
Crystalline silica is a chemically stable, highly ordered form that occurs naturally and in many industrial materials, and it poses greater inhalation hazards than amorphous silica, which is disordered and generally less reactive. Glass-based decorative aggregates are predominantly amorphous silica, formed when high-temperature melts cool rapidly, a fact that shapes how dust behaves in DIY tasks like grinding, sanding, cutting, and weathering. Respirable dust, defined as particles about 10 microns or smaller that can reach deep into the lungs, becomes a hazard when these tiny fragments are generated in project activities.
Common exposure pathways include pouring, mixing, surface finishing, and dry weathering that create fine dust clouds, with symptoms such as coughing, throat or eye irritation, or shortness of breath signaling that dust is reaching hazardous levels. Practical controls rely on wet methods, local exhaust ventilation, and properly rated masks or respirators (for example, respirators with suitable particulate filters), along with general PPE, storage, and housekeeping to minimize dust generation. For large quantities, ongoing ventilation concerns, or if you suspect elevated exposure, seek professional testing or guidance and use tailored risk assessments to plan safer work and dust-control measures.
When to test for crystalline silica content
If you’re doing work that kicks up a lot of dust—sandblasting, abrasive cleaning, cutting or grinding engineered stone, large demolition, or industrial processing—assume the material could contain respirable crystalline silica and send samples to a certified lab. For small, one-off home jobs with known materials (standard concrete, basic brick) you usually don’t need lab confirmation, but if the material is unfamiliar or from unknown sources, test it before you crank up power tools.
Collect a representative sample of at least 1 kg (2 lb) for basic screening or 2–5 kg if you plan multiple tests. Use clean tools, put the sample into a sealed, labeled container, and complete a chain-of-custody form (supplier/lab will provide one). Note where and how the sample was taken and keep a dated photo. Typical turnaround for XRD/IR silica or TCLP is 5–10 business days; expedited services cost more. Expect lab costs roughly $150–$400 per test depending on complexity and region.
Typical, reliable methods are XRD or IR testing (look for NIOSH/OSHA method references like NIOSH 7500 or 7602). Labs may also use XRF for quick screening, but XRD/IR gives the accurate crystalline silica percentage you need to plan controls. If results show significant silica, plan engineering controls, respiratory protection, or change the method before work starts.
Recommended exposure limits and monitoring
Keep it simple: the regulatory ceiling for respirable crystalline silica is around 50 µg/m³ (0.05 mg/m³) as an 8‑hour TWA. OSHA also uses an action level at about 25 µg/m³ — hit that and you need to start exposure assessments and recordkeeping. NIOSH mirrors the low-limit approach and recommends keeping exposures below those numbers whenever possible.
For small jobs, don’t overcomplicate sampling. If you’re doing a few hours of cutting or grinding, assume risk and use controls first: wet methods, local exhaust, HEPA vacs, and limit the number of people near the task. If you need numbers, get a competent industrial hygienist or contractor to do full-shift or short‑task air sampling with proper pumps and filters. A direct‑reading dust monitor can flag big problems but won’t replace a formal sample for compliance.
If monitoring shows levels above the action level or PEL, stop and tighten controls or put on certified respirators and document the plan. If you never test, treat the work as if it could exceed limits — that’s the safest and easiest rule on small projects. Ask for paperwork from any pro you hire so you know they tested and followed the limits.
Safe preparation and processing of recycled glass
Safe preparation and processing of recycled glass centers on a clear, stepwise workflow: sorting by glass type (clear, colored, coated), removing metal, ceramics, and plastics to reduce hazards; thorough decontamination through washing and rinsing protocols; followed by crushing and screening with dust suppression, noise controls, and defined screen mesh sizes for a consistent decorative aggregate, plus final washing to meet quality targets. The process emphasizes safety controls at every stage, including equipment setup, containment, and documented checks to ensure correct gradation and absence of contaminants. Handling, storage, and transport safety, along with PPE requirements and spill/dust control procedures, are integral to the workflow.
For a DIY or jobsite reader, this matters because cleaner, properly graded material lowers injury risk and improves the appearance and usability of recycled glass products. Knowing the sequence helps you plan equipment, protect workers, and meet basic quality and safety checks without specialized resources. You’ll also understand why ongoing tests for sharpness, leachate considerations, and traceability matter for recycling program compliance and for achieving reliable, safe end products in both decorative and construction applications.
Removing contaminants and mixed materials
Picking the right tools, cleaners and filters makes the difference between a clean recycled glass batch and a batch that cracks, stains or looks muddy. Choose equipment and chemicals with specs aimed at the contaminant you’re removing — cheap guesses come back as blemishes or weak bonds later.
- Heavy-duty magnet — Use a strong neodymium magnet to pull steel and iron out of crushed glass. Look for pull force 10–30 lb on the label; the stronger the better for embedded nails and screws. Cheap fridge magnets won’t do; expect $10–30 and don’t skip it or you’ll get rust stains and poor adhesion in the finished product.
- Eddy-current or non-ferrous separator — This device throws aluminum and other non-ferrous metals away from the glass stream. For DIY, rent a small portable unit or hire a recycler; specs show RPM and belt width. Renting runs ~$150–$300/day but skipping it means flaky metal pieces that can show through or corrode over time.
- Vibratory/mesh screens — Screens separate size fractions and trap ceramics and large contaminants. Look for stainless steel mesh with the aperture size matching your finished aggregate (e.g., 3–6 mm). Handheld or box screens are $20–$150; use finer mesh for countertops, coarser for aggregate — wrong mesh lets ceramics survive and scratch or weaken the product.
- Pressure washer + degreaser — High-pressure rinsing with a commercial degreaser removes oils, labels and sticky organics. Choose a pressure washer rated 2,000–3,000 PSI and a biodegradable degreaser labeled safe for glass. Renters’ units cost $40–$100/day; using only low-pressure rinses leaves organic residues that cause staining and poor bonding with resins or cement.
- Oxalic acid or rust remover — Use oxalic-acid-based cleaners (powder or liquid) to remove iron stains from glass. Look for product concentration and follow dilution instructions; oxalic handles rust better and is less aggressive than muriatic acid. A small tub costs $10–25; never pour undiluted and wear gloves — using no rust treatment leaves brown streaks and weakens surface finish.
- Diamond wet saw blade — For trimming out ceramics or stubborn inclusions, a wet saw with a diamond blade clean-cuts glass and ceramics without shattering. Match blade size to your saw and choose wet-cut rated diamonds for glass. Blades run $30–100; rent the saw (~$50/day) if you don’t own one — trying to chip out pieces with hammers causes micro-cracks and safety hazards.
- PPE and respirator — NIOSH-rated N95 or P100 respirators, safety goggles, and cut-resistant gloves are non-negotiable when sorting and washing recycled glass. Look for NIOSH approval labels and ANSI-rated gloves. Expect $20–80 for decent PPE; skipping it risks lung damage from silica dust and cuts from sharp glass that can ruin the job and your health.
Pro tip: Buy bulk cleaners and screens from masonry or recycling suppliers and store dry materials off the ground in sealed bags. Mix chemicals to the labeled dilution, label your containers, and run a small test batch after cleaning so you catch leftover contaminants before you commit to the whole project.
Washing and drying protocols
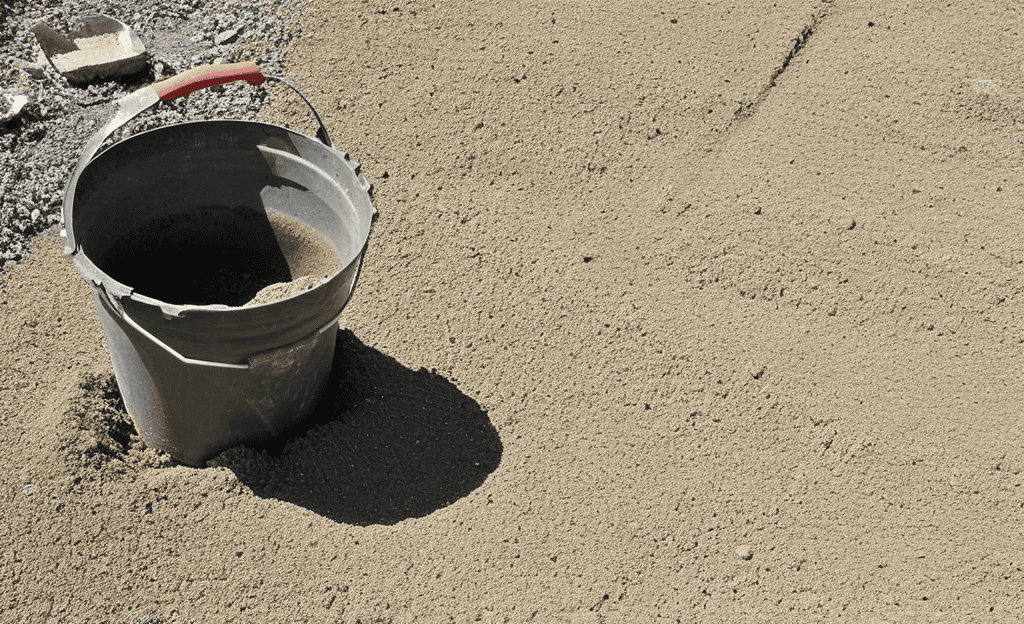
Give the glass a quick wash to get rid of grit, dust and clay — that stuff will mess with bonding and finish. A garden hose with a spray nozzle and a coarse-bristled brush or simple agitation in a tub does the job. If you’re using lots of material, run it through flowing water over a screen so fines wash away; you don’t need fancy equipment for small DIY batches.
After washing, spread the glass thin on a raised mesh or pallet so water drains and air can circulate. Direct sun and a breeze will dry it fastest. Avoid piling wet glass on bare soil or in deep heaps; trapped moisture leads to staining and can encourage organic growth. Store dry and covered once it’s ready.
Before use, check moisture by grabbing a handful — it should be loose and free-draining, not clumping. If you already handled contaminant removal earlier, treat washing as the final cleanup step. Don’t skip drying or stash wet material in a garage; you’ll regret the extra cleanup later.
DIY crushing and safety protocols
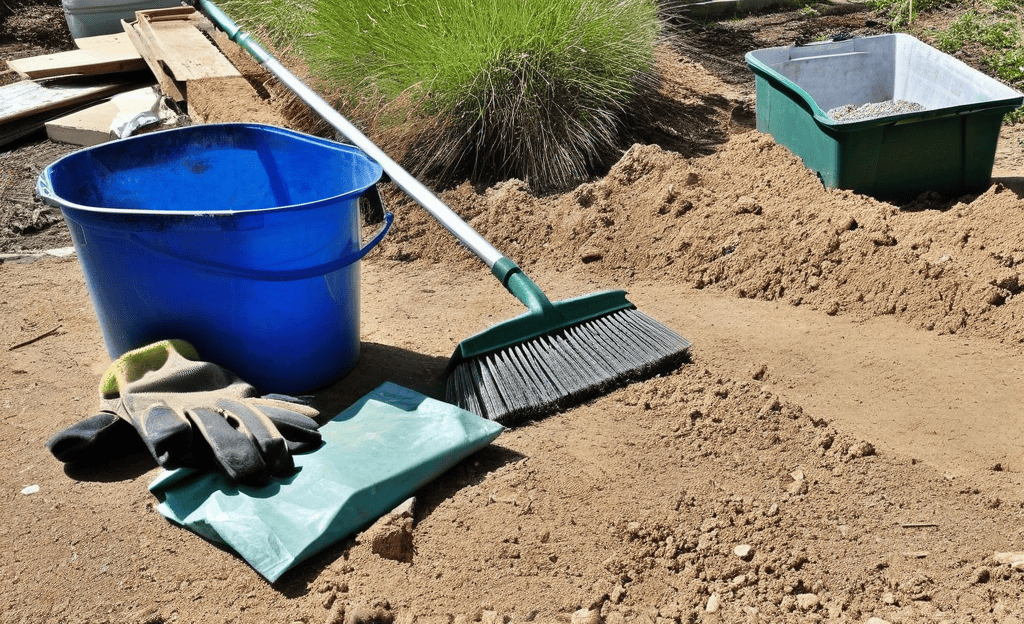
DIY crushing for decorative glass should be limited to small, non-hazardous batches and Glass that isn’t tempered or laminated; avoid industrial-scale efforts and never attempt to crush unsafe materials. Follow a clear, step-by-step safety protocol that covers selecting appropriate tools, using PPE such as eye protection, a respirator or effective dust mask, chemical-resistant gloves, long sleeves, and sturdy footwear, plus a marked safety zone and no-children rule in the work area.
Prep in a well-ventilated outdoor or workshop space with a containment mat or tarp to catch shards, dampening material to reduce dust, and a clean-up plan that includes sealing containers for crushed material. Tools should include permitted options like a manual chipping hammer, a hand crusher accessory, or a small hobbyist rock crusher with guards, while prohibitions cover angle grinders without dust collection, blasting methods, improvised devices that eject shards, and any tempered glass. After crushing, inspect for sharp edges, rinse to remove fines, store in labeled containers away from children, and test the decorative mix for safety before use in garden or concrete projects.
Recommended PPE and dust control for DIYers
Wear the right gear before you touch the crusher. Use a NIOSH-certified respirator (task-based) — N95 for brief, low-dust work under 2 hours; P100 (or elastomeric respirator with P100 filters) for sustained dusty tasks (>2 hours) or when silica is suspected; for resin work, add an organic-vapor cartridge plus a P100 particulate filter. Fit-test tight-fitting respirators annually and perform a user seal check each time you put one on. Use impact-rated eye protection or sealed goggles, durable cut-resistant gloves, hearing protection for loud tools, and sturdy boots. Don’t skimp on fit—if the mask leaks, it’s almost useless.
Control dust at the source. Keep material damp and use a steady mist while breaking or feeding the crusher. For small jobs, a garden sprayer works fine. For cleaner results, run a portable vacuum with a HEPA-rated filter near the work point to capture airborne dust. If crushing indoors or in an enclosure, use local exhaust capable of at least 300–500 CFM for a small hobby setup or hire a professional dust collection system—do not rely on general room ventilation.
Keep people and pets well away and work upwind. Use simple barriers or tarps to reduce drift. If you need more on overall procedures and site setup, refer back to the main DIY crushing and safety protocols — follow those steps, and don’t cut corners. Bad ventilation or no respirator is where most DIYers get into trouble.
DIY crushing SOP (small batches)
- Batch size: limit runs to 25–50 kg (50–110 lb) per feed cycle for hobbyist crushers; larger continuous loads increase dust and wear equipment.
- Feed practice: keep feed height low (<150 mm / ~6 in) and feed slowly to avoid ejecting shards; follow manufacturer max feed size for your crusher.
- Tool RPM and guards: use equipment at manufacturer-recommended RPM; never exceed recommended speeds. Ensure fixed guards are in place and stay clear of discharge areas.
- Dust suppression: mist material continuously while crushing; run a HEPA vacuum intake within 1 m of the crusher’s feed point if available.
- Noise and time limits: use hearing protection if noise exceeds 85 dB(A); limit individual operator shifts to avoid fatigue and mistakes.
- Cleanup: wet-sweep or HEPA-vacuum all surfaces after work; transfer crushed material into rigid, labeled containers and seal them.
- Disallowed: do not crush laminated, tempered, or coated safety glass; do not use open-flame heat, blasting, or uncontrolled grinders for crushing.
Legal and neighbor considerations for at-home crushing
Before you touch a hammer, check local ordinances for noise, hours of operation, and any zoning rules that limit crushing or demolition work. Many cities and counties restrict loud activities to certain hours and require permits for even small-scale material processing. If you rent a crusher or use heavy equipment, the permit rules can change, so call your planning or code enforcement office and get a clear answer.
Find out where the crushed material can go. Some transfer stations and recycling centers accept clean crushed glass or concrete. Others treat it as construction and demolition waste and charge a fee. Ask about quantity limits, contamination rules, and whether they will accept mixed material. Keep receipts or a weigh ticket as proof of proper disposal in case the county follows up.
Talk to your neighbors before you start. A quick heads-up about timing, noise, and truck traffic avoids complaints and potential noise citations. Keep the work contained on your property, control dust (see PPE and dust control), and don’t block public rights-of-way or sidewalks. If you’re unsure about liability or bigger loads, check your homeowner insurance and consider a short-term permit or notification to limit risk.
Sourcing recycled glass: municipal programs and suppliers
Sourcing recycled glass means identifying reliable local cullet suppliers through municipal glass programs, transfer stations, dedicated glass drop-off centers, curbside recycling streams, and glass-only facilities. Look for the hours, service area, and whether you’ll access container glass or processed cullet, plus common program terms and straightforward contact points you can reach for quotes or clarifications. Plan to compile a short list of options and verify each one’s eligibility for your project before committing.
For DIY projects, understanding quality criteria helps avoid costly contamination and inconsistent supply. Target clear, green, amber streams or labeled mixed cullet, specify particle sizes from sand-sized to aggregate-grade, and request recent batch samples along with mill certificates or lab reports before placing an order; confirm contamination thresholds and documented tests or certifications. Consider proximity to reduce transport costs, understand minimums and lead times, and confirm receiving requirements, storage considerations, and safety documentation to keep material clean and usable on site.
Questions to ask suppliers
Start blunt: ask what exactly you’re getting. Request the concrete numbers for particle sizes (sieve or gradation), the percentage of fines and oversized pieces, and acceptable moisture content. If they can’t or won’t give you a gradation curve, walk away — you’ll end up with a jobsite full of surprises.
Confirm cleanliness and contaminants. Ask where the glass is sourced, whether it’s sorted or single-stream, and what screening or washing it goes through. Demand a statement on heavy metals and stray ceramics, and ask for photos or a small sample before purchase. Cheap, unclean glass means extra work and sometimes rejects from your mix designer.
Get paperwork and specs: request the supplier’s QA testing, a Materials Safety Data Sheet (MSDS), declared % recycled content, and any compatibility notes for binders or sealers. Also clarify delivery tolerances, packaging, storage recommendations, and return policy for off-spec loads. If they hesitate on these, consider another supplier.
Free vs. commercial-grade material: tradeoffs
Free municipal glass can save money but often varies in size, cleanliness, and chemistry. Commercial, bagged products give predictable specs and finish. Choose materials to match your aesthetic and structural needs — wrong choices lead to staining, weak bonds, or cracks down the line.
- Recycled glass aggregate Used as the visible finish or mixed into concrete. Look for gradation or mesh size on the bag (coarse 3–8 mm for pavers, fines <1 mm for grout). If you grab a municipal bin with mixed fines or metal, expect staining and inconsistent color — buy screened commercial glass if appearance matters. Price: free–$50/yard screened; safety: shards need gloves and eye protection.
- Polymer-modified mortar The adhesive layer for embedding glass in thin-set or cast work. Check polymer content / “modified” label and aim for high bond strength; look for 28-day compressive strength on the bag. Use it for outdoor or load-bearing pieces; avoid plain cement if you want flexibility and long-term bond — plain mixes can pop off or crack. Price: $10–$25 per 50 lb bag; wrong choice causes delamination and water ingress.
- Masonry cement Good for bedding pavers and grout that needs some plasticity. Look for Type N (general) or Type S (higher strength) on the label. Pick Type S for driveways or heavy loads, Type N for patios and light walls; don’t use low-strength mix where frost and traffic exist — you’ll see cracking. Price: $6–$12 per 50 lb bag; durability hit if under-specced.
- Fine silica sand Used to blend with glass fines for grout or cast mixes. Look for washed, fine (0.1–0.5 mm) sand and note cleanliness—no clay or organic matter. Municipal sand often needs washing; dirty sand causes weak cures and staining. Price: $5–$15 per 50 lb bag; dirty sand reduces strength and finish quality.
- Colored epoxy grout For high-traffic or wet areas where stain resistance matters. Check chemical resistance and cure time on the label; choose UV-stable pigments for outdoor use. Use epoxy for stain-prone surfaces; avoid cheap cement grout in kitchens or around water — it’ll discolor and break down. Price: $30–$80 per kit; wrong grout leads to staining and grout loss.
- Silane/siloxane sealer Post-install sealer that repels water and salts on glass-infused surfaces. Look for silane (penetrating) vs siloxane (film-forming) and check VOC and recoat windows. Use penetrating silane for longevity; cheap surface sealers can peel or amber and trap moisture, causing freeze damage. Price: $20–$60 per gallon; wrong sealer risks spalling and staining.
- Bonding primer A thin additive or primer for slick glass surfaces before mortar. Look for “bonding” or “acrylic fortifier” and follow dilution rates on the label. Use primer when embedding large glass pieces or polished recycled glass; skip it only if adhesive maker guarantees glass compatibility — otherwise you’ll get poor adhesion and pop-offs. Price: $8–$20 per quart; poor adhesion is a safety and durability issue.
Pro tip: Buy materials that list clear specs (mesh, strength, polymer content). Store bags dry and off concrete; mix small test batches first to check color and suction. If you don’t own a grinder or screen for municipal glass, rent one — free glass often costs more in time and headaches than a few bags of screened product.
Applications suitable for decorative recycled glass
Decorative recycled glass is appropriate for a range of installations where aesthetics and drainage are priorities but heavy, concentrated wheel loads are not. Common uses include garden mulch/groundcover, decorative pathway surfacing, permeable patios (dry-laid), resin-bound decorative surfaces, and accent borders. Select materials and installation methods to match expected traffic, exposure, and maintenance capacity: fine sands and resin mixes for smooth finishes, pea-sized chips for loose-laid mulch and paths, and larger aggregates for accents or edging.
Assess each application for heat retention (glass absorbs and radiates heat), drainage requirements, slip resistance (see slip-resistance section), and plant compatibility before committing. Use barrier fabrics, edging, and appropriate base preparation to isolate glass from soil, prevent migration, and protect root zones. Where people walk barefoot or young children play, opt for screened, tumbled glass grades specifically labeled for pedestrian use.
Landscaping mulch and groundcover considerations
Decorative recycled glass works well as mulch, but think like a contractor before you dump it in. Glass holds heat more than organic mulch, so expect hotter soil and faster moisture loss in summer. Place it where heat won’t stress plants, or plan extra watering and shade for heat-sensitive species.
Glass does a decent job of weed suppression if laid thick enough, but don’t skimp. A 1–2 inch layer gives light control; 2–3 inches is better for stubborn weeds. Keep it away from crowns and trunks—leave a small clear ring so debris and moisture don’t sit against stems and cause rot.
Choose particle size for the job. Fine 1/8–1/4″ glass behaves more like sand and compacts; use it for pathways or decorative top-dressing. A 1/2–1″ crushed size stays loose, drains well, and is best as a true mulch/groundcover. Check base compaction under walkways so the glass doesn’t sink or mix with soil.
Don’t mix glass directly into planting beds like compost. If you need to mix, use a barrier fabric underneath to keep soil and glass separate and to make future weeding easier. If you covered other uses earlier in the article, follow those installation tips for edging, depth, and compatibility with plants.
Load-bearing uses: driveways and base layers
Recycled decorative glass can work as a base or wearing surface for light-duty driveways and patios if you treat it like any other aggregate. Make sure you check base compaction, use a well-graded mix (glass blended with fines), and compact in thin lifts. Loose, sharp glass alone will shift under tires and foot traffic.
Avoid using pure decorative glass where heavy vehicles, frequent deliveries, or forklifts will run. For heavier loads, either replace the glass with crushed rock or blend it into the lower lifts under a thicker conventional aggregate layer. If you try to save money by using only glass, expect rutting, edge collapse, and faster degradation.
Also watch drainage and frost. Poor drainage or frost heave will make glass sections fail faster than conventional bases. If you want the look from the landscaping section, put the glass near the surface for appearance and use a stable aggregate below to carry the load.
Installation best practices to minimize safety risks
This section outlines installation steps for decorative glass aggregate that actively minimize dust, particle migration, and sharp-glass exposure, by detailing site prep and edging, barrier setup, material handling with proper PPE, suitable binder choices, and careful compaction, placement, and curing with explicit safety checkpoints at each stage. It emphasizes selecting binders and mix designs that limit migration, controlling glass grain size and moisture, and instituting surface integrity checks and spill-prevention measures before pouring to keep work areas clean and safe.
For DIY and jobsite readers, the guidance translates to practical, repeatable routines that reduce dust creation, prevent breakage and injuries, and simplify ongoing maintenance through controlled cleanups, ventilation considerations, and waste disposal steps. Following these practices helps ensure a safer, tidier project with fewer long-term health concerns while delivering a more predictable finish and reducing the likelihood of surface staining or chemical reactions between glass and binders as work progresses.
Edge restraints and containment
Pick an edge restraint that matches the load and look. For heavy drives use a concrete curb or steel channel; for patios and pathways a rigid aluminum or heavy-duty plastic restraint works fine. Timber is okay for short runs but expect to replace it sooner. Whatever you choose, set the restraint on a firm, well-drained base and position it at the correct height so pavers sit flush and there’s no lip to trip on.
How you anchor matters more than how it looks. Drive long galvanized spikes or rebar through the restraint into compacted subbase at 18–24″ centers for light loads; use a concrete footer or mechanical anchors for high loads or loose soils. Check base compaction before fixing the edge. Backfill and compact behind the restraint so the material can’t migrate and push the edge out over time.
Walk the edge after installation and fix any gaps or high spots. Make sure the top of the restraint is flush or slightly recessed from the paved surface to avoid tripping. Keep an eye on the edges after the first winter and tighten or add anchors if any movement appears. These steps tie directly into the broader installation practices covered earlier and stop most migration and hazard issues before they start.
Compaction and base layer guidance (consolidated testing and acceptance)
Consolidated compaction guidance and simple acceptance tests:
- Target compaction: aim for 95% of Standard Proctor for most pedestrian and light vehicle bases. For heavy-duty driveways consult an engineer.
- Field testing: use a nuclear density gauge or sand-cone test to confirm compaction where possible. For DIY where these tools aren’t available, compact in specified lifts (3″ loose for plate compactor; 6″ for roller) and do a simple deflection check—no visible deflection under a 200 lb distributed load is a reasonable field check for small patios.
- Geotextile: install non-woven geotextile on soft subgrades to prevent migration and maintain drainage; use geogrid where additional strength is required.
- Acceptance: accept base only when compaction tests meet target or when contractor provides passing test certificates. If uncertain, require one independent compaction test per 500 sq ft for medium projects and one per 2,000 sq ft for large works.
Don’t skimp — under-compaction is the most common cause of settlement and safety hazards. Document tests and photos before placing decorative glass.
Binder and stabilization options (resin, polymer, sand mixes)
Binder options for securing glass in decorative mixes include epoxy or resin-based systems, polymer-modified binders, and cementitious blends such as lime or Portland cement, each offering different cure times, bonding strengths, encapsulation thickness, and compatibility with glass aggregates, depending on particle size and mix ratio to minimize slumping or segregation. They vary in mechanical performance and edge-handling requirements, with resin-based systems typically delivering strong, rapid-set bonds but potentially higher toxicity or odor compared to polymer-modified or cementitious mixes suitable for indoor or outdoor use.
Safety and toxicity considerations emphasize VOC content, off-gassing from resins, potential leaching or color-bleed from glass, and whether a formulation is food-safe or intended for industrial-use applications, guiding choice toward low-VOC or non-toxic options in sensitive environments. The practical workflow covers surface preparation, mixing methods (hand vs. mechanical), moisture management, and curing conditions, including the use of air-entraining or anti-shrinkage additives to control slump and ensure uniform encapsulation, while edge-cut glass handling and appropriate surface textures influence bond strength. Installation safety highlights dust control during crushed-glass handling, PPE like eye and skin protection, ventilation for volatile components, and proper disposal of excess materials, with long-term considerations addressing UV durability, binder degradation, cleaning approaches, and re-sealing strategies for surfaces subject to abrasion or weathering.
Resin-bound vs dry-laid systems
Resin-bound is a sealed, smooth finish where aggregate is mixed with resin and trowelled on. Dry-laid is loose or compacted aggregate held with small amounts of binder or left permeable. For a DIYer the practical trade-off is simple: resin-bound looks neater and wears well on driveways and paths, but needs a solid, well-prepared base; dry-laid gives better surface permeability and is forgiving on drainage but can move under heavy traffic.
Before you start, check base compaction and slope for drainage. If you need water to soak through, choose a dry-laid or permeable sub-base. If you want a smooth, low-maintenance finish, choose resin-bound but plan for longer curing times and keep traffic off until fully set. Expect repairs: resin-bound needs patching with matching mix, while dry-laid requires topping up and re-compaction over time.
On site, think worker safety and timing. Resin mixes can give off strong fumes and need warm, dry conditions and good ventilation—so wear a respirator and gloves. Dry-laid work is dusty and rough on hands; still use gloves, eye protection and a dust mask. Don’t rush either system—poor weather, an unstable base or skipping PPE are the fastest ways to create a job you’ll regret.
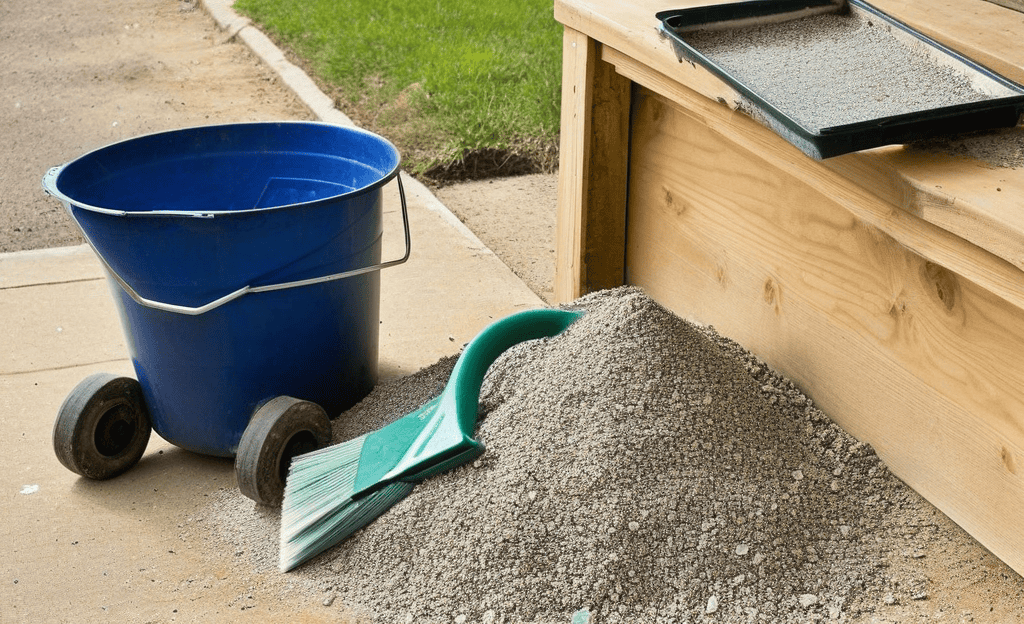
Recommended mix ratios and coverage (practical targets)
- Resin-bound: Typical resin-to-aggregate ratios are in the range of 4–8% by weight of aggregate depending on aggregate gradation and binder type. Coverage for a 10–15 mm aggregate bed is roughly 2.5–5 lb/ft² (12–25 kg/m²) before compaction; follow manufacturer data for exact coverage. Work times (pot life) vary—plan in 10–30 minute windows for standard epoxies and ensure ambient temperatures are within the manufacturer’s recommended curing range (commonly 10–30 °C / 50–86 °F).
- Cementitious/polymer-modified mortars: Typical sand:cement ratios start at 3–5:1 by volume (sand:cement) with polymer modifiers at the manufacturer-recommended dosing (commonly 3–6% by weight of cement or per product label). Allow 24–72 hours initial set depending on temperature and humidity; protect from rain until cured.
- Dry-laid stabilizers: Where stabilizers (polymer stabilizers) are used to lock loose glass, follow manufacturer dosing—common field rates are 1–3% by weight applied to the top 1–2 inches; test small patches first for strength and permeability.
Always run a small test panel (1–2 m²) and document the exact mix, pot life, ambient temp/humidity, and curing time. If the product has a VOC limit or explicit food-contact warnings, follow them—do not assume all resins are safe for indoor or food-adjacent surfaces.
Pros and cons of mixing glass with natural sand or fines
Mixing crushed glass into a sand or fines mix changes how the surface compacts, looks, and how much dust you get. I’ll keep it straight: there are clear benefits, but there are trade-offs you should know before you mix.
Pros
- Improved visual impact — glass adds sparkle and color making plain sand look far better with little extra cost.
- Better interlock in some mixes — angular glass particles can tighten up compaction and reduce movement in dry-laid mixes.
- Reduced need for pigment or additives — you can get decorative effects without buying extra binders or colorants.
- Cost-effective decorative upgrade — crushed glass often costs less than decorative aggregates or imported materials.
Cons
- Increased dust during handling — glass fines create sharp, irritating dust. You need masks and wet handling to cut dust exposure.
- Poor compaction if overused — too much glass can prevent good compaction because particles don’t pack like well-graded sand.
- Potential durability issues — glass can fracture under heavy loads, leading to loose particles and quicker wear in high-traffic areas.
- Drainage and binder compatibility — glass changes permeability; it can interfere with resin or polymer bonding if not proportioned correctly.
Use glass-sand blends when you want an inexpensive decorative finish for low-to-medium traffic areas and can control dust and mix ratios. Don’t use high glass content where heavy loads or tight compaction are needed, and always test a small patch first.
Maintenance and long-term performance
Routine maintenance keeps decorative glass surfaces performing and reduces long-term hazards. Regular tasks include debris clearing, resealing per manufacturer schedules, spot-cleaning stains with appropriate cleaners, level checks and top-ups for loose-laid areas, and annual inspections of edging and base compaction. Keep records of reseal dates and repairs so future owners or contractors know what was done.
Document expected life cycles and plan for resealing or resurfacing: resin-bound surfaces typically need recoat or maintenance every 5–10 years depending on traffic and UV exposure; dry-laid surfaces require topping up and re-compaction more frequently (every 1–3 years). If a surface shows persistent migration, rutting, or binder failure, remove and rebuild the top layer rather than repeatedly patching.
Seasonal care and freeze/thaw impacts
Cold weather and repeated thaw cycles do most of the damage, not the snow itself. After the last heavy thaw, walk the area and check base compaction, look for new low spots and any edge separation. Small settle areas can be filled and re-compacted; big dips mean you likely need to pull the surface and rebuild the base.
Keep water moving away from the surface. Clear gutters, downspouts and nearby grading so meltwater doesn’t sit on the base. If you see persistent puddles, correct the slope or add drainage stone. Standing water equals faster frost heave and faster failures.
Avoid quick fixes while the ground is frozen. Wait until the ground dries and thaws to seal, repave, or reinstall edges. Check the work after the first freeze-thaw season and patch any cracks or settled spots early. And don’t rely on de-icing salts on delicate finishes—use sand or calcium-based products recommended for your material.
Controlling weeds and plant interactions
Lay a good weed barrier under the stone or paving when you install it. Use a heavy-duty geotextile or landscape fabric and overlap seams by at least 6 inches. Don’t skip this step — pulling weeds through a shallow base is a chore that never ends. If weeds do come through, pull them when they’re small and treat only the spot; broad spraying kills nearby plants.
Consider a polymer-stabilized base for areas with heavy foot traffic or thin soils. Polymer stabilizers lock the aggregate so weeds can’t push up seedlings as easily and the surface stays firm longer. They add cost, but they save time on maintenance and reduce regrading later.
Watch how nearby plantings interact with the paved area. Tree roots can heave edges and drop seeds; planted beds next to the edge can wick moisture under the pavers. Periodically check base compaction and edge condition, cut back invasive roots, and leave a small bare buffer between beds and the hardscape to limit moisture and seed transfer. If you’ve already read about seasonal freeze/thaw care, follow those checks along with these weed controls.
Environmental benefits and lifecycle impacts
Using recycled glass as an aggregate substitute shifts a substantial amount of waste away from landfills, lowers demand for virgin quarry materials, and builds a compelling environmental value proposition that aligns construction practice with circular economy goals. Quantify waste diversion and regional supply by estimating tons diverted per project or per year and describing how local programs scale cullet availability, while noting how processing losses and contamination rates can affect realized gains. A lifecycle perspective highlights embodied energy and emissions from cullet processing and transport, and compares end-of-life performance to virgin aggregates, signaling potential CO2e reductions when optimized logistics and local sourcing are included.
On job sites, the practical takeaway is that glass cullet can reduce project embodied carbon and waste, but variability in color and size, contamination risk, and durability considerations require thoughtful specification, screening, and compliance with regulatory disclosures. Tracking KPIs such as waste diverted, CO2e avoided, and volume of glass used helps DIY crews communicate benefits with stakeholders, plan sourcing through local programs, and make informed trade-offs between cost, performance, and environmental impact.
Landfill diversion and greenhouse gas benefits
Reusing crushed glass on site is a quick way to keep material out of the landfill. A simple rule of thumb: one ton of mixed container glass occupies roughly 1 cubic meter (about 35 cubic feet) in a dump. So if you send 10 tons to reuse, you’re diverting about 10 m³ (350 ft³) of waste right away. That matters on small jobs where the truck count and tipping fees add up fast.
There are greenhouse gas benefits too. Typical savings from using recycled glass instead of new raw materials are around 0.3–0.4 metric tons CO2e per ton of glass (about 660–880 lbs CO2 per ton). So 10 tons reused equals roughly 3–4 tonnes CO2e avoided (6,600–8,800 lbs). Don’t treat those numbers like gospel. Use them to compare options: haul off vs. reuse vs. buy recycled.
What you need to do: check local acceptance rules, keep the glass free of ceramics and electronics, and decide if crushing on site or buying processed recycled glass is cheaper. If contamination is high, you lose the landfill and emissions benefits. If you get clean material and use it in sub-base or drainage, you’ll cut disposal costs and reduce greenhouse gas emissions at the same time.
Potential environmental caveats
Recycled materials cut waste, but they are not always a free pass. Long hauls for pickup can erase much of the carbon savings. Before you buy, check transport distance and compare local suppliers. If a load has to travel hours, consider cheaper local options or smaller orders to avoid needless truck miles.
Some reclaimed fill and aggregate can carry contaminants or high salt content. Don’t guess—sample and test anything you’ll use around gardens, driveways, or drainage. Ask the supplier for recent test results or test local soils yourself. If tests look iffy, use a clean cap layer or keep that material away from stormwater paths.
Think ahead about the end of life. Temporary uses (like site berms or fill) need a plan to remove or reuse the material later. If you just dump it in a corner, you’ll face higher disposal costs and contamination risk down the road. Arrange a disposal or reuse route before the material arrives.
Cost comparison and budgeting
Cost comparison for recycled glass decorative aggregate hinges on clear visibility into material cost per ton or yard, processing (sorting, washing, crushing), transport (local versus long-haul and freight surcharges), and equipment needs (rental versus purchase, depreciation, maintenance). It also weighs economies of scale for common project sizes, packaging formats (bulk vs bags), and regional or seasonal price shifts, with contingency budgets for weather, contamination, or delivery delays. Quick budgeting rules help: identify capital expenditures versus operating expenses, and apply a break-even lens to rental versus purchase for crushers, screens, and conveyors over the project life cycle.
For DIYers and job sites, this matters because it translates into practical line items, delivery formats, and timing that affect labor and overall cost. Outline example line-items for 1, 5, and 20 cubic yards, note access constraints and haul-route limits, and account for PPE, dust suppression, and site cleanup in a single budget, plus ±10–20% contingency to accommodate market shifts. Gather quotes by asking suppliers about packaging, lead times, contamination risk, and transport constraints to build a realistic, flexible budget that adapts to changing conditions.
Example budgets for small, medium, and large projects
100 sq ft (small): expect material costs around $300–$900, delivery $75–$150, and labor/installation $500–$1,200. Plan on a rough total of $875–$2,250. For this size you can often do parts yourself, but check base compaction and drainage before you start — fixing poor prep costs more than the surface.
500 sq ft (medium): material roughly $1,500–$4,500, delivery $150–$400, and installation $2,500–$6,500. Target total budget $4,150–$11,400. Decide up front if you need mechanical compaction, edging, or subbase; those choices drive the price more than the surface material itself.
2,000 sq ft (large): material $6,000–$18,000, delivery $400–$1,200, and installation $10,000–$26,000. Expect a total in the $16,400–$45,200 range. For jobs this size budget for permit fees, haul-off, and heavier equipment. Also allow a 15% contingency—unexpected site work and utility issues show up on big projects.
Per-ton unit comparators and hidden costs
For procurement decisions use these rough unit comparisons (regional variation applies):
- Processed screened cullet (commercial): $30–$80/ton (bagged or bulk, spec’d gradation, low contamination).
- Municipal free glass: $0 material cost but expect $40–$120/ton in processing, screening, and labor to make it usable.
- Typical reject/contamination rework rates: 5–20% for municipal mixed streams; insist on samples and account for rejects in contingency.
Hidden costs include transfer station processing fees, contaminated-load surcharges, additional washing or screening, and unexpected haul distances. Require an itemized quote and receipts for disposal to avoid surprises.
Regulations, standards, and testing
Regulations, standards, and testing for using recycled glass as decorative aggregate in concrete require a clear map of local building codes, zoning permits, and any site-specific restrictions, including stormwater and environmental permits where applicable. Aligning with relevant standards and guidelines—covering acceptable aggregate specs, glass content limits, and compatibility with cementitious systems—helps ensure safe, durable mixes and references recognized national or regional guidance for recycled glass usage. A tested workflow includes particle size distribution, contaminant screening, leachability assessments, and safety checks for sharp edges, with defined frequency, thresholds, and concise documentation for traceability from source to site.
For DIY and jobsite readers, this means a transparent process: know who performs each test, how results are reported, and how non-conforming batches are handled, with supplier qualification criteria and clear traceability. Material disclosures—safety data sheets, glass source, flattening or crushing method, maximum glass percentage in mix, and any warranties or caveats—help homeowners and contractors make informed choices and communicate risks upfront. Emphasizing dust control, edge sharpness, color bleeding, and potential efflorescence, the plan supports safer handling, smoother approvals, and better long-term performance through consistent practice and documented compliance.
Concrete acceptance criteria and common ASTM/test references
Concrete and decorative acceptance thresholds you can demand or use as go/no-go checks:
- Gradation / sieve analysis: Provide ASTM C136 or ASTM D422 sieve curve for the batch; accept batches that match the specified gradation within ±1.0 mm for coarse fractions and ±0.2 mm for fines.
- Maximum contamination by weight: For visible decorative uses accept <2% by weight ferrous/non-ferrous metal and ceramics; for structural mixes maintain <1% contamination. For municipal supplies consider <5% as the maximum workable threshold if you plan to process further.
- Crystalline silica content: If crystalline silica is present, suppliers should quantify it via XRD/IR (NIOSH 7500/OSHA methods). For decorative, aim for 0.1% crystalline silica by weight if the material will be used where dust may be generated; higher levels require stricter controls and professional oversight.
- Leach testing: Request TCLP (EPA Method 1311) for heavy metals where material will be in soil or near runoff. Accept only batches with TCLP results below local regulatory limits for target use.
- Slip resistance: For walking surfaces target a DCOF (wet) ≥ 0.42 per ANSI A137.1 / A326.3 or a Pendulum Test Value (PTV) / British Pendulum R > 36 for external surfaces and pool surrounds. Specify in the contract which test and target is required.
Lab/testing minimums, sampling, and costs
Minimum sample and sampling protocol:
- Sample size: collect at least 1 kg (2 lb) for single tests; 2–5 kg if running multiple analyses (gradation, TCLP, silica).
- Sampling method: take representative grabs from three or more locations in the load, combine, mix, and then split for lab submission. Avoid cross-contamination—use clean tools and sealed containers.
- Chain-of-custody: use lab COC forms (lab will provide). Record date/time, job, batch number, and sampler name and keep copies.
- Turnaround and costs: standard XRD/IR silica or TCLP testing typically returns in 5–10 business days; budget $150–$400 per test. Expedited testing is available at higher cost.
- Mandatory vs optional: for landscaping decorative uses, require gradation and visual contamination check and TCLP if near soil/runoff. For paving, wear surfaces, or anything that will be cut/grinded, require gradation, XRD/IR silica, and TCLP before acceptance.
Liability, contractor disclosure, and warranties
Liability for recycled glass installations hinges on clear ownership of risk across design, procurement, and installation, including breakage, injury, or product failure, so who bears responsibility is defined before work begins. Contractors must disclose glass source, processing method, potential contaminants, safety data sheets, and testing results to homeowners, establishing transparency that informs warranty positioning and helps manage liability from the outset. Standards and certifications govern permissible textures, particle size limits, material safety criteria, and related testing requirements, shaping warranty scope, exclusions, and how liability shifts if code changes occur after installation.
For DIYers and specifiers, clear contract language—indemnification, limitation of liability, hold-harmless provisions, notice requirements, and warranty disclaimers—paired with required inspections and sign-offs, reduces disputes and sets practical expectations for performance. Documented disclosures, supplier certifications, batch-specific data, and testing results create a traceable trail that supports installation conformity and future claims, while a warranty registry keeps outcomes visible across the life of the project. This approach matters on real jobsites because it translates technical requirements into enforceable protections, helps prevent risky misunderstandings, and guides ongoing maintenance and safety decisions for in-situ recycled glass components.
What to require in contracts
Spell out the material source. Name the supplier or require receipts and batch numbers. Say whether reclaimed or virgin materials are allowed. Give a maximum contamination tolerance (for example, a clear percentage or lab test result) and require the contractor to provide test reports before installation.
Define clear performance expectations. List the metrics you care about—compaction, drainage rate, load capacity, or visual standards—and set pass/fail criteria and inspection points. Require independent third‑party testing at key stages and keep a short, specific timeline for fixes if results fail.
Decide and put in writing who pays for remediation. Use plain language like “contractor pays for removal and replacement if contamination or performance failures are their fault.” Include remedies: holdbacks, change‑order limits, and a warranty period with exact start and end dates. If you want extra protection, require proof of contractor insurance and name yourself as an additional insured for remediation claims.
Insurance and risk transfer tips
Before any work starts, get a certificate of insurance and call the carrier to confirm it’s real. Check policy dates, general liability limits, and that the contractor carries workers’ comp. Ask for the owner to be named as an additional insured on the liability policy. If the contractor can’t or won’t provide that, walk away—don’t bet your house on verbal promises.
Take a simple, signed condition report of the site and the surrounding property before installation. Snap timestamped photos of the driveway, siding, landscaping, and any existing equipment. Have the contractor sign the report and keep copies in your project file. If something gets damaged, you’ll want proof from day one.
If you’re storing pricey materials on site, ask about builder’s risk or inland marine coverage and consider moving them offsite overnight. Tie final payment to receipt of current insurance docs and a signed waiver of liens. These steps transfer risk and make claims or disputes far easier to resolve.
Common installation mistakes and remedies
The section highlights common installation mistakes such as an insufficient base, missing edging, and incorrect particle size, and pairs each issue with practical remedies and rough cost/time estimates. You’ll learn how to verify base depth and material, set edging to prevent lateral movement, and choose the right gradation for the project. Expect quick fixes with approximate material and labor costs per square foot to help you plan without overcommitting.
Applying these checks early saves you from settlement, edge breakdown, or drainage problems down the line, which can dramatically cut rework time and expenses. Understanding proper sequencing, edging installation, and screening practices helps you avoid over-tamping, gaps, or uneven thickness that drift from plan. This guidance translates directly into safer, more durable surfaces and clearer budgeting for base material, containment, and timely curing or resealing as needed.
Fixes for migration and rutting
First, assess the damage. Walk the area and note where the material has migrated or rutted and how deep the ruts are. If the base has failed, check base compaction before you throw more material on top — patching loose material over a soft base only delays the next failure.
Regrade and re-compact the affected area. Remove loose or contaminated fill down to a firm layer, reshape to the correct slope, add a compactable base (crushed stone or recycled asphalt), and compact in thin lifts with a plate compactor. Don’t skimp on compaction; a few passes make a big difference.
Containment and binding are the final steps. Install solid edging to stop lateral migration and, where traffic or washout is an issue, add a binder layer (paving binder, stabilizer, or a thin asphalt/tar tack) to lock the surface. If problems continue after these fixes, call a pro — repeated rutting usually means a deeper drainage or subgrade issue that needs heavier equipment.
Remedying color staining or fading
First figure out if the problem is surface staining or true color loss. Try a gentle cleaner and a scrub with a stiff brush on a test a small area before doing more. For oil, grease, or plant stains use a degreaser and hot water. For mildew or algae, a diluted bleach solution works—rinse thoroughly and let the surface dry fully.
If cleaning doesn’t bring the color back, the pigment may have faded or the binder eroded. Light sanding or a mechanical surface prep can remove surface discoloration and expose fresher material. For DIY jobs rent a floor buffer or a light grinder; don’t grind too deep or you’ll thin the mat.
When repairs are cosmetic only, consider a color coat or sealer. For deeper loss or widespread damage, opt for resurfacing or full overlay to restore uniform look and performance. If migration or rutting were part of the original issue, check those fixes too—resurfacing won’t hold if the base and drainage problems aren’t addressed.
Visual and aesthetic guidance
Visual and aesthetic guidance helps you pick color palettes that complement common countertops and flooring, using recycled glass as decorative aggregate to create both harmonious and deliberate bold contrasts. Decisions about transparent versus opaque glass, hues of recycled glass, and translucency are paired with how natural or artificial lighting shifts perceived color, so you test visuals before full installation. Mixing guidelines with natural stone and other aggregates should aim for clean, dry components, appropriate ratio ranges, and texture balance to preserve sparkle without muddiness or clumping, while also considering edge treatments and safe layouts.
Stain prevention and safety protocols matter for longevity, including sealing options, recommended sealers, recoat schedules, and best practices to minimize moisture intrusion and color bleed from common spills. This guidance helps DIY readers plan layouts (random scatter or deliberate tessellation), spacing, and containment to prevent glass shards and ensure safe foot traffic, while maintaining vibrant visual impact. Understanding how lighting, pattern, and maintenance routines interact helps you avoid costly mistakes and enjoy a durable, eye-catching result.
Colorfastness and UV/weather effects
Colors don’t stay the same out on the job. Sun, rain and heat break down pigments and change glass tint over years. Pick materials made for outdoor exposure: look for manufacturers that list lightfastness or ASTM fade testing. If the spec sheet is vague, assume the product will fade faster than you want.
Choose inorganic or ceramic-fired pigments for long-lasting color when you can. For paints and plastics, select UV-stabilized formulas and ask about UV absorbers or HALS additives. For colored glass or glazes, prefer tempered or laminated glass with a clear UV inhibitor layer. Cheap organic dyes and untreated plastics will go pale or turn amber; don’t buy them for exposed areas.
Do a quick field test and plan maintenance. Order samples and leave them in place for a season or at least compare against a control out of sun. Consider placement and shading to reduce direct exposure, and specify recoat or reseal intervals if the finish isn’t fully UV-protected. Warranties matter—get one that covers color loss, not just structural failure, and write the expected lifespan into the job sheet.
Combining glass with plants and hardscapes
Plan the layout like you would for pavers. Put glass where it won’t sit right against plant trunks or in the root zone. Give trees and shrubs a clear soil strip or mulch ring at least 12–24 inches wide so roots have uncompacted soil. Before you install anything, check base compaction — plants hate compacted soil and will stress fast if you smother roots with glass or heavy base material.
Separate materials with a visible, durable edge. Use metal or PVC edging, stone borders, or a concrete curb to keep glass in its lane and soil in another. A 2–4 inch crushed-stone or sand buffer under the glass helps drainage and prevents glass from settling into the soil. For deeper-rooted beds add a short root barrier (4–8 inches) between decorative glass and planting soil to stop roots from pushing material and to protect plant health.
Think maintenance: leave access paths and avoid tiny glass chips where you weed or dig. If you use glass as mulch, keep it off seedling beds and bulbs — it’s fine around established perennials if you give them a clean soil edge and a way to breathe. Finally, plan irrigation so water reaches the soil, not trapped under glass; shallow drippers or mulched irrigation strips work best.
Testing, monitoring, and long-term health risk mitigation
The monitoring plan identifies dust, worker exposure, and environmental runoff as the core focus, with clear pass/fail criteria and escalation paths, as well as specified methods, tools, and thresholds for ongoing assessment. It covers direct-reading dust meters for PM2.5/PM10, personal sampling, substrate moisture checks, and runoff pH and turbidity tests, all with calibration and maintenance schedules and defined triggers for corrective action. Initial activity is intensely monitored—daily to weekly during the first 4–6 weeks—followed by quarterly checks or event-triggered assessments after incidents or heavy wind days, with a centralized log to document dates, locations, results, and actions taken.
For a DIY or jobsite reader, this approach translates into practical steps to protect health and prevent environmental impact while staying compliant. It helps you spot conditions that require immediate action, assign responsibility to a site supervisor or safety tech, and maintain a transparent record that supports timely corrective measures. The plan emphasizes engineering and administrative controls—enclosures, dust suppression, containment, staging areas, housekeeping, and runoff barriers—along with clear PPE requirements and escalation procedures to keep operations safe and compliant.
On-site dust suppression methods
Start by keeping surfaces damp, not soaked. Use a hose with a fine spray or a pump sprayer to do a quick wet-down of the work area and stockpiles before you start and every 30–60 minutes if things get dusty. Don’t create puddles or runoff — that just moves contamination. Work small areas at a time so you can keep them consistently damp.
For stubborn dust use a surfactant or wetting agent mixed per the label. It helps water penetrate and bind fine particles so they don’t go airborne. Apply only as directed, test a small area first, and avoid chemicals that will harm plants or groundwater. If you’re unsure, treat it like a temporary aid until you can get professional advice.
Schedule dusty tasks for calmer times of day and when monitoring shows lower airborne levels. Do demolition or earthmoving early morning or after watering and stop if wind picks up. Cover or tarp stockpiles and seal off work zones to limit spread. Use these suppression steps alongside your testing and monitoring plan — don’t skip checks because the area looks “less dusty.”
When to call a professional hygienist or contractor (decision thresholds)
Call a professional hygienist or contractor when measurable thresholds or practical triggers are exceeded. Use these clear decision points:
- Processing rate > 1 ton/day (sustained) or cumulative processing over several days.
- Continuous dusty operations > 2 hours per day without engineering controls.
- Visible dust escaping the work area beyond 10 m (33 ft) or dust observed inside occupied buildings nearby.
- Work in enclosed spaces where ventilation cannot achieve safe air changes, or when cutting/grinding indoors with power tools.
- Workers complaining of respiratory irritation, persistent cough, headaches, or if neighbors complain about dust or odors.
If any of the above apply, stop and engage a qualified industrial hygienist for air sampling and control recommendations. Professional monitoring is also recommended for multi-day commercial jobs and for any project that may affect schools, hospitals, or other sensitive receptors.
Case studies and real-world examples
Case studies drawn from municipal installations such as street medians and playgrounds alongside residential or perceivedly smaller PDR projects like driveways and landscape features illustrate how scale, loading, and maintenance context influence safety checks and performance outcomes. They highlight milestones including surface sharpness, glare, trip hazards, edge containment, erosion resistance, color stability, and coating compatibility observed across different environments. Lessons focus on challenges like shipment damage, contamination, moisture issues, and frost heave, with concrete steps such as screening, washing protocols, sequestering glass fines, and protective sealants used to mitigate risk and sustain performance, while early regulatory and permitting notes shape material choices and installation methods.
For the DIY reader, these examples translate into practical design guidance and risk-aware sequencing that can be adapted to local conditions and budgets, emphasizing how maintenance, monitoring, and stakeholder feedback influence ongoing safety and aesthetics. The takeaway is a concise set of transferable guidelines—quick-checks, suggested testing (slump, compaction, pH, residue checks), and example spec language—that help plan project scoping, ensure consistent workmanship, and anticipate common issues before installation. Understanding how municipalities evaluate safety standards and permitting steps, and how those decisions affect edge containment, site drainage, and surface finish, empowers readers to anticipate regulatory constraints and tailor their methods accordingly.
Municipality program—collection to finished product
Start like a foreman: set collection routes, verify material streams, and segregate contamination on arrival. Have the scale tickets and chain-of-custody forms ready at the gate. If loads don’t match the ticket, send them back or flag them—don’t let bad feedstock ruin the batch.
At the processing site, insist on stop-and-check points. Weigh every load, check base compaction on stockpiles, and sample for moisture and contamination before you blend. Run small test batches before full production and log every result. If a test fails, fix the issue, retest, and don’t shortcut corrective action.
Safety and final acceptance are non-negotiable. Require hard hats and traffic control during tipping, keep ignition sources away from dust and fuel, and have a trained operator at every machine. Before delivery, verify specs, label the product, and lock down paperwork so the municipality can sign off without excuses.
Residential landscaping example
Before: small yard with thin topsoil, bare spots, and a cheap pea gravel path that washed out every rain. After: we ripped out the gravel, graded the slope, installed a compacted crushed stone base for the new path, laid permeable pavers, and built two raised planting beds filled with blended topsoil and compost. If you hire a crew expect roughly $2,500–$6,000 for that scope; DIY materials for a weekend can drop it to $800–$1,500 but plan on hard labor and rental tools.
Key installation choices that matter: check base compaction under hard surfaces or your path will fail fast; use well-draining mix in beds to avoid soggy roots; and swap thirsty ornamentals for native grasses to cut watering. I chose drip irrigation to target roots and a 3″ mulch layer to cut weeds. Those two moves cut routine watering and weeding by over half compared with the old layout.
Maintenance outcomes are simple: better soil and correct drainage mean healthier plants with fewer inputs. The homeowner went from weekly spot-filling and reseeding to seasonal pruning and annual top-dressing. If your town has a compost or mulch program (we covered municipal collection earlier), use that material — cheaper and usually better than bagged stuff. Don’t skimp on the base or you’ll be paying contractors to redo it later.
Quick start checklist for homeowners and contractors
This quick start checklist helps homeowners and contractors safely plan a decorative project using recycled glass, covering PPE, handling and storage, edge safety, and proper disposal of breakages. It also guides sourcing and verification of materials, including which glass types are acceptable, contamination risks, and QA notes from suppliers. The checklist includes installation guardrails, surface prep, recommended decorative aggregate ratios, and basic compaction and slip-resistance considerations, plus permitting and ongoing maintenance steps.
Following the checklist supports safer work practices, clearer documentation for compliance, and better long-term performance of decorative surfaces. It helps you identify when permits may be needed, keeps essential records handy for inspections, and reduces risk by outlining cleaning protocols, sealants, and cautions about chemical exposure and pH effects. This practical approach translates safety rules and codes into actionable on-site steps that DIYers and professionals can apply from first prep to routine upkeep.
Pre-purchase checklist
Before you sign anything, call the supplier and the contractor and get clear answers. Ask for the exact product code, batch size, and any available lab results. If they can’t or won’t show you test certificates, walk away — don’t buy based on a photo or a promise.
Agree the delivery date, time slot and who is responsible for offloading. Confirm the truck size and access needs so materials aren’t left on the road. Also agree on acceptable contamination limits and how rejects will be handled if the load arrives dirty or mixed.
Make sure everyone understands the site checks from the quick start checklist: base levels, drainage and compaction. Finalize quantities and tolerances so you don’t get stuck short or burdened with returns. A clear written brief beats phone calls when things go south.
Installation day safety checklist
Before anyone steps on site, confirm crews know the plan and have the right gear. Make sure each person has hard hat, gloves, eye and ear protection, and an appropriate respirator for dust — no exceptions. Keep a clearly marked first-aid kit and a charged fire extinguisher within easy reach.
Control dust and debris: damp down work surfaces as needed, run a HEPA air scrubber if cutting or grinding, and seal off house openings with plastic sheeting and tape. Protect HVAC intakes, close doors and windows, and lay down plywood or walkboards to prevent tracking dirt into finished areas.
Protect the site and people: cover landscaping and drains, roll out tarps for waste, and have plywood or corner protectors for finished surfaces. Post emergency contact numbers and the job supervisor’s phone where everyone can see them. If something looks unsafe, stop work and call it out — better a delay than a hospital run.
Further resources and where to get help
Authoritative safety guidance matters for DIY projects using recycled glass. This section points readers to OSHA/NIOSH guidance on silica exposure, abrasive handling, and respirable dust; local extension services for region-specific practices; and certified labs for independent testing. It also highlights templates for testing and contracts to standardize quality and safety.
A practical path helps you verify supplier claims, request SDS/COAs, and confirm standards (ASTM/ANSI mix design, particle size distribution, leachate testing) before use in concrete. You’ll find a quick-start safety checklist, a one-page resource map for tests and contacts, and guidance on documenting decisions and results for future projects. These supports connect you with extension agents, certified geotechnical or materials labs, universities with testing programs, and consultants who can review results.
Sample supplier questions and testing request template
Keep it short and direct when you contact a supplier. Tell them what product you need, where it will be used, and your timeline. Ask for lead time, minimum order, and delivery method. If they dodge these basics, walk away.
Ask for technical data and proof. Request the product sheet, recent test reports, and certificates of conformity. Ask for batch traceability and samples from the same batch you’ll accept. Also specify standard and sample size so they send usable results, not manufacturer fluff.
Copy and paste one short testing request: “Please provide test reports showing compliance with [relevant standard], sample size and batch ID, and results for compressive strength, water absorption, and dimensional tolerance. If available, include independent lab reports within the last 12 months.” Keep a follow-up line: “If you can’t provide these, state why and propose an alternative.” That’s all you need to decide fast on site.
Links to standards, MSDS, and technical papers
Find the product SDS/MSDS and technical data sheets from the manufacturer first. If you can’t find them on the product page, call the supplier and demand them. Get the SDS/MSDS before you buy — it tells you handling, hazards, and required PPE in plain language.
Match the right standards to the job. Search ASTM or ISO by material type (for example look up compaction and strength tests for soils and concrete). Also check OSHA, EPA, and your local building department for regulatory limits and installation rules. If unsure, hire a licensed lab or engineer to identify which specific standard applies.
Use technical papers and agency guidance for details when tests fail or design questions come up. Look for white papers from manufacturers, state DOT specs, and university extension publications. And remember the supplier questions and testing request template you used earlier — use it again when you order tests or ask for paperwork so you don’t miss the basics.
Conclusion
Decorative glass adds color and texture to your project, but the finish only lasts if you methodically protect people and the work itself. Prioritize safe handling, proper preparation, and tested procedures to keep chips, dust, and failures from undermining durability and appearance.
First, verify your source and sizes, pick a suitable binder or mix, set up containment and ventilation, wear the right PPE, test a small area to confirm compatibility, follow measured steps for crushing or processing if you do it yourself, and document every step for maintenance and warranties. Work in that order: source, safety, test, mix, install, cure, seal, and monitor.
Common mistakes to avoid include rushing a crush or recycling step without PPE, skipping dust control or ventilation, and applying glazes or binders beyond the manufacturer’s guidance. Always keep your work area clean, double-check ventilation and personal protection, and stick to proven ratios and cure times. If anything about dust, binding, or structural load feels uncertain, pause and reassess before continuing.
If you’re unsure about local regulations, testing requirements, or structural implications, call a professional for an assessment or to supervise critical steps. Stay disciplined, follow the plan, and you’ll get a durable, visually striking result that stands the test of time. Safety first, test in a small area, and follow binder guidelines as your guardrails for success. You’ve got this—move from planning to solid, safe installation with confidence.
FAQ
Are recycled glass pieces safe to handle?
Yes, but wear gloves and eye protection. Glass can cut or chip, so handle with care and wash up when you’re done.
What safety gear should I use when pouring or mixing?
Use gloves, safety glasses, and a dust mask if you’re cutting or deburring. Wear closed-toe shoes and long sleeves to protect your skin from shards.
Can recycled glass be a slip hazard?
Yes. Keep the work area clean and dry, sweep up small shards, and use non-slip mats where water or slurry is common. Don’t leave glass on slick surfaces.
Are there health concerns with tiny glass particles?
Fine dust can irritate lungs and eyes. Use wet methods or a proper respirator when cutting, and ventilate the area well.