

Table of Contents
- Types of Wash Water and Slurry You May Generate
- Legal & Environmental Considerations
- Health & Safety — PPE and Emergency Steps
- Estimating Volumes and Planning Capacity
- On-site Pre-treatment Methods (DIY)
- Safe On-site Disposal Options
- Off-site Disposal and Transport
- Equipment, Materials and Cost Comparisons
- Concrete, Grout and Resin — Protocols with Measured Steps
- Common Mistakes, Quick Decision Flowchart and FAQ
Introduction
Safe disposal of wash water and slurry at home means treating and disposing of wastewater in a way that protects people, pets, and the environment.
You’ll learn practical steps, tips, and common-sense guidelines you can apply to identify safe disposal options, minimize contamination, and manage runoff in your daily routine.
Types of Wash Water and Slurry You May Generate
Common wash water and slurry generated on DIY projects include concrete/cement slurry, grout, tile adhesive, paint wash, resin wash, and clay slip, each with distinct chemical characteristics that drive how they must be managed, stored, and disposed of. By categorizing these types and noting hazards such as setting solids, solvent content, dust potential, and pH effects, you can choose appropriate handling steps like settling, decanting, containment, or restricted reuse and avoid cross-contamination or storm drain discharges. This section outlines disposal pathways aligned with local programs, municipal wastewater guidelines, and on-site options while clearly marking what is prohibited.
Applying a simple decision framework helps DIYers decide when to test solids, contact authorities, or follow local guidelines, and it emphasizes practical practices such as labeling, ventilation, PPE, secure containment, and documenting disposal actions. Understanding why each type matters—solvent-rich washes, resin-containing slurries, or dusty dry-content mixtures—reduces exposure risk and improves compliance with regulations, preventing risky shortcuts and misconceptions around dilution or improper recycling. By following these guidelines, you protect waterways, workers, and equipment, while keeping job sites organized and compliant with household hazardous waste programs and municipal rules.
Concrete, cement and grout slurry
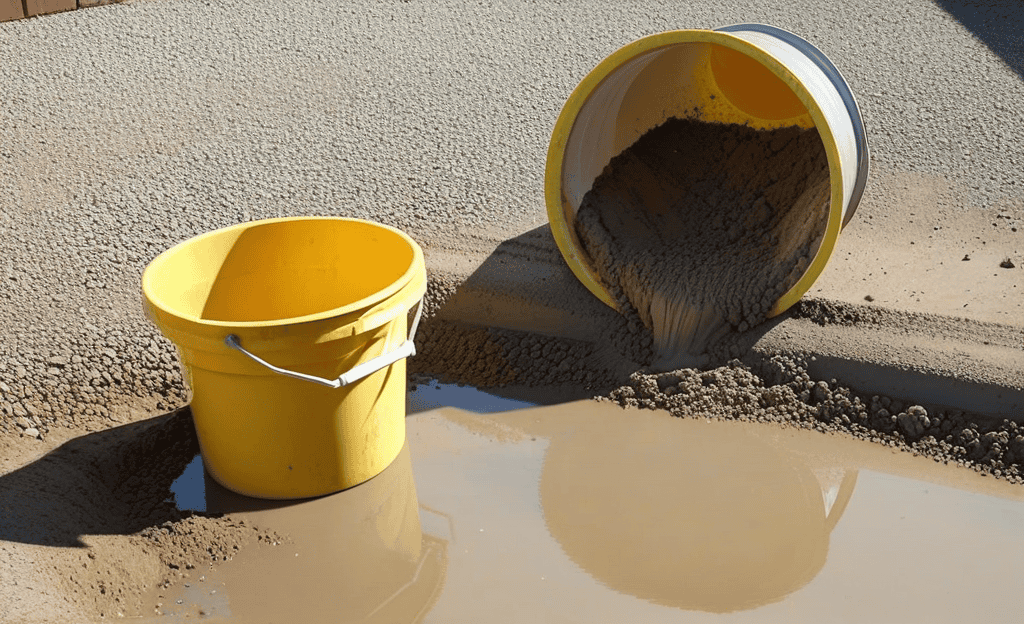
Concrete, cement and grout slurry is highly alkaline and full of very fine particles that stay suspended for a long time. Small home jobs often produce a few buckets to a couple dozen gallons; truck or pump rinseouts can produce hundreds of gallons. Because the particles are tiny they clog filters and storm drains fast, and the high pH can cause serious skin and eye burns.
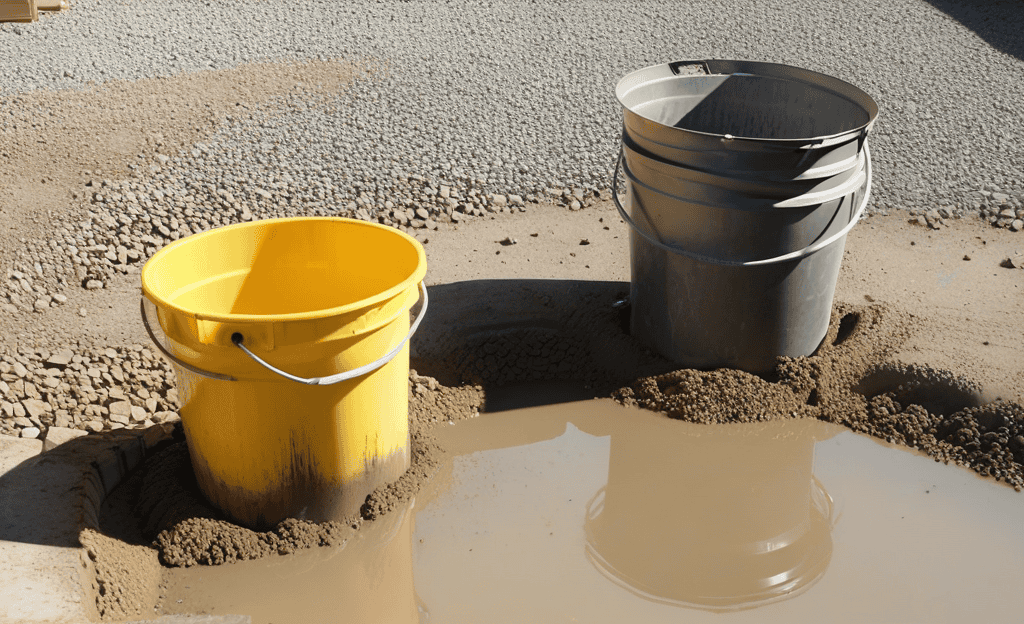
Do the obvious: contain and let solids settle instead of rinsing into the street or storm system. Set up a settling pit or tank, let the solids drop, decant clearer water from the top, and collect the settled solids for proper disposal. For small amounts you can let slurry evaporate in a lined area and dispose of the residue; don’t try to neutralize large volumes on site unless you have a plan and permits.
Protect yourself: wear eye and skin protection, rubber gloves and boots, and rinse immediately if you get slurry on you — alkaline burns are real. Check local rules before disposing any decanted water; in many places you must haul it away or discharge only to the sanitary sewer with permission. If in doubt, call your local waste authority rather than dumping and hoping for the best.
Paint, solvent and resin wash water
First thing: read the product labels and safety data sheets. Water‑based paints and resins rinse out with water but still carry pigments, binders and biocides. Solvent‑based products use flammable chemicals and won’t mix cleanly with your site wash water. Treat the two streams separately and don’t assume “water” makes them safe.
Containment is the priority. Set up a settling tank or buckets to keep wash water off soil and out of drains. Let heavy pigments settle, then decant clear water for disposal only after you confirm local rules. For solvent-based washouts, do not pour off or evaporate on site — these are hazardous wastes. If the resin is uncured (epoxy, PU), keep it contained and contact your hazardous waste handler; cured solids can often be disposed of as regular construction waste once fully cured and free of chemical residue.
Protect people and the site. Use gloves, eye protection and a respirator when cleaning solvent or resin tools. Keep solvents away from sparks, heaters and open flames — they can flash and ignite fast. For water‑based products, good ventilation and simple PPE reduce risk, but still avoid releasing wash water to storm drains. When in doubt, bag solids, tag the waste, and arrange proper disposal instead of guessing.
Clay, tile adhesive and general construction rinse water
Clay and tile adhesive rinse water is full of very fine, sticky fines that stay suspended and make murky slurry. That slurry will happily clog pipes, silt fences and storm drains. Treat it like mud that will set hard when it dries: let it settle or capture it before it gets into the drainage system.
Tile adhesives and some modern mastics contain polymers and additives that aren’t readily biodegradable. They don’t behave like plain grout or paint. You can’t just wash them down the curb. Use a settling tank, filter socks or basins and remove the settled solids for disposal. If you plan reuse, keep rinse water clear by letting most solids fall out first.
Practical checks: stop wash water at the source, scrape and dry off surfaces before rinsing, put flow onto a temporary bermed area or tank, and check local disposal rules before dumping solids. Also test for obvious chemistry issues — strong alkalinity or unknown additives — and don’t rely on household drains. Clogged lines and regulatory fines are cheaper to avoid than to fix.
Legal & Environmental Considerations
Most jurisdictions prohibit discharging wash water and slurry from concrete work into storm drains, roadside gutters, or unfiltered sewer lines, with local codes, state environmental rules, and permit requirements shaping those prohibitions. Concrete slurry contains cement, fines, and chemicals that can raise pH, clog waterways, harm aquatic life, and contaminate groundwater, leading to long-term municipal and ecosystem costs. Compliance depends on understanding where disposal is allowed and following approved methods for containment and disposal.
For DIY and jobsite audiences, it matters to know where to check: municipal codes, county or state environmental agencies, and any property-type exemptions that may apply. Plan to contain and filter washouts, obtain documented waivers or approvals from waste-hauler or disposal-site operators, and avoid drain connections entirely. On-site options like curb slurry capture or reuse after filtration, plus off-site licensed concrete washout facilities, should be weighed against project timing and location, with pre-mixing and post-wash steps guiding predesignated containment areas, permissible washout containers, and thorough recordkeeping of disposal methods and permits.
Stormwater vs sanitary sewer rules
Stormwater pipes and drains carry rain and surface runoff to creeks, rivers, and lakes. Sanitary sewers carry household and building wastewater to treatment plants. They are treated very differently by municipalities, so you must know which system your site connects to before you dump or drain anything.
Common prohibitions are simple: no paints, solvents, concrete washout, oils, sediment, or chemicals into storm drains. Do not hook construction runoff or dewatering into a storm system without a permit. For sanitary lines, never pour industrial or high‑strength wastes down the toilet or cleanout—those can damage treatment systems and trigger immediate action.
Practical steps: trace the drain, use containment for washouts, keep stockpiles covered, install silt controls, and get the required permits for any discharge. If you see a spill, stop work and call your municipality—fines, stop‑work orders, cleanup bills, and even criminal penalties can follow an illegal discharge. Don’t guess; document and ask before you drain.
Consolidated regulatory prohibitions (short authoritative list)
- Never discharge slurry, wash water, paint, solvents, oils, or concentrated chemicals to storm drains, gutters, creeks, or surface water.
- Do not send hazardous liquids to sanitary sewers without written municipal approval or a permit.
- Keep washout areas within lined containment away from wells, potable water lines, and property boundaries.
- Label and manifest hazardous waste shipments; municipal drop-offs may restrict residential vs commercial quantities.
How to find your local rules and contacts (sample searches and permit names)
First stop: your city or county website. Search for terms like “stormwater permit”, “public works permits”, “construction site erosion control”, “concrete washout guidance”, or “household hazardous waste”. Typical permit names and pages to look for include “Stormwater Pollution Prevention Plan (SWPPP)”, “Construction General Permit”, “NPDES municipal stormwater”, “Public Works – Wastewater Discharge Authorization”, and “Household Hazardous Waste (HHW) drop-off”.
If you don’t find a clear page, call the main switchboard and ask for public works, stormwater, environmental compliance, or the building department. Suggested call/email script:
- “Hello, my name is [Your Name] at [Address]. I’m doing a small concrete/grout/resin cleanup and need to know disposal limits and whether I need a permit for decanting wash water. Which office handles construction washouts and stormwater compliance, and what forms or approvals are required?”
Also call your state/provincial environmental agency hotline if you suspect drainage or contamination issues. Use the public works number for road crossings and curb cuts. Have these ready when you call: the property address, a short description of the work, approximate volumes, and planned disposal method (evaporation, sanitary sewer, hauler pickup). If you have photos or a site sketch, email them first so the inspector sees the problem before the call.
Typical municipal limits and examples
- Common pH constraints: many municipalities require discharged water to be approximately pH 6–9 or 6.5–8.5; check with local authority for exact numbers.
- Total Suspended Solids (TSS): some programs expect low TSS (e.g., <50–100 mg/L) for permitted discharges to sanitary sewers—again, verify locally.
- VOC and solvent limits: solvent-containing wash water is frequently banned from sewer/storm discharge and must be handled as hazardous waste.
When wash water is considered hazardous waste — tests and sampling basics
If your wash water contains strong acids or bases (very low or very high pH), concentrated solvents, or lingering industrial chemicals like chlorinated solvents or heavy metals, treat it as hazardous. Don’t guess—get it tested. Recommended tests to discuss with the lab:
- pH (field strips and laboratory confirmation)
- Total Suspended Solids (TSS)
- Toxicity Characteristic Leaching Procedure (TCLP) for heavy metals and regulated organics
- Volatile Organic Compounds (VOCs) including common solvents (IPA, acetone, toluene, methylene chloride)
- Specific analytes listed on product SDS (e.g., bisphenol A, isocyanates, certain biocides)
- Conductivity/total dissolved solids (TDS) when salt content may be an issue
Sampling tips for chain-of-custody and lab submissions:
- Collect at least 1 L for routine chemistry, 40–120 mL vials for VOCs (preserved per lab instructions), and follow the lab’s sample preservation and hold-time instructions.
- Use clean, labeled bottles from the lab when possible. Record date/time, sampler name, and sample location.
- Request a chain-of-custody (COC) form from the lab—keep copies of forms and receipts. If you use a hauler, ask whether they require lab results and how they want samples documented.
- To find accredited labs, search “NELAP accredited environmental lab” or ask your local environmental agency for an approved list.
Health & Safety — PPE and Emergency Steps
Essential PPE for wash water and slurry handling includes chemical-resistant gloves, splash goggles or a face shield, a splash apron or lab coat, and respiratory protection when airborne mists or fumes are likely, with clear criteria for when each item is required based on spill size, additive concentration, and ventilation status. Create a safe workspace by ensuring adequate ventilation, using exhaust or fume fans, providing open air only where safe, enclosing containers to control fumes, and arranging the layout to minimize reach into splash zones and to separate clean areas from contaminated zones.
Be aware of common additives, their pH ranges, and potential irritants in wash water and slurry so you can recognize early signs of exposure such as skin redness, eye irritation, coughing, or throat irritation, and know when to stop work and seek medical advice. In spills, splashes, or inhalation events, follow a simple sequence: spot clean if safe, rinse thoroughly with ample water, remove and bag contaminated PPE for proper disposal, and escalate to medical care if symptoms persist, while storing and labeling contaminated materials and waste with regulatory-compliant disposal options.
Required PPE by slurry type
For cement-based slurries wear heavy-duty nitrile or neoprene gloves, splash goggles, and waterproof boots. Use long sleeves and a disposable coverall or washable work clothes. Cement dust and wet slurry will burn skin and eyes — keep an eyewash nearby and rinse immediately if you get splashed.
For solvent-thinned slurries use solvent-resistant gloves (butyl or thicker nitrile), sealed eye protection, and a respirator with organic-vapour cartridges. Avoid cotton or leather boots; use chemical-resistant boots or overshoes. Work outside or with forced ventilation and replace cartridges as soon as they smell anything.
For resin and epoxy slurries use nitrile gloves rated for epoxies, full-face protection if you’ll mix or pour, and repeatable disposable clothing if you can’t launder contamination out. Some resins give strong vapours and allergic reactions over time — choose the right respirator and don’t shortcut gloves. If you already read the main Health & Safety section, follow those emergency steps if exposure occurs.
Contaminated PPE — cleaning, storage and disposal
- Disposable PPE (single-use nitrile gloves, disposable coveralls, wipes) contaminated with solvents, uncured resin, or heavy contamination should be sealed in labeled hazardous waste bags/drums and handled as hazardous waste per local guidance.
- Reusable PPE (chemical-resistant boots, goggles) must be decontaminated following manufacturer and SDS guidance: remove gross contamination outdoors, rinse with water away from drains into a contained settling tank, and launder separate from household laundry if appropriate. Record decontamination steps and retain contact info for laundry services if outsourced.
- Soaked rags or absorbents used with solvents or resins: store in closed metal cans or approved drums labeled “hazardous — solvent soaked” and arrange pickup via municipal HHW or licensed hauler. Do not leave solvent‑soaked rags in vehicles or trash where spontaneous combustion or leaks can occur.
Emergency response for alkaline/corrosive exposure
If slurry or any alkaline material contacts skin, clothing or eyes, stop the job and get into clean air. Remove contaminated clothing and brush off any dry powder first. For skin and eyes, flush with water immediately — lots of water, continuous, at least 15–20 minutes for eyes and 20–30 minutes for skin. Don’t rub, don’t try to neutralize with household acids on a person; that can make it worse.
For small spills on non-porous surfaces you can neutralize after containment, but only with proper PPE and a tested neutralizer and in small amounts. Use dilute acetic or citric acid solutions only if you know the chemical and have neutralization instructions. If the material is unknown, keep the area isolated and call your supplier or poison control for guidance.
Seek medical care immediately for any eye exposure, signs of deep burns, breathing difficulty, numbness, worsening pain, or if flushing doesn’t stop the irritation. If in doubt, call emergency services and bring the slurry label or MSDS. Quick water irrigation and tidy reporting beats a permanent injury.
Safe handling and spill containment
Stop the source first and keep people away. If a container is leaking, move undamaged containers out of the area. Remember to check storm drains and block them immediately with absorbent socks, rags or a temporary dam. Don’t stand around debating—containment comes before cleanup.
Create a quick barrier with soil, sandbags, plastic sheeting or absorbent booms to keep the slurry from running downhill or into landscaping. For small spills, sprinkle absorbent material over the liquid and work from the outside toward the center so the spill doesn’t spread. For larger flows, cut off the flow path with a shallow trench or temporary berm and divert material to a safe collection point.
Collect contaminated material into appropriate containers and label them. Scoop or shovel solidified slurry; never hose it into a storm drain. If the material is hazardous or you’re unsure, call your waste hauler or emergency contact. And don’t forget—use the required PPE you already set up and follow the emergency steps outlined earlier if anyone is exposed or if the spill reaches drains or soil.
Estimating Volumes and Planning Capacity
Use straightforward geometry and conservative margins to size tanks, pans and settling basins. Multiply area by depth to get volume (m² × m = m³), then convert: 1 m³ = 1,000 L ≈ 264 US gallons. Add a contingency of 25–50% for extra rinsing, rain, or accidental dilution. Plan retention time based on expected particle size: sand settles in minutes to hours; silt and clay can take 24–72+ hours.
Quick volume calculators and examples
Keep it practical: multiply area by depth to get cubic metres, then convert to litres (1 m³ = 1,000 L) or gallons (1 L ≈ 0.264 gal). If you already read the earlier planning notes, you know how to use these numbers to size bins, pumps and disposal capacity — just do the math before you start.
Tile removal example: 10 m² of tile with 10 mm (0.01 m) of thinset/grout = 10 × 0.01 = 0.1 m³. That’s about 100 litres, roughly 26.4 gallons of material/waste you need to handle. If tiles are thicker or have a screed layer, double or triple that estimate — don’t assume thinset only.
Small concrete pour cleanup: a 0.5 m³ pour (2.0 m × 1.0 m × 0.25 m) leaves runoff and wash water. Tool and chute washdown typically generates ~50–150 L of slurry; expect about 100 L (~26 gal) on average. For a 1.0 m³ pour, plan for 150–300 L (40–80 gal) of wash slurry. Always add a 25–50% buffer for extra water, solids and accidental spills; underestimating cleanup volume is where projects get stuck.
Sizing settling/containment vessels
Start with your peak flow and how long you must hold water for solids to drop out. Use the quick volume calculators mentioned earlier to get a starting tank size, then add margin. Aim for at least the calculated volume plus extra allowance for sludge and routine clean-outs.
Decide a practical retention time based on the material you expect to settle—sand drops fast, silts take hours. If unsure, size for the longer time. Also include at least 20–30% extra height as freeboard so surges or wind won’t spill the top.
Layout matters: make access for pumps and clean-out easy, slope the floor to a drain point, and check base compaction before you place liners or concrete. If you skip that you’ll regret it when the tank shifts or leaks. Plan emptying frequency and safe overflow routing as if the pump fails.
Storage safety, inspection schedule and recordkeeping
Keep slurry away from drains, wells and stormwater. Use an impermeable pad or lined pit and a bermed secondary area sized to hold the full slurry volume plus a safety margin — typically around 10–20% extra. Cover tanks or pits to cut odors and rain loading, and avoid storing where it can freeze or flood.
Inspection schedule (minimum): visually check liners, seams, bungs, valves and containment daily during active use; perform a more detailed inspection (pump test, liner seam check, sample TSS/pH) weekly. Empty and dispose or dewater before sludge depth exceeds 25–35% of tank volume or when performance drops noticeably.
Recordkeeping: keep a simple log (date, volume added/removed, pH/TSS results, photos, destination or hauler name, manifest numbers) and retain records for at least one year or as local rules require. Label every container or temporary storage area with source, date filled and basic hazards (e.g., “paint slurry — solids 8% — alkaline”).
On-site Pre-treatment Methods (DIY)
This on-site pre-treatment guide outlines a practical, DIY workflow for slurry management: start with settling to clarify the liquid, then move to filtration, adjust pH as needed, and add flocculation and solidification only when the slurry characteristics require it, with separate steps tailored to common home-generated slurries like concrete wash water, resin or epoxy slurry, and ceramic slip. It emphasizes simple, safe methods such as settling tanks or settled pits, mesh or cloth filtration, straightforward pH testing and adjustment, and cementitious solidification to produce stable solids, all with clear thresholds to proceed to the next stage and with attention to protective gear, spill prevention, odor control, and local disposal rules.
Why it matters on a DIY or jobsite setting: following this sequence minimizes environmental impact, reduces regulatory risk, and can lower disposal costs by converting liquids to compliant solids, while providing practical, actionable steps, checklists, and a troubleshooting mindset that covers tool readiness, measurement accuracy, and documentation to ensure consistent results and safe disposal of treated solids and liquids. The approach also offers a concrete basis for decision-making in irregular slurry conditions, helping you adapt the workflow to different slurry types and stay within safety and regulatory requirements without relying on specialized equipment or complex procedures.
Settling and decanting for mineral slurries (concrete, grout, clay)
Dump slurry into a gravity settling tub and let it sit. For coarse concrete and grout sand, you’ll see most solids drop in 24–48 hours. For fine clay or silts, expect 48–72 hours or longer. Don’t stir or move the tub while it’s settling. The clearer the top layer becomes, the safer to decant.
Use a second clean container to receive the clear water. Either siphon from the top or slowly pour from about an inch below the surface so you leave the settled layer behind. Stop decanting when you see turbidity or near the final inch of liquid. Do not pour solids down the drain; they clog and violate disposal rules.
Before you reuse or release the decanted water, check clarity and pH. If it’s still cloudy or very alkaline from cement, hold it longer or neutralize per local rules. If in doubt, bag and dispose of the settled solids as wet construction waste and contact your local waste authority for disposal limits.
Filtration and silt bags for fine particulates
Pick your filter to match the particle size and flow. Use coarse mesh or heavy-duty coffee filters for larger grit, and fine cheesecloth or specialty filter bags for silt and clay. If you can’t tell the particle size, start with a coarser media and step down — changing clogged fabric is cheaper than a plugged drain.
Install silt bags or filter socks inline ahead of any drain or sump and keep the inlet low so water passes through, not around, the bag. Secure the bag so it can’t flip or burst at peak flow. Manage flow with a simple valve, diversion barrel, or small weir so the bag sees steady, not surging, flow — surges kill filter life and send solids downstream.
Check and replace filters often; they clog fast when you skip the routine. Empty captured solids into the right waste container — don’t wash them back into the street or storm drains. If settling and decanting is possible on site, use that first to remove the bulk of solids, then finish with filters for the fines. Strong containment and routine checks prevent fines from becoming someone else’s problem.
pH neutralization and flocculants (measured DIY recipes and safety)
If your slurry is alkaline from concrete or grout, neutralize it slowly and measure as you go. Follow this safe, stepwise approach:
- Measure starting pH with strips or a meter and record it.
- Start with small, incremental additions: for 100 L of slurry, add ~1 L of 5% white vinegar, stir gently, wait 2–3 minutes and re-test. Continue in 0.5–1 L steps until you reach pH 7–8. For citric acid use 25–50 g steps dissolved in water, retest after each addition.
- For strongly alkaline waters (pH > 11), work in a well-ventilated area and add acid slowly — too much at once produces heat, fizzing and fumes. Use PPE and have eyewash available.
- If you prefer a basic neutralizer for acidic streams, sodium carbonate (washing soda) is commonly used; add in small grams-per-100 L increments with frequent rechecks.
- If the slurry contains solvents or unknown organics, do NOT neutralize as a DIY step—stop and call a qualified laboratory or hazardous waste contractor.
Flocculation: run a jar test before scaling. For light silt try 1–3 g dry PAM per 100 L; for heavy clay try 5–20 g per 100 L. Prepare a concentrate in clean water, then add to the slurry while stirring gently, wait 10–30 minutes and observe settling. Avoid overdosing — it can re-stabilize solids.
Safety notes: always add chemicals to water (never water to acid), work in small test batches, use PPE (gloves, goggles, respirator if fumes are present), and keep an extinguisher and spill kit on hand. If you see unexpected heat, strong fumes, or persistent emulsions, stop and consult a professional.
Safe On-site Disposal Options
On-site disposal relies on three practical options—evaporation, solidification, and slow infiltration—each with clear pros and limits for different slurry volumes and soil types, and each requiring safeguards such as PPE and air-quality checks. Evaporation is fastest but depends on weather and containment; solidification locks in solids with additives and may reduce odor, while slow infiltration relies on soil permeability with careful monitoring to avoid pooling or breach. Pre-steps like recapturing water, using silt traps, checking pH and solids, and establishing lined containment help minimize waste and prevent leaks before you start the workflow.
A practical sequence from initial containment through final disposal helps builders stay within safety rules, document volumes, measure slurry, apply appropriate amendments, and track evaporation rates while watching for signs to switch methods. Understanding site constraints—permeability, slope, rainfall, and groundwater proximity—along with equipment needs and disposal rules keeps projects compliant and reduces the risk of contamination or failed tests. This context matters for DIYers because clear planning, proper PPE, ventilation, spill kits, absorbents, sealable containers, and a solid plan for final disposal of solidified material help prevent hazards and keep the job moving smoothly under real-world conditions.
Evaporation pits and pans — when it’s appropriate
Use evaporation pits or pans only for small, low-hazard liquid volumes you can’t haul off-site. Think hundreds of litres, not thousands. Dig a shallow pit or set a metal pan on compacted soil so it drains toward the pit edge, not into surrounding ground. Check base compaction and keep the surface level to avoid runoff.
Line the pit or pan when soil is porous or groundwater is close. A heavy-duty plastic or a purpose-made impermeable lining will stop liquids seeping down. Place the setup well away from trees, drains, wells, and property lines. If in doubt about groundwater depth, don’t use a pit—call a pro.
Timing matters: choose dry, hot spells and avoid the rainy season. Small pans can evaporate in days in summer, but pits take longer and need regular monitoring. Cover pans when not actively evaporating to keep debris and critters out. And remember the other safe on-site disposal options if volumes grow or contaminants are risky—pits are a short-term, controlled fix, not a permanent dump.
Solidification for transport or landfill acceptance
Solidify liquid or semi-liquid wastes when the landfill or transporter requires a non-flowable material. Use Portland cement as the binder and add an absorbent like kiln dust, hydrated lime, or clean sawdust to bulk it up. A practical starting mix is roughly one part cement to one to three parts waste by volume — thicker sludges need less cement, thin liquids need more — and add absorbent until the mix looks like stiff mortar. Wear gloves, goggles and a dust mask while mixing; don’t skimp on PPE.
Mix thoroughly until there is no free liquid visible and the mass holds shape. Place in small batches into a rigid container or lined roll-off so it can cure without disturbance. Initial set will occur in 24–72 hours; allow at least 7 days of curing before load-out whenever possible. If the landfill or hauler has stricter time or strength rules, follow theirs instead of shortcuts.
Test stability before disposal: press with your thumb or a trowel—no smear, no ooze; pick up a small chunk once cured and drop it 1–2 feet—if it crumbles into powder or releases liquid, it’s not done. For sites that require verification, get an unconfined compressive strength or leachate (TCLP) test from a lab. And remember: don’t replace proper solidification with evaporation pits or pans unless those were previously approved for this specific waste and site conditions.
Controlled infiltration and landscape reuse
If the waste is low-tox and allowed for reuse, you can route treated water to non-edible landscaping or a shallow infiltration basin. First, confirm concentration limits and local rules — don’t guess. Keep a clear buffer from wells, streams, and potable lines, and avoid fast-draining sandy soils that send contaminants straight to groundwater.
Prepare the area so it actually soaks in. Loosen topsoil, check base compaction, and direct flow into mulched beds or a shallow trench lined with coarse rock for even spread. Keep the treated flow away from tree root collars and vegetable areas. If vegetation shows stress after a few applications, stop and reassess chemistry and rates.
Label the reuse area and monitor it for at least a few weeks. If you can’t meet buffer, soil or chemistry limits, choose evaporation or solidification options already discussed earlier. Don’t shortcut this — letting untreated or borderline waste into your yard is how you make a long-term problem.
Off-site Disposal and Transport
Off-site disposal and transport means preparing waste so it can be accepted by municipal hazardous waste centers, transfer stations, or licensed contractors, depending on local rules. Prepare the waste with containment, settling or decanting where possible, filtration to reduce solids, and clear labeling with date, contents, volume, and hazards, plus any required manifests or center-specific forms. Ensure containers are sealed, leak-proof, and compatible with the waste type, and organize the right paperwork for pickup, including transfer details, contractor information, and a disposal log.
Knowing the correct off-site destination and following preparation steps helps avoid spills, fines, and delays, while protecting workers and the environment. It also clarifies whether you should use municipal routes or hire a licensed hazardous waste contractor, and what level of service to expect from each option. This guidance helps jobsite teams plan routes, secure packaging, and maintain records that prove compliant disposal and track disposal dates.
Preparing waste for drop-off (containment, drying, labeling)
Before you move anything, make liquids safe to handle. Pour small amounts into a tray and let solvents evaporate outdoors, or mix in an absorbent like cat litter or commercial gel until the slurry holds shape. For paint or resin, let the can skin over and add dried absorbent to the rest. The goal is solidify liquids so there’s no sloshing or spills during transport.
Put wastes in sturdy, compatible containers. Use original containers when possible or UN-rated replacement drums for larger volumes. Tape lids, use screw caps, and wrap seams with heavy-duty tape if needed. Keep incompatible wastes separate; do not cram acids next to bases or solvents next to oxidizers. Make sure there are no drips—no leaks when you pick it up.
Label everything before you load the truck. Write the contents, hazard type (flammable, corrosive, etc.), and the date. Add your name and a contact number if the facility needs to reach you. Finally, do a quick pre-trip check: secure containers upright, block movement, and bring PPE and spill cleanup materials. If you’re unsure about classification or limits, refer back to the Off-site Disposal and Transport section or call the drop-off facility—don’t guess on hazardous waste rules.
Using municipal hazardous waste programs
Call ahead and read the program page before you go. Many centers require an appointment, limit the amount you can drop off per visit, and only accept certain items. If you show up without an appointment or with banned materials, they will turn you away. Call ahead to confirm hours, fees, and any vehicle‑access rules.
Bring photo ID, proof of residency if required, and any paperwork the program asks for. Expect small per-bucket or per-car fees at some locations. Don’t assume it’s free — budget for a fee and possibly a short wait. If your load is large, ask about commercial versus residential rules so you don’t get charged extra or refused.
Package your items as instructed (see the earlier notes on containment and labeling) and keep incompatible wastes separated. Don’t try creative shortcuts — mixing or leaking containers will get you sent home and could be dangerous. When you arrive, tell staff exactly what you have so they can direct you quickly and avoid surprises.
Hiring a licensed waste hauler — cost and benefits (vetting checklist)
For a homeowner with more than a few cans of paint or a small drop-off haul, hiring a licensed waste hauler saves time and risk. Expect small pickups to run roughly $150–$500. Jobs with several drums, mixed hazardous liquids, or bulk debris commonly land in the $500–$2,000 range. If asbestos, regulated PCB oils, or large-volume chemicals are involved, costs can jump higher because of special handling and disposal fees.
What you need to check before they roll up:
- State or EPA licensing — ask for the carrier’s permit numbers and a copy of their waste transporter license.
- Liability insurance proof and minimums.
- Request a sample chain-of-custody/manifest and confirm they will provide signed disposal receipts.
- Ask which disposal facility they will use and request the facility name and address.
- Get an itemized written quote with per-item or per-ton tipping fees, minimum charges, and any extra fees for manifests or emergency service.
Negotiation tips: compare 2–3 quotes, ask about consolidation options (pooling small loads), and clarify whether the quote assumes pre-treatment (solidification) or includes it. If credentials are vague or they refuse to provide manifest/receipt copies, look elsewhere.
Equipment, Materials and Cost Comparisons
An essential equipment kit for wash-water and slurry disposal includes filters, silt bags, buckets or pans, pH strips, sealable containment, and basic PPE, with each item chosen to separate solids, measure acidity, and keep workers safe during filtration and collection. DIY workflows typically filter sludge through silt bags into settling or holding tanks, while professional disposal involves hauled waste to licensed facilities, with flow rates and handling limits affecting what can be treated on site. Across items and consumables, you’ll see price ranges from inexpensive replacement filters and PPE to moderate costs for neutralizers and absorbents, contrasted with typical service fees for licensed disposal, plus time for setup, filtration, testing, and final transfer.
Understanding these elements helps a jobsite decide whether to invest time in a DIY kit or hire a service, based on slurry volume, contaminants, budget, and local rules. The practical benefit is quicker safe handling, clearer compliance records, and predictable maintenance when using professional facilities, or greater control and potential cost savings when DIY is feasible. A simple on-site decision framework can guide choices based on volume, contaminants, budget, and local regulations, helping you avoid common pitfalls and stay compliant without promising external resources.
Low-cost DIY kit and expected lifespan
Grab a sturdy plastic container or two (20–50 L) for about $5–15 each; they’ll last years if you avoid UV and cracks. Add a roll of hardware cloth or fine mesh for screening—$8–20—and expect it to last multiple seasons unless it rusts; stainless or PVC-coated mesh costs more but lasts far longer. For a simple setup you can expect initial spend around $30–60, excluding tools you already own.
Include a small jar of flocculant powder (sample size $5–12) and a neutralizer (pH adjuster, $5–10). The flocculant is the consumable—plan on one small jar lasting several uses for low-volume jobs, but check the expiration and store it dry. The neutralizer keeps chemistry in check and can be reused until contaminated; replace if it gets visibly dirty or the effectiveness drops.
Before you start, check seals and mesh integrity and decide if reusing the same containers is worth the risk for potable or sensitive uses. If you need repeatable, clean results, budget to replace the consumables yearly and upgrade to better mesh or coated containers. For one-off or occasional jobs, this kit is cheap and effective; for frequent work, spend a bit more up front and you’ll save time and headaches.
Professional service cost breakdown
Expect three basic charges: pickup/transport, lab testing, and disposal. Pickup is usually around $50–$150 for a single run. Testing runs about $100–$300 depending on how many analytes they check. Disposal jumps the most: small non-hazardous loads can be $200–$500, while hazardous classification or higher-volume loads can push $500–$1,200+ or more.
Costs climb for a few clear reasons. If the material is classified hazardous you’ll see higher transport fees, special handling, manifests, and sometimes permit surcharges. Volume changes the math too—many companies have a minimum charge and then a per-ton rate, so a bigger job doesn’t scale linearly. Sensitive locations, tight timeframes, or required containment add extra fees.
Before you book, ask for an itemized quote and the facility’s required waste profile. Get written confirmation of disposal receipts and chain-of-custody paperwork. If the quote is vague, walk away—cheap can mean illegal dumping or surprise invoices. If you’re weighing this against a low-cost DIY kit covered earlier, compare total out-the-door cost including possible lab-confirmed test results and certified disposal documentation.
Where to buy materials and environmentally friendly product choices
Pick the right materials and you save time and avoid repairs. The right brick, mortar, sand and cleaners determine durability, color match and how long the job looks good. Buy sensible grades — don’t guess from looks alone.
- Paving bricks Used for surface and appearance. Look for freeze-thaw rating and water absorption on the spec sheet (≤6% for harsh climates). Buy from a masonry supplier or reclaimed yard; cheap soft bricks will spall and stain within a few winters.
- Mortar mix Binds bricks and handles load. Choose Type N for above-grade walls and Type S for retaining/structural use; look for “masonry” and compressive class on the bag. Avoid cheap high-cement mixes for brickwork — they crack and damage brick faces.
- Masonry sand Used for mixing mortar and joints. Opt for sharp sand or “masonry sand” with good grading (not rock dust). Clean, well-graded sand gives strong joints; dirty or clayey sand weakens the bond and causes premature failure.
- Polymer additives Improve bond and flexibility in cold or damp conditions. Look for “polymer-modified” on the label and follow dosage rates. Skip them only on straightforward repairs in perfect conditions; using the wrong additive can prevent proper curing or cause staining.
- Brick adhesive For small repairs and non-structural fixes. Choose a high-strength construction adhesive rated for masonry; look for weatherproof and freeze-thaw resistance. Use adhesive for trims and caps — don’t substitute for real mortar on load-bearing work or you’ll get failures.
- Sealant / water repellent Protects against moisture and salt damage. Pick silane/siloxane or low-VOC breathable sealers labeled “masonry water repellent.” Avoid film-forming, non-breathable sealers; they trap moisture and accelerate spalling. Expect $20–$60 per gallon depending on brand.
- Cleaners & detergents For efflorescence and mortar smears. Use biodegradable, low-VOC masonry cleaners or diluted phosphoric cleaners; check acid strength on the bottle. Strong muriatic acid is cheap but risky — it stains, eats mortar and is hazardous; use only with experience, or choose gentler eco options from specialty suppliers.
- Tools & hardware Trowels, jointers, mixers and a decent drill are needed. A homeowner-grade drill and a paddle mixer are fine; rent a mortar mixer for big jobs. Cheap tools slow you down and give sloppy joints; rent the heavy stuff to avoid wasting time and materials.
Pro tip: Buy from a local masonry supplier when possible — they’ll match specs and often sell reclaimed brick. Store cement and mortar bags off the ground and dry. Mix only what you’ll use in an hour and label any leftover additives; improper storage or overmixing is the fastest way to waste money and ruin durability.
Concrete, Grout and Resin — Protocols with Measured Steps
Concrete wash water, grout slurry, and resin/epoxy slurry each have a defined, measured protocol to safely treat and dispose of contaminants. Three separate step-by-step procedures specify quantities in gallons or liters, exact wait times, and actions like dilution, neutralization, or filtration. The protocol also covers initial settling, solids removal, container labeling, and how to store solids for later disposal.
For DIY and job sites, clear containment and labeling with dedicated containers, tight seals, and leak alarms help prevent cross-contamination. Safety, documentation, and visuals—such as PPE, spill response, measurement logs, and placeholders for photos—support consistent, compliant practice.
Concrete/cement slurry protocol (quantities, neutralization, disposal)
For small pours or washout, mix slurry with a binder-only solidifier at a ratio of about 3:1 bucket of slurry to 1 bucket of binder by volume for workable tack and quick set. If the slurry is watery or very dilute, use 2:1. For heavy, paste-like waste, move toward 4:1 so the mix still drains and solidifies. Work in 5–20 L batches. Stir, let the binder wet all particles, then let sit undisturbed.
Neutralization guidance (clear sequence): first measure pH. If the slurry is alkaline (pH > 9–10) and you plan to discharge to a system that allows neutral pH, neutralize slowly with dilute acetic acid (5% white vinegar) or citric acid in small increments, following the titration steps in the pH neutralization section above. If the slurry is acidic (pH < 6), consider sodium carbonate (washing soda) in small steps to bring pH toward neutral. Always add neutralizer to slurry incrementally, monitor pH after each addition, use PPE, and ventilate for fumes. Do not mix neutralizers together or attempt large-scale neutralization where VOCs or unknown organics are present—call a pro.
Allow solids to settle for 24–72 hours depending on load and temperature. Clear supernatant can go to the sanitary sewer only if local rules allow and pH is neutral. Decant carefully and dispose of cake and used binder as construction waste through your normal licensed waste hauler. Never wash slurry to storm drains or soils. If in doubt, bag the settled solids and send them to a concrete recycling or hazardous waste facility per local regs.
Grout and tile adhesive cleanup protocol
Start with capture at source: scrape and wipe excess grout/adhesive into a bucket before you rinse. Rinse tools into a separate wash bucket or pump tank, not the gutter. Use a coarse strainer first (about 300–500 microns) to catch chunks, then pass the water through a finer filter or silt bag in the 100–200 micron range to remove the bulk of the suspended solids.
Let captured rinse water sit so solids settle — typically 24–48 hours. Decant the clearer water from the top for possible reuse on-site for mop water or tool rinsing. Once the solids have dried to a manageable cake, shovel them into a labeled waste container for disposal as solid construction waste per your local rules. If you used any acid-based cleaners, follow the neutralization/disposal steps used for concrete slurry rather than dumping them down the drain.
Only consider sending rinse water to the sanitary sewer if your municipality allows it, the water is clear of visible solids, and pH is neutral. Never pour slurry or filtered solids to storm drains or directly to the environment — do not pour into storm drains. When in doubt, bag the solids and call your local waste authority; it’s cheaper than a fine or site contamination.
Resin wash and IPA waste handling
Wipe up excess uncured resin with disposable absorbent cloths or pads. Do the wiping over a tray or bucket so you capture the mess. Never rinse resin into a yard gully or storm drain — do not pour down drains. Place used cloths in a sealed metal can or plastic drum and label them so they aren’t tossed with general rubbish.
When you rinse tools with IPA, collect the wash into a closed container. Let heavy solids settle and decant clear solvent from the top. If you can, run the solvent through a simple filter or use activated carbon or a small distillation unit to recover and reuse it. Do not evaporate IPA to air on site; open-air evaporation is unsafe and often illegal.
For disposal, contact a licensed hazardous-waste contractor. Store accumulated solvent and contaminated absorbents in appropriate drums with lids and labels until pickup. Small, cured bits of resin can follow the same solid-waste route as cured grout or tile adhesive, but liquids and soaked rags need specialist handling — use a licensed hazardous waste contractor and check local rules before deciding.
Common Mistakes, Quick Decision Flowchart and FAQ
Tackle common concrete wash water issues with a clear, three-path framework: dispose, treat, or call pros, aligned with typical wash water and slurry constituents such as concrete dust, curing agents, detergents, and resins, plus hazards like silica, chemical exposure, and pH shifts. The section highlights the top mistakes—improper segregation, skipping pH and solids testing, dumping into drains, ignoring local regulations, and using inappropriate cleaners—and links each to practical fixes and a concise decision flow that triages the situation quickly. It also lays out simple on-site steps for settling, filtration, and pH adjustment, plus safe storage and transport rules, with explicit signals to stop DIY and escalate to licensed professionals where needed.
For a DIY or jobsite reader, this guidance translates into actionable, time-saving decisions that reduce spill risk and regulatory trouble while keeping project momentum. The short decision prompts help you assess contamination, safe pH ranges, and container capacity, and guide you toward home disposal, on-site treatment, or professional handoff. By clarifying remediation paths and urgent FAQ topics—treatment timelines, acceptable disposal methods, permit requirements, emergency spill steps, and when to contact local waste management—you gain clarity to protect workers, meet compliance, and prevent costly mistakes before they escalate.
Common mistakes and how to fix them
These are the real-world slipups I see on jobsites. Avoid them and you’ll save time, money, and headaches. If you need the basics, check the Quick Decision Flowchart and FAQ above.
- Pouring into drains — Dumping leftover wash water, slurry, or debris down storm drains clogs systems and can lead to fines. Collect wash water, filter solids, and dispose of slurry with your local disposal facility.
- Insufficient compaction — Skipping proper base compaction causes settling and cracks later. Rework the base in 2–3″ lifts and use a plate compactor until there’s no visible movement.
- Wrong grade or slope — Flat or reversed slopes send water where you don’t want it. Re-establish a consistent fall (usually 1–2% for flat surfaces) before finishing. Fix low spots with compacted fill, not loose sand.
- Poor material choice — Using the wrong mix or cheap aggregate saves money now and costs more later. Match materials to the task (base vs. finish) and buy from a reputable supplier. When in doubt, ask for product specs.
- Opening too soon — Traffic before the work has settled or cured leads to ruts and pop-outs. Follow cure/settle windows for the material and protect the area with signage or temporary barriers.
When to stop DIY and call a professional (hard thresholds)
- Volume thresholds: more than ~200 L (≈50 US gal) of mixed slurry with unknown composition — strongly consider professional handling or hauler pickup.
- pH extremes: measured pH <2 or >11 should trigger immediate contact with a hazardous waste contractor or local authority.
- Contaminants detected: presence of chlorinated solvents, petroleum products, heavy metals above local limits, persistent VOCs, or isocyanates — call a professional.
- Site constraints: groundwater depth <2 m, wells within 30 m, surface water within 100 m, or poor soil (high permeability) — stop and consult an environmental professional.
- Uncontrolled fumes, ignition risk, or health symptoms among workers — evacuate and call emergency services or a hazardous materials contractor.
Quick decision flowchart (capture → test → treat → dispose)
See the sequence: capture, test, treat, dispose. First thing: contain immediately. Stop spreading material, block drains, and keep people away. Make quick photos and note times. Don’t get cute with temporary fixes that mix contaminated and clean soil.
Next, test fast. Use a field kit or send a sample depending on the suspected contaminant (see lab tests section). If a quick screen reads high, treat on-site only if you have the right method and permits. If unsure, treat as contaminated and call a pro. For disposal, arrange transport to an approved facility and keep chain-of-custody paperwork.
Timing: capture within minutes, screening within hours, decide treatment within a day, and move to disposal on the next available permitted load. If any step flags on safety, regulation, or cost, stop and consult the experts. For common mistakes to avoid and fixes, refer back to the earlier Common Mistakes notes rather than redoing the same bad moves.
Frequently asked questions
If you mean small amounts of household chemical slurry, do not pour it down the sink. Even tiny amounts can clog traps or contaminate drains. Follow the quick decision flowchart from earlier: capture, test, treat, dispose. If you have only a harmless water-based rinse, neutralize and run in very small amounts while flushing with plenty of water—but when in doubt, contain it and dispose properly.
Letting slurry settle depends on what’s in it. For most mixes, let the solids settle for about 24–48 hours in a sealed container, then decant clear liquid off the top. If the mix contains heavy metals or unknown toxins, you must test before releasing any liquid. Keep a safe distance and avoid stirring during settling.
If anyone breathes fumes, gets chemical on skin, or you suspect poisoning, call poison control or emergency services immediately. Don’t wait to see if symptoms worsen. If you’re unsure how to handle a substance after testing, pause and call for professional advice rather than guessing—better safe than sorry.

Conclusion
Handling wash water and slurry correctly protects your project’s durability, your home, and the environment. A clear plan, careful testing, and strict adherence to safety rules keep errors from turning into costly repairs or junked materials.
First, assess the type and volume of wash water you’ll generate, confirm local rules, choose a practical pre-treatment method, and test a small batch before scaling up. Set up containment and labeling, gather the right PPE, and map out the step-by-step disposal path—on-site if feasible, or off-site with proper transport in place. Keep a simple log of quantities, treatments used, and final disposition to stay compliant and ready for inspections.
Common mistakes to avoid include ignoring local disposal laws, skipping PPE or spill controls, and dumping or diluting into inappropriate surfaces like storm drains. Don’t guess about pH or contaminant levels; test first, adjust with approved steps, and never mix chemicals unless the method explicitly calls for it. Maintain a clean work area, have spill kits ready, and keep kids and pets away during handling. If you’re unsure about the waste stream, or the proposed method could affect foundations, concrete or nearby drainage, step back and re-evaluate before moving forward.
If the volume or complexity exceeds your capacity, or you’re dealing with stubborn slurries, call in a professional instead of forcing a DIY workaround. When in doubt, prioritize safety, regulatory compliance, and protecting the structure—and push forward with confidence, one careful step at a time.
FAQ
1. Can I dump wash water or slurry down the drain?
No. Regular drains, septic tanks, or waterways can get damaged or clogged. Always treat the water first and dispose of it properly.
2. What’s the quickest safe way to dispose of wash water from concrete or slurry?
Let the solids settle, then decant the liquid into a suitable greywater container. Use a licensed disposal service or a designated disposal point if your area requires it. Don’t pour it into storm drains or onto the ground.
3. How do I handle wash water from cleaning tools and equipment?
Chances are it’s mostly soap and dirty water. Let it sit, then pour off the clean water and reuse what you can. Dispose of the dirty water where local rules allow.
4. What mistakes should I avoid when disposing of wash water?
Avoid dumping near plants, wells, or watercourses. Don’t mix chemicals with wash water and don’t ignore local disposal rules. Always check the rules before you pour anything out.