
Introduction
Lead paint was banned in 1978, and this article explains the DIY thresholds and when to call a pro.
You’ll learn how to assess risk, apply practical safety steps for common home projects, and know when professional removal is warranted.
Key takeaways
- Lead paint banned federally in 1978; earlier uses included residential coatings.
- States may have stricter rules; verify local requirements before renovation.
- Common sources persist in old houses, chipped windows, and soil near foundations.
- Testing methods include certified lab tests and home test kits for screening.
- Safe DIY threshold: avoid sanding, use containment, and follow ventilation guidelines.
- Hire certified pros for unknown lead levels, large areas, or regulated renovations.
Table of Contents
- Introduction
- Key takeaways
- Brief history of lead paint use in the U.S.
- Federal and state bans: what changed in 1978 (and earlier)
- Where lead persists today: common sources in and around homes
- Identifying lead paint in your home: tests and visual clues
- DIY thresholds: when it’s safe to do repairs yourself
- Safe DIY methods and step-by-step precautions
- Professional options, costs, and when to hire a certified contractor
- Legal, disclosure, and renovation requirements
- Conclusion
- FAQ
Brief history of lead paint use in the U.S.
Lead pigments and stabilizers gave paint durability, moisture resistance, and fast drying, which is why it became widespread in U.S. homes from the early 1900s through the mid-century. Over time, health research linked lead exposure to problems in children and pregnant people, driving regulatory steps that culminated in bans and tighter limits.
For DIY work, this history matters because it helps you read old paint labels and gauge risk in older houses. Know that older finishes may contain lead and that disposal varies by location, so follow local hazardous-waste rules and consider professional testing or remediation when needed.
How lead became a common paint ingredient
Lead was widely used in paints due to its unique properties that made it highly desirable for manufacturers. It offered excellent durability and resistance to moisture, which helped protect wood and metal surfaces from corrosion and rot. Additionally, lead provided a smooth, glossy finish, enhancing the aesthetic appeal of painted surfaces.
In homes, lead paint was commonly used on exterior walls, windowsills, doors, and trim because it could withstand harsh weather conditions without peeling or fading quickly. In industrial settings, its resistance to chemicals and abrasion made it ideal for machinery and equipment. The widespread adoption of lead-based paints continued until the health risks associated with lead exposure became more widely recognized.
Timeline of scientific and public-health discoveries
The journey to understanding the dangers of lead paint began with early studies in the 20th century. In the 1920s, researchers started to notice health issues among workers exposed to high levels of lead, leading to initial concerns about its safety. By the 1940s and 1950s, public-health advocates were raising alarms about the broader risks of lead exposure in homes, especially for children.
In the late 1960s and early 1970s, landmark studies confirmed that lead paint could cause severe health problems, including brain damage and developmental delays. These findings sparked widespread activism and public awareness campaigns aimed at educating homeowners about the risks of lead exposure. As a result, many communities began to take steps to reduce or eliminate the use of lead-based paints in residential areas.
Throughout the 1980s and early 1990s, continued research and advocacy led to stricter guidelines and recommendations for managing existing lead paint safely. This period saw significant shifts in public policy and homeowner practices, marking a critical turning point in addressing the long-term impacts of lead exposure.

Federal and state bans: what changed in 1978 (and earlier)
In 1978, the federal government barred the sale and use of lead-based paint for consumer, household applications. The ban covered residential paints used on homes and similar settings, but allowed some non-residential or specialized coatings to stay on the market. Some states had banned or restricted lead paint before 1978, and those measures worked alongside the federal rule rather than replacing it.
For a DIYer, that history matters because it shaped what you can buy for renovation projects, and it sets the stage for when lead-safe practices are required. It also explains why older homes can still have lead-painted surfaces and why testing and professional help are smart steps, even today.
Details of the 1978 federal rule
The Consumer Product Safety Commission (CPSC) banned lead-based paint for consumer use in homes, schools, and other residential settings starting in 1978. The ban applied to paints with more than 0.5% lead by weight. This means any paint sold or used after this date had to meet strict limits on lead content.
The rule covered a wide range of consumer products, including interior and exterior house paints, furniture finishes, and other decorative coatings intended for residential use. The ban was designed to protect children and families from the harmful effects of lead exposure in homes and schools.
It’s important to note that while this federal regulation set a standard, it didn’t cover all industrial or specialized applications where lead-based paint might still be used. For example, marine paints or certain commercial products could have higher allowable levels of lead content.
State and local variations before and after 1978
Before the federal ban in 1978, several states had already enacted their own regulations to limit or prohibit lead-based paint. For example, California banned lead-based paints for residential use as early as 1950 due to health concerns.
Even after the federal rule took effect, some localities continued to implement stricter guidelines or additional requirements. These variations can make it tricky for homeowners and DIYers to navigate compliance issues, especially when dealing with older properties that may still have lead-based paint on surfaces.
The regional differences highlight why understanding your specific state and local regulations is crucial. Local building codes and health departments often provide more detailed guidance on handling pre-1978 painted structures during renovations or maintenance work.
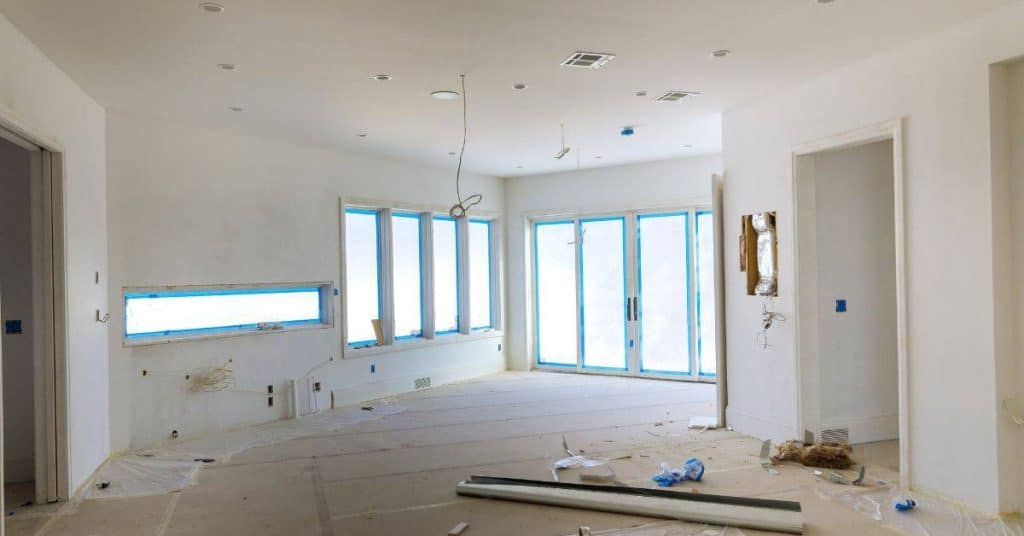
Where lead persists today: common sources in and around homes
Lead can persist in soil around your home, in drinking water from old pipes and solder, in indoor dust, and in legacy products like old fixtures and glazing. It can still come from canned products, folk remedies, and cosmetics.
Knowing where it hides helps you reduce exposure in daily life. Disturbing soil, opening windows, or cleaning dusty surfaces can release lead into the indoor environment. Stick to damp cleaning, use a good vacuum with appropriate filters, avoid tracking outdoor soil inside, and only tackle soil or water issues with careful, rule-following steps and local guidance from reputable sources.
Interior paint, dust, and friction surfaces
Old homes with lead-based paint can be a hidden danger. Peeling paint is one of the biggest culprits for releasing lead into your home environment. When you sand or scrape old walls to prep them for new paint, you’re kicking up fine particles that contain lead. This dust can settle on surfaces and get tracked around your house.
Another common source is friction from opening and closing windows and doors. The constant rubbing of the frames against the sashes can wear down the paint and create tiny bits of lead-contaminated dust. Over time, this dust accumulates in corners, along baseboards, and on window ledges where kids might play.
To reduce risk, keep your home clean with damp mops and cloths to trap dust instead of spreading it around. Use a HEPA vacuum for thorough cleaning. If you’re doing any renovations or repairs that involve old paint, wear protective gear like gloves and masks to avoid breathing in the dust.
Exterior paint, soil contamination, and former industrial sites
The exterior of your home can also be a source of lead exposure. Old paint chips that fall off the siding or trim can land in your yard and mix with the soil. This is especially true if you have kids who play outside—lead-contaminated soil can stick to their hands and shoes, bringing it inside.
Historically, gasoline used to contain lead additives which would settle on roads and eventually wash into nearby yards and gardens. If your home was built near an old industrial site or busy road, there’s a higher chance of contaminated soil in your yard. Lead from these sources can leach into the ground over time.
To assess risk, test your soil around play areas and along the foundation where paint chips might accumulate. Use home testing kits for quick results, but consider sending samples to a lab for more accurate readings. If you find high levels of lead in your soil, it’s best to call in professionals who can safely remove or encapsulate contaminated areas.
Identifying lead paint in your home: tests and visual clues
Lead paint identification starts with practical suspicion and a clear understanding of what you can and cannot determine by sight. Look for sheen changes, cracking, chipping, or peeling in prep areas, layers on window sashes, and indicators tied to older homes. Visual clues have limits, so pair what you see with appropriate testing options rather than assuming results from appearance alone.
Knowing when to test and how to handle the assessment matters because it guides the next steps, from containment during testing to decisions about abatement, encapsulation, or professional removal. If your home is old, has renovations that disturb old paint, or shows multiple layers in high-traffic or child-occupied spaces, use DIY test kits with caution and consider professional lab analysis or certified HPU services for confirmation; always follow proper containment and disposal rules and check local guidelines before proceeding.
Visual and age-based risk indicators
If your home was built before 1978, there’s a good chance it has lead paint. Look for signs like chipping or peeling paint in high-traffic areas such as door frames, windowsills, and stairwells. These are strong visual clues that the paint might contain lead.
Another key indicator is if you notice changes in paint sheen or layers on window sashes. Multiple layers of old paint can also suggest a history of repainting over lead-based paint. If your home has been recently renovated and older paint was disturbed, there’s an even higher risk that lead may be present.
Remember, while visual clues are important, they’re not foolproof. A professional test is the only way to know for sure if you have lead paint in your home. But these red flags can help guide your next steps and keep you aware of potential risks.
Testing options: home kits, XRF, and lab analysis
There are a few ways to test for lead paint. DIY kits are the easiest and cheapest option. They’re quick to use but can give false positives or negatives, so they’re best used as an initial screening tool.
If you need more accurate results, consider professional X-ray fluorescence (XRF) testing. This method is non-destructive and provides immediate readings on-site. It’s a bit pricier than DIY kits but offers reliable data without damaging your walls or surfaces.
For the most definitive test, send paint samples to a lab for analysis. This option gives you detailed results but requires taking small paint chips from your home, which can be risky if done improperly. Always use proper containment and safety measures when collecting samples.
DIY thresholds: when it’s safe to do repairs yourself
DIY thresholds mean defining a small, low‑risk scope that a homeowner can handle safely without hiring a pro. Keep the work to limited areas and light tasks, such as repainting non‑lead‑contaminated sections, minor caulking, and simple window/door adjustments that don’t involve removal or heavy scraping. For any measurable work, use a qualitative rule of thumb and check the product label or datasheet for guidance on what is considered safe to DIY and what requires a licensed contractor.
Right behind that, follow lead‑safe practices for permitted projects: contain work areas with plastic sheeting, use damp or wet scraping, avoid dry sanding, wear proper PPE, and set up a dedicated cleanup routine with a HEPA vacuum and wet‑wipe decontamination. Understand the practical limits—e.g., treat more than one window or large stretches as high‑risk and plan professional help, and document any paint history or testing results if available. If you’re unsure or you see signs of contamination, escalate to a licensed contractor and plan for safer execution in vacant spaces with occupants informed and air quality checked as needed.
Low-risk tasks and safe practices
When it comes to DIY work on thresholds, stick to low-risk jobs like sealing gaps, repainting intact surfaces, or minor caulking. These tasks are manageable as long as you take the proper precautions.
For any work involving lead paint, always use LEAD-safe certified practices. This means setting up containment with plastic sheeting around your work area to prevent dust from spreading. Use damp scraping methods and never dry sand or strip paint unless it’s a small patch under 100 square feet.
Wear proper personal protective equipment (PPE) including gloves, goggles, and respirators rated for lead dust. After completing the job, clean up thoroughly using a HEPA vacuum and wet-wipe protocols to remove any residue.
Thresholds that should trigger professional methods
If your project involves more than 100 square feet of surface area or multiple features like windows and doors, it’s best to call in a pro. Large-scale work increases the risk of lead exposure.
Avoid high-risk activities such as dry sanding, using heat guns for stripping paint, or dealing with lead glazing on thresholds. These methods can release dangerous amounts of lead dust into your home.
Always check local regulations and building codes to ensure you’re not required by law to hire a licensed contractor. If there’s any doubt about the extent of lead contamination or if testing reveals high levels, err on the side of caution and bring in professionals.
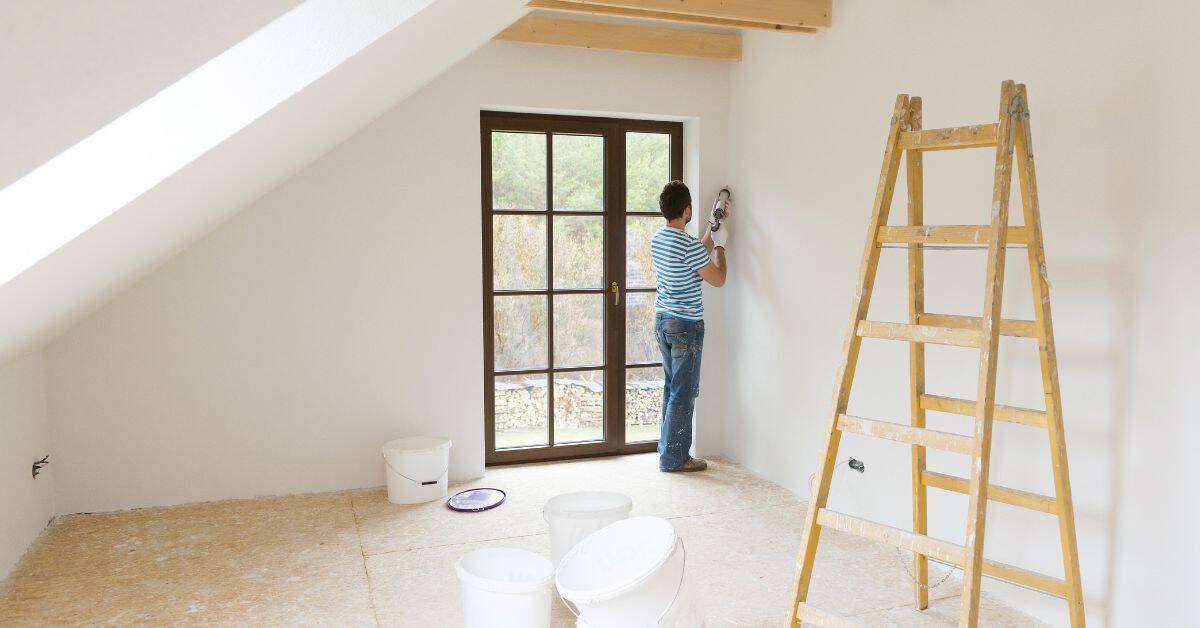
Safe DIY methods and step-by-step precautions
Set up a dedicated work zone with clearly marked boundaries using plastic sheeting and floor-to-ceiling containment if possible, plus a defined entry and exit to minimize dust migrating to the living areas. Wear the right PPE at all times—respirator with a suitable filter, disposable coveralls, gloves, and eye protection—and know how to don and doff safely so you don’t contaminate yourself or the house. Stick to tasks you’re allowed to do, use wet methods like scraping and damp wiping to keep dust down, and plan your cleanup steps as you go to limit recontamination.
Follow a full cleanup sequence: wet wipe, then HEPA vacuum if you have one, then mop, and bag waste with proper labeling and disposal per local rules. Afterward, shower or change, store contaminated gear separately, and keep a simple project diary so you can track what was done and what remains, which helps decide when to call a pro. If you notice excessive dust, odors, or signs that the work is getting risky, pause and reassess; not all lead-containing tasks are safe for DIY and delays may be wiser than jumping ahead.
Step-by-Step Process
This sequence ensures a safe and thorough approach to handling lead paint.
- Set up your work zone with plastic sheeting, creating a dedicated area for the job. Ensure negative airflow if possible.
Check that all entry points are sealed tightly. - Don personal protective equipment (PPE): respirator, coveralls, gloves, and eye protection.
Ensure you can breathe comfortably while wearing your PPE. - Use wet scraping or low-dust tools to remove paint. Avoid dry sanding or power washing that could spread lead dust.
Keep a damp cloth handy for immediate cleanup of debris. - Clean up thoroughly after each work session: use HEPA vacuum, wet wipes, and mop the area.
Double-check that all surfaces are free from visible dust or paint chips. - Dispose of waste properly in sealed containers labeled as hazardous material.
Check local regulations for disposal procedures.
Containment, dust control, and cleanup
Proper containment is key to preventing lead dust from spreading. Use plastic sheeting to seal off the work area completely.
Ensure there’s a clear path for entry and exit that minimizes contact with other parts of your home.
Use wet methods like scraping or sanding with water to minimize dust generation during paint removal.
Regularly clean up using a HEPA vacuum and damp cloths to capture any remaining particles.
After completing the work, conduct thorough verification cleaning. Check surfaces for residual dust or debris.
Maintain records of your cleanup process and waste disposal methods.
Personal protection and disposal
Wear a respirator with P100 or HEPA cartridges to filter out lead particles effectively.
Ensure you can breathe comfortably without feeling restricted.
Use disposable coveralls, gloves, and eye protection to prevent skin contact and inhalation of dust.
Change into clean clothes immediately after finishing the job.
Store used PPE in a sealed container until it’s time for disposal. Follow local regulations for hazardous waste management.
Properly label all containers with warning labels indicating they contain lead-contaminated materials.
Professional options, costs, and when to hire a certified contractor
Professional remediation options include encapsulation, enclosure, interim controls, and full abatement. Encapsulation seals or stabilizes painted surfaces; enclosure creates a separated barrier; interim controls slow or limit access and disturbance; full abatement removes or permanently treats all lead-based materials. Use decisions based on lead risk, substrate condition, and occupant risk, especially with kids, pregnant individuals, or the elderly at home. Each method has its own cost drivers and must be evaluated by a certified contractor to ensure proper containment, disposal, and safety.
Costs vary with square footage, accessibility, complexity, lead content, and disposal needs, so expect ranges rather than fixed prices and check the product label or datasheet for guidance. You’ll know professional abatement is non-negotiable when DIY attempts fail, contamination is widespread, substrates are disturbed, or high-contact areas show deteriorated paint. Look for licensing, insurance, references, a clearly written scope of work and safety plan, and a plan for post-remediation clearance testing to stay compliant and protect occupants.
Types of professional remediation and certifications
When it comes to dealing with lead paint, there are several methods a pro can use. The main ones are encapsulation, which involves sealing the lead paint under a protective layer; abatement, where the old paint is removed entirely; and interim controls, like regular cleaning or repairs that don’t disturb the paint.
A certified contractor will have an EPA Lead-Safe Certified Firm designation. This means they’ve been trained in safe work practices to minimize exposure during lead abatement. They’ll also carry liability insurance and should be able to provide references from past clients who had similar projects.
Before hiring, ask for a written scope of work that outlines the exact steps they plan to take. Make sure it includes safety measures like containment barriers and dust control systems. Also, check if they offer post-remediation clearance testing to ensure all lead hazards have been removed properly.
Cost factors and how to get reliable quotes
The cost of professional remediation can vary widely based on several factors. Square footage is a big one—larger areas naturally mean higher costs. Also, the level of contamination plays a role; more severe cases will require more extensive work.
Access issues are another key factor. If there’s limited space or tricky spots to reach, it’ll drive up labor and material costs. Similarly, if you’re dealing with lead paint on structural elements like beams or columns, the complexity increases significantly.
To get a reliable quote, start by getting multiple bids from certified contractors. Provide them with detailed information about your property’s condition and any existing test results for lead levels. Ask each contractor to give you a written estimate that breaks down costs item-by-item so there are no surprises later on.
Legal, disclosure, and renovation requirements
The EPA Renovation, Repair and Painting (RRP) rule can apply when you disturb lead-based paint during renovations, and you’ll likely need an EPA-certified renovator and lead-safe work practices, plus post-renovation cleaning verification to curb lead dust exposure. Don’t guess—check the product label or datasheet and follow the required steps for your project type and location. If you’re unsure, treat it as needing certified help or professional oversight.
Also, landlords, sellers, and contractors have disclosure duties—you must inform tenants or buyers about known lead paint and provide the required notices on the appropriate timeline to avoid penalties. Permits and inspections add time and paperwork, so coordinate with your local building department early and track what inspections might affect your schedule. For DIY vs professional work, know which activities trigger compliance, and keep solid documentation of trainings, waste disposal, and any testing results to stay compliant through the project.
Seller and landlord disclosure rules
If you’re selling a home built before 1978, federal law requires you to disclose any known lead-based paint hazards. This means handing over a lead hazard information pamphlet and signed disclosures to potential buyers or renters. Check your state’s laws too; some areas have stricter rules on when and how to inform tenants.
Landlords must also provide these documents before lease signings, especially if the property was built before 1978. Failure to disclose can lead to legal disputes and penalties, so it’s crucial to get this right. If you’re unsure about your home’s history or need help with documentation, consult a professional.
Remember, disclosure isn’t just a formality—it protects everyone involved from potential health risks down the line. So take the time to understand what needs to be disclosed and when.
Renovation rules and contractor obligations
The EPA’s Renovation, Repair, and Painting (RRP) rule applies if you’re doing work that could disturb lead-based paint in homes built before 1978. Contractors must be certified under the RRP to handle such projects legally.
Contractors need specific training on lead-safe work practices, which include containment, dust control, and proper cleanup methods to prevent exposure. Homeowners also have a role in ensuring compliance by verifying that contractors follow these rules during renovations.
If your project requires permits from local building departments, make sure you coordinate with them to ensure all safety measures are in place before work starts. This might involve additional inspections or paperwork but is essential for staying compliant and safe.

Conclusion
Safety comes first. Lead paint issues can linger in walls, dust, and hidden layers, so treat every project as a containment job until you know what you’re dealing with and what’s allowed by law.
Do this as a practical checklist: identify possible lead sources, test a small area first, decide whether to DIY or hire a pro, follow safe methods with containment, clean up with the right methods, and dispose of waste correctly before you move to the next area.
Avoid these common missteps: skip testing before you scrape or sand, use open flames or dry scraping, or fail to seal off the work area and wear proper PPE. Don’t ignore ventilation or proper disposal, and don’t rush through a repair that requires more precision than you have. Keep the area damp when removing paint, use a HEPA vacuum, and work in stages so you can spot dust or shavings before they spread.
If a project involves intact but deteriorating paint over large areas, or you’re dealing with textured coatings, old homes with hidden layers, or legal disclosures, it’s time to call a certified contractor. When you know the rules, stay patient, stay meticulous, and you’ll keep your home durable and safe—and avoid costly rework. You’ve got this.
FAQ
When was lead paint banned in the United States?
Lead paint for homes was banned in 1978. If your house is older, assume lead may be present. Test before you touch it to be sure.
What should I do if I suspect lead paint on my walls?
Don’t sand, burn, or dry scrape it. Use a lead test kit to confirm. If it tests positive, hire a pro for safe removal or containment.
What are common DIY thresholds for lead paint projects?
Seal the work area and wear a respirator rated for lead. Avoid dry scraping and blasting. If in doubt, or if the job is big, call a licensed pro.
When do I call a pro for lead paint?
Call a pro if the paint is peeling, chipping, or you have kids, pregnant people, or pets in the home. For testing, abatement, or disposal, a licensed contractor is the safe route. Don’t DIY those steps unless you’re trained and equipped.