
Introduction
Crawling paint on previously waxed surfaces is paint that beads and drags, failing to adhere because a wax film repels the coating. This usually shows up where wax or cleaners were used before painting. You’ll fix it by cleaning, removing the wax, and preparing the surface for a fresh coat.
Decontamination means removing the wax layer and any residue so the new paint can grip. Scrub with a wax-removing cleaner or degreaser, rinse thoroughly, and dry completely before testing the surface. If the surface feels slick after drying, lightly sand, wipe with a tack cloth, and follow up with a compatible primer—always check the cleaner, primer, and local instructions on the label.
Key takeaways
- Inspect surfaces for wax residue and paint failure before decontamination begins.
- Ventilate well, wear respirator, and protect surrounding floors during decontamination.
- Use proper cleaners as per manufacturers’ instructions; avoid solvent overuse on waxed areas.
- Test decontamination on a hidden corner to verify wax removal first.
- Decontaminate, rinse, and dry thoroughly before repainting to ensure adhesion.
- Repaint only after surfaces are clean, dry, and free of wax residue.
Table of Contents
- Introduction
- Key takeaways
- What Is Paint Crawling and How Wax Causes It
- Safety, Ventilation, and Surface Protection
- Tools and Materials Checklist
- Inspection and Visual Checkpoints Before Starting
- Step-by-Step Decontamination Procedure
- Treating Areas Where Paint Has Already Crawled or Failed
- Repainting and Finishing Checklist
- Prevention, Maintenance, and Troubleshooting
- Conclusion
- FAQ
What Is Paint Crawling and How Wax Causes It
Paint crawling is when the coating bunches up, pulls away, or retracts from the surface as it dries. This usually shows up on surfaces that have wax, conditioner, or similar residues beneath the paint film. The result looks like little rivers or craters across the finish.
Different wax types and residues interfere with how paint wets the surface and how it adheres. The wax forms a barrier that repels or reduces adhesion, and it can selectively bloom as the solvent tries to evaporate. Understanding this interaction helps you choose the right decontamination steps and restore proper bonding.
Common symptoms and visual cues
Paint crawling on previously waxed surfaces presents distinctive signs. Here’s what to look for:
Beading: Instead of the paint leveling out, it forms small beads or droplets that don’t spread evenly.
Bare streaks: You’ll see thin, bare areas where the paint didn’t adhere, leaving visible streaks.
Irregular edges: Paint may lift off in tiny pieces along the edges of the surface, creating a ragged look.
Types of wax and contaminants that cause problems
Different waxes and contaminants can interfere with paint adhesion. Here’s how:
Carnauba wax: Natural carnauba wax is tough to remove, causing persistent crawling issues.
Synthetic waxes: These are generally easier to clean off but can still cause problems if not completely removed.
Spray detailers and silicones: These products often contain silicone, which repels paint and causes crawling. They’re particularly troublesome as they can be hard to detect and remove.
Safety, Ventilation, and Surface Protection
Prioritize basic PPE: gloves, eye protection, and a respirator or good mask when working with solvents. Ensure your workspace is well ventilated to carry away fumes. Keep children and pets out of the area during cleanup and repairs.
Protect nearby trim and glass from splashes with tape or coverings, and dispose of waste according to local rules. Always follow the manufacturer safety instructions for the products you use. If a label or data sheet suggests different precautions, base your actions on that guidance.
Personal protective equipment (PPE) checklist
Before you start decontaminating, gear up to protect yourself from solvents and abrasives.
- Gloves: Use chemical-resistant gloves. Check they’re not torn or worn out before starting.
- Eye protection: Wear safety goggles or a face shield. Make sure they fit well and cover your eyes completely.
- Respiratory protection: For heavy-duty solvents, use a respirator with a particulate filter. Check the manufacturer’s instructions for compatibility.
- Avoid contact lenses: Wear glasses instead to prevent solvent exposure to your eyes.
- Protect skin: Cover exposed skin with long sleeves and pants. Solvents can cause irritation or burns.
- Footwear: Wear sturdy, closed-toe shoes to protect your feet from spills and dropped tools.
- Head protection: If there’s a risk of falling objects, wear a hard hat.
- Hearing protection: If using power tools, wear earplugs or earmuffs.
Quick rule: Always check your PPE before starting work. A small oversight can lead to big problems.
Environmental and disposal considerations
Proper handling of solvents and waste is crucial for safety and environmental protection.
Used rags: Store them in a well-ventilated area, away from heat sources. They can spontaneously combust if not handled properly.
Solvent disposal: Never pour solvents down drains or onto the ground. Check local regulations for approved disposal methods. Some areas have hazardous waste collection sites.
Chemical waste: Always check local rules before disposing of chemical wastes. Some chemicals require special handling and disposal procedures.
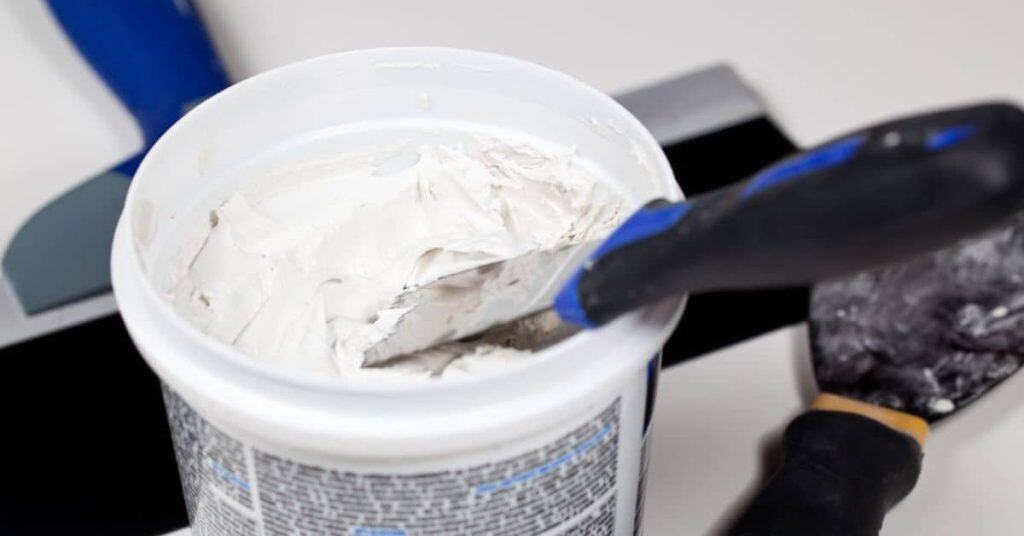
Tools and Materials Checklist
Gather your decontamination tools first: brushes, sponges, and clean rags for initial washing. Include a non-aggressive cleaner and a solvent compatible with waxy residues. Have a bucket, protective coverings, and tape ready to manage drips and spills.
For repair and finishing, assemble sanding implements, skim coats or patch materials if needed, primer, and compatible topcoat. Include masking supplies and a small scrub brush to target problem areas. Match items to what you already own and what the product labels advise.
Cleaners, solvents, and decontamination products to consider
Before you start, make sure you have the right cleaners and solvents to tackle the wax and contaminants on your surface.
- Degreaser: To remove heavy grease and oil. Check label for ‘degreasing’ or ‘heavy-duty cleaner’.
- Solvent-based wax remover: For removing wax buildup. Look for ‘wax & polish remover’ on the label.
- Isopropyl alcohol (90%+): To clean and prep painted surfaces. Check it’s safe for paint.
- Clay bar kit: For removing bonded contaminants. Includes clay, lubricant, and sometimes a cleaner.
- Glass cleaner: For cleaning windows and glass-like surfaces. Ensure it’s ammonia-free.
- pH-neutral soap or detergent: For general cleaning. Check it’s safe for painted surfaces.
- Rubbing alcohol (70%): To clean hands, tools, and surfaces during the process.
- White spirit or mineral spirits: For thinning paints and cleaning brushes. Ensure it’s paint-grade.
Quick rule: Always check product labels to ensure they’re compatible with your painted surface and won’t cause damage.
Abrasives, pads, and polishing tools
To remove the wax and contaminants effectively, you’ll need the right abrasives, pads, and tools.
- Sandpaper (120-220 grit): For light sanding to smooth surfaces. Start with 120 for heavy issues, then progress to finer grits.
- Foam pads: To apply and buff wax or polish. Choose a size that fits your tool.
- Microfiber towels: For wiping surfaces clean during the process. Use clean ones for each step.
- Random orbital sander: For machine sanding. It reduces swirl marks compared to other sanders.
- Polishing compound: To remove fine scratches and restore gloss. Choose one suitable for your paint type.
- Buffing pad (soft): To apply polishing compound and buff the surface.
- Handheld orbital polisher: For machine buffing. It helps achieve a consistent, even finish.
- Compressed air or shop vacuum: To blow off or suck up dust during sanding and polishing.
Quick rule: Be gentle when sanding to avoid over-sanding or damaging the paint. Start with a lower grit, then progress finer as needed.
Inspection and Visual Checkpoints Before Starting
Start with a thorough visual inspection of the entire surface to identify spots with crawling, wax halos, or dull patches. Test a small, inconspicuous area with a mild cleaner to see if the wax lifts or beads water. Check for surface delamination or obvious substrate damage.
Document the extent by noting where the paint lifts or beads, and test whether primer or substrate shows through. Use a cautious touch test on suspect areas to confirm adhesion problems without creating new damage. If you’re unsure, verify guidance from product labels or manufacturer instructions.
Performing a small test patch
Before diving into the full job, it’s crucial to run tests on an inconspicuous area. This helps predict how your surfaces will react and saves you time in the long run.
- Pick an out-of-sight spot: Choose a small, hidden area for your test patch.
- Clean the surface: Use a mild soap and water solution to clean the area. Wipe with a damp cloth, then let it dry.
- Apply solvent: Lightly apply your chosen decontaminant (see ‘Tools and Materials’ section) onto the cleaned spot using a cotton swab or soft brush.
- Wait for reaction: Allow 15-30 minutes for the solvent to interact with the wax and paint. Keep an eye out for any changes in appearance or texture.
- Scrape gently: Use a plastic scraper or your fingernail to lightly scrape the area. If the paint comes off easily, you’ll need to strip it.
- Test paint adhesion: Apply a small amount of new paint onto the test patch using a brush or roller. Let it dry for 24 hours.
- Check for crawling: Inspect the dried paint for any signs of crawling, such as wrinkling, peeling, or poor adhesion.
- Document results: Note down your findings and observations to inform your full-surface plan.
Quick rule: If the test patch shows significant issues, be prepared to strip and repair panels before repainting.
Assessing paint integrity and substrate damage
Before deciding whether to strip or repair your surfaces, it’s essential to assess the current state of your paint and underlying substrate.
- Inspect visually: Look for signs of peeling, cracking, or discoloration. These could indicate deeper issues.
- Tap gently: Gently tap on the surface with a plastic hammer or knuckle. Listen for a hollow sound, which may indicate delamination.
- Check for soft spots: Press firmly but gently across the surface. Soft or spongy areas could signal damage beneath the paint.
- Feel for texture: Run your fingers over the surface to detect any raised or rough areas, which might indicate previous repairs or underlying issues.
- Test adhesion: Use a sharp object like a utility knife to lightly score the paint in an inconspicuous spot. If the paint lifts easily, it may need stripping.
- Check for moisture: Look out for water stains, warping, or other signs of moisture damage, which could affect your repair work.
- Inspect edges and corners: These areas are often more vulnerable to damage. Check them carefully for any signs of deterioration.
- Document findings: Keep a record of all observed issues to inform your repair plan.
Quick rule: If you find extensive damage or delamination, it’s best to strip and repair panels before repainting.

Step-by-Step Decontamination Procedure
Begin with the least aggressive method: a thorough wash to remove surface waxes and contaminants. Rinse and dry, then re-evaluate the surface for any remaining crawling. If problems persist, move to a targeted solvent treatment following the product label directions.
Proceed in small, controlled steps, testing adhesion after each stage. Stop and consult a pro if you see new peeling, substrate damage, or if the wax keeps reappearing after cleaning. Always follow the manufacturer instructions and local rules for disposal of used materials.
Step-by-Step Process
This section guides you through the decontamination procedure, from preparation to final checks. Follow these steps carefully for best results.
- Wear appropriate PPE and protect surrounding areas.
Reason: Safety first, prevent damage to nearby surfaces. - Perform a test patch to assess paint integrity.
Quick check: Inspect the test area for any signs of damage or discoloration. - Start with an initial wash using car-safe detergent.
Reason: Remove surface dirt and grease before applying solvents. - Apply wax remover, following manufacturer’s instructions.
Quick check: Ensure even coverage, no pooling or dry spots. - Agitate softened wax gently, then wipe off.
Reason: Avoid pushing contaminants deeper into the paint. - Use clay bars or detailing mitts to lift residual particles.
Quick check: Feel for any remaining rough spots after each pass. - Inspect and reapply decontamination steps as needed.
Reason: Ensure thorough removal of contaminants before painting. - Clean up tools, dispose of waste properly.
Reason: Maintain a clean workspace, follow environmental guidelines.
Initial wash and grease removal
Begin by removing surface dirt and grease using a car-safe detergent. This step prevents contaminants from being pushed deeper into the paint during solvent application.
Tools needed: Car-safe detergent, soft brush or sponge, bucket of water, hose or cloth for rinsing.
Apply detergent to the affected area, gently agitate with a soft brush or sponge. Rinse thoroughly with clean water. Allow the surface to dry before proceeding.
Solvent-based wax removal and dwell times
Apply a solvent-based wax remover or cleaner to the affected area, following manufacturer’s instructions. Allow the product to dwell on the surface for the recommended time before agitation.
Safety note: Always wear appropriate PPE when handling solvents. Ensure proper ventilation and keep flames and sparks away from the work area.
After the dwell time, gently agitate the softened wax using a soft brush or cloth. Wipe off the wax using a clean, dry cloth. Repeat this process if necessary to remove all wax residue.
Mechanical decontamination (clay, brushes, pads)
After applying solvents, use mechanical methods to lift residual wax and particles from the paint surface. This step ensures a thorough clean before painting.
Tools needed: Clay bar kit, detailing mitts or soft brushes, lubricant (if using clay bar), clean cloths for testing and wiping.
Lubricate the clay bar with the provided spray or use a damp cloth. Gently rub the clay bar over the affected area in straight lines. Check the clay frequently for picked-up contaminants. Wipe off any residue with a clean, dry cloth. Repeat this process until no more contaminants are picked up by the clay.
Treating Areas Where Paint Has Already Crawled or Failed
For panels with exposed substrate, consider localized repairs that minimize feathering into good paint. If the area can be salvaged, perform a light feather edge and recoat only the affected zone. If the substrate is too compromised, plan for more extensive repainting or partial stripping where necessary.
Avoid reintroducing contamination by keeping new coatings away from contaminated edges and by protecting surrounding areas. When in doubt about how far to feather or whether stripping is required, follow the guidance on product data sheets or consult instructions from the manufacturer.
Feathering, Sanding, and Scuffing for Adhesion
First, you need to prepare the surface for new paint. This involves creating a ‘feather edge’ where old paint meets bare substrate.
Use fine-grit sandpaper (around 220 or 320) to lightly sand these areas. Be gentle – you don’t want to expose bare metal or plastic, just create a rough surface for new paint to stick to.
Tip: Use ‘X’ or ‘Z’ shaped motions to avoid creating visible scratches.
Priming, Spot Putty, and Sealing Exposed Areas
Before repainting, you need to create a stable base. This involves using primers, fillers, and sealers.
For primers, match the type to your substrate – metal, plastic, or wood. They should also be compatible with your chosen paint. Use a brush or roller to apply, following the manufacturer’s instructions.
If there are any small imperfections or scratches, use a spot putty to fill them in. Apply with a putty knife, let it dry, then sand smooth.
Finally, apply a sealer. This creates a barrier between your primer and new paint, preventing tainting or contamination.
Repainting and Finishing Checklist
Choose a compatible topcoat and test patch on a small area to verify adhesion and appearance. Follow spray technique basics or brush/roller methods as appropriate for your project. Adhere to product cure instructions rather than relying on generic timelines.
Finish with careful, even coats and minimal handling until cured. Check for compatibility with any existing coatings and protect freshly painted areas from dust and contaminants during the curing window. If recontamination risks remain, revisit the decontamination steps before finalizing the finish.
Test patches and compatibility checks
Before you start repainting, make sure to check for any potential issues. This step is crucial to avoid repeating the same problems.
- Check paint type: Ensure it’s compatible with your existing surface. Water-based paints don’t stick well on waxed surfaces.
- Test spray technique: Practice your spraying technique on a small area to ensure even coverage and avoid runs or drips.
- Observe for crawling: Keep an eye out for any signs of paint ‘crawling’ back up the surface after application. If it does, you’ll need to troubleshoot before proceeding.
- Check product labels: Always follow manufacturer guidelines for application and curing times.
- Test on a small area: Apply paint to a hidden or inconspicuous spot first to see how it reacts with your surface.
- Wait and observe: Give the test patch time to cure. Check back after 24 hours, then again after 72 hours for any signs of failure.
- Inspect for adhesion: Gently scratch at the test patch with a nail or coin. If the paint lifts off easily, it’s not adhering properly.
- Check for blistering: Look for any bubbles or blisters forming under the paint surface. This indicates that the paint isn’t bonding correctly.
Quick rule: Always test before you commit to avoid costly mistakes and rework.
Final polishing and protective measures
Once your paint has cured, it’s time to give your surface that extra protection. Follow these steps to ensure longevity.
- Check cure time: Always follow the manufacturer’s guidelines for full curing times before applying any additional coatings or sealants.
- Lightly sand: Gently sand the painted surface with fine-grit sandpaper (220-320 grit) to remove any raised grain and ensure a smooth finish.
- Wipe clean: Use a damp cloth to wipe away any dust or residue from sanding.
- Apply sealant/wax: If you’re reapplying wax, make sure it’s compatible with your paint. Follow the manufacturer’s instructions for application and drying times.
- Buff lightly: Use a soft cloth to buff the surface lightly after applying sealant or wax to ensure an even finish.
- Avoid direct sunlight: Keep the area out of direct sunlight while the sealant/wax cures to prevent uneven drying or damage.
- Allow proper curing time: Give your final protective layer enough time to cure completely before exposing it to heavy traffic or harsh conditions.
Quick rule: Patience is key when it comes to curing times. Always follow the manufacturer’s guidelines to ensure optimal results.
Prevention, Maintenance, and Troubleshooting
Adopt a routine that matches your wax or barrier products with your painting schedule. Allow fresh paint to cure fully before applying any protectants, and choose protectants that are compatible with your coating. Regular inspections help catch creeping before it spreads.
If crawling reappears, run through quick troubleshooting: re-clean, recoat with compatible products, and verify ventilation and surface conditions. If issues persist, consult product labels, data sheets, or local procedures to determine the safest next step.
When crawling returns: common causes and fixes
If you’re seeing paint crawl again, don’t panic. First, figure out why it’s happening.
Residual silicone from previous cleaning or waxing can cause issues. Test with a solvent like mineral spirits – if it bubbles, that’s your culprit. Remove it using the solvent-based method we discussed earlier.
Improper cure time for paint or wax can also lead to problems. Check manufacturer guidelines and ensure you’ve waited long enough before applying anything new. If not, give it more time and try again.
Incompatible products can cause crawling too. Make sure your wax or sealant is compatible with your paint type. Double-check product labels and consider doing a small test patch before applying to the whole area.
Maintenance schedule and product selection guidance
Preventing future crawling starts with a good maintenance routine. Here’s how:
Rule of thumb: wax or seal every 6 to 12 months, depending on traffic and weather conditions. More often if it’s a high-traffic area, less so in mild climates.
Choose waxes and sealants wisely. Go for ones that are specifically designed for your paint type. They’ll be less likely to contaminate new paint. Always check manufacturer guidelines for cure times and compatibility too.
Remember, prevention is key. Stick to this schedule and you’ll minimize the risk of crawling paint in the future.
Conclusion
Decontaminating wax before repainting protects the finish, keeps paint from crawling again, and reduces costly mistakes. Do not rush this; a thorough, measured approach pays off with a durable result.
Check that ventilation is steady, surfaces are clean and dry, the wax has been neutralized or removed to the level you tested, and you have followed the step-by-step decontamination plan in the right order. Confirm you have the right tools and materials within reach, and test a small area first before scaling up any treatment or finish work. If a spot proves stubborn, repeat the safe steps rather than forcing a fix.
Common mistakes to avoid are skipping ventilation and protection, cutting corners on surface prep, and applying primer or paint over partially treated wax. Stay safety-focused: wear the right gloves, eye protection, and respirator if needed, and never apply finish over an untested area or a wax-laden surface. If the job feels off, or a large area stubbornly crawls after treatment, call in a professional instead of pushing through and risking damage or a bad finish. When you follow the plan, you stay in control and can finish with a durable, clean look you can be proud of.
FAQ
What are the telltale signs that wax is causing paint crawling on a surface?
You’ll see uneven film, tiny cracks, or areas where paint doesn’t adhere and pulls away. Touching the surface often shows a slick feel where wax is present. If it doesn’t grab evenly after a light scrub, wax residue is likely the culprit.
How should I decontaminate a wax-coated surface before repainting?
-avoid>Follow the product label for approved wax removers or cleaners. Use a clean scrub pad to work the cleaner in, then rinse with clean water and let the surface dry completely.
-avoid>
Make sure to remove all slick residues and recheck with a dry cloth. If the surface still feels slick, repeat the cleaner and rinse steps or choose a product with explicit wax-removal instructions.
How can I confirm the surface is ready for paint after decontamination?
Do a small adhesion test patch in an inconspicuous area and let it cure as directed by the paint or primer you plan to use. If the test patch adheres and remains intact, the surface is ready. If it crawls again, revisit decontamination or consider an alternative primer.
What should I do if crawling returns after a repaint?
Re-clean the affected area, focusing on removing any new wax or slick residues. Reprime with a primer compatible with the surface and follow product instructions exactly, then repaint with care to avoid trapping contaminants.