
Introduction
Painting over oil-based trim with water-based paint is possible with the right prep.
It means you’ll remove grime, scuff the surface, and use a compatible primer before applying the water-based finish. This article walks you through a practical, step-by-step approach you can do with basic tools.
First, clean the trim and roughen the surface to help the new paint grip.
Key takeaways
- Assess old trim for peeling, wax, or chalky film before beginning.
- Ventilate well and wear eye protection during cleaning, degreasing, and sanding.
- Sand until smooth and test patched areas for existing gloss levels.
- Choose bonding primer suitable for water-based topcoat over oil-based substrates.
- Apply even coats with proper technique to minimize brush marks and peeling.
- Perform adhesion tests after curing and address any sticky or soft spots.
Table of Contents
- Introduction
- Key takeaways
- Quick Answer and When This Approach Works
- Tools and Materials Checklist
- Assessing the Old Trim: Visual, Physical, and Safety Checks
- Step-by-Step Surface Prep (Clean, Degloss, Sand, Repair)
- Choosing the Right Primer for Bonding Water-Based Paint to Oil-Based Surfaces
- Painting Techniques to Avoid Peeling and Achieve a Professional Finish
- Post-Paint Adhesion Checks and Troubleshooting Peeling
- Finishing, Curing, and Maintenance Best Practices
- Conclusion
- FAQ
Quick Answer and When This Approach Works
This approach can work when the old trim is firmly attached and the surface is sound. Success hinges on thorough cleaning, proper deglossing, and good bonding between the primers and topcoat. If the surface is peeling or damaged, you may need repairs or alternative methods before painting.
Use this guidance to decide if water-based paint over oil-based trim is appropriate for your project. Always verify surface condition and product instructions before starting, and follow local rules or manufacturer directions for surface preparation and priming.
Conditions that make a safe conversion
The first step is to check if your old oil-based trim can safely take water-based paint. Here’s what to look for:
Stable adhesion: Gently scratch the surface with a nail or scraper. If the paint doesn’t flake off, it’s stable.
No active peeling: Check for any areas where the paint is already peeling. Water-based paint won’t stick to these spots.
Sound substrate: The trim should feel solid and not give under pressure. If it feels soft or hollow, there might be damage underneath.
When you should strip or get professional help
Sometimes, trying to paint over old oil-based trim with water-based paint isn’t the best idea. Here are some scenarios where you might need to remove the old paint or call in a pro:
Severe flaking: If more than 50% of the surface is already flaking, it’s better to strip off the old paint.
Thick layered finishes: Multiple layers of oil-based paint can make it hard for water-based paint to adhere. Stripping might be necessary.
Possible lead presence: If your home was built before 1978, there could be lead in the old paint. Always test for lead and consider hiring a professional to handle removal.
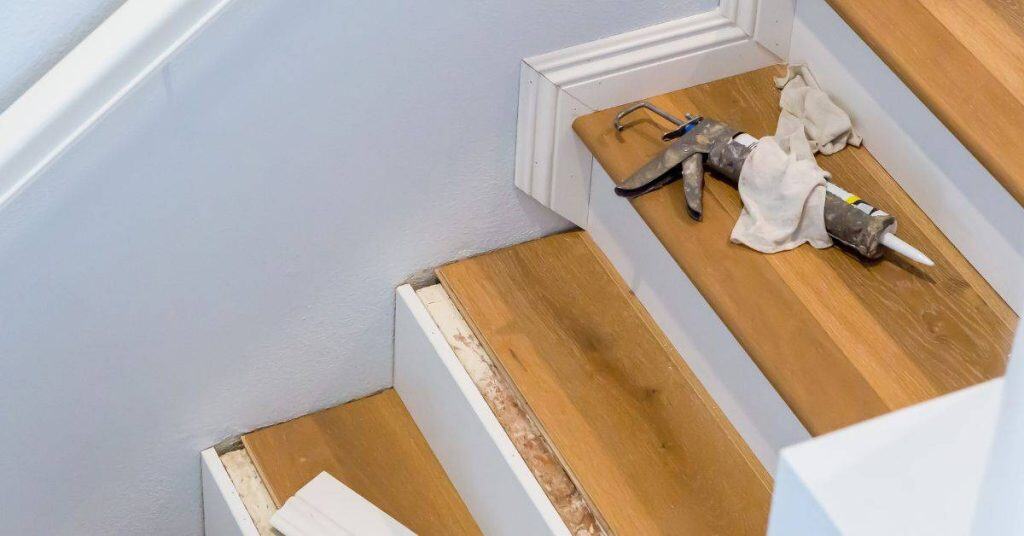
Tools and Materials Checklist
Gather basic hand tools for scraping, sanding, and detailing work. Include safety gear like gloves and eye protection for your protection and comfort. You will also need workable cleaners, a deglosser, sanding materials, a bonding or shellac primer, and a water-based topcoat.
Keep note of the label directions for each product and have spare brushes or rollers on hand. Brief usage notes should guide you to choose the right tool for the job and to follow manufacturer instructions and local requirements.
Painting tools and application gear
Before you start, gather these tools to ensure a smooth paint job on your trim.
- Angled sash brushes (1.5-2 inches): Ideal for cutting in along edges and corners.
- Roller frame and covers: For larger areas, use 3/8-inch or 1/2-inch nap covers with a roller frame.
- Sprayer (optional): For large projects, consider an HVLP sprayer for even coverage.
- Blue painter’s tape: Protects adjacent surfaces from paint drips and overspray.
- Drop cloths: Covers the floor to catch drips and prevent damage.
- Painter’s pyramids or blocks: Keeps freshly painted trim off the floor, allowing for proper drying.
- Safety glasses: Protects your eyes from paint splatter and debris.
- Respirator: Essential when sanding to avoid inhaling dust particles.
Quick rule: Always protect surrounding surfaces with tape and drop cloths to prevent unwanted paint marks and damage.
Prep and cleanup supplies
Proper preparation is key to a successful paint job. Here’s what you’ll need for cleaning, deglossing, sanding, and safety.
- TSP (trisodium phosphate) or similar cleaner: Removes dirt, grease, and grime from surfaces before painting.
- Deglossing solution: Reduces the gloss of the old oil-based paint, helping water-based paint adhere better.
- Tack cloth: Removes dust and debris after sanding, ensuring a smooth surface for painting.
- Sandpaper (120-grit): Gently sands the trim to help paint adhesion; use 220-grit for a smoother finish.
- Sandpaper (220-grit) – optional: For a super smooth, professional-looking finish.
- Respirator: Protects you from inhaling sanding dust and fumes from cleaners.
- Gloves: Keeps your hands clean during the prep process.
- Trash bags or disposal bin: For proper disposal of cleaning rags, sandpaper, and other debris.
Quick rule: Always wear a respirator when sanding to protect your lungs from harmful dust particles.
Primers and water-based paint options
Choosing the right primer and paint is crucial for a successful conversion from oil to water-based trim. Here are your options:
- Bonding primer: Seals porous surfaces, blocks tannins, and promotes better adhesion of topcoats.
- Shellac-based primer: Seals and primes in one step; ideal for high-gloss or problem areas like kitchen cabinets.
- Water-based acrylic paint (latex): Durable, easy to clean, and low VOCs; suitable for most trim applications.
- Water-based alkyd paint: Offers better adhesion and durability than acrylic; ideal for high-traffic areas or exterior use.
- Paint with primer included: Some water-based paints have built-in primer, reducing the number of coats needed.
Quick rule: Always check product labels to ensure compatibility between primers and topcoats for best results.
Assessing the Old Trim: Visual, Physical, and Safety Checks
Start with a visual sweep for loose, cracking, or peeling paint and for any signs of damage. Tap along trim edges to listen for hollow spots that signal rot or looseness. Check for peeling that indicates poor adhesion or substrate issues.
Assess physical stability by gently probing with a tool to detect softness or delamination. Also screen for health hazards like lead paint when applicable and follow safety guidelines from reputable sources or local regulations.
Visual inspection for failure patterns
Before you start painting, give your trim a thorough visual once-over. This checklist helps spot issues that could cause problems later.
- Cracks: Look for hairline cracks or larger gaps. These can let moisture in, leading to rot and poor paint adhesion.
- Crawling: Check for paint ‘crawling’ – when it doesn’t adhere properly and forms tiny beads or runs.
- Gloss loss: Areas with dull or matte finish might not accept new paint well. They could be signs of poor adhesion.
- Substrate problems: Look for warping, swelling, or soft spots. These indicate underlying issues that need fixing before painting.
- Peeling: Any peeling indicates poor adhesion. It’s best to scrape off loose paint and prep the area properly.
- Blistering: Blisters form when moisture gets trapped under the paint. They need to be addressed before painting.
- Alligatoring: This is when the paint surface looks like an alligator’s skin, with deep cracks in a pattern. It indicates poor adhesion and needs attention.
- Mold or mildew: Greenish-black spots could be mold or mildew growth. These need to be cleaned off before painting.
Quick rule: If you spot any of these issues, address them before painting. Ignoring them can lead to paint failure and costly repairs later on.
Simple adhesion tests to perform
Sometimes, visual checks aren’t enough. Here are some simple tests to confirm the existing paint is well-bonded:
First, use a piece of painter’s tape. Press it firmly onto the surface, then pull it off quickly at a 45-degree angle. If the paint comes off with the tape, it’s not well-adhered.
Next, try lightly scraping the paint with a utility knife or nail. If the paint flakes off easily, it’s not bonded properly and needs to be scraped off before painting.
Note: These tests should only be done on small areas to avoid damaging the surface. If the results aren’t clear, consider hiring a professional for further evaluation.
Lead paint considerations and safe handling
Before you start working, it’s crucial to check if your trim might contain lead paint. Lead is dangerous, especially for children and pets.
Recognition: If your home was built before 1978, there’s a good chance it has lead-based paint. Even if it looks like new paint, it could be lead under the surface.
Testing: You can buy lead test kits at hardware stores. These use a chemical reaction to indicate the presence of lead. Always follow the kit’s instructions carefully.
Safety and cleanup: If you find lead, wear a certified respirator, not just a dust mask. Wet sanding or using a liquid paint remover can help control dust. Clean up thoroughly with a HEPA vacuum and damp cloth. Never sand, scrape, or power-wash lead paint.
Professional help: If you’re unsure about testing or handling lead paint, hire a certified contractor. They have the right equipment and training to keep you safe.
Step-by-Step Surface Prep (Clean, Degloss, Sand, Repair)
Begin with thorough cleaning to remove dust, oils, and grime. Use a deglosser or light solvent wipe to reduce gloss and expose bare substrate. Feather any edges where old paint remains intact to create a smooth transition.
Repair cracks, chips, and imperfections with appropriate filler, then sand to a uniform surface. Clean off sanding dust and inspect for a uniform matte surface ready for priming.
Step-by-Step Cleaning Process
The cleaning process is crucial to remove contaminants and prepare the surface for painting. Follow these steps for a thorough clean:
- Wear gloves, goggles, and a dust mask.
- Remove any hardware (nails, screws) with a claw hammer or screwdriver.
- Vacuum or brush off loose dirt and debris.
- Apply a suitable cleaner for grease, wax, or dirt (see next section).
- Rinse with clean water and let dry. Inspect for any missed spots.
Cleaning grease, wax, and dirt
Oil-based paints can leave behind residues that hinder adhesion. Use the following methods to clean your trim:
Grease and Wax: Apply a degreasing cleaner or mineral spirits with a cloth or brush. Let it soak for 10-15 minutes, then scrub and wipe off.
Dirt: Use a mild detergent solution (like dish soap) and warm water. Scrub with a soft-bristle brush, then rinse clean.
Verify cleanliness by running your hand over the surface. It should feel smooth, not sticky or tacky.
Deglossing versus sanding: choose and execute
Both deglossing and sanding reduce gloss and improve paint adhesion. Choose based on your trim’s condition:
Deglossing (chemical): Use a liquid deglosser for minor touch-ups or when the surface is in good shape. Apply, let it sit, then wipe off with a clean cloth.
Sanding (mechanical): For damaged or heavily glossy surfaces, sanding is necessary. Start with coarse (60-80 grit) for major imperfections, then follow up with fine (120-150 grit) to smooth the surface.
Always wear appropriate safety gear when sanding.
Filling, feathering, and edge preparation
Proper filling and edge preparation ensure a smooth, even paint job:
Filling: Apply spackling compound to nail holes or gaps with a putty knife. Let it dry, then sand flush with the surface.
Feathering: For old edges, use a sanding sponge or fine-grit sandpaper to lightly sand and blend into bare wood or existing paint.
Edge Preparation: Use painter’s tape to create crisp profiles. Apply it firmly against the surface, then run your fingers along the edge to ensure adhesion and prevent bleeding.

Choosing the Right Primer for Bonding Water-Based Paint to Oil-Based Surfaces
Understand the differences between bonding primers and shellac-based primers and how they interact with oil-based substrates. Look for label claims that specify adhesion to oil-based substrates and compatibility with water-based topcoats. Select a primer based on the trim condition and the type of topcoat planned.
When in doubt, verify the product data sheet or manufacturer instructions to confirm suitability for your situation. Consider the level of surface conditioning required by the coating system and follow local guidance as needed.
Bonding primers: what they do and when to use them
Modern bonding primers are designed to improve adhesion between surfaces with different chemical compositions. They work by creating a mechanical bond, rather than just a chemical one.
Use bonding primers:
- On glossy or semi-gloss oil-based surfaces.
- When the old trim has been cleaned and deglossed (as explained earlier).
- To seal in any remaining contaminants that could affect paint adhesion.
Shellac and alcohol-based options: pros and cons
Shellac and alcohol-based primers can be effective for very slick or contaminated surfaces, as they seal in contaminants and provide a good base for paint adhesion.
Pros
- Seals in contaminants.
- Provides good adhesion for subsequent coats.
- Dries quickly.
- Can be used on a variety of surfaces.
Cons
- Strong odor during application and drying.
- Requires proper ventilation.
- Cleanup involves using denatured alcohol, which can be harsh.
- Not recommended for use in high-humidity areas due to potential bubbling or peeling.
These primers make sense when dealing with very slick surfaces or known contaminants, but consider the trade-offs before using them.
Primer application tips for long-term adhesion
Applying primer correctly is crucial for ensuring long-lasting adhesion of your water-based topcoat. Here are some tips:
Apply thin, even coats: Thick coats can lead to peeling or cracking over time.
Avoid overworking the primer: Overbrushing can cause the primer to lift off the surface and create an uneven base for your topcoat.
Ensure compatibility with your topcoat: Always check that the primer you’re using is compatible with your chosen water-based paint. Most primers are, but it’s always best to double-check.
Painting Techniques to Avoid Peeling and Achieve a Professional Finish
Adopt a method that minimizes thick coats and avoids dragging Edge lines. Maintain a steady pace and keep strokes consistent to reduce lap marks and brush marks. Use a quality tool designed for trim to achieve a smoother result.
Apply coats in compatible steps, watching for even coverage and avoiding excess buildup at corners. Follow the primer’s recommendations for recoat windows or surface readiness, and never rush the curing process without guidance from the product label.
Brush, roller, and spray techniques for trim
Choosing the right application method depends on your trim’s profile and the current weather conditions. Here are some guidelines:
Brush: Use a good quality brush with synthetic bristles for water-based paints. Work in small sections, about 2-3 feet at a time, to maintain a ‘wet edge’ and avoid lap marks.
Roller: For large, flat surfaces, use a roller with a cover that matches your trim’s profile. Work in ‘W’ or ‘M’ patterns to ensure even coverage and minimize lap marks.
Spray: If you’re using an airless sprayer, maintain a consistent distance from the surface (usually 6-12 inches) and use smooth, steady strokes. Spraying requires more paint than brushing or rolling, so be prepared to buy extra.
Layering, wet edge, and recoating guidance
Applying thin, even coats is key to a professional finish. Here’s how to manage your layers:
Start with the first coat, applying it thinly and evenly. Don’t try to cover everything in one go; that can lead to runs and sagging.
As you work, maintain a wet edge. This means keeping your brush or roller wet as you move along the trim, so there’s no visible line where one stroke ends and another begins.
When it’s time for the second coat, wait until the first is completely dry. Follow the manufacturer’s recoat instructions; this will usually be 4-24 hours depending on humidity and temperature. Apply your second coat in the same manner as the first, ensuring you’re not disturbing any dried paint.
Avoiding common application mistakes
Here are some common pitfalls to steer clear of when painting your trim:
- Overloading the brush: Too much paint on your brush can lead to drips and runs. Keep your brush about half to three-quarters full.
- Applying thick coats: Thick coats take longer to dry and can crack or peel over time. Stick to thin, even layers.
- Poor ventilation: Ensure your workspace is well-ventilated to avoid fumes building up. If you’re painting indoors, open windows and use fans.
- Painting in direct sunlight: Heat can cause paint to dry too quickly, leading to a rough finish. Paint in the shade or early/late in the day when temperatures are cooler.
- Ignoring surface preparation: If you’ve skipped any steps in your prep work (like cleaning, sanding, or priming), your paint won’t adhere properly and could peel over time.
By avoiding these mistakes, you’ll be well on your way to a smooth, professional finish that lasts.
Post-Paint Adhesion Checks and Troubleshooting Peeling
After painting, test adhesion with a light tape pull or gentle probe to detect any loose areas. If adhesion issues surface, identify whether they stem from surface prep, primer selection, or moisture problems. Plan corrective steps before considering additional coats.
Use a targeted repair approach to reattach or recoat affected areas, following product directions for patching and re-coating. Rely on manufacturer guidance and local codes to ensure a durable finish and safe practices.
How to test adhesion after the topcoat cures
After your paint has fully cured (usually 24-48 hours), it’s time to check its adhesion. Here’s how:
1. Scratch Test: Gently scratch the surface with a coin or a key. If the paint lifts off, you’ve got an adhesion problem.
2. Tape Test: Stick a piece of painter’s tape on the painted area and pull it off quickly. If any paint comes off, re-prepping is needed.
3. Visual Inspection: Look for signs like cracking, peeling, or blistering. These indicate poor adhesion and require immediate attention.
Diagnosing causes of peeling and blistering
If you’re seeing paint peel or blister, it’s usually due to one of these reasons:
1. Contamination: Dirt, grease, wax, or other contaminants can prevent proper adhesion. Refer back to our cleaning process at the start.
2. Inadequate Preparation: Skipping steps like deglossing, sanding, or priming can lead to peeling. Re-prep the area following our earlier guidance.
3. Wrong Primer: Using the wrong primer for your surface and paint type can cause issues. Make sure you’ve used a bonding primer suitable for oil-based surfaces transitioning to water-based paint.
Repair methods for peeled or delaminated areas
If you find areas that have peeled or blistered, here’s how to fix them:
1. Remove Failed Paint: Scrape off the loose paint using a putty knife or a paint scraper. Sand any remaining lumps smooth.
2. Re-prep and Re-prime: Clean the area, degloss if needed, sand lightly, and prime again using your bonding primer.
3. Repaint and Blend: Once primed, repaint the area using a small brush or roller to match the surrounding finish. Work in thin layers, feathering out at the edges for a seamless repair.
Finishing, Curing, and Maintenance Best Practices
Distinguish between drying and curing as you plan the project timeline. Protect freshly painted trim from dust, moisture, and direct contact during the curing phase. Schedule finish protection with simple barriers and careful handling.
Establish a maintenance routine that checks for wear, touch-ups as needed, and timely cleaning of the painted surfaces. Refer to product labels for care guidance and follow local recommendations to extend the life of the finish.
Managing use and traffic during cure
Once you’ve applied your water-based paint over the old oil-based trim, it’s crucial to manage use and traffic around the area while the paint cures. Curing is different from drying – drying is when the surface feels tack-free, but curing is when the paint hardens and gains its full protective properties.
Limit physical contact with the freshly painted trim for at least 24 hours after painting. This gives the paint time to set and prevents any damage from handling. Follow your specific paint’s instructions for exact cure times.
Keep pets and children away from the area during this period. Use alternative routes in your home to avoid walking near the freshly painted trim. Once cured, gradually return to normal use, but be gentle with the surface for the first few weeks.
Cleaning and long-term care for painted trim
Proper cleaning and care are essential to maintain the longevity of your newly painted trim. Always use gentle cleaning methods to preserve the finish and prevent premature wear.
For regular dusting, use a soft, dry cloth or a microfiber duster. For more thorough cleaning, dampen a cloth with mild soap and warm water, wring it out well, then gently wipe the trim. Avoid using harsh chemicals like bleach or ammonia as they can damage the paint.
If you notice any spots or stains, address them promptly. Use a spot-touch approach – test a small, hidden area first to ensure your cleaning method doesn’t remove the paint. Always follow up with a clean, damp cloth to rinse and dry the area.
When to touch up versus when to repaint
Over time, your trim may show signs of wear or damage. Knowing when to touch up and when to repaint can help you maintain the longevity of your paint job.
Touch up small localized repairs if the paint is still in good condition elsewhere on the trim. Inspect the area for adhesion issues – if the paint is peeling or lifting, it’s a sign that the surface needs to be repainted. If the paint is intact and the damage is minor (like a few scratches or small chips), touch up with a small brush using your leftover paint.
However, if the trim shows signs of widespread wear, peeling, or blistering, it’s time for repainting. Repaint when the existing paint is in poor condition, as touching up will only provide temporary results. Always prepare the surface properly before repainting to ensure good adhesion.
Conclusion
You can get a durable, clean finish if you finish the job safely and follow the prep and primer steps. The payoff is a trim that looks fresh and holds up without costly peeling or frequent touch ups.
To move from prep to paint, run this quick check in order: inspect the trim for any oil residue or loose finish, choose a bonding primer suited for water-based top coats over oil-based surfaces, clean the surface thoroughly, deglose, sand, and make repairs where needed, test a small area to confirm adhesion, then apply thin, even coats and allow proper curing between steps.
A few bad habits will derail progress fast: skipping the degloss step or roughing only lightly, skipping or mismatching primer, and piling on thick coats that trap solvents. Always wear a respirator or mask in a well-ventilated space, protect floors and furniture, and test a hidden spot first before committing to the whole project.
If you discover widespread cracking, damp conditions, lead paint concerns, or obvious structural damage, don’t push ahead alone. Call a professional for a safe assessment and remediation. Stay steady, follow the steps, and you’ll finish with a professional look that lasts.
FAQ
Can I skip any steps and still end up with a good finish?
No. Skipping steps increases peel risk. Follow the surface prep steps and use the right primer recommended for bonding water-based paint to oil-based trim. Always check manufacturer instructions for your products.
How do I test the bond before committing to a full paint job?
Do a quick adhesion check on a small area. Lightly tape the surface and remove it to see if the finish lifts. If it peels, rework the surface or switch products per the label instructions.
Can I use regular latex paint directly over oil-based trim to save time?
No. Oil-based trim needs proper bonding primer before water-based paint. Look up the primer’s label for compatibility and follow the manufacturer’s instructions.
What should I do if the paint starts peeling after I’ve finished?
Stop what you’re doing and inspect the edges. Re-sand the affected areas, re-prime if needed, and repaint using the same process. If peeling continues, consult the product instructions or test with a different primer or paint type.