

Introduction
Loading a roller correctly means getting enough paint into the nap so it lays down an even coat without dripping or running. Think of it like charging a sponge: dip, roll out on the tray until it’s saturated but not shedding, and work in manageable sections so you keep the roller loaded. This prevents dry streaks and excessive splatter when you move across the surface.
Practical checks are simple: watch the roller as it spins on the tray — it should hold paint without forming beads that fling off, and the surface you roll should receive consistent coverage. If you’re unsure about soak times or nap choices, check the paint can label and roller packaging, and test on a scrap board before starting the main surface.
Key takeaways
- Load roller evenly from tray edge, avoiding excessive pressure on drywall.
- Maintain a wet edge while rolling to ensure uniform coverage and minimize lap marks.
- Keep your workspace clean; taped edges reduce splatter onto nearby surfaces.
- Use light, even strokes and roll off slowly at boundaries to avoid ridges.
- Inspect for dry roll and back-roll with fresh pass before finishing.
- Wear eye protection and gloves; address splatter risks before painting.
Table of Contents
- Introduction
- Key takeaways
- Why Proper Roller Loading Matters
- Tools and Materials Checklist
- Preparing Paint and the Workspace
- Step-by-Step Roller Loading Technique
- Coverage Strategies and Rolling Patterns
- Splatter Control Techniques
- Avoiding and Correcting Dry Roll
- Visual Checkpoints and Troubleshooting
- Conclusion
- FAQ
Why Proper Roller Loading Matters
How you load a roller directly affects finish quality, material use, and cleanup effort. Poor loading increases paint waste, boosts splatter, and makes it far easier to hit a dry-roll situation that shows up as streaks and poor coverage.
Paying attention to loading reduces rework and keeps application consistent from start to finish. If a spec or performance detail matters for your paint, check the product label or technical data sheet before you begin.
How roller loading affects finish and coverage
The amount of paint you load onto your roller directly impacts the final look of your walls. Too little, and you’ll see every brush stroke; too much, and you’ll end up with drips and runs.
Proper loading gives an even film thickness. This ensures a smooth, uniform finish that hides imperfections and provides good coverage. It’s like applying sunscreen – not too much, not too little, just right.
Think of it this way: underloading is like trying to paint your entire house with a single brush stroke; overloading is like dumping a bucket of paint onto the wall and hoping for the best. Neither works well.
Common mistakes and their consequences
There are a few common roller loading mistakes that can ruin your finish. Here’s what to avoid:
- Overloading: Too much paint causes drips, runs, and uneven coverage. It’s like trying to eat a whole cake in one sitting – it’s just too much.
- Underloading: Not enough paint leaves visible brush strokes and poor coverage. It’s like trying to build a sandcastle with only a few grains of sand.
- Uneven loading: Inconsistent paint distribution leads to patchy, streaky walls. It’s like trying to mow the lawn with a lawnmower that has one blade missing.
- Loading too often: Constantly reloading the roller causes overworking the paint and can lead to poor adhesion and increased splatter.
Each of these mistakes can leave you with a less than perfect finish. So, take your time, load your roller correctly, and enjoy the smooth, even results.
Tools and Materials Checklist
Gather the core items before you start: suitable roller frame and extension, a selection of covers matched to the paint and surface nap, a tray or bucket system, and basic accessories like a grid, stir stick, and drop cloths. Choose nap length based on texture and check the roller cover packaging or manufacturer guidance for compatibility with your paint type.
For larger jobs consider a roller bucket with a grid to reduce trips to the tray and a thicker nap for rough surfaces; for smooth walls use a short nap. If you’re uncertain about a tool or cover, consult the product label or manufacturer instructions for recommended uses.
Choosing the right roller cover and nap
Selecting the correct roller cover is crucial for a smooth, even finish. Use this checklist before starting your project.
- Nap length: Longer naps (3/4″ to 1-1/2″) are for textured surfaces and thick paints; shorter naps (1/4″ to 3/8″) are for smooth surfaces and thin paints.
- Nap material: Synthetic napped rollers are versatile, while lambswool is ideal for oil-based paints. Check manufacturer guidance for compatibility with your paint type.
- Cover size: Standard sizes are 9″ and 18″. Choose based on the width of your surface to avoid excessive rolling or undercoverage.
- Frame material: Aluminum frames are lightweight, while steel is more durable. Consider using an extension pole for high ceilings.
- Test on scrap: Before starting, test your chosen roller cover and nap on a small, inconspicuous area to ensure it works well with your surface and paint.
Quick rule: Always match nap length and material to your surface texture and paint type for best results.
Trays, buckets, grids, and other loading aids
Using the right tools makes painting easier and more efficient. Here’s a checklist of essential loading aids.
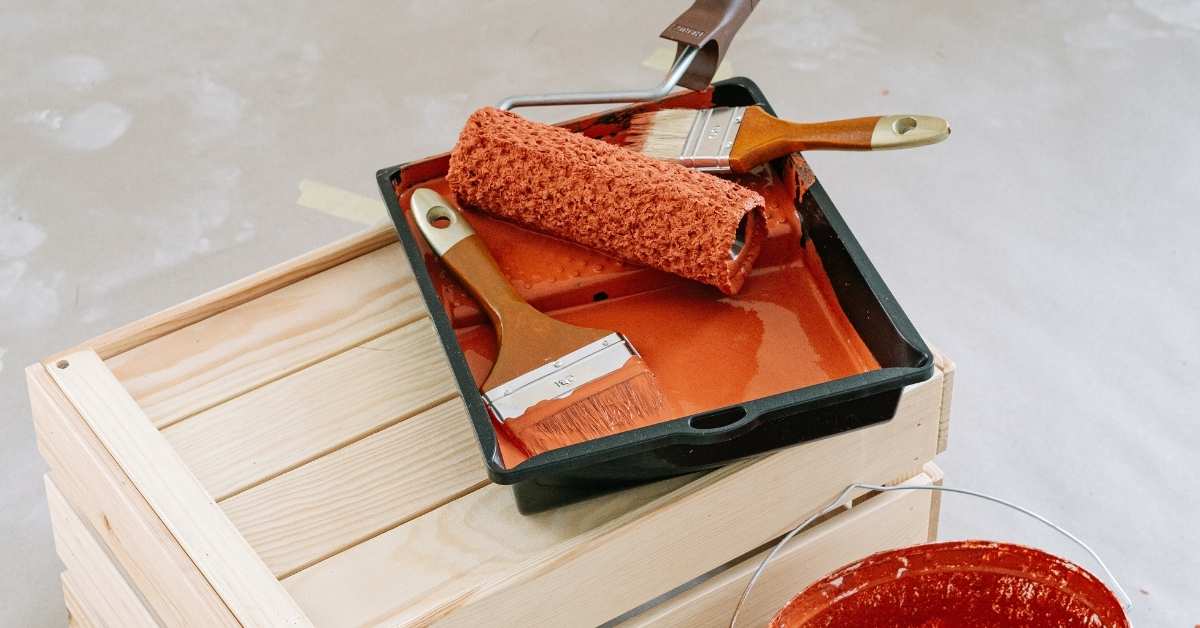
- Roller tray: A deep tray (2″ to 4″) is ideal for most projects, allowing you to load your roller fully without spilling paint.
- Bucket with grid: Use this for large quantities of paint. The grid helps remove excess paint and keeps your work area clean.
- Sleeve wringer: This tool removes excess paint from your roller, reducing splatter and improving coverage. It’s essential for high-coverage paints like latex.
- Liner bags: These disposable bags fit inside your tray or bucket, making cleanup a breeze. They’re especially useful when switching between colors.
Quick rule: Choose the right loading aid based on your project size and paint type to maximize efficiency and minimize mess.
Preparing Paint and the Workspace
Stir paint thoroughly and verify consistency looks uniform; if the manufacturer provides thinning or viscosity guidance, follow that direction. Set up a tray or bucket system at a comfortable height and lay out drop cloths and masking to keep traffic away from the work zone.
Position lights and create a clear route so you’re not interrupted while working a panel or wall. When in doubt about product handling or drying characteristics, read the label or product technical data sheet before proceeding.
Stirring, straining, and adjusting paint
Before you load your roller, give your paint a good stir. Paint can separate over time, so it’s crucial to mix it well.
Use a wooden stick or a paint mixer attachment on your drill to ensure consistent stirring. Go around the edges of the bucket too – that’s where separation happens most.
Check for lumps or debris in your paint. If you find any, strain your paint through a mesh filter into another container. This helps prevent clogging and ensures an even finish.
Pro tip: Always follow the manufacturer’s recommendations on your paint can regarding thinning or conditioning. Some paints need it to apply smoothly.
Workspace layout and protection
Before you start painting, lay down drop cloths to protect your floors from drips and splatters. Make sure they’re big enough to cover the area you’ll be working in, plus a bit extra for when you move around.
Use painter’s tape to mask off edges where you don’t want paint to go – like baseboards or trim. Press down firmly on the tape to ensure a good seal and prevent bleeding.
Open windows or use fans to provide ventilation. This helps control odors and prevents fumes from building up. It also helps your paint dry faster and reduces the risk of dust settling in the wet paint.
Pro tip: If you’re painting a room with multiple doors, close them all except one – the one you’ll be using to enter and exit. This helps contain any overspray or splatter and makes cleanup easier.
Step-by-Step Roller Loading Technique
Dip the roller into the paint and transfer it across the tray or grid so the cover picks up an even film rather than a single pooled spot. Work the cover across the tray’s ridges or grid until paint is distributed evenly over the nap—too much paint will puddle and too little feels dry and thin.
A correctly loaded roller will look saturated without dripping and will leave a smooth, even stripe when you roll a test patch. If you need exact guidance for load amounts, check the paint manufacturer’s instructions or test on a scrap surface until you get a consistent feel.
Step-by-Step Process
Follow these practical steps to load your roller correctly, ensuring even coverage and minimal waste.
- Check your roller cover for any defects. If it’s new, give it a quick rinse to remove any loose fibers.
Why: A good roller starts with a quality cover. - Fill your paint tray or bucket about halfway with paint.
Why: This depth allows you to dip the roller without overloading it. - Submerge the roller in the paint, pushing it down firmly but not forcefully. Let it soak for a few seconds.
Why: This ensures the entire roller cover is saturated. - Roll the loaded roller on the grid or textured side of your tray to remove excess paint.
Why: This helps achieve even coverage and prevents drips. - Perform a test stroke on a scrap piece of cardboard or paper. The roller should leave an even, consistent line with no dry spots or overloaded areas.
Why: A proper test stroke ensures your roller is loaded correctly before you start painting.
Initial loading: dip and transfer
Loading the roller begins with dipping it into the paint. Here’s how to do it right:
Submerge the roller about three-quarters of its length into the paint. This depth ensures you’re getting paint onto the entire roller cover without overloading it.
Why: Too little paint and you’ll have dry spots; too much, and you’ll have drips.
When removing the roller from the paint, hold it vertically to allow excess paint to drip off. This helps prevent overloading the core of the roller.
Why: A saturated core can cause uneven coverage and increase the risk of drips.
Once you’ve removed the roller from the paint, roll it on the grid or textured side of your tray to remove any remaining excess. This step is crucial for achieving even coverage.
Leveling the roller: roll-out and test stroke
After dipping, it’s time to level out your roller. This step ensures even coverage and helps prevent drips:
Roll the loaded roller on a grid or cardboard until you see paint evenly distributed across the entire width of the roller cover.
Why: This step ensures that every part of the roller is coated with an equal amount of paint.
Perform a test stroke on a scrap piece of cardboard or paper. The roller should leave an even, consistent line with no dry spots or overloaded areas.
Why: A proper test stroke confirms your roller is loaded correctly and ready for use.
If the test stroke reveals any inconsistencies, repeat the roll-out process until you achieve an even coat. It’s better to spend a few extra minutes here than to start painting with a poorly loaded roller.
Reload rhythm during a job
Knowing when and how often to reload your roller is key to maintaining consistent coverage:
Watch for the paint on your roller starting to look dry or patchy. This is a sign that it’s time to reload.
Why: Painting with a dry roller can lead to uneven coverage and missed spots.
Instead of counting strokes, test your roller by running it lightly over a small, hidden area. If the paint no longer transfers evenly, it’s time to reload.
Why: Counting strokes can be inaccurate due to variations in stroke length and pressure.
When reloading, follow the same process as initially loading your roller. Dip, transfer, level out, and perform a test stroke to ensure even coverage before continuing with your painting job.
Coverage Strategies and Rolling Patterns
Use a reproducible pattern—such as the box or W method—to place paint and then flatten with parallel passes for an even coat and to avoid lap marks. Overlap each pass slightly so wet edges tie into each other rather than drying separately and leaving visible seams.
Adjust your pattern and pressure for the surface and paint sheen to maintain a wet edge across the working area. If coverage requirements or recommended film thickness are critical, consult the product data sheet rather than guessing at layer thickness.
Establishing your starting panel and wet edge
Start by cutting in along the edges of your first panel with a brush. This gives you a clean line to work from.
Now, load your roller as described earlier. Begin rolling at the top corner of your panel, using a ‘W’ or ‘M’ pattern to distribute the paint evenly. This is your starting point and should be done on all panels for consistency.
As you roll outwards from this point, maintain a wet edge. This means keeping enough paint on the roller as you move so that when you overlap with your next stroke, it blends seamlessly into the previous one. This helps eliminate lap marks and ensures even coverage.
Overlap, pressure, and stroke length
Consistent overlap is key to avoiding thin spots or heavy buildup. Aim for about a 50% overlap on each stroke. This means that half of your roller should be rolling over the area you’ve just painted.
Apply moderate pressure when rolling. Too much pressure can cause the paint to build up and create an uneven surface. Too little, and you won’t get good coverage. Find a balance that works for you.
Stroke length is also important. Keep your strokes consistent in length to ensure even coverage. Aim for about 3-4 feet at a time, depending on the size of your roller and the area you’re painting.
Splatter Control Techniques
Control splatter by moderating roller speed, maintaining steady travel, and avoiding sudden jerks when changing direction or lifting the roller. Use the correct nap and a well-loaded roller—overloaded covers and high rotor speed create the most flick-off.
Contain splatter by working from the farthest point toward the exit, using drop cloths and masking, and keeping a slow consistent pace at edges. If a product has specific spraying or splatter warnings, review the label or manufacturer information for any special handling notes.
Handling and motion to reduce splatter
Keep your roller parallel to the surface for smooth, even coverage. Flicking can happen when you lift the roller off the wall at an angle. To avoid this, maintain a steady, moderate speed throughout each stroke.
Start slow: Begin rolling at a slower pace until you’re comfortable with the motion and pressure needed. This helps prevent excess paint from flying off the roller.
Avoid sudden stops: Instead of stopping abruptly at the end of each pass, gradually reduce your speed and lift the roller gently. This minimizes splatter and keeps your edges clean.
Containment and protective measures
Protecting nearby surfaces and trim is crucial to keep your workspace tidy and prevent unwanted paint marks. Here are some simple yet effective containment methods:
Use low-tack masking tape: Apply it around edges, baseboards, and other areas you want to protect. This creates a barrier that paint won’t stick to, making cleanup easier.
Set up protective barriers: Use drop cloths, plastic sheets, or rosin paper to cover floors and furniture. This prevents overspray from settling on surfaces below.
Wear appropriate clothing: Opt for old clothes or paint-splattered workwear that you don’t mind getting more paint on. This helps protect your regular clothes and reduces the risk of accidental spills onto yourself.
Tools and accessories that reduce splatter
Investing in the right tools can significantly minimize paint splatter, making your job easier and more efficient. Here are some useful aids to consider:
- Roller shields: These attachable guards fit onto your roller frame, channeling paint and reducing overspray. They’re affordable and easy to find at hardware stores.
- Splash guards: Similar to roller shields, splash guards are designed to fit onto your paint tray, preventing paint from splashing out as you load your roller.
- Slow-drying additives: Adding a slow-drying agent to your paint can help reduce splatter by giving the paint more time to adhere to the surface before drying. This is particularly useful for textured surfaces or when using high-gloss paints.
- Extendable roller poles: Longer poles allow you to reach higher areas without having to use a ladder, reducing the risk of spills and splatter from overreaching.
- Paint sprayers (optional): While not roller-specific, paint sprayers can be rented or purchased for larger projects. They provide even coverage with minimal overspray but require proper technique and protection to avoid mess.
Avoiding and Correcting Dry Roll
Dry roll shows as thin, streaky areas where the roller isn’t leaving a continuous film; it usually happens from underloading, working too far from a wet edge, or letting paint skin over. If you notice dry roll, immediately reload the roller and backroll the area while the paint is still wet to blend it in.
Prevent recurrence by keeping smaller working sections, keeping a wet edge, and reloading regularly rather than pressing on with a near-empty cover. If the paint is behaving unusually, check the label or technical data sheet for recommended working times and conditions.
How to recognize dry roll early
Dry roll isn’t always obvious. But if you know what to look for, you can catch it early.
First, look for streaks or lines on your surface. These are signs that the roller wasn’t fully loaded or the paint dried too fast.
Next, feel your work. If it’s rough or drags when you run your hand over it, that’s dry roll.
The sheen should be even. If some areas are dull, that’s another sign of dry roll.
Mid-job fixes for dry roll
If you spot dry roll mid-job, don’t panic. You can fix it.
First, rewet your roller. Dip it back into the paint and transfer evenly onto your surface.
Then, feather the edges of the dry patch. This blends it with the surrounding wet paint.
Finally, use a fresh, properly loaded roller to blend the area. Work from the wet edge outwards to avoid further dry roll.
Preventative habits to stop dry roll
The best way to deal with dry roll is to prevent it. Here’s how:
Check your roller frequently. Make sure it’s always evenly loaded.
Maintain a wet edge. Don’t let the paint dry out before you’ve rolled over it.
Monitor drying conditions. If it’s too hot or humid, you might need to adjust your rolling speed or take breaks.
Visual Checkpoints and Troubleshooting
Use quick visual cues: a properly loaded roller leaves an even sheen and consistent texture; problems show as drips, streaks, or sparse coverage. Stop periodically and inspect the surface from a few steps back under the same light you’ll be finishing in.
When you see an issue, identify the cause—overload, underload, wrong nap, or speed—and correct it with the appropriate tool or technique adjustments. If a defect persists or a product acts unexpectedly, consult the manufacturer instructions or technical sheet for troubleshooting guidance.
What a properly loaded roller looks like
Before you start rolling, check your roller for these signs of proper loading.
- Consistent wetness: The entire cover should be evenly damp. Dry spots mean it’s not loaded enough.
- No dripping: When you tilt the roller, no paint should drip out. If it does, unload some paint.
- Even nap saturation: The roller’s nap (the fuzzy part) should be fully saturated but not overloaded with paint.
- No lumps or clumps: Paint should spread evenly across the cover. Lumps mean you need to strain your paint better.
- Smooth surface: The paint on the roller’s surface should be smooth, not bumpy or uneven.
- No excess paint: There shouldn’t be a thick layer of paint around the edges. If there is, wipe it off.
- Right amount of paint: The roller should feel heavy but not so heavy that it’s hard to control.
- No paint on the handle: If paint gets on the handle, you’ve loaded too much.
Quick rule: A properly loaded roller feels right in your hand. It’s not too light or too heavy, and it doesn’t drip when you tilt it.
Diagnosing common problems and solutions
If something goes wrong while rolling, check this list to diagnose the issue and find a quick fix.
- Sagging paint: Your roller is overloaded. Unload some paint or use a lighter nap cover.
- Spatter: You’re applying too much pressure or rolling too fast. Lighten up and slow down.
- Lint pickup: Your roller or clothes are shedding fibers. Use a new, clean roller and change your clothes if necessary.
- Thin coverage: You’re not applying enough paint. Increase pressure slightly or use a heavier nap cover.
- Streaks: You’re rolling with too much speed or pressure. Slow down and lighten up.
- Dry roll: See our earlier section on avoiding and correcting dry roll for solutions.
- Paint not leveling: Your paint might be too thick or the surface is too rough. Thin your paint or sand the surface first.
- Uneven coverage: You’re rolling with inconsistent pressure or speed. Try to maintain a steady rhythm and pressure.
Quick rule: Most problems can be fixed by adjusting your technique, roller, or paint consistency.
When to replace the roller or change materials
Knowing when to switch out your roller or adjust your materials can save you time and effort. Check for these signs.
- Worn cover: The nap is flattened, frayed, or no longer holds paint evenly. Replace it.
- Contaminated cover: If the roller has picked up dirt, dust, or other contaminants, clean it or replace it.
- Insufficient coverage: Your current nap isn’t providing enough coverage. Try a heavier nap.
- Excessive lint pickup: Your clothes are shedding too much. Change into clean clothes or use a new roller.
- Paint not adhering: The surface might be too smooth, or the paint isn’t suitable. Sand the surface or try a different paint.
- Uneven drying: Your paint might be taking too long to dry. Check the product specs and adjust your technique accordingly.
- Streaking or lap marks: Your roller might be too wide for the job, or you’re rolling with inconsistent speed. Try a narrower roller or maintain a steady rhythm.
Quick rule: If your roller or materials aren’t working as expected, don’t hesitate to switch them out. It could save you time and effort in the long run.
Conclusion
Getting roller loading right protects the finish, keeps your edges sharp, and avoids costly mistakes. Focus on consistent paint transfer, steady motion, and clean edges to finish with a durable, professional look.
Check in this order: verify you have the right roller cover and tray setup, prepare the paint and workspace, load the roller evenly with a light to moderate pressure, apply in steady patterns for even coverage, and test a small area first to confirm texture and sheen before you proceed widely.
Avoid these common missteps: overloading the roller or forcing it to spin dry, skipping the test patch, and rolling over a wet edge or too dry surface. Safety first means you wear eye protection, keep ladders secure, ventilate the space, and wipe up spills promptly. If you notice drips, heavy stipple, or pull-off, stop and fix it before it hardens into a flaw.
If the surface is curved, highly textured, or you’re working over existing coatings that may peel, consider bringing in a pro rather than pushing on. When in doubt, take a step back, re-check your materials and technique, and finish with a confident, controlled pass. You’ve got this—steady hands, careful prep, solid results.
FAQ
How do I tell if my roller is overloaded or properly loaded?
If the paint squeezes out along the edge and drips, it’s too much. A properly loaded roller should hold paint in the nap and transfer to the wall with minimal squeeze-out. Wipe the roller edge with a rag to judge it cleanly.
What should I check before loading the roller with a new paint?
Read the paint label for the recommended nap length and any thinning instructions. Make sure the roller is compatible with the paint type (latex vs oil-based). If in doubt, ask at the store or check the manufacturer’s instructions.
How can I test coverage after loading and starting to roll?
Spot test on an inconspicuous area and look for even color and no roller marks. If you see heavy ridges or missed spots, reload lightly and roll in a different direction. Don’t press hard—let the roller do the work with steady, even strokes.
What should I do if the roller starts dripping or shedding lint?
Stop and wipe the roller on the tray edge to remove excess paint. If it’s shedding lint, peel off the visible loose fibers and restart with a fresh roller cover. Check that you’re using a clean, dry roller cover designed for your paint type.