
Introduction
Paint sprayer vs roller is a trade-off between speed, finish, and setup that you choose by room or project.
Sprayers offer quick coverage on large, open areas but take time to learn and clean up, while rollers are simpler and steadier for small spaces.
The learning curve for a paint sprayer is steeper; rollers are familiar and forgiving.
Coverage and efficiency depend on room size and surface, and sprayers can cover fast but overspray is a risk, so masking and ventilation matter.
Check paint type compatibility with your tool and consider texture, and plan for setup and cleanup times with sprayers.
Key takeaways
- Assess room size and texture to choose sprayer for even coverage.
- Rollers offer simpler setup, faster cleanup, and predictable texture for small rooms.
- Sprayers excel on large areas, but require masking and sealing to prevent overspray.
- Texture and paint type influence compatibility; check label for material limits.
- Budget in time for setup, spraying, and thorough teardown between rooms.
- Safety: always ventilate, wear respirator, and shield adjacent finishes from splatter.
Table of Contents
- Introduction
- Key takeaways
- Quick Comparison — Strengths and Tradeoffs
- Learning Curve and Skill Level Required
- Coverage, Speed, and Paint Usage
- Surface Types, Textures, and Paint Compatibility
- Setup, Masking, and Teardown Workflow
- Room- and Project-Specific Recommendations
- Cost, Tools, and Materials Checklist
- Safety, Ventilation, and Environmental Considerations
- Conclusion
- FAQ
Quick Comparison — Strengths and Tradeoffs
Sprayers shine on large, flat surfaces where speed matters. Rollers excel at edges, corners, and textured walls where control is key. Expect faster coverage with a sprayer and a more uniform close-up finish with a roller.
Surface type and room size affect results. Fresh drywall, existing paint, or texture influence how much flaws you’ll see and how many passes are needed. Masking, drop cloths, and tape technique shape cleanup and safety in both methods.
Sprayer strengths and drawbacks
A paint sprayer is your best bet for speed on large, flat surfaces. It can cover a wall in minutes, half the time of a roller.
Seamless finish: Sprayers give a smooth, even coat with no visible strokes or texture. Great for new drywall or when you want a factory-like look.
Overspray risk: Be aware, sprayers can overspray and create mess. You’ll need to mask off areas and use drop cloths to protect floors and furniture. It’s extra work but worth it for the time saved.
Cleanup is a bit more involved with sprayers. They require thorough cleaning after each use to prevent clogging. And if you’re using oil-based paint, that means dealing with harsh solvents.
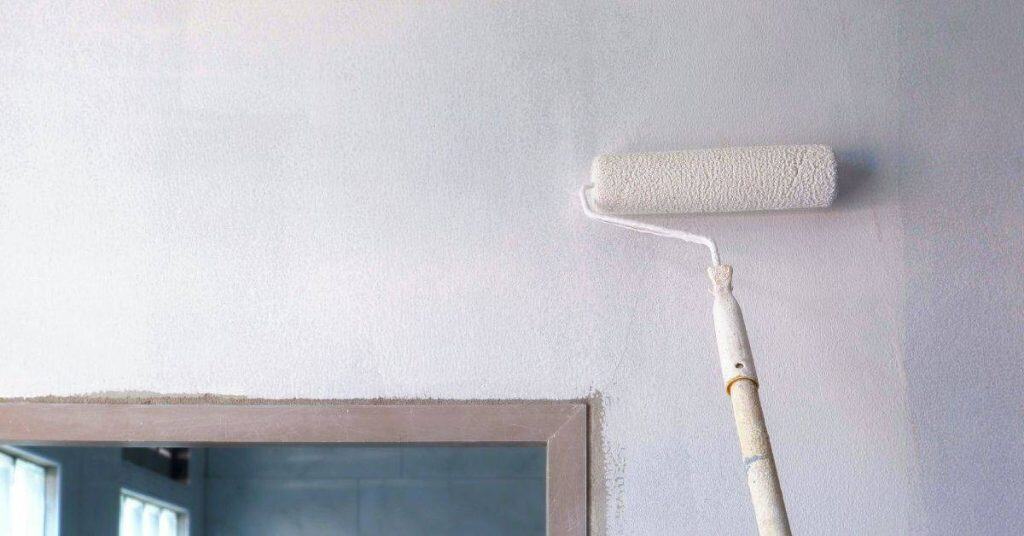
Roller strengths and drawbacks
A roller is your friend when it comes to control and paint efficiency. It’s great for edges, corners, and textured walls where a sprayer might cause runs or overspray.
Edge work: Rollers allow you to ‘cut in’ edges with precision, giving you clean lines without the need for tape. They also handle minor texture well, providing even coverage.
Ease of setup: Rollers are easy to set up and use. No masking needed like with sprayers. Just dip, roll, and go.
While rollers are slower than sprayers on large surfaces, they’re more forgiving. They won’t show every imperfection in the surface like a sprayer will. And cleanup is easier too, just soap and water for most paints.
Learning Curve and Skill Level Required
Most DIYers pick up a roller quickly and see immediate results. Sprayers can take a bit longer to master for a refined finish. Practice helps; expect a slower start with spraying until you build consistent passes.
Drills on test panels or scrap concrete help. Focus on overlap, distance, and angle to build muscle memory. Key techniques like back-rolling and even pass speed shorten the learning curve over time.
Roller skills to master
The roller’s learning curve is gentle, but there are techniques to master for a smooth finish. First, cutting-in with a brush around edges ensures no paint bleeds onto other surfaces.
Choose the right nap – thick naps hold more paint, ideal for textured surfaces; thin naps are better for flat ones. Apply even pressure, not too hard or soft.
Control your strokes: side-to-side on the first pass, up-and-down on the second. Overlap each stroke by about half to avoid lap marks. Keep a consistent speed and rhythm.
Sprayer skills to master
A sprayer’s learning curve is steeper, but with practice, you’ll achieve professional results. Start by test-spraying on scrap concrete to get a feel for the gun.
Move the gun consistently – too fast and you’ll miss spots; too slow and you’ll over-apply. Maintain an even distance from the surface (usually 10-12 inches). Use a side-to-side, overlapping motion, with each pass slightly overlapping the previous one to ensure full coverage.
Adjust settings as needed: wider fan patterns for larger areas, narrower for details. Practice on test panels to find your ideal pressure and flow rate. Avoid orange-peel textures by keeping a steady hand and even speed.
Coverage, Speed, and Paint Usage
Project type impacts speed and efficiency. Small rooms may not show a large time advantage with a sprayer, while large walls can benefit from quicker coverage. Ceiling height and exterior surfaces change the dynamics as well. Verify current conditions before choosing.
Overspray and masking influence effective coverage. Room layout and ventilation affect paint waste. Coats and paint type determine total usage, so check labels and data sheets for guidance on thinning and application technique.
How sprayers affect time and paint usage
A sprayer can be your best friend on large, uninterrupted surfaces like walls and ceilings. It’s faster than a roller – up to 10x quicker on big areas.
But here’s the catch: sprayers use more paint due to overspray. That’s when tiny droplets miss the target and float around, wasting material. Thin coats also mean you might need more applications to get the coverage you want.
To minimize waste, keep your nozzle clean, adjust pressure for different surfaces, and maintain a consistent spray pattern. Don’t forget to mask off areas too – it’ll save you paint and time in cleanup.
How rollers affect time and paint usage
A roller is your go-to for small to medium rooms with lots of nooks and crannies. It’s slower than a sprayer, but it transfers paint efficiently – up to 10-15 square feet per gallon.
Rollers don’t waste paint on overspray, but they do require more effort to cover large areas. You’ll need to make multiple trips with your roller, which can add time. Plus, rolling might not be the best choice for high ceilings or hard-to-reach spots.
To maximize efficiency, use a good quality roller cover suited to the surface. Work in manageable sections, and maintain a ‘W’ or ‘M’ pattern for even coverage. Remember, less is more with a roller – apply light coats to avoid drips and wasted paint.
Surface Types, Textures, and Paint Compatibility
Smooth or lightly textured surfaces usually favor rollers for control. Rough, porous, or highly textured surfaces often respond better to sprayers for even coverage. Always check surface porosity and texture before deciding.
Paint formulations vary in spray need. Some latex, acrylics, and elastomerics spray well, while very thick finishes may require thinning or alternative methods. Review primer needs and test a small area first.
Smooth and large flat surfaces
For smooth, large areas like walls and siding, a paint sprayer is your best bet. It’ll give you even coverage quickly.
Masking is key here. Tape off nearby items to avoid overspray. Use drop cloths for floors.
Rollers can be used too, but they’re slower and may leave visible roller marks on large flat surfaces.
Textured, rough, or specialty surfaces
For textured surfaces like concrete blocks or brick, a sprayer can reach into crevices and voids. But be careful with overspray.
With rollers, nap selection is crucial. Longer naps handle texture better but may leave visible roller marks on smoother areas.
Spraying may miss deep textures or leave a patchy finish. Test a small area first to see what works best.
Paint types and formulations
Latex, acrylic, elastomeric, and oil-based paints can be sprayed on concrete with the right setup. Thinning or using a reducer may help.
Some heavy coatings or specialty textured paints may clog spray tips or perform poorly when sprayed. Always check the paint label or manufacturer guidance.
For spraying, use primers that improve adhesion and flow. For rollers, consider primers that seal and block stains.

Setup, Masking, and Teardown Workflow
Understand the workflow scope and how setup and teardown differ between tools. Include time estimates for masking, ventilation, and protection planning. This helps you factor which method fits your schedule.
Concrete prep affects setup duration. Dust removal, crack filling, humidity, and curing status change readiness. Mask edges, adjacent surfaces, and plan overlap to minimize rework later.
Masking and protecting the space
Before you start painting, it’s crucial to protect your workspace. This is where sprayers and rollers differ slightly.
For sprayers: Use floor paper or plastic sheets on the floor to catch any overspray. Tape off trim and edges with painter’s tape. Don’t forget to cover HVAC intakes if you’re painting near them.
For rollers: You can get away with less masking here. A quick run of painter’s tape along baseboards and edges should do the trick. No need for floor protection unless you’re worried about drips.
Equipment setup and priming
Setting up your equipment right is key to a smooth job.
- Select tip/nozzle: Choose the right nozzle for your sprayer. Larger tips are better for thick paints, smaller ones for thin. Follow your tool’s guidelines.
- Thinning (if required): Some paints need thinning to spray smoothly. Check your manufacturer’s instructions and use water or a paint conditioner as directed.
- Test passes: Before you start, do some test passes on a scrap piece of concrete to get the feel for your tool and adjust settings if needed.
- Roller selection: Choose a roller cover that matches your surface. 9-inch covers are standard but can be switched out depending on your needs.
- Tray/extension pole setup: Set up your paint tray with liners for easy cleanup. Attach an extension pole if you’re using one to avoid bending and stretching.
- Layout planning: Plan your layout before you start. For sprayers, work in manageable sections. For rollers, plan your runs to minimize overlap and missed spots.
Cleaning and storage
After the job’s done, it’s time to clean up. This is where sprayers and rollers diverge again.
Rollers: If you’re using disposable covers, just toss them when you’re done. Otherwise, wash your roller cover thoroughly with soap and water until no paint remains. Let it dry before storing.
Sprayers: Cleaning sprayers is more involved. First, flush the lines with water or a cleaning solution as per your tool’s instructions. Then clean the nozzle and tip. Store with the pump disassembled to prevent mold growth.
Room- and Project-Specific Recommendations
Decide by room and project type: kitchens, bathrooms, ceilings, exterior, or trim each have unique needs. Consider surface type, detail work, and tolerance for overspray when choosing a tool. Quick checks help you decide mid-project if needed.
Masking and ventilation vary by room. Some areas require full masking and controlled airflow; others allow simpler setups. Use room-specific guidance to set up efficiently and safely.
Interior rooms (living rooms, bedrooms, ceilings)
For full-room repaints in interior spaces, a sprayer is your best bet. It’s fast and covers large areas quickly. But you’ll need to mask well to control overspray.
Use a roller for small rooms or when patching walls. It gives you more control over the paint application and requires less prep work. Plus, it’s great for touching up small areas.
When painting ceilings, use an extendable pole with your roller. This way, you can reach high spots without needing a ladder. And remember, always start from one corner and work your way across the ceiling in even strokes.
Kitchens, bathrooms, and moisture-prone areas
In kitchens and bathrooms, precision is key. Use a roller for applying paint around fixtures like sinks and tubs. It gives you more control over the paint application.
For gloss or satin paints, use a roller to maintain that smooth, even finish. But remember, ventilation is crucial in these areas, especially when using moisture-cured paints.
Before painting, make sure to clean and prep the surfaces well. Fill any holes or cracks with spackling compound and let it dry before sanding and priming.
Trim, doors, cabinets, and exterior projects
For trim, doors, and cabinets, use a roller or brush for edges. This way, you can maintain a neat, crisp line.
When painting large exterior surfaces like siding or fencing, a sprayer is your friend. It covers areas quickly and evenly. But remember to control overspray by masking off nearby areas.
For cabinets, consider using an HVLP sprayer for a smooth, even finish. But be prepared to do some touch-ups with a brush afterwards to ensure all edges are well-painted.
Cost, Tools, and Materials Checklist
Plan tool investments versus rentals and factor in consumables for concrete projects. Consider a basic setup and what you will reuse across jobs. Budget ranges should be checked against local rental options and shop prices.
List essential tools and consumables for spraying and rolling. Include primers, sealers, and topcoats, plus cleaners and maintenance supplies. Always verify compatibility with your chosen coatings and equipment.
Tools and sprayer types to consider
Before you start, check these tools and sprayers to ensure they match your project.
- HVLP Sprayers: Ideal for fine finishes. Check manufacturer’s recommended uses.
- Airless Sprayers: Great for large areas. Confirm they can handle your paint type.
- Spray Tips: Different sizes for varied textures. Match tip to surface and paint.
- Hoses: Check length for reach, diameter for flow rate.
- Cleaners: Use manufacturer-recommended cleaners to prevent clogging.
- Gun and Cup Assembly: Ensure they’re compatible with your sprayer type.
- Pressure Regulator: Essential for consistent finish. Check it’s adjustable.
- Filter Kits: Reduce overspray, improve finish quality.
Quick rule: Always check manufacturer recommendations to avoid compatibility issues.
Roller options and accessories
Choose the right roller for your surface texture and project size.
- Nap Length: Longer naps (3/4″ to 1″) for textured surfaces. Shorter naps (1/4″ to 1/2″) for smooth ones.
- Frame Size: 9″ or 18″ frames for most walls. 12″ to 18″ for ceilings.
- Extension Poles: 18″ to 36″ poles for high areas. Check length and weight capacity.
- Trays: Deep trays (4″ or 5″) for large rollers. Shallow trays (2″ to 3″) for smaller ones.
- Guards: Edging guards for clean lines. Extension pole guards for safety.
- Roller Covers: Reusable or disposable. Choose based on project size and budget.
- Tape and Liners: For easy cleanup, use liners and tape to secure roller covers.
Quick rule: Match nap length to surface texture for best results.
Consumables and masking supplies
Protect your space and ensure a clean finish with these consumables and masking supplies.
- Masking Tape: Blue tape for paint. Green tape for delicate surfaces.
- Flooring Paper: Protect floors from drips and spills.
- Plastic Sheeting: Cover large areas to prevent overspray.
- Drop Cloths: Protect furniture and floors. Use canvas for durability.
- Respirators: Use approved respirators for paint fumes. Check manufacturer’s recommendations.
- Gloves: Disposable gloves to protect hands from paint.
- Cleaners: Use manufacturer-recommended cleaners to remove paint and prep surfaces.
- Disposal Considerations: Check local regulations for paint disposal. Use approved containers.
Quick rule: Always use materials recommended by paint and tool manufacturers for best results.
Safety, Ventilation, and Environmental Considerations
Wear appropriate PPE and choose respiratory protection based on the coating and method. PPE needs differ between solvent- and water-based coatings. Always check current product labels for guidance.
Ventilation and enclosure strategies protect occupants and reduce overspray. Review local rules on VOCs, storage, and disposal before starting. Plan cleanup steps to minimize environmental impact and waste.
Respiratory and skin protection
When spraying solvent-heavy paints, wear an appropriate respirator. A P100 filter will protect you from most particles.
Never spray without eye protection – goggles or a full-face shield.
For both sprayers and rollers, use gloves to protect your hands from paint and chemicals.
Ventilation and overspray control
Indoor spraying needs ventilation. Open windows or use fans for cross-ventilation.
Consider using an exhaust fan to remove fumes directly, or temporarily wall off adjacent areas with plastic sheeting to limit dust/overspray.
Outdoor projects still need airflow control – don’t let overspray drift onto neighboring properties or into the air you’re breathing.
Disposal and environmental cleanup
Seal paint containers tightly when not in use. Return unused paint to the store if possible, or find a local recycling program.
Clean up spills immediately with absorbent materials like rags or kitty litter. Never pour paint down drains.
Follow local hazardous-waste disposal guidelines for cleaning solvents and other chemicals. Some areas have specific collection days or facilities.
Conclusion
aras>Make the right call on sprayer or roller based on the room, texture, and how durable you want the finish to be, and do it with safety as the first step so you don’t damage the space or yourself.
aras>
You should decide quickly, then run a small test area, mask and protect every surface, set up the equipment correctly, and follow a simple flow: prep, test, cover, spray or roll, check coverage, and clean up before the next session. Start with the least risky method for the room, and move up only if you need a smoother, more even coat or faster progress, all while watching ventilation and keeping paint off unintended surfaces.
Avoid these common missteps: neglecting proper masking or ventilation, over-wetting or over-rolling, and rushing the setup or teardown. Always wear eye and skin protection, ventilate well, test on a hidden patch first, and clean the tool fully after use to prevent costly clogs or corrosion. If in doubt about surface compatibility, test a small area and follow the manufacturer’s guidelines for that paint and substrate.
If the project is large, highly textured, or involves tricky angles or high-moisture areas, consider bringing in a pro rather than pushing on alone. Stay disciplined, plan room by room, and you’ll finish with a durable, even finish that looks right and lasts. You’ve got this—now map the steps, grab the gear, and start with a safe, solid baseline.
FAQ
Which tool is easier for beginners: a paint sprayer or a roller?
Rollers tend to be more forgiving for first-timers. Sprayers require masking and technique to avoid runs, so expect a steeper learning curve and plan practice time.
How can I maximize coverage and efficiency for my room or project?
Use the right nozzle or tip for the job and keep a steady, even pass. Back off if you see heavy buildup and move to touch up with a roller for thin areas to avoid waste.
What materials or paints work with sprayers vs rollers?
Check the label or datasheet for your sprayer’s compatible materials and thinners. For rollers, choose a compatible paint type and nap length for the surface texture; avoid applying materials that clog the tool.
How long does setup and cleanup typically take, and how can I speed it up?
Mask well and prep the area first to reduce cleanup backtracking. Clean tools according to the manufacturer instructions and local rules; have rags, containers, and disposal options ready to avoid delays.