
Introduction
Learn how to achieve a smooth, professional-looking cabinet finish using a paint sprayer.
You’ll discover practical prep steps, tool choices, and pro tips that help you get even coverage, minimize drips, and complete the job efficiently.
The guide walks through what to consider before you start and how to handle common challenges so you can tackle cabinet painting projects with confidence.
Key takeaways
- Plan a two-stage project timeline with masking, drying, and curing intervals.
- Label each cabinet part before removal, and photograph for reassembly accuracy.
- Degloss, clean, and repair surfaces to ensure even primer adhesion.
- Use a suitable sprayer pattern, temperature, and thin coats for best finish.
- Allow adequate drying between coats and avoid dust during curing.
- Clean tools and dispose of residues safely after project completion.
Table of Contents
- Introduction
- Key takeaways
- Project Planning and Timeline
- Tools, Materials, and Workspace Setup
- Remove, Label, and Store Cabinet Parts
- Prep: Cleaning, Deglossing, and Repairing Surfaces
- Priming and Sprayer Techniques
- Drying, Sanding Between Coats, and Finishing
- Safety, Cleanup, and Disposal
- Common Mistakes, Troubleshooting, and Pro Tips
- Conclusion
- FAQ
Project Planning and Timeline
Scope the project: decide which cabinet parts to paint, assess the existing finish, count pieces, and note any repairs or replacements. Plan the phases and rough timelines for prep, sanding, masking, priming, paint days, and cure periods, with attention to drying and ventilation. Build a day-by-day schedule that covers prep day, sanding/patching, masking and priming, paint spray days, cure periods, and reassembly, plus a bit of buffer time.
This planning helps you avoid delays and keeps the work moving if conditions or equipment shift. It clarifies what tools, materials, PPE, masking materials, ventilation setup, and a dust-free workspace you’ll need. Check product labels and local rules for drying guidance and disposal before you start.
Assess scope and set goals
Before you start, take a good look at your cabinets. Count the doors, drawers, frames, and any hardware that needs to be removed. This will help you figure out how much paint and supplies you need.
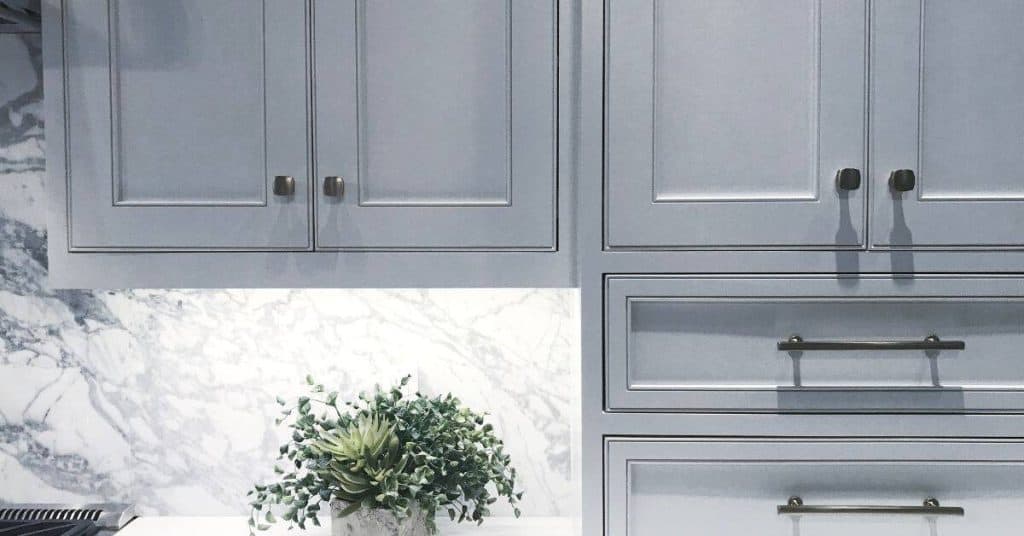
Choose a finish that fits your style and budget. A smooth satin or glossy finish can make your kitchen pop, while a matte or semi-gloss might suit a more traditional look. Once you have the color in mind, pick up samples to see if it matches your vision.
Remember, this project isn’t just about painting; it’s also about preparing and protecting surfaces. Sanding, patching holes, and masking off areas are crucial steps that can make or break your final look. Take your time with these details to ensure a professional finish.
Create a realistic timeline
A well-planned schedule is key for this project. Start by setting aside a day just for prep work—removing hardware, sanding surfaces, and applying primer if needed. This sets the stage for smooth painting.
Next, plan your spray days around drying times. Each coat needs time to dry before you can apply another one. Check the paint label for specific recommendations on flash times and curing periods. Factor in weather conditions too; high humidity or cold temperatures can slow down drying.
After spraying, allow a full day between coats for thorough curing. This prevents issues like peeling or bubbling later on. Once all coats are dry, you’ll need to reassemble your cabinets and reinstall hardware. Plan buffer days in case of delays or unexpected issues.
Budget and cost comparison
Painting cabinets yourself can save a lot compared to hiring professionals, but it’s important to budget for all the supplies you’ll need. Start by listing out your tools—sprayer, sandpaper, brushes, and tape—and materials like primer and paint.
Consider reusable items that will pay off over time. A quality paint sprayer can be used for multiple projects, making it a smart investment. Also, look at bulk discounts on supplies to cut costs further.
If you’re unsure about the DIY route, compare your total cost against professional estimates. While pros charge more upfront, they save you time and ensure a high-quality finish. Weigh these factors carefully before deciding which path is best for you.
Tools, Materials, and Workspace Setup
This section covers the core tools, materials, and workspace setup you’ll need for spray finishing, including sprayers, compressors, protective gear, primers, paints, and the right accessories. It also walks you through setting up a safe, well-ventilated spray area or a temporary spray booth. Get the basics dialed in before you mix or spray.
Choose sprayer options based on the job: understand when to use HVLP versus airless, and whether a battery or corded compressor fits your shop. Equip yourself with PPE, plan for ventilation, and keep a staging area organized with masking, drop cloths, and containment to minimize dust and spills. Know the compatible primers and topcoats and watch for signs of cure as you plan your workflow.
Sprayer types and what to choose
You’ve got a few options when it comes to sprayers for painting cabinets: HVLP (high volume low pressure), airless, and turbine. Each has its strengths.
HVLP is great for fine finishes because it reduces overspray and minimizes the risk of damaging delicate surfaces. Airless sprayers are powerful and fast but can be rough on finer details, making them better suited for larger projects or when speed is key. Turbine sprayers offer a balance between HVLP and airless, providing good coverage with less mess.
Before you buy or rent, check the flow rate and pressure settings to ensure they match your project needs. For cabinets, look for a sprayer that can handle thin paints without excessive overspray. Also, make sure it’s easy to clean and maintain.
Materials, primers, and coatings checklist
This checklist covers everything you need for a smooth painting process:
- Bonding primer: essential for adhering to bare wood or existing finishes; check compatibility with your paint.
- Waterborne enamel: quick-drying and durable, ideal for cabinets; ensure it’s rated for indoor use.
- Sandpaper: 220-grit for smooth sanding before priming; skip at your peril—rough surfaces lead to poor paint adhesion.
- Tack cloths: remove dust after sanding and between coats; skipping this step means visible imperfections in the finish.
- Masking tape: protects edges from overspray; use high-quality brands for durability.
Quick rule: Always test materials on a small, inconspicuous area first to ensure compatibility and quality.
Workspace and spray booth setup
Pick a location with good airflow and minimal dust. A garage or basement works well if you can seal off the space from other rooms. If outdoors, use a covered area to protect against wind.
To build a temporary spray booth, set up a frame around your work area and cover it with plastic sheeting. Use fans to pull air through the booth and out of the workspace. This keeps overspray contained and reduces drying time.
Protect surrounding surfaces by laying down drop cloths and masking off walls or floors. Keep tools and materials organized in bins or on shelves to avoid clutter and accidental damage.
Remove, Label, and Store Cabinet Parts
Set up a safe workspace, unplug any electrical parts, and protect countertops while you remove doors, drawers, and hardware. Assign each door, drawer, and hinge a unique ID, photograph orientation, and tag hardware with matching identifiers. Detach parts carefully without forcing, then label every piece with its ID for easy reassembly.
Create a centralized storage plan using labeled bins or magnetic trays for small hardware and keep parts in order or in numbered bags that match the IDs. That system saves time, prevents mix‑ups, and gives you a quick reference map for reassembly and any needed adjustments.
Best practices for removal and organization
Start by numbering each cabinet door, drawer, and piece of hardware with a unique identifier. Use zip-top bags to store screws, bolts, and small parts separately, labeling the bag with the corresponding number. This keeps everything organized and easy to find when it’s time to put things back together.
Photograph every assembly before disassembly to capture how each part fits together. This visual reference is invaluable for reinstallation. Make sure you document hinge types and locations too, as these can vary widely between cabinet pieces.
Use numbered tags or stickers on each component to match the photos and bags. For example, if Door 3 has a specific hinge setup, make sure that hinge gets labeled with ‘Door 3’ so it goes back in exactly the right spot when you’re done painting.
Having this system in place saves time and reduces stress during reassembly. It’s all about being prepared and organized from the start to avoid any confusion later on.
Safe storage and staging
Once you’ve removed your cabinet parts, find a safe spot for them that’s out of the way but still accessible. Use padded racks or soft bins to keep hardware from getting scratched or damaged by dust.
For drawers and doors, lay them flat on clean sheets or foam padding. This prevents warping and ensures they stay in good condition until painting day. If you’re working with a large area, consider setting up staging areas near your spray booth for easy access during the painting process.
Avoid storing parts directly on concrete floors; use wooden pallets or plastic sheeting to keep everything clean and dry. This also helps prevent rust from forming on metal components.
Keep your workspace tidy by having a central bin for all small hardware and screws. Label each container clearly so you know exactly what’s inside without opening every bag. This makes the reassembly process smoother and quicker when it comes time to put everything back together.
Prep: Cleaning, Deglossing, and Repairing Surfaces
Prep starts with a solid clean, deglossing when needed, and repairing any gouges or gaps so the finish can lay down smoothly. Use cleaning methods that won’t gum up a spray setup—mild detergent, a degreaser, or a TSP substitute can work, followed by a quick wipe and a proper dry time before you prime or spray. Decide between deglossing with a chemical product or a light sanding to create a tack‑free surface, and always test gloss and adhesion readiness on a small area before committing to the whole cabinet.
Repair work should fill flaws with wood filler or putty and feather the edges for a seamless look, then dry and sand smooth after curing as directed by the product label. Stripping old finishes is only needed when peeling, excessive gloss, or incompatible stain are obvious, and safety and ventilation matter with any method. Protect nearby surfaces, remove hardware, establish a dust‑free work zone, then do a final wipe‑down and surface check before priming, using a tack cloth and a quick test spray on a sample panel to verify uniformity and adhesion potential.
Cleaning and deglossing
To prep your cabinets for painting, start by cleaning them thoroughly. Use a mild detergent or a TSP substitute to remove grease and grime. Make sure the cleaner is safe for use with a paint sprayer—check the label for water-based formulas.
After washing, degloss the surface if it’s glossy. You can chemically degloss using products like Zinsser Deglosse or lightly sand to create a tack-free finish. Test the gloss level by rubbing your finger over the surface—if you feel any smoothness, it needs more work.
Once clean and deglossed, give the cabinets time to dry completely before moving on to repairs. A quick wipe-down with a damp cloth followed by thorough drying ensures no residue remains that could affect adhesion.
Repairing, filling, and sanding
Before priming your cabinets, inspect them for any gouges, scratches, or gaps. Use wood filler or putty to fill these imperfections. Choose a product that matches the wood type and color of your cabinets.
Sand the filled areas with fine-grit sandpaper (220-320 grit) until they’re smooth and blend seamlessly into the surrounding surface. Feathering the edges helps create an invisible repair job.
Check for uniformity by running your hand over the repaired area. If you feel any bumps or rough spots, keep sanding until it feels as good as new. Skipping this step can lead to a patchy finish that detracts from the overall look of your cabinets.
Final prep checklist and contamination control
Before you prime, run through this quick checklist to ensure everything is ready:
- Dust removal: Use a tack cloth or compressed air to remove any fine dust. Skipping this step can lead to poor adhesion.
- Vacuuming: Vacuum the booth and surrounding area thoroughly. Dust left behind will show up in your paint job.
- Cover hardware: Mask off all cabinet hardware with painter’s tape or plastic sheeting. Leaving them exposed can result in paint buildup on knobs and pulls.
- Seal gaps: Use masking tape to seal any gaps between cabinets and walls. This prevents overspray from getting into hard-to-reach spots.
Quick rule: Always double-check your prep work before priming to avoid costly mistakes later on.

Priming and Sprayer Techniques
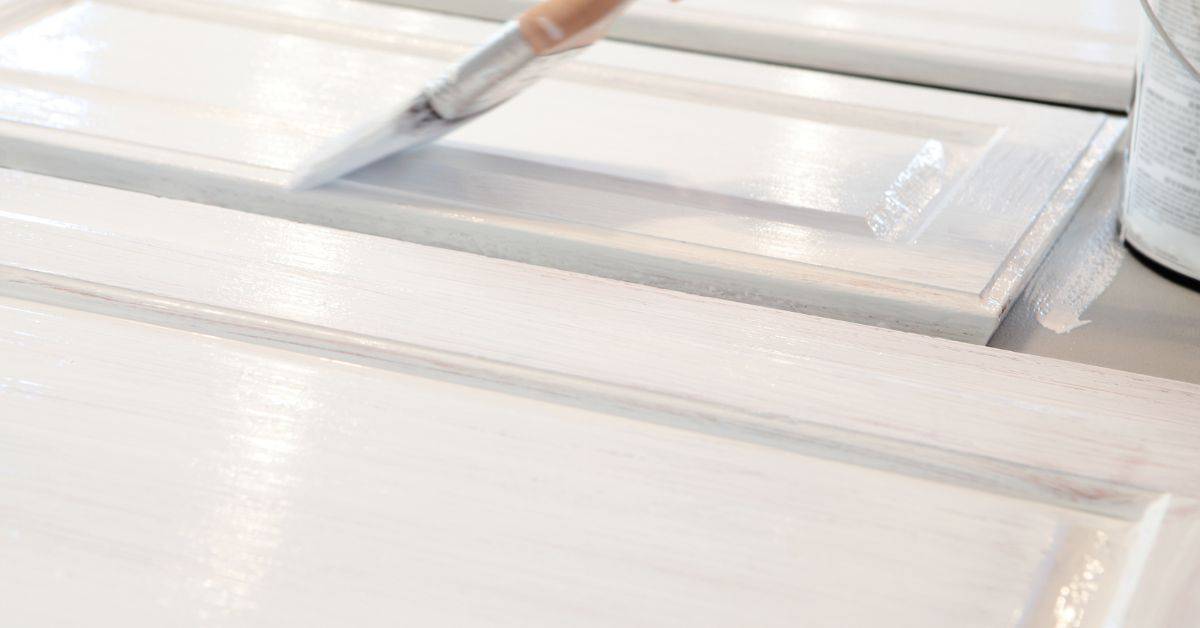
Your primer choice matters as much as the sprayer you pick, and the way you thin and mix it will define how even the cabinet surfaces come out, so you’ll want to match shellac, latex, or specialty primers to the substrate and spray system you’re using, then adjust viscosity by following the label and manufacturer instructions while keeping an eye on how it flows through your nozzle and tip setup. You should plan a test spray on a scrap piece to dial in pattern, fan width, and overlap, and you must calibrate your thinning and pressure by the spray gun’s guidance rather than guessing, because variations in material and climate will change results.
This stuff matters because a sloppy setup creates runs, orange peel, or fat builds that are hard to fix later, and a solid plan helps you stay consistent across all panels and coats, especially when you’re balancing temperature, humidity, and drying times in a shop or garage. Following a sensible technique helps you stay productive, avoid rework, and finish with a smoother, more durable surface that won’t trap dust or stains as soon as you re-enter after spraying.
Primer selection and application tips
Choosing the right primer is key to a successful paint job. For cabinets, you’ll typically use either a bonding primer or a stain-blocking primer. Bonding primers are great for surfaces that need extra grip, like bare wood or metal. Stain blockers are perfect when dealing with dark stains or previous paint colors.
For most cabinet projects, one coat of primer is usually enough to provide a solid base. However, if you’re working on a surface that’s particularly porous or stained, two coats might be necessary for full coverage and adhesion. Make sure the primer dries completely before applying your topcoat paint.
If you’re unsure about which primer to use, refer back to your materials checklist where we covered different types of primers in detail. Remember, a good primer can make all the difference between a mediocre job and one that looks professional.
Sprayer setup and spray technique
The right sprayer settings are crucial for even coverage without waste. Start by selecting the correct nozzle size—typically 1.5 to 2 mm works well for most cabinet paints. Adjust your air cap according to the paint viscosity; thinner paints require finer nozzles.
Set your pressure correctly so that the spray pattern is consistent and not too wet or dry. A good test is to calibrate on a scrap piece of wood first, adjusting until you get an even mist without streaks or runs. This will help you dial in the perfect fan width and overlap for your specific sprayer.
When spraying, maintain a steady pace and consistent distance from the surface—about 6 inches is ideal. Overlap each pass by at least half to ensure full coverage. Keep your spray gun perpendicular to the surface for even application. Practice on scrap material until you get comfortable with these techniques.
Troubleshooting common spray issues
Spray painting can sometimes lead to problems like runs, orange peel texture, or fisheye spots. Runs happen when the paint is too thin and flows unevenly; fix this by increasing viscosity with water or reducer.
Orange peel occurs if the paint is sprayed too thickly or at an incorrect distance. Adjust your settings for a finer mist and closer to the surface. Fisheye, which looks like small craters in the finish, often results from dust or contaminants; clean your spray area thoroughly before starting.
If you encounter clogging issues, check if your paint needs re-straining through a fine mesh filter. Regularly cleaning your sprayer between coats can prevent buildup and ensure smooth operation throughout your project.
Drying, Sanding Between Coats, and Finishing
Drying is the surface losing moisture and feel enough to handle, while curing is the chemical hardening of the finish. Temperature, humidity, and airflow slow or speed either phase, so wait times aren’t one-size; check the label for your product and adjust for damp or cool rooms. Expect different cues for when a surface is ready between coats—tack-free can be enough for another layer, but full cure means you can’t dent it with a fingernail.
Between coats, plan on sanding when the surface is dry but not soft, using a light touch and the right grit progression: 320–400 for wipe-on finishes, 400–600 for smoother topcoats, and always clean the dust with a tack cloth or vacuum before the next layer. Cabinets need careful sanding on doors versus frames to avoid round-overs or gouges, and you’ll handle tricky profiles more slowly. Topcoat options vary—water-based poly, acrylics, or specialty polyurethanes—with different recoat windows and maintenance notes, so read the label and test compatibility on a hidden spot before committing.
Dry time vs curing time and environmental effects
The difference between dry time and cure time is crucial for your cabinets. Dry time refers to the surface becoming touch-dry, while cure time involves deeper chemical changes that make the paint more durable.
Temperature and humidity play a big role here. In warm, dry conditions, drying happens faster but curing can take longer due to less moisture in the air. Conversely, cooler, humid environments slow down both processes significantly. Aim for an indoor temp between 65°F and 80°F with low humidity.
For typical home conditions, wait at least 24 hours after spraying before handling cabinets lightly. For high-moisture or cool areas, extend this to 36-48 hours. This ensures the paint is fully cured and less likely to smudge.
Keep an eye on your project’s environment and adjust wait times accordingly. A tack-free surface indicates it’s ready for sanding between coats but not necessarily fully cured yet.
Sanding and recoating workflow
Scuff-sand each coat with a fine-grit paper like 400 or higher to smooth out imperfections before applying the next layer. This helps create a uniform finish.
Start with 400 grit for wipe-on finishes and move up to 600 grit for smoother topcoats. Clean off dust thoroughly using tack cloths or vacuums before applying the next coat.
The number of coats depends on your desired durability and look. Typically, two full coats followed by a light sanding and third coat will give you a robust finish. More layers might be needed for high-traffic areas like kitchen cabinets.
Remember to check if each layer is fully cured before sanding again. A surface that feels slightly tacky but not sticky is usually ready for another pass with the sander.
Final topcoats and hardware reinstallation
Choose a clear topcoat like waterborne polyurethane, conversion varnish, or oil-based poly for added protection. These sealants enhance durability and resistance to wear.
Apply your final coat evenly and let it cure completely before handling the cabinets again. This ensures the finish is fully set and won’t be marred by touch.
When reinstalling hardware like knobs and pulls, use a soft cloth or foam pad under tools to avoid scratching the new paint job. Take care not to press too hard on freshly painted surfaces.
Maintain your cabinets regularly with light cleaning and occasional reapplication of sealant if needed. This keeps them looking great for years to come.
Safety, Cleanup, and Disposal
Protect yourself first: wear a respirator or mask, goggles, gloves, and painter’s coveralls, and set up a well‑ventilated spraying area to limit fumes and dust. Be mindful of safe operation and cleanup: prepared wipes or rags for spills, and plan to rinse and wipe tools after use to prevent clogs and prolong tool life. When in doubt about disposal, follow the product label for safe handling of leftovers and waste, and keep off‑target areas masked to minimize environmental impact.
This matters because good PPE and ventilation reduce health risks, while proper cleanup and disposal protect your home and the environment. After spraying, clean equipment thoroughly to extend life and prevent failures, and store leftover materials and solvents according to the label until you can dispose of them properly. Check whether the product is oil- or water-based and follow the recommended disposal routes and local guidance; look for recycling options and minimize waste wherever you can.
PPE and ventilation best practices
Wear a N95 respirator or better to protect against overspray. Goggles are essential, along with gloves that resist the type of paint you’re using—latex for water-based paints, nitrile for solvent-based ones.
Set up your work area in a well-ventilated space like a garage with open doors or windows. Use fans to direct fumes and overspray away from breathing zones. Keep the room temperature between 65°F to 80°F to ensure proper drying conditions for paint.
Maintain clean, dry work surfaces free of dust and debris. Cover floors with plastic sheeting and use painter’s tape around edges to prevent overspray from damaging other areas.
Cleaning sprayers and tools safely
After each use, clean your sprayer thoroughly to avoid clogs and maintain performance. Here’s how:
- Disconnect hoses: Remove the air hose from the compressor and disconnect the paint line.
- Rinse with solvent: Flush out remaining paint using a cleaning solvent that matches your paint type—water for water-based paints, mineral spirits for oil-based ones.
- Scrub components: Use a brush to clean nozzles and filters. Replace any damaged parts like seals or gaskets.
- Dry thoroughly: Let all parts air dry completely before storing to prevent rusting.
- Maintain filters: Regularly replace filter elements as per the manufacturer’s guidelines, typically every 50 hours of use. This keeps your sprayer running smoothly and prevents clogs.
Disposal and leftover materials
The type of paint you choose affects how it’s disposed of, so be sure to read labels carefully. Water-based paints can often go down the drain with plenty of water, but oil-based paints must be treated as hazardous waste.
- Check local regulations: Before disposing, verify what your city or county allows for paint disposal. Some areas have specific drop-off locations and schedules.
- Reuse containers: If you have leftover water-based paint, consider storing it in a sealed container for touch-ups. Oil-based paints should be stored separately to avoid contamination.
- Avoid mixing materials: Never mix different types of paint or solvents together; this can cause chemical reactions that are harmful and difficult to clean up.
Common Mistakes, Troubleshooting, and Pro Tips
Common mistakes to avoid include neglecting surface prep, skipping proper masking, mixing primers and finishes that don’t play well together, and rushing spray technique with too little dry time. You’ll also see issues like orange peel, runs, and dust in the finish when thinning or spray passes aren’t right. The pro tips push you toward consistent distance, steady speed, light multiple coats with careful cross-hatching, and using a compatible topcoat to get a factory-like cabinet look.
This matters because small setup and technique flaws compound into visible defects and longer cure times. A clean prep, correct masking, appropriate thinning per product guidelines, and a repeatable workflow make the finish more forgiving and durable for DIYers. It’s worth a plan for environment control, proper ventilation, and staged cleanup so you don’t lose progress to humidity swings or dusty air between coats.
Top mistakes to avoid
Avoid these common pitfalls to ensure your cabinet painting project goes smoothly and looks professional.
- Inadequate surface prep: Clean and degloss cabinets thoroughly before priming. Use a deglosser or sandpaper to create a smooth, even surface for paint adhesion.
- Improper masking: Mask edges and hinges carefully with painter’s tape to prevent overspray and ensure crisp lines. Double-check all areas before starting the spray process.
- Incompatible materials: Choose primers and finishes that are compatible with your cabinet substrate, whether it’s wood, laminate, or another material. Follow manufacturer guidelines for best results.
- Incorrect sprayer settings: Adjust air pressure (PSI) and nozzle size according to the paint viscosity. Incorrect settings can lead to uneven coverage and wasted materials.
- Poor ventilation: Ensure proper airflow in your workspace to prevent dust contamination and fumes buildup. Use fans or open windows to maintain a clean environment during painting.
Avoiding these mistakes will save time, reduce frustration, and result in a professional-looking finish on your cabinets.
Quick troubleshooting guide
If you encounter issues like orange peel texture, it usually means the paint was sprayed too thick or at too high pressure. Adjust your sprayer settings to a lower PSI and thinner consistency.
Runs and sags indicate that the paint is being applied too heavily or too quickly. Slow down your spray speed, increase distance from the surface, and apply lighter coats with more passes.
If you notice dust specks in the finish, it’s likely due to poor ventilation or dust accumulation during application. Clean the area thoroughly before starting and use a fan to keep air moving.
Pro tips and finishing touches
Start by painting cabinet edges first, then move to larger surfaces for better control and coverage. This technique ensures crisp lines and even application around corners and crevices.
For cabinets with concealed hinges, mask the hinge area carefully before spraying. Use a small brush or spray can to touch up any missed spots after the main coat dries.
Store leftover mixed paint in an air-tight container. Label it clearly with the date and contents for future reference if you need additional coats later on.
To complete your project, consider replacing old hardware like knobs and pulls for a fresh look. Choose new pieces that complement your newly painted cabinets and enhance their overall appearance.

Conclusion
Painting cabinets with a sprayer yields a durable, smooth finish if you plan, test, and pace yourself with safety in mind. Stay focused on proper prep, consistent technique, and clean setup to avoid costly mistakes and floppy results.
Use this practical checklist as you finish: secure and label all parts, set up a clean, ventilated workspace, test spray on a scrap panel, mix and strain materials as needed, apply thin, even coats with steady passes, keep a wet edge and don’t rush drying times, and wipe tools and cleanup supplies immediately after use. Always wear eye and respiratory protection, follow manufacturer instructions for the sprayer, and dispose of waste safely.
Two common missteps to watch for are skipping a proper degloss and repair before priming and trying to rush through coats or sanding between coats. Do not skip the test spray or exceed recommended drying times, and never spray into enclosed spaces without ventilation. Keep safety first: protect yourself with PPE, take breaks to reduce fatigue, and pause if any fumes or dust feel excessive.
If you’re unsure about complex cabinet shapes, severe finish damage, or tricky surfaces, consider a pro for proper spray technique, color matching, or durable top coats. The work will pay off in a durable, professional look that lasts—so plan carefully, work clean, and finish strong.
FAQ
What should I do to prep cabinets before spraying?
Wash them clean to remove grease and dust. Lightly sand or scuff the surface for paint to stick, then wipe again to remove dust.
What tools do I need for a smooth spray finish?
Use a real spray gun or sprayer with a fine nozzle. Keep a good mask, protective glasses, and drop cloths to protect nearby surfaces.
How do I avoid runs and uneven coverage?
) Start with thin coats and keep the gun moving. Overload coats will run; multiple light passes beat one heavy coat every time.
How do I finish and clean up after painting?
Let each coat dry fully before the next. Rinse and clean the sprayer according to the manufacturer’s instructions to avoid clogs.