
Introduction
Embarking on a cabinet spray finishing project with waterborne lacquer? Understanding the timeline is crucial to ensure you allocate enough time and resources for each step. From surface preparation to final cure, let’s break down the process into manageable stages.
Whether you’re a seasoned DIYer or a first-timer, this detailed timeline will help you plan your project efficiently and achieve professional-looking results.
For the full guide, see Spray Finishing Cabinets With Waterborne Lacquer: Setup, Dry Times, and Scratch Resistance.
The Comprehensive Timeline for Spray Finishing Cabinets with Waterborne Lacquer
Spray finishing cabinets with waterborne lacquer involves several stages that require careful planning and execution. Here’s a step-by-step timeline to guide you through the process, ensuring you allocate sufficient time for each task:
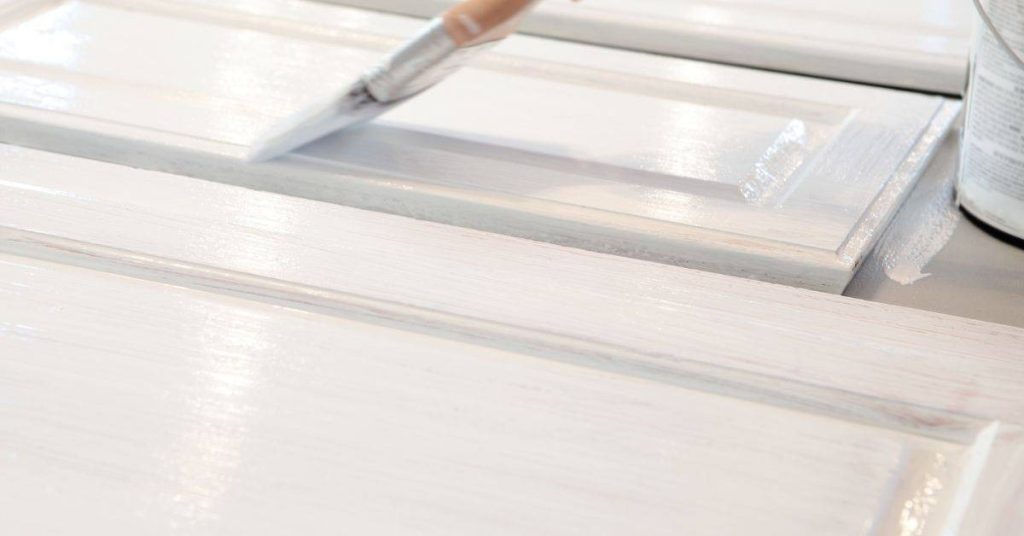
- Surface Preparation (Day 1-2): Start by cleaning and sanding your cabinet surfaces. Allow ample time for thorough sanding, tack-cloth cleanup, and applying primer or sealer.
- Masking and Protection (Half Day): Spend a few hours masking off areas you don’t want to be sprayed, protecting adjacent surfaces, and setting up your spray area.
- Mixing, Thinning, and Filtration (1-2 Hours): Dedicate time to mixing, thinning, and filtering your waterborne lacquer according to the manufacturer’s guidelines. This step is crucial for achieving a smooth, even finish.
- Spray Gun Setup and Test Passes (1 Hour): Assemble your spray gun, adjust settings, and perform test passes on a scrap panel to dial in your spray pattern and technique.
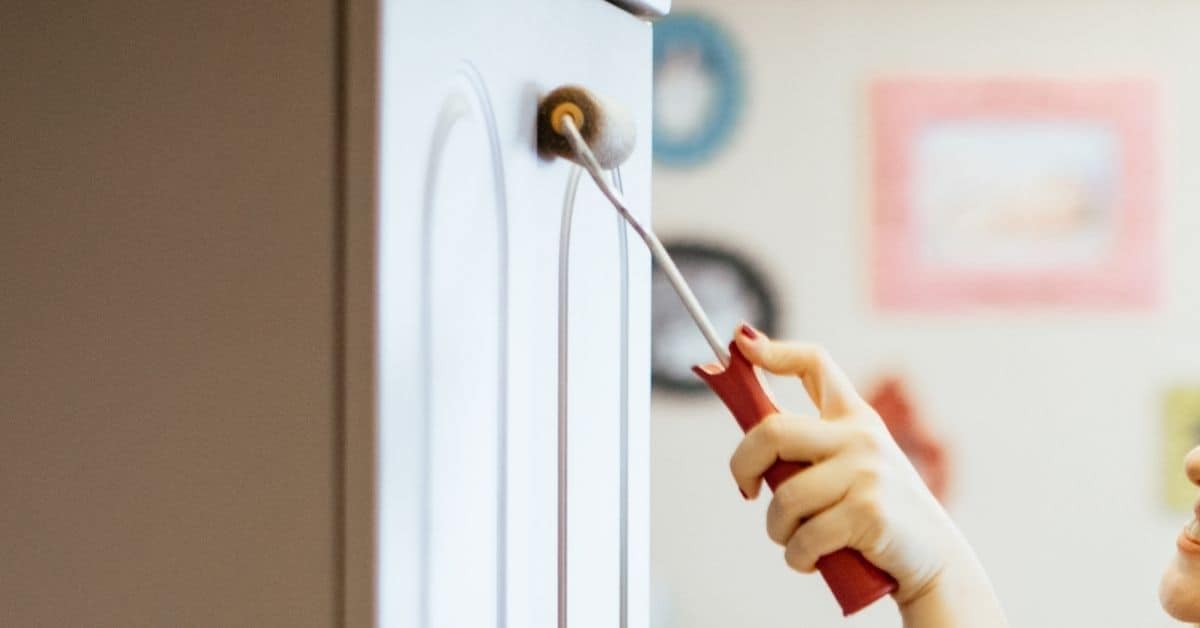
- Spray Application (2-4 Hours per Coat): Apply multiple coats of waterborne lacquer, allowing the recommended flash time between each coat. The exact duration will depend on the size of your cabinets and the number of coats required.
- Drying and Cure Time (1-7 Days): Allow sufficient drying time between coats and follow the manufacturer’s guidelines for full cure. This step is critical for ensuring durability and scratch resistance.
By following this timeline, you’ll be well on your way to achieving a stunning, professional-looking finish on your cabinets using waterborne lacquer.
Key takeaways
The time spent on surface preparation directly impacts the overall project duration. Ensuring thorough cleaning and sanding at the beginning will save you time and effort in the long run.
- Choose waterborne lacquer for its lower odor and easier cleanup around cabinets.
- Set up a dedicated spray area with proper ventilation and containment to prevent drift.
- Mask, cover, and seal all adjacent surfaces to prevent staining during spraying.
- Inspect material specs and follow manufacturer’s guidance for thinning and filtration.
- Wear respirator and eye protection; follow PPE guidelines during spraying.
- Dry times and cures depend on film build and environmental conditions; check labels.
Table of Contents
- Introduction
- Key takeaways
- Why Choose Waterborne Lacquer for Cabinets
- Tools and Materials Checklist
- Material Specs and Standards Explained
- Workshop and Spray Booth Setup for Cabinets
- Surface Preparation and Masking for Flawless Results
- Mixing, Thinning, and Filtration Best Practices
- Spray Equipment Setup and Application Technique
- Dry Times, Recoat Windows, and Full Cure Explained
- Conclusion
- FAQ
Why Choose Waterborne Lacquer for Cabinets
Waterborne lacquers offer distinct tradeoffs versus solvent-based lacquers and other cabinet finishes; highlight appearance, odor, safety, and environmental factors when deciding. Compare the finish clarity and sheen control, but also weigh open time and sanding behavior against alternatives.
Be careful to check product labels and the manufacturer technical data sheet for claims about VOCs, odor, and recommended substrates, because those details vary by formulation. If you need specific safety or environmental limits, consult local regulations or the product paperwork rather than relying on generalizations.
Performance tradeoffs compared to alternatives
Waterborne lacquer has its strengths, but it’s not always the best choice. Let’s compare.
Durability: Waterborne is tough, but solvent-based can be harder-wearing. It depends on your project’s demands.
Clarity: Both give a clear finish, but waterborne might show brush strokes or orange peel if not applied perfectly.
Repairability: Waterborne is easier to touch up than solvent-based. Just ensure you match the sheen and color exactly.
When waterborne lacquer is a poor fit
Waterborne lacquer isn’t always the best choice. Here’s when to consider alternatives:
Moisture-prone areas: Waterborne can raise the grain in humid conditions, so it might not be ideal for bathrooms or kitchens with high moisture.
Extreme temperatures: Very hot or cold environments can affect waterborne lacquer’s performance. Consider other options if your cabinets are exposed to these conditions.
High-traffic areas: If your cabinets take a lot of wear and tear, solvent-based might be more durable.
Tools and Materials Checklist
List the essential tools, consumables, and PPE you’ll need for a spray job so you arrive at the jobsite prepared; include spray gun, compressor or sprayer, filters, masking tape, tack cloths, and abrasive supplies. Note optional items like an HVLP turbine, dedicated mixing cups, and a spray booth or tent for cleaner results.
Verify the manufacturer’s recommendations for consumables (strain filters, gun tips) and the product label for required PPE and cleanup solvents. When in doubt about compatibility—such as which masking materials to use—refer to the product data sheet or manufacturer instructions.
Essential spray equipment and accessories
Before you start, ensure you have the right gear to apply waterborne lacquer smoothly.
- Sprayer: Choose a HVLP (High Volume Low Pressure) or LVLP sprayer. Verify it’s compatible with waterborne lacquers.
- Cups: Use plastic cups designed for your sprayer to prevent leaks and ensure proper atomization.
- Tips/nozzles: Select 1.8mm – 2.5mm tips for lacquer application. Check they fit your sprayer.
- Strainers: Use a fine mesh strainer to filter out impurities and prevent clogging.
- Measuring tools: Have a measuring cup or scale to mix lacquer accurately.
- Gloves: Wear gloves to protect your hands from lacquer and chemicals.
- Drop cloths: Use canvas or plastic drop cloths to catch overspray and protect floors.
- Tack cloth: Have a tack cloth on hand to remove dust before spraying.
Quick rule: Always check your gear’s compatibility with waterborne lacquers to avoid application issues.
Safety and ventilation gear
Protect yourself and maintain a safe working environment during spraying.
- Respirator: Use a P100 or N95 respirator with replaceable filters. Check the manufacturer’s instructions for compatibility with lacquers.
- Goggles: Wear safety goggles to protect your eyes from lacquer and debris.
- Gloves: Use nitrile or latex gloves for chemical resistance.
- Coveralls: Wear a disposable coverall to protect clothing and skin.
- Ventilation: Ensure proper ventilation, ideally using an exhaust fan directed outwards.
- Safety Data Sheets (SDS): Review the SDS for your specific lacquer product to confirm PPE recommendations.
- Fire extinguisher: Have a suitable fire extinguisher nearby in case of accidents.
- First aid kit: Keep a first aid kit handy for quick response to minor injuries.
Quick rule: Always follow the manufacturer’s guidelines for PPE and ventilation when using waterborne lacquers.
Material Specs and Standards Explained
Key labels to read are solids content, VOC statement, and the manufacturer’s technical data sheet; these dictate coverage, film build, and compliance with local rules. Understand that higher solids generally mean more build per coat but check the product paperwork for how the manufacturer defines it.
Also look for application notes, recommended substrate preparation, and drying conditions on the TDS rather than relying on marketing copy. If you need clarification about a spec or standard, ask the manufacturer or consult the product data sheet directly.
How to Read Technical Data Sheets (TDS) and Safety Data Sheets (SDS)
The TDS and SDS are your roadmaps for using waterborne lacquer safely and effectively. Here’s what you need to look out for:
Technical Data Sheet (TDS):
- Recommended film thickness: This tells you how much lacquer to apply per coat.
- Flash/recoat guidance: This helps you plan your work schedule by telling you when it’s safe to apply the next coat.
- Curing notes: This explains how long it takes for the lacquer to fully cure and reach its maximum hardness.
Safety Data Sheet (SDS):
- Hazards identification: Understand what hazards are associated with the product.
- Precautionary measures: Learn how to handle, store, and dispose of the lacquer safely.
- First aid measures: Know what to do if you come into contact with the lacquer.
Compatibility and Substrate Preparation Notes
Waterborne lacquer is versatile, but it’s not a one-size-fits-all solution. Here’s how to ensure compatibility with your cabinets:
First, check the TDS for recommended substrates. If your cabinets are made of an approved material, great! If not, consult the manufacturer or consider testing a small area.
Next, consider using a compatible primer and sealer. These can improve adhesion and enhance the lacquer’s performance. Always check with the lacquer manufacturer for recommendations.
Finally, ensure your cabinets are properly prepared:
- Clean: Remove all dirt, grease, and dust.
- Dry: Waterborne lacquers need a dry surface to adhere properly.
- Sand (lightly): This helps the lacquer bond better. Wipe off any sanding dust before applying.
Workshop and Spray Booth Setup for Cabinets
Set up a workspace sized for cabinet doors and carcasses with controlled airflow, dust control, and good task lighting to avoid finish defects. Decide between a temporary booth, spray tent, or a dedicated booth depending on the number of pieces and site constraints.
Monitor temperature and relative humidity and follow the product’s recommended conditions on the technical data sheet for best drying and atomization. If you have questions about ventilation rates or filter types, check the spray equipment manual and local safety codes before starting.
Dust control and visual checkpoints
Before you start spraying, run through this checklist to ensure your workspace is clean enough for a fine finish.
- Clear the area: Remove any clutter that could kick up dust.
- Vacuum surfaces: Use a soft brush attachment to remove surface dust from cabinets.
- Wipe down: Use a tack cloth or damp rag to pick up any remaining dust and debris.
- Check for grease: Wipe with a degreasing cleaner if necessary. Grease can cause poor adhesion.
- Feel for rough spots: Run your hand over the surface. Any rough patches need sanding.
- Inspect corners: Check for dust or debris buildup in corners and crevices.
- Check lighting: Ensure your workspace is well-lit to spot any missed spots.
- Final wipe: Just before spraying, give surfaces a final wipe with a damp cloth.
Quick rule: A clean workspace is half the battle. Skipping this step can lead to poor finish quality and wasted effort.
Controlling temperature and humidity
Temperature and humidity play a big role in how your lacquer applies and dries. Here’s what you need to know:
Temperature: Lacquers typically perform best between 70-85°F (21-29°C). Too cold, and the lacquer won’t flow right. Too hot, and it can dry too fast, leading to poor leveling.
Humidity: Ideal humidity ranges are usually around 40-60%. High humidity can cause slow drying and increased likelihood of mildew growth. Low humidity can lead to quick drying but poor adhesion.
Always consult your lacquer’s technical data sheet for specific application and storage temperature and humidity guidelines. Keep your spray booth within these ranges using heaters, dehumidifiers, or humidifiers as needed.
Surface Preparation and Masking for Flawless Results
Proper sanding, cleaning, and sealing are the foundation of a smooth lacquer job—walk each piece through progressive abrasives, dust removal, and any grain filling needed for the substrate. Decide whether to use a sealer or primer based on the substrate and the manufacturer’s guidance.
Mask hardware and mating surfaces with materials compatible with waterborne coatings and ensure edges and gaps are protected to prevent overspray. If unsure which filler or masking tape to use, consult the product label or technical data sheet for compatibility notes.
Sanding Schedule and Surface Feel
Start with a medium grit sandpaper, like 120 or 150, to remove any mill glaze and smooth out the surface. Use even strokes, following the grain of the wood.
Next, move on to a fine grit paper, such as 220 or 320, for a smoother finish. Sand lightly, focusing on removing any remaining scratches from the previous sanding.
The surface should feel smooth and even when you run your hand over it. If there are still rough spots, keep sanding until they’re gone. A good rule of thumb is to sand until you can’t feel anything but the grain of the wood.
Masking and Hardware Considerations
Before you start spraying, remove all hardware – hinges, knobs, pulls. You don’t want lacquer on them. If they’re tricky to remove, use painter’s tape to mark their positions so you can put them back in the same spot.
For inside edges and corners, use blue painters tape. Press down firmly to seal the edge and prevent overspray. For a clean line, use a sharp edge like a putty knife or a credit card to press along the tape after applying it.
Protect any adjacent surfaces with drop cloths or plastic sheeting. Lacquer can stain other materials if not properly contained.
Mixing, Thinning, and Filtration Best Practices
Follow the manufacturer’s mixing instructions as your primary source for thinning and induction time instead of guessing ratios; viscosity adjustments depend on the gun and conditions. Strain the mixed finish through recommended filters to remove skins and particulates before filling the gun cup or pressure pot.
Document what you do—note thinning amounts and filtration microns—so you can repeat settings that work and adjust for changing temperature or humidity. When in doubt about a thinner or reducer, verify compatibility on the product data sheet or with the manufacturer.
Measuring and mixing techniques
Start by measuring your waterborne lacquer carefully. Follow the manufacturer’s mixing ratio for best results, usually it’s one part lacquer to two parts hardener.
Pour both components into a clean container, then mix them thoroughly using a clean stirrer or drill with a mixing paddle at low speed. Aim for a homogeneous mixture without any lumps or streaks.
If you notice the lacquer is too thick, thin it slightly with water – but be careful not to exceed 10% by volume. If it’s still not flowing smoothly after mixing, let it rest for a bit and try again.
Straining and pot-life guidance
Before spraying, strain your mixed lacquer through a fine mesh filter to remove any impurities or lumps that could clog your spray gun. Use a dedicated paint strainer bag for this.
Keep an eye on the pot life of your mixture. Most waterborne lacquers have a workable time of around 2-4 hours before they start to thicken and lose their effectiveness. If you notice the lacquer is getting too thick, discard it and mix a new batch.
If your lacquer starts to form a skin on top or has a strong odor, these are signs that its pot life has been exceeded. Don’t try to refresh it; just mix up a fresh batch.
Spray Equipment Setup and Application Technique
Choose and set up a spray gun based on qualitative factors like atomization style, transfer efficiency, and the size of parts you are spraying; test on scraps to dial in pattern, fluid flow, and air pressure. Practice consistent gun speed, overlap, and distance for faces, edges, and interiors to avoid runs and blotches.
Adjust technique for cabinet-specific challenges—thin edges, recessed panels, and hardware cutouts—using backpasses and controlled passes rather than heavy single coats. Refer to the spray gun manual and the lacquer manufacturer’s application notes for recommended tip sizes and handling tips.
Gun distance, angle, and motion
Hold your spray gun about 6 to 8 inches away from the cabinet surface. This distance helps you apply an even coat without runs or sags.
Angle: Tilt your gun at a 45-degree angle to the surface. This helps you get into corners and edges, ensuring full coverage.
Motion: Move the gun steadily and smoothly across the surface. Overlap each pass by about 50% to ensure even coverage. Don’t stop or start spraying in the middle of a surface; instead, pull the trigger as you begin to spray off the edge, then reverse the process at the end.
Managing coats: build, flash, and sanding between coats
Plan your passes to build up an even film. Start with the cabinet faces, then move on to edges, and finally interiors.
Flash time: Allow each coat to flash for about 5-10 minutes before moving on to the next step. This gives the lacquer time to set but not fully cure. You’ll know it’s ready when it no longer feels wet or tacky.
Sanding between coats: Lightly sand between coats using fine-grit sandpaper (around 220-320 grit). This helps remove any dust nibs and ensures good adhesion for the next coat. Wipe off any dust with a damp cloth before applying the next coat.
Dry Times, Recoat Windows, and Full Cure Explained
Differentiate between surface dry, the recoat window, and full cure and use those terms to plan sanding, handling, and assembly steps for cabinets. Rely on the manufacturer’s stated times for your specific product because ambient conditions and film thickness affect each stage.
If the product data sheet lists ranges or conditions for recoat and cure, follow those instructions rather than guessing, and adjust based on measured temperature and humidity in your workspace. If you need exact numeric targets for your project, check the technical data sheet or ask the manufacturer for guidance.
Factors that slow or speed drying and curing
Drying and curing of waterborne lacquer aren’t set in stone. They depend on a few things:
Temperature: Warmer temps speed up drying. Ideal is 70-85°F (21-29°C). Too cold, and it’ll take forever.
Humidity: Low humidity helps lacquer dry faster. High humidity slows it down. Keep your shop around 40-50% relative humidity if you can.
Film Thickness: Thicker coats take longer to dry and cure. Be patient, and don’t rush with heavy applications.
Airflow: Good airflow helps lacquer dry faster. Keep windows open, use fans, but not too strong or you’ll blow dust around.
Safe approaches to accelerating cure
Need your cabinets ready sooner? Here are some safe ways to speed things up:
First, check the manufacturer’s guidelines. Some lacquers don’t like heat until they’re fully dry.
Use low heat: A space heater on low or indirect sunlight can help. But keep it below 90°F (32°C). Too hot, and you’ll risk blistering or other defects.
Forced drying with fans is okay, but keep them at a distance. Too close, and they’ll blow dust around or cause uneven drying.
Conclusion
Finishing cabinets with waterborne lacquer delivers a durable, smooth look when you respect setup, times, and safety. Nail the environment, follow the mix and spray rules, and you’ll keep from wasting material or making costly mistakes.
Make this your checklist: verify ventilation and personal protection, mask and protect all adjacent surfaces, mix and thin to the specified range, filter clean and free of debris, set up the spray gear with the right pressure and nozzle, practice on a sacrificial piece or scrap, apply thin passes and respect dry and recoat windows, monitor ambient conditions for cure, and clean and store everything properly after the job. Test a small area first, then proceed in controlled passes, and retreat if anything looks off.
Common mistakes to avoid include skipping masking or sealing, mixing outside the recommended thinning range, rushing dry times or overcoating, and overlooking booth cleanliness or ventilation. Safety first means eye and skin protection, proper ventilation, and never spraying in confined, unventilated spaces. If you’re unsure about the substrate, large surfaces, or a specific environment, consider bringing in a pro rather than pushing on and risking damage.
FAQ
How do I know when the cabinet finish is dry to the touch vs cured?
Dry to the touch is when the surface feels dry and you can lighty handle it without sticking. Cured means the film has fully hardened and won’t gouge or smear when you press it. Check the product label or datasheet for guidance, and don’t trust feel alone.
What factors affect scratch resistance in a waterborne lacquer on cabinets?
Thin, even coats plus proper curing give the best scratch resistance. Surface prep, masking, and avoiding dust on the last coat matter a lot. If you’re unsure, follow manufacturer instructions and run a small test piece first.
When is it safe to reassemble or load cabinets after spraying?
Don’t rush reassembly. You need the finish to reach a safe handling state, then complete curing per the product’s guidelines. If in doubt, check the label or instructions for the specific reassembly or loading wait times.
What are common mistakes that ruin spray finishes and how to avoid them?
Over-thinning, rushing coats, and poor masking let dust and runs ruin the finish. Uneven application or poor ventilation can lift or blush the film. Stop and verify each step with the product instructions and your local rules if applicable.