

Introduction
The transition from oil-based systems to waterborne coatings is a significant step in any DIY project, but it’s crucial to understand the time commitment involved. This guide walks you through the process with a clear timeline, ensuring you allocate enough time for each step and avoid common pitfalls.
Whether you’re converting an entire room or just touch-ups, understanding the duration of each phase is key to planning your project effectively. Let’s dive into the step-by-step timeline for converting an oil-based system to waterborne.
The Step-by-Step Timeline: Converting Oil-Based to Waterborne
Converting from an oil-based system to waterborne involves several stages, each with its own timeframe. Here’s a detailed timeline to help you plan your project:
- Project Scoping and Safety Planning (1-2 hours): Assess the scope of your project, gather necessary tools and materials, and create a safety plan.
- Substrate Assessment and Surface Preparation (2-4 hours): Inspect the substrate, remove any failed coatings, clean surfaces thoroughly, and protect edges. The time taken depends on the size of the area and the condition of the existing surface.
- Compatibility Testing and Adhesion Promotion (1-3 days): Perform patch tests and adhesion trials on representative surfaces to ensure compatibility with the new waterborne system. This step may take up to 72 hours, depending on drying times.
- Mixing, Thinning, and Application Techniques (2-4 hours per coat): Mix, thin, and apply coats according to manufacturer guidelines. The time taken depends on the number of coats required and the size of the area.
- Controlled Drying and Curing Strategy (1-7 days): Allow for proper drying and curing time between coats and after the final application. This step can take anywhere from 24 hours to a week, depending on the product used and environmental conditions.
By following this timeline, you’ll ensure that each stage of your project is completed thoroughly and efficiently, resulting in lasting adhesion and a high-quality finish.
Key takeaways
The time spent on surface preparation directly impacts the overall duration of your project. Thorough cleaning and proper substrate assessment can prevent delays caused by rework or failed adhesion.
- Assess substrate compatibility and remove failed coatings before starting adhesion protocols.
- Perform patch tests and adhesion trials on representative surfaces prior to full scale.
- Prepare and clean surfaces thoroughly, protect edges, and minimize dust before application.
- Wear PPE, follow safety labels, and follow manufacturer guidelines with caution.
- Monitor drying and cure conditions; avoid traffic or vibration until set.
- Document results and establish ongoing QA; verify adhesion with simple pull checks.
Table of Contents
- Introduction
- Key takeaways
- When to Convert and Project Scoping
- Tools and Materials Checklist
- Substrate Assessment and Surface Preparation
- Compatibility Testing and Adhesion Promotion
- Mixing, Thinning, and Application Techniques
- Controlled Drying and Curing Strategy
- Quality Assurance and Adhesion Verification
- Troubleshooting Common Failure Modes and Remediation
- Conclusion
- FAQ
When to Convert and Project Scoping
Deciding whether to convert an oil-based system to waterborne starts with matching the substrate and end-use to waterborne performance; check the material type and the coating’s exposure conditions against the waterborne product data sheet. Consider labor, surface prep scope, and long-term maintenance when weighing cost versus benefit.
If the existing coating is failing badly, heavily contaminated, or the substrate is contaminated/chemically altered, conversion without full strip and replacement may be inadvisable; verify this by inspection and test patches. When in doubt, document the condition and consult manufacturer instructions or a coatings professional before proceeding.
Benefits and limitations of conversion
The switch from oil-based to waterborne systems brings several perks. You’ll breathe easier with the lower VOCs, making it friendlier for your health and the environment. Plus, waterborne paints often have better color retention and durability.
But hold onto your hard hat, there are some potential pitfalls too. Converting can be trickier on aged or damaged surfaces. Adhesion might be a challenge, and you could end up with issues like peeling or blistering if not done right.
Another thing to keep in mind is that waterborne paints may require more coats to achieve the same coverage as oil-based ones. So, while they’re generally easier to clean up, they might take a bit longer to apply.
Feasibility checklist
Before you dive in, run through this checklist to make sure your conversion project is a go. It’s like checking your toolbox before starting a job.
- Surface type: Confirm the substrate can handle waterborne paints. Some surfaces, like certain types of metal or previously oil-based coatings, might need extra prep or not be suitable at all.
- End-use requirements: Make sure waterborne paints meet your project’s needs. For instance, if you’re painting a high-traffic area, ensure the paint can handle the wear and tear.
- Cost-benefit analysis: Crunch the numbers to see if conversion makes financial sense. Consider the cost of new materials, labor (if hiring), and any prep work needed.
- Manufacturer guidelines: Check if your chosen waterborne paint is compatible with your existing system. Some paints might not play nice with others.
- Timeline: Factor in extra time for prep work, application (more coats), and drying/curing periods.
- Weather conditions: Waterborne paints need specific temperature and humidity levels to apply and cure properly. Check your local forecast before starting.
- Lab or manufacturer confirmation: If you’re unsure about any aspect, don’t hesitate to send samples to a lab or contact the manufacturer for advice.
- Safety measures: Ensure you have proper PPE and ventilation. Waterborne paints might be low VOC, but they’re not zero VOC.
Quick rule: If any of these checks raise red flags or you’re unsure about anything, it’s best to err on the side of caution and consult a pro or the manufacturer before proceeding.
Tools and Materials Checklist
Gather tools, PPE, and consumables in organized categories: cleaning agents and degreasers, primers or adhesion promotors, and chosen waterborne topcoats, plus application tools and measurement instruments; always check each product data sheet for compatibility notes. Include PPE suited to the cleaners and coatings you select and have adequate containment and disposal supplies on hand.
Select products that list cross-compatibility with your existing system or have proven adhesion on similar substrates; if compatibility isn’t stated, plan for extra test panels. Keep records of batch numbers and product datasheets for supplier support and warranty questions.
Personal protective equipment and shop setup
Before you start, ensure your safety and workspace are ready.
- Gloves: Protect hands from chemicals. Choose nitrile or latex gloves.
- Eye protection: Goggles or safety glasses to prevent eye irritation.
- Respirator: Use a P100 respirator for dust and fumes. Check local regulations.
- Apron or coveralls: Shield clothing from spills and splashes.
- Ventilation: Ensure workspace is well-ventilated, use fans if needed.
- Containment: Use drop cloths or plastic sheets to protect surfaces.
- Fire extinguisher: Have one nearby for emergencies. Check it’s suitable for chemical fires.
- Safety data sheets (SDS): Keep SDS of all products on hand for quick reference.
Quick rule: Always consult local safety guidelines and product SDS before starting work.
Consumables, primers, and test materials
Select the right consumables to ensure a smooth transition from oil-based to waterborne systems.
- Cleaners: Choose a cleaner compatible with both existing and new coatings. Check data sheets for compatibility notes.
- Primer: Select a primer that adheres well to the existing oil-based layer and is compatible with your chosen waterborne topcoat.
- Adhesion promoter: If needed, use an adhesion promoter to enhance bonding between old and new layers.
- Test kit: Use a test kit to ensure compatibility of all products before full application. Check for signs of incompatibility like blushing or delamination.
- Waterborne topcoat: Choose a high-quality waterborne topcoat that matches your project’s needs and is compatible with the primer.
Quick rule: Always check product data sheets for compatibility notes to avoid application issues.
Substrate Assessment and Surface Preparation
Inspect the substrate systematically: check for rust, delamination, contamination, and previous coating adhesion, and document visual and tactile findings with notes and photos. Establish preparation goals—clean, sound, and profile the surface to the level required by the waterborne system—and use test patches to confirm the approach.
Follow inspection with the appropriate cleaning sequence (mechanical or chemical) and repair any substrate damage before priming; verify compatibility of cleaners and repairs with the waterborne product instructions. Keep a log of methods used, abrasives, and surface profile measurements for quality control.
Identifying and removing contamination
Before you start, check for any contaminants that could interfere with your waterborne coating’s adhesion. Here’s what to look for:
Oils, silicones, waxes: These can prevent paint from sticking. Use a simple chemical test or swab some isopropyl alcohol on the surface – if it becomes cloudy or smears, contamination is present.
Remove with appropriate cleaners, following manufacturer’s instructions. Always test a small area first to ensure compatibility.
Salts: These can cause peeling and blistering. A simple water rinse should reveal any salt deposits – if the surface feels gritty or leaves a residue, it’s likely contaminated with salts.
Rinse thoroughly with clean water and allow to dry completely before proceeding.
Mechanical profile and feathering techniques
A uniform surface profile is crucial for good adhesion. Here’s how to achieve it:
Use abrasion – sanding, grinding, or shot blasting – to create a consistent surface texture. The exact method depends on the substrate and its condition.
For edges and corners, use feathering techniques to ensure a smooth transition from the prepared surface to the existing one. This prevents sharp lines that could lead to peeling.
Always follow the coating manufacturer’s guidance for surface preparation. They know their product best and can provide specific advice tailored to your project.
Dealing with rust, corrosion, and delamination
Rust, corrosion, and delaminating coatings can compromise the integrity of your substrate. Here’s how to address these issues:
Neutralize: If the rust or corrosion is minor, you might be able to neutralize it with a suitable primer or converter. This changes the chemistry of the rust so it won’t continue to corrode.
Spot-repair: For larger areas of rust or corrosion, you may need to spot-repair by grinding out the affected area, cleaning it, and applying a suitable patching compound before priming.
Full removal: If the substrate or coating is extensively damaged, it might be best to remove it entirely and start fresh. Always follow safety guidelines when removing old coatings.
Use corrosion control products approved for use under waterborne systems to prevent future issues. Your coating manufacturer can provide recommendations.
Compatibility Testing and Adhesion Promotion
Small-scale compatibility and adhesion tests are mandatory because waterborne chemistry can react differently to existing films; prepare test panels that replicate the actual substrate and coating layers. Run a sequence of tests—surface prep, primer (if used), waterborne topcoat—so you can evaluate adhesion, appearance, and cure behavior.
Record exact methods, materials, environmental conditions, and test results to share with suppliers if issues arise; this documentation supports troubleshooting and warranty discussions. If adhesion is marginal, consult manufacturer instructions for adhesion promoters or alternate primers and repeat testing before full application.
Test patch and cross-cut adhesion tests
Before diving into the conversion, you must test your waterborne system’s compatibility with your existing oil-based coating. This is crucial to avoid costly mistakes.
Prepare a small test patch on an area that matches your substrate. Apply your new waterborne coating and let it dry according to the manufacturer’s instructions. Then perform a cross-cut or pull-off adhesion test. If the coating peels off easily, it’s a fail. If it stays put, it’s a pass.
Remember, these tests are pass/fail indicators. If your results are borderline, consider sending samples to a lab for more precise analysis.
Primer and tie-coat selection strategy
Choosing the right primer and tie-coat is like laying a solid foundation. They bridge the gap between your old oil-based system and the new waterborne one.
Look for primers and tie-coats that are specifically designed to convert from oil-based to waterborne. Check their chemistry – they should be compatible with both systems. Also, confirm their dry times and recoat windows with the product data sheet.
Pro tip: Don’t skimp on these steps. A good primer and tie-coat can save you a lot of headaches down the line.
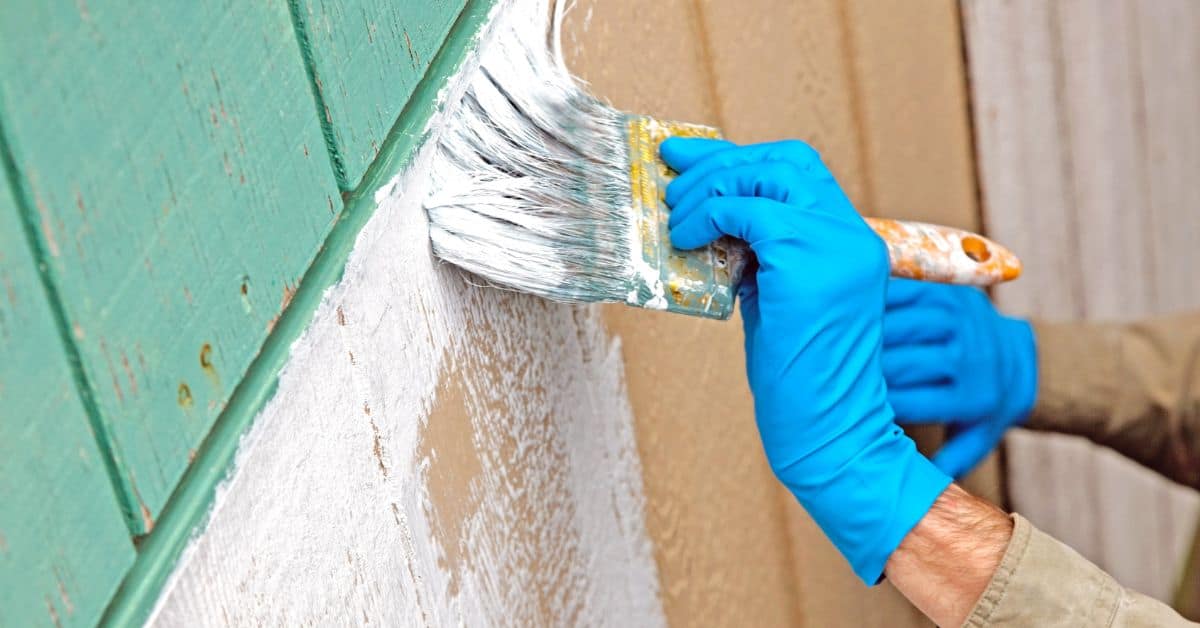
Mixing, Thinning, and Application Techniques
Mix waterborne products thoroughly and in the sequence the manufacturer specifies, taking care to avoid contamination from tools or residues from oil-based materials; use clean, dedicated mixing and application equipment. Follow pot-life and thinning recommendations on the technical data sheet rather than fixed recipes from other jobs.
Adjust viscosity to suit your application method and environmental conditions, using approved thinners only, and maintain consistent wet film thickness through controlled passes. Clean tools promptly and store mixed materials per label guidance to prevent spoilage and cross-contamination.
Pot-life, Induction, and Agitation
The pot-life of a waterborne coating is the time it remains usable after mixing. It’s crucial to follow your manufacturer’s technical data sheet for exact timing.
Factors affecting pot-life: Temperature, humidity, and the amount of air incorporated during mixing can reduce pot-life.
Controlled mixing/agitation is key. Use a clean, dedicated drill with a mixing paddle at a consistent speed to avoid incorporating excess air.
Application Methods and Common Spray Setup Considerations
Waterborne coatings can be applied using handheld or conventional spray systems. Always verify equipment settings with the spray system and coating manufacturers.
Handheld spray: Use a low-pressure, wide-fan spray tip for even coverage. Keep the nozzle moving to avoid over-application.
Conventional spray: Ensure your spray gun is clean and well-maintained. Check filters regularly and replace as needed. Adjust pressure and fan width based on coating requirements.
Controlled Drying and Curing Strategy
Drying and curing of waterborne systems are sensitive to temperature, humidity, and airflow, so plan controls that keep conditions within the product’s recommended ranges; consult the technical data sheet for those ranges. In-shop conditions can often be adjusted with heaters or dehumidifiers; in the field, use enclosures, fans, or scheduling to avoid adverse weather.
Monitor environmental conditions during cure and document readings to ensure the system achieves the intended properties before service or overcoating. If conditions fall outside manufacturer guidance, allow additional time and confirm cure with manufacturer-recommended tests rather than assuming completion.
Managing flash times and recoat windows
Waterborne coatings need time to set before applying the next coat. This is called the flash time. It’s not just about waiting a certain number of minutes, though. You’ve got to check if the surface is tack-free.
Here’s how: Gently touch the surface with a clean, dry glove or rag. If it sticks, wait some more. If it doesn’t, you’re good to go. But don’t rush it. Too short a flash time can lead to poor adhesion and ruined work.
If your coat takes longer to cure due to low temps or high humidity, be patient. Let it set fully before recoating. Always check the product’s technical data sheet for recommended ranges.
Accelerated cure options and when to avoid them
Sometimes you might want to speed up curing. But be careful, accelerating cure can backfire if not done right.
- Increased airflow: Fans or open windows can help dry the coat faster. But too much airflow can cause the film to form too quickly, leading to poor adhesion and a weak finish.
- Controlled heat: Applying heat can also speed up curing. But be gentle. Too much heat can cause the coating to cure too fast, leading to stress in the film and potential delamination.
- Avoid accelerating if: The temperature is below the product’s recommended minimum. This can lead to poor adhesion and a weak finish.
- Always check with the manufacturer first: Before trying any acceleration methods, make sure they’re suitable for your specific product. Some coatings don’t play well with heat or increased airflow.
Remember, accelerating cure is a balancing act. Too much too fast can hurt your finish. So, use these methods wisely and always follow the manufacturer’s guidelines.
Quality Assurance and Adhesion Verification
After application, perform a structured QA check: visual inspection for defects, confirm dry film thickness with calibrated gauges, and run adhesion tests per the chosen protocol; document all findings. Use the same test methods you used during compatibility trials so results are comparable.
Maintain a project log with batch numbers, environmental readings, test locations, and repair actions; when certification or third-party verification is required, arrange independent testing early in the schedule. If tests fail, refer to documented test conditions and supplier guidance before deciding on remediation steps.
Visual and dimensional inspections
Conduct these checks after application to ensure a quality job. Use this checklist before moving on to the next step.
- Check for visible defects: Inspect the surface for any missed spots, runs, or sags. These can affect adhesion and appearance.
- Measure wet film thickness: Use a wet film gauge at multiple points to ensure target coverage. Inconsistencies may lead to varied drying times and potential issues.
- Check for proper leveling: Ensure the coating is spread evenly. Irregularities can cause uneven curing and adhesion problems.
- Inspect edges and corners: These areas are prone to missed spots or over-application. Proper edge coverage is crucial for overall adhesion.
- Verify dry film thickness: Measure again after drying to confirm target coverage. Significant variations may indicate application errors or incompatibilities.
- Check for signs of curing: Ensure the coating is drying and curing properly. Delays can lead to adhesion issues and other problems.
- Inspect for contamination: Check for any new contaminants that might have been introduced during application. These can affect adhesion.
- Examine the surface tension: Ensure the coating has a consistent, even sheen. Irregularities may indicate issues with application or curing.
Quick rule: If any checks fail, re-inspect and correct before proceeding to avoid costly rework later on.
Field and lab adhesion tests
Adhesion testing is crucial to ensure your new waterborne system bonds well with the substrate. Here’s how to test in the field and when to escalate:
Start with simple, quick field tests like cross-hatch or tape pull-off. These can help identify any obvious adhesion issues early on.
Cross-hatch test: Cut a cross-hatch pattern into the coating, apply pressure-sensitive tape, and pull it off. If more than 5% of the coating remains, the adhesion is likely sufficient for most applications.
Tape pull-off test: Apply pressure-sensitive tape to the surface, then pull it off quickly. If the coating pulls away from the substrate, adhesion may be an issue.
If field tests fail or if warranty validation is required, escalate to laboratory pull-off testing or accelerated weathering. These provide more accurate, controlled results but require specialized equipment and expertise.
Troubleshooting Common Failure Modes and Remediation
Recognize common failure symptoms—adhesion loss, blistering, fisheyes, or poor coverage—and use a decision process: inspect, check records, compare to test panels, and isolate the likely cause before repairing. Determine whether the issue is localized (spot repair possible) or systemic (may require full strip) based on extent and test results.
When corrective action is needed, follow a documented remediation plan that includes re-preparation, compatibility re-testing, and reapplication under controlled conditions; consult manufacturer instructions and recorded test data to choose the right path. If uncertainty remains about root cause or repair scope, seek third-party evaluation or follow the product warranty procedure before proceeding.
Symptom-based remediation steps
First, contain the problem. Stop work and prevent further damage. Then, identify the root cause based on symptoms:
Adhesion loss: Likely due to poor surface preparation or incompatible products. Spot repair may be possible if it’s localized.
Blistering: Could be from moisture entrapment during application or insufficient drying time. Re-strip and re-prepare affected areas.
Fisheyes: Indicates contamination or incompatibility. Clean the area, let it dry, then spot repair.
Prevention and lessons learned log
To prevent future issues, document failures and corrective actions. Keep a log with details like:
– Date of conversion
– Products used (with supplier and batch numbers)
– Surface preparation methods
– Application conditions (temperature, humidity)
– Any deviations from the approved protocol
Review this log regularly to refine your processes. Communicate findings with suppliers to improve product choices for future conversions.
Conclusion
Moving from oil-based to waterborne is a smart upgrade, but it only pays off if you respect the prep, test, and cure steps. Do it right and you’ll get safer work, a cleaner finish, and lasting adhesion that won’t peel or fail in season.
Check these steps in order: confirm your project scope and safety plan, inspect the substrate, run compatibility tests and a small adhesion promotion trial, mix and thin to the correct viscosity, apply under clean conditions with proper ventilation, control the drying and curing, verify adhesion, and document the results for future touch-ups. Keep the area dry, well-ventilated, and free of dust, and follow the manufacturer’s guidelines for cure times and film buildup.
Avoid these common mistakes: skipping surface prep or skipping compatibility testing, rushing into full-area application, and neglecting proper ventilation or PPE. Always test a small area first, work in the recommended temperature window, and respect cure times. If you’re unsure about substrate condition, product compatibility, or the needed thinning ratios, pause and reassess before proceeding.
When in doubt, call a pro—especially for large areas, uncertain substrates, or if the existing system shows signs of delamination or coating failure. Stay methodical, safety-minded, and you’ll finish with a durable, even finish that stands up to use and time. You’ve got this—plan, test, and seal the deal with confidence.
FAQ
What should I review before starting the switch from oil-based to waterborne coatings?
Check the manufacturer’s instructions for both products you’ll use. Look for surface prep, compatibility notes, and any required primers or adhesion promoters. If in doubt, call the product tech line or check local rules for recommended practices.
How do I test adhesion without committing the whole project?
Do a small spot test on the actual surface. Follow the product label for the test method and observe adhesion after a short cure period. If it passes, you can proceed with the bigger area; if not, adjust prep or choose a different product.
What are the red flags during mixing and application?
Watch for inconsistent viscosity, streaks, or fish-eyes that don’t lay out smooth. If you see separation or pooling, slow down and re-stir exactly as the label directs. Do not add additives unless the manufacturer approves them in the instructions.
How should I handle drying and curing to avoid failures?
Keep the area free of dust and drafts during the initial cure window. Respect the product’s cure guidance from the label or datasheet, then finish with the recommended re-coat window if you’re applying more layers. If conditions change, adjust coverage or timing per manufacturer guidance.