
Introduction
Delamination testing using the tap test provides a quick check for bond failures in composite laminates.
The guide explains how to perform the test, recognize abnormal sounds or responses, and interpret what those cues mean for structural integrity.
You’ll learn practical steps, common tips, and how to determine when further inspection or more thorough testing is warranted.
Key takeaways
- Assess bond integrity by tapping suspected areas and listening for hollow sounds.
- Document consistent tapping responses across panels to identify delamination patterns.
- Prepare a flat, clean surface and use appropriate tapping tool for accuracy.
- Contrast with reference samples and note moisture or substrate condition effects.
- Ensure safety by wearing PPE and verifying test areas are legally permitted.
- Record findings clearly with timestamp, location, tap sound, and recommended actions.
Table of Contents
- Introduction
- Key takeaways
- What is the Tap Test?
- Advantages and limitations
- Tools and materials checklist
- Step-by-step tap test procedure
- Recording, documenting, and reporting findings
- Interpreting results and common pitfalls
- Case studies and examples
- Safety, training, and certification
- Conclusion
- FAQ
What is the Tap Test?
The tap test is a simple nondestructive inspection method used to surface-screen composites for potential delamination. It relies on listening for changes in tone when the surface is tapped. Use it to identify areas that may warrant closer investigation with more advanced methods.
Compare this approach to other methods by noting its quick, low-cost nature and its reliance on sound. It is often a first step in the inspection workflow, guiding where to focus more detailed testing. Always reference manufacturer or project guidelines for context and limits.
Basic principle and physics
The tap test is a simple, nondestructive method used to detect delamination in composite materials. It’s based on the change in sound and vibration when tapping on delaminated areas.
When you tap on a solid, undamaged surface, you hear a clear, sharp sound. However, when there’s delamination – a separation between layers – the sound changes. It becomes duller, lower-pitched, and often has a hollow ring to it.
The physics behind this is simple: sound waves travel differently through solid materials than they do through voids or air pockets caused by delamination. An experienced inspector can listen for these acoustic cues to identify potential issues.
Typical applications and industries
The tap test is widely used in various industries due to its simplicity, speed, and effectiveness. Here are some common uses:
Aerospace: Inspecting aircraft structures for delamination, especially in composite materials like carbon fiber.
Wind Blade Industry: Quick field assessment of wind turbine blades for damage or delamination caused by fatigue or impact.
Marine and Automotive Industries: Checking for delamination in boat hulls, car bodies, or other composite structures. It’s often preferred when a quick, on-site inspection is needed.
Advantages and limitations
One clear advantage is speed. The method is portable and requires minimal setup. It fits well for quick field checks and routine surveys.
Limitations include subjectivity in interpretation and the need for surface access. Depth ambiguity can make it hard to quantify severity. Use it as part of a larger assessment plan rather than as a final verdict.
Sensitivity factors
The Tap Test’s sensitivity depends on several factors. First, laminate thickness matters. Thinner laminates are easier to test, as the sound travels better through them.
Next, consider the material. Different materials have different acoustic properties. Some may muffle the sound, making it harder to detect delamination.
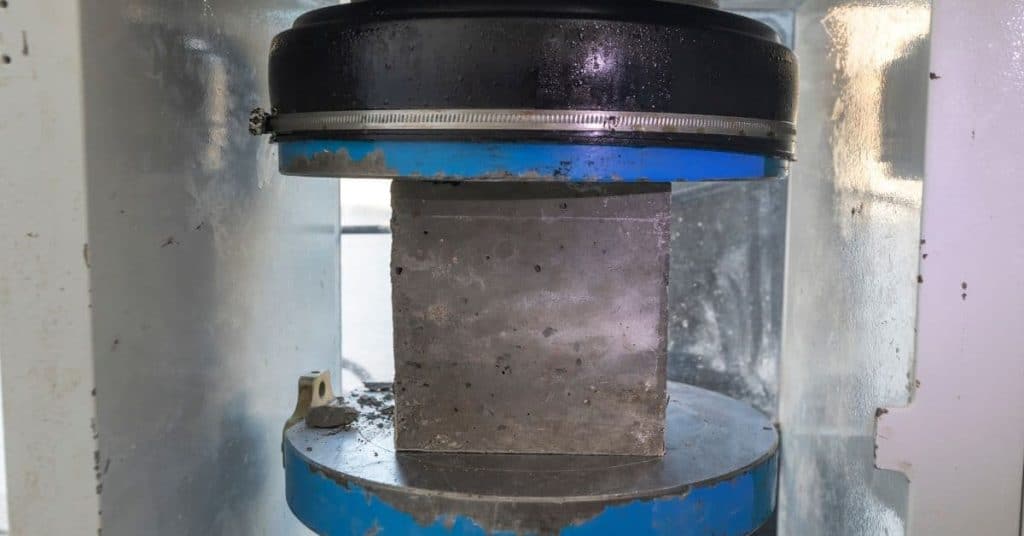
The backing also plays a role. A hard backing like concrete will give a clearer sound than a soft one like foam.
Lastly, adhesive properties affect results. A strong bond may not produce a clear ‘dull thud’, making delamination harder to detect.
When to choose an alternative method
The Tap Test is great for quick, cheap checks. But sometimes, you need more precision or depth resolution. That’s when you might want to consider other methods.
For instance, ultrasonic testing can provide better depth resolution and accuracy. It’s often used in critical structures where precise information is needed.
If you’re dealing with large areas or need a non-contact method, thermography might be your best bet. It can scan wide areas quickly but requires specific conditions for accurate results.
Lastly, if you need detailed documentation and records, consider shearography. It provides full-field data and is often used in research and quality control settings.
Tools and materials checklist
Have taps or hammers with different hardness levels available to compare tones. A rubber mallet can help isolate surface vibrations. Keep a small coin or similar object for quick percussion tests.
A handheld microphone or simple recorder captures sounds for later review. Marking tools and safe personal gear complete the basics. Verify any tool specifications with the product label or manufacturer instructions if in doubt.
Recommended tapper types and why
Choose the right tapper for your surface to avoid damage and get accurate results.
- Hard (metal) tapper: Use on concrete, masonry. Provides clear, sharp sound.
- Soft (rubber, wooden) tapper: Use on delicate surfaces like thin concrete or tile. Minimizes surface damage.
Quick rule: Harder surfaces need harder tappers; softer surfaces require gentler touch.
Optional measurement aids
Enhance test objectivity with these helpful accessories.
- Contact microphone: Amplifies sound for clearer recording. Ideal for thin or weak surfaces.
- Smartphone recording app: Captures and saves audio for later analysis. Useful for comparing results over time.
- Lightweight stethoscope: Directly listens to surface response. Helpful when visual inspection is difficult.
Quick rule: These tools improve accuracy, especially on challenging surfaces or when detailed records are needed.
Step-by-step tap test procedure
Start with a clean, dry surface and a visual check for obvious defects. Establish a quiet testing area to hear subtle changes. Plan your grid or areas of interest before you begin tapping.
Proceed with a consistent tapping rhythm and compare tones across neighboring spots. Record or note the initial impressions as you go. Mark any suspect areas for follow-up with additional methods per the project guidelines.
Step-by-Step Process
The following is a clear, numbered sequence of practical steps to guide you through the tap test procedure from preparation to final checks.
- Preparation and Safety: Ensure the area is clear and safe. Wear appropriate PPE (Personal Protective Equipment).
- Select Your Tapper: Choose a recommended tappyper type as mentioned earlier. A light, medium, or heavy-duty tapper depends on the concrete’s thickness.
- Perform Initial Visual Inspection: Check for any visible signs of delamination such as cracks, spalls, or discoloration.
- Conduct the Tap Test: Tap the surface at regular intervals (usually 4-6 inches apart) using a consistent force and angle. Listen carefully for changes in sound.
- Mark Suspect Areas: If you hear a dull or dead sound, mark the area with chalk or paint to revisit later. Clean up any debris after testing.
Surface preparation and inspection pattern
Before starting the tap test, follow this checklist to ensure a thorough and repeatable inspection.
- Clean the surface: Remove any dirt, debris, or loose material using a broom, brush, or compressed air.
- Mark a grid pattern: Using chalk or tape, mark out a grid pattern (e.g., 1 ft x 1 ft) on the surface to ensure systematic scanning.
- Check for obvious defects: Look for any visible signs of delamination such as cracks, spalls, or discoloration. If present, note them down.
- Start from a corner: Begin your tap test at a corner and work your way across the surface in rows and columns following your marked grid pattern.
- Test edge areas: Pay extra attention to edges, corners, and any areas near expansion joints as these are common spots for delamination.
- Revisit suspect areas: If you marked any areas during the initial visual inspection, revisit them during your tap test.
Quick rule: Always start from a corner and work your way across the surface in rows and columns to ensure complete coverage.
Tapping technique and sound interpretation
A consistent tapping technique is crucial for accurate results. Here’s how to do it:
Force and Angle: Hold the tapper at a 45-degree angle to the surface and apply a consistent force, striking the concrete with the same amount of energy each time.
Spacing: Tap at regular intervals (usually 4-6 inches apart) to ensure you cover the entire surface systematically.
Sound Interpretation: Listen carefully for changes in sound. A sharp, clear sound indicates solid concrete. A dull or dead sound may indicate delamination. If unsure, retest the area and compare the sounds.

Recording, documenting, and reporting findings
Document each area with clear photos that show tap patterns and any visible flaws. Use a grid or coordinate system to keep results organized. Attach simple acoustic notes to accompany the visuals.
Keep a defect log that notes location, intensity of the concern, and any immediate next steps. Store recordings and images together in a project folder or reporting system. Check applicable reporting standards or client instructions when compiling the final report.
Creating a severity and confidence rating
After performing the tap test, it’s crucial to document not just the findings but also their severity and your confidence level. This helps prioritize repairs or further testing.
Severity: Estimate the size and depth of delaminations. Use a simple scale like:
- 1: Small (<50mm), shallow
- 2: Medium (50-150mm), moderate depth
- 3: Large (>150mm), deep
Confidence: Rate your confidence in the findings. This could be based on clear sound interpretation, consistent results, or use of measurement aids.
When to escalate to advanced NDT
While the tap test is powerful, there are situations where you might need more advanced non-destructive testing (NDT) methods.
Escalate if:
- Results are uncertain or inconclusive. This could be due to complex structures or ambiguous sounds.
- The suspect areas are large. Advanced methods can provide more detailed mapping.
- The structure is critical, and high confidence in results is needed. For instance, bridges, dams, or other high-stakes infrastructure.
Methods to consider include ultrasonic testing, tap hammer with digital analysis, or lab analysis of core samples.
Interpreting results and common pitfalls
Learn to differentiate delamination cues from core issues or resin gaps by comparing related spots and considering surface conditions. A dull or hollow sound can signal a concern, but context matters. Use follow-up tests to confirm ambiguous cases.
Avoid common errors like inconsistent tapping force or misreading tones due to surface coatings. Ensure multiple testers calibrate their assessments when possible. Reference any local codes or guidelines that affect interpretation.
Environmental and material influences
The materials used in your concrete slab and the environmental conditions can affect the sound produced during a tap test, influencing your results.
- Temperature: Cold temperatures can make concrete sound dull. Solution: Test when it’s above freezing.
- Moisture: Wet surfaces may produce muted sounds. Solution: Ensure the surface is dry before testing.
- Paint/Skins: Paint or other coatings can muffle sounds. Solution: Remove coatings if possible, or note it in your report.
- Honeycomb Cores: These can cause a hollow sound. Solution: Look for slabs with cores rated for your load.
- Wrong material: Using the wrong material can lead to cracking, staining, or weak bonds. Tip: Always use materials rated for your project’s needs.
Avoiding false positives/negatives
False positives and negatives can occur due to user error. Here are some checks to avoid mistakes.
- Repeatability: If results vary, you might be doing something wrong. Solution: Repeat tests in the same spot.
- Tapper hardness: Using a softer tapper can give false negatives. Solution: Use a medium-hardness tapper (around 12-14 on the Mohs scale).
- Visual cues: Don’t rely solely on sound; use visual checks too. Tip: Look for cracks, delaminations, or other anomalies.
- Angle of impact: Hitting at an angle can give false results. Solution: Strike the surface perpendicularly.
- Surface condition: Rough surfaces can affect sound. Solution: Ensure the surface is smooth and even.
Regularly cross-check your results with visual cues to ensure accuracy.
Case studies and examples
Real-world notes show how tapping revealed hidden delamination in a repair region and guided a targeted repair plan. Observations from another site illustrate how a failed test prompted an additional non-destructive method. These examples emphasize the value of documenting context and results.
Other cases highlight the limits of the method when access is restricted or conditions are unfavorable. Use these stories to frame expectations and to design a sensible testing sequence for your project. Always cross-check with additional testing as needed per instructions.
Aerospace inspection example
The tap test is a go-to for aircraft skin inspections. Here’s how it’s done.
- Prep the surface: Clean and dry the area to be tested. Any dirt or moisture can skew results.
- Select your tool: Use a standard tapper, as discussed earlier.
- Mark out pattern: Divide the area into a grid for systematic testing.
- Perform the test: Tap each point in the grid, listening and recording results.
- Validate findings: For critical areas, follow up with more advanced NDT methods like ultrasound or thermography to confirm delamination.
- Document all steps: Keep detailed records of your testing process and results.
- Avoid false positives/negatives: Be aware of environmental factors that can affect test accuracy, as discussed earlier.
- Escalate when needed: If you find severe delamination or suspect underlying issues, escalate to advanced NDT methods immediately.
Quick rule: Always validate tap test findings with more advanced methods for critical areas like aircraft skin.
Wind blade maintenance example
Field technicians use the tap test to quickly identify damaged wind blades and schedule comprehensive inspections. Here’s how:
First, perform a visual inspection from a safe distance. Look for any visible damage or unusual appearance.
Next, use the tap test on suspected areas. Follow the step-by-step process outlined earlier in this guide. Be sure to document your findings thoroughly.
Then, based on your tap test results, prioritize repairs and schedule comprehensive inspections for severe cases. Remember, the tap test is a screening tool; follow up with more advanced NDT methods as needed.
Lastly, keep detailed records of all testing and repair work done. This helps track blade health over time and plan future maintenance.
Safety, training, and certification
Follow standard field safety practices to protect yourself during tapping and handling tools. Use hearing protection if noise levels are a concern. Keep the work area organized to prevent accidents.
Outline key training elements such as consistent tapping technique, interpretation criteria, and documenting results. Certification or formal instruction can help reduce variability in assessments. Refer to approved training programs or manufacturer notes for acceptable curricula.
Recommended training drills and proficiency checks
To ensure reliable delamination testing, regular training is crucial. Here are some simple yet effective drills:
Blind Samples: Test samples with known defects without revealing their locations. This helps inspectors develop a ‘feel’ for different types of delaminations.
Inter-Inspector Comparison: Have multiple inspectors test the same sample and compare results. This helps identify and address any inconsistencies in technique or interpretation.
Regular proficiency checks are also essential to maintain skill levels. Set aside time every few months for these drills to keep your team sharp.
Standards and references to consult
Before starting any delamination testing, familiarize yourself with relevant industry standards. These provide detailed procedure requirements:
Industry Inspection Standards: ASTM D4587 is a common standard for non-destructive testing of concrete. Check if there are specific standards applicable to your project or region.
Operator Manuals: Always consult the operator manual for the specific tap test equipment you’re using. This ensures you’re following the manufacturer’s recommended procedures and safety guidelines.
Remember, standards and manuals can be updated regularly. Always verify you have the latest versions to ensure you’re working with the most current information.
Conclusion
The tap test is a practical way to spot delamination before it shows up as real damage. Use it to protect the structure, keep the job looking right, and avoid costly repairs.
Start with a simple, clear sequence: inspect the surface for anything loose, pick a small, hidden spot to begin, tap gently and listen for a hollow sound, mark and record suspect areas, compare results with other spots, and decide what to do next based on what the findings show. Do this in a calm, deliberate way, and document what you learn as you go so you can explain it to someone else if needed.
Avoid these mistakes: don’t over-tap or strike hard, don’t test near edges or corners where finishes can crack, and don’t push beyond what the material and install allow. Always wear eye protection, test in a small area first, and keep the area supported and dry so you don’t create new damage while testing.
If you find widespread delamination, unusual movement, or you’re unsure what you’re feeling, call a professional rather than pushing on. When in doubt, get a second opinion before you cut or drill. Stay focused, test methodically, and you’ll keep the job safe, durable, and looking right.
FAQ
What is the tap test and what does it tell me?
The tap test is a quick way to check for delamination. You tap the surface with a small tool or knuckle and listen for changes in sound. A hollow, dull, or dead sound means the layers may be separating.
How do I perform the tap test safely?
Work on a clean, dry surface. Use a light tap and move in a grid so you don’t miss spots. If it’s loud or you hear a different tone, mark it for a closer look.
What should I do if I find delamination?
Stop using that area and inspect further. Delamination can weaken the structure, so patching might be needed or replacement. Consult a pro if the damage covers large areas.
What are common mistakes to avoid?
Don’t rely on a single spot. Don’t press hard or pry at the edge. Don’t ignore moisture sources; fix leaks first.