
Introduction
Bulging stucco usually signals moisture intrusion or lath failure and should be treated as a warning sign.
You’ll learn how to tell the difference between moisture-related swelling and lath failure through simple visual checks and non-invasive assessments, plus practical steps to evaluate exterior walls.
The guide outlines common causes, practical maintenance habits, and how to approach repairs in a way that minimizes damage and protects the home.
Key takeaways
- Bulging stucco signals moisture concerns or lath failure; both require prompt assessment.
- Moisture intrusion symptoms include damp patches, staining, and efflorescence near seams.
- Lath failure presents as loose panels, rust, nail pops, or hollow sounds.
- DIY tests like taped moisture checks aid initial screening, not definitive proof.
- Repair decisions balance damage extent, safety, doorways, and cost versus full remediation.
- Preventive maintenance, sealant upkeep, and proper flashing reduce recurrence risk.
Table of Contents
- Introduction
- Key takeaways
- Quick overview: why bulging stucco matters
- Two primary failure paths: moisture intrusion vs. lath (metal) failure
- Diagnostic toolkit: tests and inspections (DIY and professional)
- Interpreting findings: evidence that points to moisture vs. lath failure
- Repair options and decision-making: repair vs. partial or full remediation
- Cost factors and timelines: what affects price and schedule
- Preventive measures and maintenance to avoid recurrence
- Visual signs and examples to look for
- Conclusion
- FAQ
Quick overview: why bulging stucco matters
Bulging stucco is more than a surface blemish. It can signal water behind the wall or a failing backing like lath. Left unaddressed, it invites hidden problems that grow over time.
Look for ripples, soft spots, staining, or edge lifting near openings. These cues help you judge whether the issue is moisture driven, lath related, or a mixed problem. The goal is to identify the root cause before costs and damage multiply.
Visual and Tactile Signs of Bulging
Bulging stucco isn’t always obvious. Here’s what to look for:
Visible bulges: These are easy to spot, but remember, shadows or painting imperfections can mimic them.
Hairline cracks: Around windows, corners, or penetrations, these could indicate underlying issues.
Staining: Discoloration, especially around access panels, might hint at moisture intrusion. And hollow sounds when you tap the wall can signal delamination.
When to Call a Professional
DIY is great, but know your limits. Here are signs it’s time to call in an expert:
Size and location: If bulges are large or near structural elements like corners or windows, play it safe.
Multiple affected areas: More than one spot? It might be a bigger issue than you can handle.
Interior staining or soft framing: These could indicate moisture intrusion and potential rot. And if there’s structural concern, don’t risk it – call a pro immediately.

Two primary failure paths: moisture intrusion vs. lath (metal) failure
Two main culprits drive bulging: ongoing moisture behind the stucco and failures in the lath or its adhesion. Each path changes how you plan repairs and what parts are replaced. Distinguishing them guides the sequence of work.
Expect moisture signs like staining, damp patches, and mold cues for the first path. Lath-related clues include rust halos or delamination tied to the backing material. Use these indicators to map your repair approach and consult specialists as needed.
How Moisture-Driven Bulging Develops
Moisture intrusion occurs when water finds its way behind your stucco, getting trapped and causing problems. Here’s how it happens:
Flashing or window leaks: Water can seep in through damaged flashing or poorly sealed windows.
Ground contact: If your stucco comes into direct contact with the ground, moisture wicks up into the wall.
EIFS barrier failures or poor drainage: When exterior insulation and finish systems (EIFS) barriers fail, or water can’t drain properly from the roof or gutters, it leads to trapped moisture.
How Lath Corrosion or Attachment Failure Causes Delamination
Lath failures happen when the metal mesh or its fasteners corrode, rust, or mechanically separate from the substrate. Here’s how:
Rusting lath: Over time, moisture causes the metal lath to rust, weakening it and compromising its bond with the stucco.
Corroding fasteners: Nails or screws holding the lath in place can corrode, leading to mechanical separation.
Mechanical stresses or freeze-thaw cycles: Expansion and contraction due to temperature changes or physical stress can cause the lath to pull away from the substrate, leading to delamination.
Diagnostic toolkit: tests and inspections (DIY and professional)
Start with non-invasive checks you can do at home, then move to professional methods if needed. Visuals, moisture meters, and simple surface tests are first steps. Reserve invasive tests for when non-invasive results are inconclusive.
Document findings with notes and photos as you go. Have a plan for how far you will go with core samples, behind-wall checks, or testing when warranted by the on-site condition. Always verify manufacturer instructions and local rules for each method.
DIY checks homeowners can do safely
Before you call in the professionals, there are several safe and simple checks you can perform yourself to gather initial information about your bulging stucco.
- Visual Inspection: Look for patterns of bulging, cracks, staining, efflorescence, mold, or soft spots. These could indicate moisture issues or lath failure.
- Hollow-Sound Tap Test: Gently tap the stucco with a hammer. A hollow sound may indicate delamination due to moisture or lath failure.
- Staining and Efflorescence Check: Inspect for water stains, efflorescence (white powdery deposits), or rust-colored stains that could signal moisture intrusion or lath corrosion.
- Probe Softness: Gently probe the stucco with a screwdriver to check for soft spots. This can indicate moisture damage or delamination.
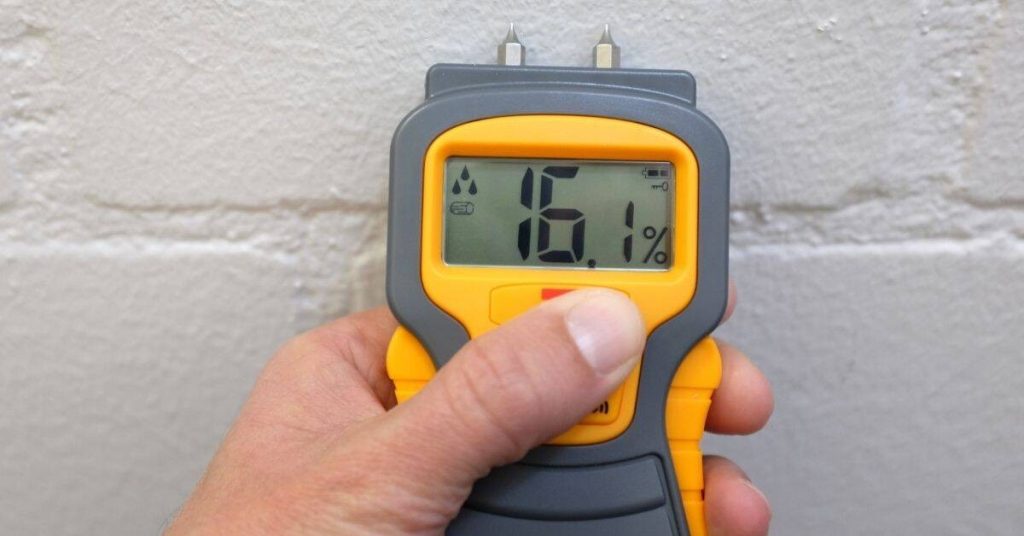
- Moisture Meter Reading: Use a simple pin-type moisture meter to check surface moisture levels. High readings may indicate moisture intrusion, but remember, results are indicative not definitive.
Quick rule: These DIY checks help you understand the problem’s nature and extent before deciding on further action or calling professionals.
Professional diagnostic methods
When DIY checks aren’t enough, it’s time to call in the pros. Here are some advanced diagnostic methods they might use:
- Infrared Thermography: This non-invasive method uses an infrared camera to detect temperature differences that may indicate moisture intrusion or insulation gaps.
- Invasive Probe/Removal: Professionals may remove small sections of stucco or use probes to check behind the wall. This invasive method provides direct evidence but causes minor damage.
- Controlled Openings: In some cases, controlled openings (small holes) are made in the stucco to insert probes and check for moisture or delamination directly.
- Relative Humidity and Moisture Content Testing: Professionals use specialized meters to measure relative humidity and moisture content within the wall assembly. High readings may indicate moisture intrusion.
- Lab Analysis: Sometimes, samples are sent to a lab for analysis to confirm the presence of mold, salts, or other contaminants that could cause bulging.
- Structural Inspection: If lath failure is suspected, a structural inspection may be needed. This involves checking the condition of the metal lath and its attachment to the wall.
Quick rule: These professional methods provide more accurate diagnoses but are typically more expensive and invasive than DIY checks.
Interpreting findings: evidence that points to moisture vs. lath failure
Create a clear split between moisture issues and local lath failure in your notes. This helps you decide on immediate actions and who to call next. Quick-reference signs keep you from mixing up causes.
Active water entry, staining, and mold point to moisture problems. Localized rust, fastener corrosion, or hollow sounding spots point toward lath or substrate failure. Use these cues to plan further steps and documentation.
Moisture-dominant indicators
When moisture is the primary culprit, you’ll see signs both inside and outside your home. Keep an eye out for these:
External signs: Water stains, efflorescence (white powdery deposits), mold or mildew growth, soft or spongy stucco, paint bubbling, and a musty odor.
Internal signs: Persistent elevated moisture readings with a moisture meter, rot in sheathing or framing, condensation patterns near exterior walls, and any evidence of drainage/vent issues like poor grading or improper flashing.
Lath/attachment-dominant indicators
If the problem is mainly due to lath or attachment failure, you’ll typically find isolated issues rather than widespread moisture damage. Here’s what to look for:
Local bulges with: Rusted or missing metal lath, corrosion at fasteners, and cracking patterns around openings. Tap these areas; if they sound hollow, it could indicate delamination.
Lack of: Water staining on the interior, rot in sheathing or framing, and signs of chronic water exposure from prior repairs.

Repair options and decision-making: repair vs. partial or full remediation
Think in tiers: localized patch, section replacement, partial system replacement, or full system replacement. Each tier has different implications for stucco, lath, and moisture barriers. Your choice depends on extent and source control.
Confirm moisture source, assess lath condition, and check for hidden damage before proceeding. Consider code and warranty requirements, and plan for drainage and flashing improvements if needed. Remember to document decisions for future maintenance.
Typical remediation methods for moisture damage
The first step is to remove all damaged stucco. This might mean chipping off bulging sections or cutting out delaminated areas.
Next, inspect and repair or replace any rotted sheathing behind the lath. Ensure there’s a solid substrate for your new work.
Restoring drainage is