
Introduction
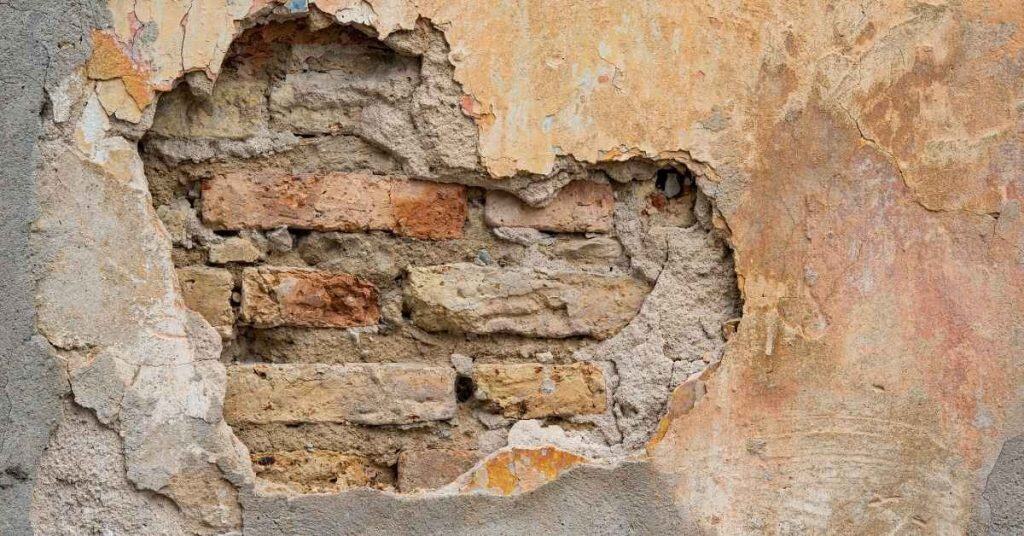
Delamination in stucco occurs when the outer stucco layer loses its bond to the underlying substrate, creating a hollow or tinny sound when tapped. Visually, you’ll see cracks, bubbling, or patches that feel loose or wiggle under pressure. That combination signals a likely delamination that needs closer inspection.
To assess it, gently probe suspected areas with a blunt tool to feel for softness or looseness. Sound the surface across a wide area and note how far the hollow spots extend to help you determine the repair scope. Consider moisture tests to check for hidden moisture behind the stucco and plan accordingly.
Key takeaways
- Inspect exterior for cracking, bulging, or hollow sounds using light taps.
- Probe suspected areas with a small poke to locate delamination depth.
- Test moisture with a moisture meter or accessible moisture indicators before repair.
- Decide repair approach based on delamination extent: patch versus re-stucco.
- Choose compatible patch or stucco finish materials and follow manufacturer instructions.
- Follow safety: wear eye protection, respirator in dusty areas, and ladder stability.
Table of Contents
- Introduction
- Key takeaways
- Quick Overview: What Delamination and Hollow-Sounding Stucco Mean
- How to Inspect Stucco Visually and with Simple Tests
- Decide: Repair Patching Vs. Partial or Full Re-Stucco
- Tools, Materials, and Material Specs You’ll Need
- Step-by-Step Guide: Repairing Small to Moderate Delamination (DIY-Friendly)
- Safety Precautions and Working Best Practices
- Common Mistakes to Avoid
- Cost Considerations, Timeframes, and Budgeting Guidance
- Conclusion
- FAQ
Quick Overview: What Delamination and Hollow-Sounding Stucco Mean
Delamination is when the outer stucco layer separates from the substrate, creating a hollow feel behind the wall. Hollow-sounding areas are spots that sound dull or drum-like when tapped. Moisture signals, cracking, or soft patches help homeowners spot trouble early.
This matters because separation can hide structural concerns and hidden moisture intrusion. Cosmetic fixes may mask deeper damage if the problem is not addressed. The guide will help you diagnose, repair, or decide when replacement is needed based on observed conditions.
What causes delamination
Delamination happens when stucco layers separate. Here’s what causes it:
Moisture intrusion is the main culprit. It seeps in, weakens bonds, and causes layers to peel apart.
Failed flashing or rusted lath can also lead to delamination. They let water in, causing similar damage.
Improper installation or thermal movement can cause stress, leading to separation too.
Risks and urgency
Delamination isn’t just cosmetic. It poses real risks:
Falling plaster can cause injury. Rot and mold can damage your home’s structure and health.
Rust jacking occurs when rust from metal lath expands, pushing stucco layers apart. This needs immediate attention as it worsens quickly.
If you see large cracks, hear hollow sounds, or notice moisture, act fast. These are signs of serious damage that won’t improve with time.
How to Inspect Stucco Visually and with Simple Tests
Focus on high-risk zones like around windows, doors, eaves, corners, and where stucco meets other materials. Look for cracks, staining, efflorescence, and fatigue patterns in patches. Note any rust stains or delamination signs you see.
Use gentle probing to test for looseness and listen for hollow sounds when tapping. Moisture checks include dampness after rain and simple moisture tests in suspect spots. Take clear photos, map affected areas, and log dates for reference.
Step-by-Step Process
The following steps guide you through a thorough visual and simple test inspection of your stucco.
- Preparation: Gather tools like a flashlight, screwdriver, awl, small hammer, moisture meter (optional), and safety gear. Wear gloves, safety glasses, and sturdy shoes.
- Start at the base: Inspect corners, foundation, and base flashing for cracks, staining, efflorescence, or rust stains.
- Check windows and doors: Look for cracks around openings, especially where stucco meets trim or other materials. Tap gently to listen for hollowness.
- Inspect eaves and exposed joints: Check for delamination signs, patch fatigue patterns, or soft spots. Use a gentle probing technique with a screwdriver or awl.
- Moisture checks: Observe surface dampness after rain, check for persistent damp spots, and use a moisture meter to confirm intrusion in suspected areas.
- Document findings: Take clear photos from multiple angles, sketch affected zones, log measurements, dates, and note any unusual symptoms.
- Final checks: Revisit problem areas after a few days of dry weather. If issues persist or worsen, consider consulting a professional for advice on repair or replacement.
Probing and sounding techniques
Gently tapping and probing your stucco helps identify hollow or delaminated sections. Here’s how:
Tapping: Use a coin or small hammer to tap the stucco surface. Listen for solid, dull sounds (good) or hollow, muffled ones (bad). Mark troubled areas with chalk.
Probing: Gently insert a screwdriver or awl into cracks or suspected soft spots. If it goes in easily and feels unstable, you’ve found delamination. Mark these areas too.
Safety note: Be careful not to damage the stucco further while probing. If you encounter resistance, stop and consult a professional.
Moisture testing and signs of trapped water
Moisture intrusion can cause stucco issues. Here’s how to spot it:
Efflorescence: White, powdery deposits on the surface indicate moisture has been present. It’s not always active, but it warrants further investigation.
Blistering: Bubbles or raised areas in the stucco signal trapped water and potential delamination beneath.
Use a moisture meter for accurate readings: Green (0-5%) indicates dry; yellow/orange (6-12%) suggests some moisture; red (>13%) confirms a problem. If readings are high or uncertain, consider hiring a professional for further testing.
Decide: Repair Patching Vs. Partial or Full Re-Stucco
Set clear criteria for choosing repair type, such as the damaged area size, repeating cracks, and rust or moisture indicators. Assess lath integrity to decide whether partial or full re-stucco is warranted. Use visual checks and probing to distinguish delamination from superficial cracks.
Plan moisture testing and interpret results to guide the repair choice. If lath is compromised, consider partial or full replacement rather than a quick patch. Keep notes for permits, expectations, and potential future concerns.
Red flags that require full re-stucco
Full re-stucco might be necessary when you spot these serious issues:
Widespread delamination: If more than 20% of your stucco shows signs of delamination, it’s best to replace the entire surface.
Snapped or rust-jacked lath: Check behind the stucco. If you find snapped lath or severe rust jacking (rust stains and corrosion), full replacement is usually the only option.
Multiple recurring cracks: More than a few cracks in the same area, especially if they’re reappearing after repairs, indicate underlying structural issues that require full re-stucco.
Persistent moisture problems: If you’ve had ongoing water intrusion or trapped moisture issues, even after previous repairs, it’s time for a full replacement to prevent further damage and mold growth.
When a patch is appropriate
A localized repair might be sufficient in these cases:
Small, isolated hollow areas: If you’ve found just one or two small delaminated spots (less than 1 sq. ft. each) with no other signs of damage, a patch could be all you need.
Intact substrate: Before patching, ensure the underlying lath and substrate are solid and free from corrosion or rot.
Dry conditions: Moisture is the enemy here. Make sure the area is dry before and after your repair to prevent further delamination.
Tools, Materials, and Material Specs You’ll Need
Describe how to distinguish delamination from cracks and note moisture indicators that affect material choices and cure times. Keep your assessment simple and accurate before selecting products. Record what you confirm with product labels or manufacturer data sheets.
List practical hand tools and PPE for safe work, plus patch materials and mixes. Include bonding agents, patch compounds, and options for base and finish coats. Remember to verify compatibility and follow local rules for substrates.
Fasteners, lath, and mesh options
When repairing delaminated stucco, you’ll need to choose between galvanized and stainless steel fasteners. Galvanized are cheaper but can rust over time. Stainless is more durable but costs more.
For reinforcement, consider wire lath or fiberglass mesh. Wire lath is traditional but can rust. Fiberglass mesh won’t rust but may be harder to find and install.
If the existing lath is sound, you can overlay with mesh. If it’s damaged, replace it.
Mortars, bonding agents, and finish coats
For base coats, use a cement-sand mix with a ratio of 1:2 or 1:3. For small repairs, you can use a premixed patch. Always check product data sheets for curing times.
Use an acrylic or PVA bonding agent to ensure the new stucco adheres properly to the old. Some products have latex admixtures built-in, so check labels.
For finish coats, match the existing texture as closely as possible. Smooth finishes require a different technique than textured ones. Always test a small area first to ensure compatibility.
Step-by-Step Guide: Repairing Small to Moderate Delamination (DIY-Friendly)
Identify and remove all loose or hollow stucco in the affected area while protecting surrounding sound work. Plan patches for small to moderate delamination without overdoing it. Keep the work area organized and controlled.
Assess the substrate under the removed area for moisture intrusion and lath condition. Determine if reinforcement is needed before rebuilding with lath or mesh. Follow a logical sequence from base coat to finish coat with proper curing steps.
Step-by-Step Repair Process
Follow this clear, numbered sequence to repair small to moderate delamination on your stucco wall. Safety checks, main work, and final touches are all covered here.
- Preparation: Gather tools, wear safety gear, and cover nearby plants or furniture.
- Remove loose stucco: Use a chisel or flathead screwdriver to gently pry off damaged stucco. Be careful not to damage surrounding sound stucco.
- Assess substrate: Check for moisture intrusion, rot, rusted lath, or damaged sheathing. If in doubt, consult a professional.
- Main work: Apply base coat, optional scratch coat, and finish coat following recommended curing times between each.
- Cleanup: Remove debris, wash tools, and dispose of waste properly.
Removing loose stucco and preparing the substrate
Safely remove damaged stucco without harming surrounding areas. Inspect and repair underlying building paper or sheathing.
Tip: Work from top to bottom to prevent further damage from falling debris.
Strip back to sound stucco, using a utility knife to score lines if needed. Inspect the substrate for any signs of rot, moisture intrusion, or damaged sheathing. Repair as necessary before proceeding.
Installing lath/mesh and applying base coats
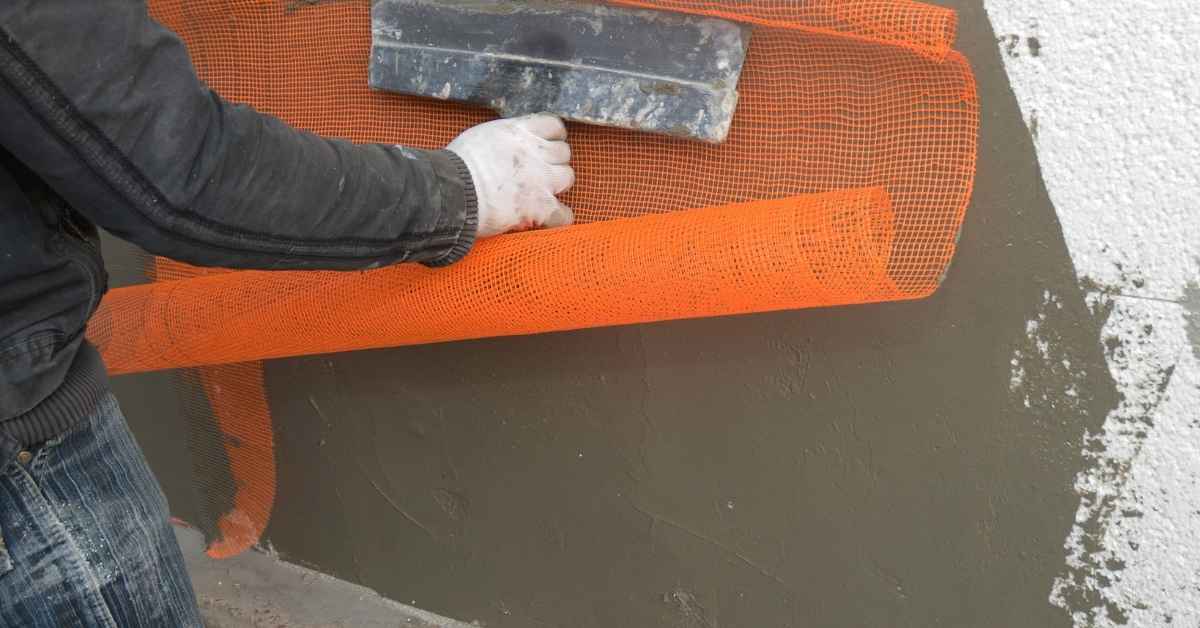
Fasten lath or embed mesh into the base coat for added strength. Achieve a strong bond with recommended thicknesses.
Note: Use galvanized or stainless steel lath to prevent rust.
Secure lath or mesh using appropriate fasteners, following manufacturer guidelines. Apply base coat at a consistent thickness, ensuring it adheres well to the substrate and any embedded materials.
Finishing, texture matching, and curing
Match existing texture, blend feathered edges, and follow recommended drying/curing times for optimal results. Seal or paint after curing.</