

Introduction
Hidden moisture can cause or worsen stucco damage, but a crack alone does not prove there is a leak. Cracks also occur from shrinkage, poor curing or installation, impact, settlement, thermal movement, corrosion, and movement in framing, masonry, or another substrate.
The practical question is whether a crack is paired with signs of water entry, movement, or loss of bond. Start by identifying the stucco system, documenting the crack, inspecting drainage and openings, and correcting the water path before making a cosmetic patch.
Key takeaways
- Moisture is one possible cause or amplifier of stucco cracking; the crack pattern and accompanying symptoms matter.
- Bulges, hollow areas, rust staining, soft interior finishes, active staining, or cracks concentrated at openings warrant a moisture investigation.
- Inspect roof edges, gutters, flashing, windows, doors, penetrations, and the stucco base before filling a crack.
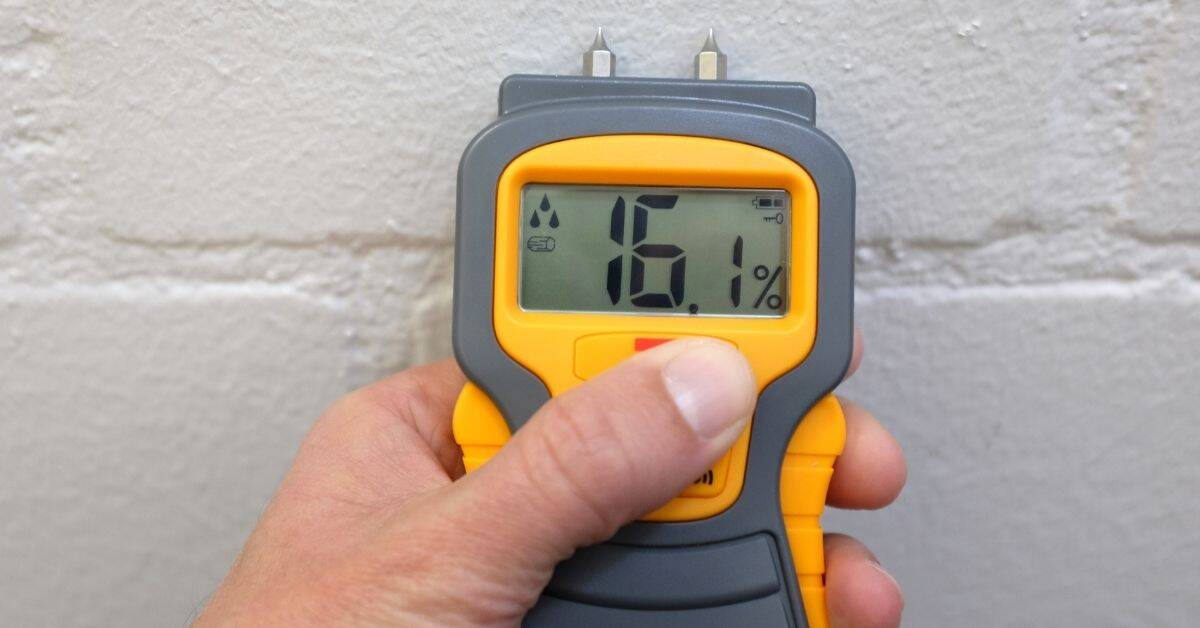
- Moisture meters and thermal cameras are screening tools. Compare readings with known-dry areas; one reading does not prove a leak or cause.
- Do not bury or seal the weep screed. Keep drainage outlets at the stucco base visible.
- Use repair materials approved for the existing system: traditional cement stucco, acrylic finish systems, EIFS, and painted stucco are not repaired alike.
- Stop DIY work when cracks move or widen, damage is widespread, flashing or the water-resistive barrier needs reconstruction, or work requires unsafe access.
Table of Contents
- Introduction
- Key takeaways
- The real culprit: trapped/hidden moisture behind stucco, not just surface water
- How moisture and freeze-thaw cycles actually damage stucco
- Inspecting stucco: visual cues and targeted diagnostics
- Sealing penetrations, windows, doors and common leak paths
- Water-repellent and breathable coatings: choosing the right product
- Managing drainage: gutters, grading, flashing and yard details
- Repair techniques — DIY patching vs. professional remediation
- Tools, materials, costs, time estimates and permits
- Safety, common DIY mistakes, long-term diagnostics and maintenance schedule
- Conclusion
- FAQ
When hidden moisture is a likely stucco-crack cause
Rain can enter at cracks, roof-to-wall transitions, windows, doors, vents, deck attachments, and other penetrations. Whether it damages the concealed wall depends on the entire assembly: flashing, water-resistive barrier (WRB), drainage space or bond-break layer, base drainage, and the wall’s ability to dry. Moisture may contribute to loss of bond, corrosion of metal components, deterioration of sheathing, or movement in wet materials. It is not a universal “pressure behind the wall” explanation.
For a wood-frame wall, water that bypasses the exterior finish can affect the WRB, sheathing, and framing, so uncertain or widespread symptoms deserve prompt professional evaluation. Stucco over masonry does not have the same sheathing-and-framing risk, but water, salts, corrosion, bond loss, and movement in the masonry or foundation can still cause damage. Do not assume either assembly is watertight solely because the outer stucco looks intact.
Use the clues below to choose an investigation, not to diagnose from appearance alone.
| What you see | What it may suggest | Best next check |
|---|---|---|
| Fine random or map cracking | Shrinkage, curing, finish-coat behavior, or coating movement; moisture is not established. | Document it and look for staining, wet-weather change, or loss of bond. |
| Vertical or diagonal cracking at a window or door | Stress concentration, substrate movement, deficient jointing, or water entry at the opening. | Inspect the opening, head flashing, sill, sealant joint, and interior finishes. |
| Stepped cracking following masonry joints | Masonry, foundation, or substrate movement is more likely than concealed moisture alone. | Document the pattern and obtain professional evaluation before patching. |
| Long, widening, displaced, or recurring cracks | Movement in the wall, framing, foundation, or substrate. | Record width and endpoints; obtain professional evaluation before patching. |
| Bulging, hollow-sounding, rust-stained, soft, discolored, or flaking areas | Delamination, corrosion, loss of bond, or concealed water damage. | Investigate the nearby water path and arrange a qualified inspection if damage is more than localized. |
| Damage below windows, at roof transitions, penetrations, parapets, or the wall base | A flashing or drainage detail deserves priority. | Inspect during or soon after rain and preserve access to the drainage path. |
| A localized dent or puncture | Impact is likely; moisture is possible only if the finish or drainage layer was breached. | Repair the localized damage with materials compatible with the system. |
Numbered inspection workflow
- Identify the system. Determine whether the wall is traditional cement stucco, an acrylic finish system, EIFS, or painted stucco before selecting tools or repair materials.
- Document before disturbing. Photograph each crack with a ruler or other scale. Record its location, endpoints, width, date, weather, interior symptoms, and whether it recurs or changes.
- Inspect from the ground first. Check roof edges, gutters, downspouts, windows, doors, penetrations, deck attachments, wall transitions, parapets, and the wall base. Ground-level inspection is the DIY limit unless you have appropriate training, equipment, and local compliance knowledge for elevated work.
- Observe during or soon after significant rain. Look for overflowing gutters, runoff against the wall, fresh staining, wet interior finishes, or water appearing at the base. A wall that looks dry after one rain event may still have concealed moisture.
- Check accessible interior areas. Inspect window sills, baseboards, corners, attic or crawlspace edges, and wall areas opposite exterior defects for staining, soft finishes, odors, or visible mold.
- Use instruments only for screening. Calibrate as the manufacturer directs, take comparison readings on known-dry comparable areas, and map patterns rather than relying on one number or image.
- Stop before probing or cutting. Do not drill, remove stucco, or open the WRB solely because an instrument shows an anomaly. A destructive opening needs a clear purpose and a reliable plan to restore weather protection.
- Escalate when the source remains uncertain. Use a qualified building-envelope professional for controlled testing or exploratory openings, especially on wood-frame walls, where damage is widespread, or where testing could worsen a defect.
- Repair only after addressing water entry and movement. A patch can be durable only when the surrounding material is sound and the water path or movement cause has been addressed.
Call a professional before cosmetic repair if you find soft framing, persistent interior dampness or odors, visible mold, widespread hollow areas, rot, damaged flashing or WRB, electrical components affected by water, or suspected structural movement. Ask for a written inspection report that states observations, testing performed, limitations, repair scope, and how the repair will be verified.

How moisture can damage stucco
Liquid water entering through a defect is different from moisture carried by air leakage or vapor diffusion. Condensation occurs only when temperature and humidity conditions allow it in a particular wall assembly; it should not be assumed simply because stucco is cracked. In most exterior investigations, first rule out rain entry and drainage failures.
Freeze-thaw mechanics and pore pressure
In freeze-prone climates, repeated saturation followed by freezing can enlarge pores and microcracks, loosen coatings, and contribute to spalling. This mechanism is most relevant where the stucco stays wet and experiences repeated freeze-thaw exposure; it is not an explanation for every climate or crack.
Salt deposits and delayed drying
White deposits, called efflorescence, show that dissolved salts reached the surface and dried there. They are evidence of moisture movement, not proof of a current leak. Brush deposits off dry, document the location, and investigate why that area is getting wetter or drying differently than adjacent wall areas. Do not rely on a coating or water repellent to correct a leak, active crack movement, failed flashing, or blocked drainage.
Inspecting stucco: visual cues and targeted diagnostics
Identify the system before selecting a repair. Traditional cement stucco is a cement-plaster assembly and may show a layered plaster profile at an existing edge or damage. Acrylic finishes are thin textured finish systems. EIFS has a synthetic finish over basecoat, reinforcement, and insulation or drainage components. Painted stucco has a film coating that may conceal cracks and affect drying. Confirm the system through construction records, installer information, or the manufacturer before choosing repair materials.
Visual checkpoints: cracks, staining, bulges, and delamination
Photograph each defect with a ruler or other scale. Record the date, weather, location, crack endpoints, and whether the crack crosses a window, trim, masonry joint, or another material. From the ground, inspect roof edges, gutters, downspouts, windows, doors, vents, fixtures, deck attachments, wall transitions, and the base of the wall.
Inspect during or soon after a significant rain when it is safe to do so. Look for overflowing gutters, runoff against the wall, fresh staining, wet interior finishes, or water appearing at the base. A dry-day inspection, or a wall that looks dry after one rain event, cannot rule out concealed water entry.
Diagnostic tools: moisture meters, thermal imaging, and probe tests
A moisture meter or thermal camera can identify an anomaly, not its source, depth, age, or pathway. Follow the instrument’s calibration instructions and take control readings on comparable, known-dry areas. Compare patterns rather than treating a single number or a cool thermal image as proof of a leak; salts, temperature, solar exposure, framing, insulation, and air leakage can affect readings.
Do not drill, probe, or cut into stucco merely because a meter reads high. Opening a wall can damage the WRB and may be difficult to restore correctly. If the source remains uncertain, the wall is wood-framed, or testing could drive water into a defective assembly, use a qualified building-envelope professional for controlled testing or an exploratory opening.
Check the base drainage
Locate the weep screed at the bottom of a stucco wall and keep its outlet clear of soil, mulch, paving, sealant, and patch material. The cited residential-code provision is an example of an adopted-code requirement: it requires drainage to the exterior and specifies that the WRB lap the weep-screed attachment flange. Your locally adopted code and the approved system detail control. Review the relevant residential wall-covering drainage provisions and confirm local requirements before altering the base.
Openings and penetrations: inspect before sealing
Prioritize areas where water is concentrated: window and door heads and sills, roof-to-wall intersections, vent hoods, pipes, electrical boxes, light fixtures, and deck attachments. Look for damaged or missing flashing, cracked or detached sealant, staining below an opening, and details that direct water behind trim instead of out over the wall. Related guidance: Repairing Stucco Around Dryer Vents: Flashing and Sealant Details That Drain.
Best-practice detail for window and door flashings
Flashing and WRB sequencing are assembly-specific. A repair may require removing stucco to expose and rebuild the drainage plane; adding caulk at the face is not a substitute for correctly integrated flashing. Follow the window manufacturer’s instructions, the approved stucco-system details, applicable installation standards such as ASTM C926 and ASTM C1063 where relevant, and local code. If you cannot see how the repair will shed water outward at every overlap, stop and obtain a qualified repair detail.
Penetrations, vents, and utility flashings
Use a compatible, manufacturer-approved sealant only where the system calls for a sealant joint. Joint geometry, substrate, primer, backer material, coating, and expected movement determine the correct product. Do not fill drainage outlets or use sealant to bridge a moving stucco crack without addressing the cause.
Do not spray an entire wall or soak cracks with a hose as a casual test. Uncontrolled testing can force water into a damaged assembly and produces ambiguous results. When testing is necessary, isolate one suspected detail at a time, document the sequence, use an interior observer, and use a qualified professional for window, roof, or WRB investigations.
Water-repellent and breathable coatings: choosing the right product
Coatings and repellents are maintenance products, not leak repairs. They do not restore failed flashing, drainage layers, corroded lath, loose stucco, active movement, or wet sheathing. Applying a coating over a damp or unsound wall can conceal evidence and complicate drying or later repair.
First determine whether the wall is uncoated cement stucco, painted stucco, an acrylic finish system, or EIFS. Then use only a product specifically approved for that substrate and existing coating. The manufacturer’s surface-preparation, weather, coverage, cure, primer, texture, and recoating instructions control. Test a small inconspicuous area if appearance matching matters.
Application limits
Do not apply any coating until the water path is corrected, the substrate is sound, loose material and salts are removed, and the wall has dried as required by the product instructions. A vapor-transmitting product may be appropriate for a particular stucco assembly, but it is not automatically the right choice for every painted or proprietary system. Avoid broad product choices based only on a test-method label or a chemistry name.

Managing drainage: gutters, grading, flashing and yard details
Keep roof runoff and surface water from repeatedly wetting the wall base. Clean gutters, correct sagging sections and blocked outlets, secure downspouts, and direct discharge away from the foundation in a way that works for the site. During or after rain, confirm that runoff does not pond at the wall, discharge against the stucco base, or overflow from gutters onto the wall.
Grading, soil contact, and landscaping
Keep soil, mulch, paving, and plants from covering the stucco base or weep screed. The often-cited clearance is not a universal six-inch stucco rule: one residential-code example places the weep screed at least 4 inches above earth or 2 inches above paved areas, but local requirements and approved systems differ. Preserve the visible drainage outlet and ask the local building department before regrading, paving, or altering a wall base.
Shape landscape drainage so water does not pond at the wall. Where site constraints prevent a simple grade correction, a drainage professional may be needed; adding soil against stucco to create a slope can block the drainage path the wall needs.
Repair techniques — DIY patching vs. professional remediation
DIY is limited to a narrow case: a crack must be narrow, localized, dry, stable over documented observations, and not displaced or stepped. The surrounding surface must be firm and well bonded, with no fresh staining, bulging, hollow areas, rust, soft material, interior symptoms, or recurring wet-weather change. If any condition is absent or uncertain, investigate further or obtain professional evaluation rather than filling the crack.
Small-crack DIY: preparation and material compatibility
- Confirm conditions: Work only when the wall is dry, the crack is stable, nearby drainage and opening details have been checked, and weather is within the repair product’s stated limits.
- Prepare gently: Wear eye protection, gloves, and dust protection appropriate to the task. Remove only loose material, brush and vacuum dust, and avoid enlarging sound stucco or damaging drainage details.
- Match the system: Traditional cement stucco needs a compatible cementitious repair and system-specific preparation. Acrylic systems require their approved basecoat, mesh, primer, and finish. EIFS must be repaired to the system manufacturer’s details, not treated as ordinary cement stucco. For painted stucco, verify both patch and paint compatibility.
- Follow the product instructions: Mix, application depth, curing, texture matching, painting, and exposure limits vary by product, temperature, humidity, and substrate. Do not substitute interior spackle or use a generic sealant where the system calls for a cementitious repair.
- Check the result: After curing, the patch should be firm, bonded at its edges, visually matched as practical, and free of fresh staining. Reinspect after rain. The weep-screed outlet must remain visible and unobstructed, water must flow away from the base and openings, and no new interior staining or exterior wetting pattern should appear.
Large delamination and substrate repair: what pros do
Large delamination, loose sheets of stucco, widespread hollow areas, or suspected water damage require removal to sound material and inspection of the lath, WRB, flashing, sheathing, and framing where present. This is professional work because the drainage plane must be restored continuously and the finish tied back into the existing assembly. A patch over active moisture or movement is likely to fail again.
Tools, materials, costs, time estimates and permits
Basic inspection and small-repair kit
- Camera or phone, ruler, notebook, flashlight, and painter’s tape for documenting crack location and change.
- Gloves, eye protection, long sleeves, and dust protection appropriate to the task.
- Soft brush, vacuum, and hand tools for removing loose material from a small repair area.
- Optional moisture meter or thermal camera for comparison screening—not as a stand-alone diagnosis.
- System-compatible patch, finish materials, primer, paint, or sealant only when the manufacturer specifies them for the existing assembly.
Costs, timing, and permits
A useful stucco estimate separates inspection and moisture mapping; controlled testing or exploratory openings; access and protection; localized repair; removal and replacement of finish or lath; flashing, WRB, or base-drainage reconstruction; sheathing, framing, or corrosion repair; and finish matching. Access, hidden damage, system type, and the amount of assembly reconstruction matter more than crack length alone. Related guidance: How to Fix Stucco Damage (DIY Steps + Stop Rules).
Do not rely on generic brick, mortar, or tuckpointing estimates for stucco work. Small patches may be completed in a suitable weather window, but drying, curing, finish matching, and any concealed repair can extend the schedule. Follow product-specific cure requirements rather than a universal number of hours or days.
When comparing quotes, give each contractor the same information and ask each to identify: the stucco system; suspected water path; proposed testing or exploratory openings; access equipment and protection; substrate, flashing, WRB, or drainage work; finish matching; permits; post-repair verification; warranty; and exclusions. Permit rules are local. Cosmetic patching may be treated differently from work that alters flashing, WRB, framing, exterior openings, scaffolding, or a historic façade. Check with the local building department before starting, and keep photos, product data, invoices, and any contractor scope or warranty. Related guidance: Fixing Stucco Cracks Without Trapping Water: Drainage Plane Reality Check.
Safety, common DIY mistakes, long-term diagnostics and maintenance schedule
Safety precautions: access, PPE, and mold
Inspect from the ground whenever possible. Do not improvise platforms, use scaffolding casually, or undertake elevated stucco removal as DIY work. Fall-protection duties vary with the work and jurisdiction; OSHA’s residential fall-protection guidance is a useful reference for understanding the hazards. Hire qualified help when the work exceeds your ability, equipment, or local compliance knowledge.
If you encounter mold, avoid creating unnecessary dust or spreading debris through the house. For limited cleanup, CDC recommends at least a NIOSH-approved N95 respirator, gloves, and eye protection; people with respiratory conditions or other vulnerabilities should not do cleanup themselves. See the CDC mold cleanup guidance for precautions and limits.
Top DIY mistakes and how to avoid them
- Patching before investigating: Fix the water path or movement cause first.
- Trusting one instrument reading: Use controls, repeated observations, and visual evidence.
- Burying the stucco base: Keep the weep screed and drainage outlet open.
- Using generic materials: Match the repair to cement stucco, acrylic finish, EIFS, or the paint system.
- Testing with uncontrolled water: Do not soak a wall or spray cracks with a hose.
- Ignoring movement: Widening, stepped, diagonal, or displaced cracks need evaluation, not repeated filler.
Seasonal monitoring
Inspect after major storms, in spring after freeze exposure where relevant, and before wet seasons. Photograph the same areas from the same positions, note weather and runoff behavior, clean gutters, check downspout discharge, and confirm that landscaping has not covered the wall base. A stable, dry repair with no fresh staining, unobstructed base drainage, and no new wetting during or after rain is a better completion check than a particular meter number.
Conclusion
Hidden moisture can be an important cause or amplifier of stucco deterioration, especially where water can enter at cracks, openings, flashing, or the wall base. It is not the only cause of cracks, and a crack or meter reading alone does not prove concealed leakage.
Identify the system, document the defect, inspect drainage and water-entry details, and observe the wall during or after rain. A dry wall after one rain event does not exclude concealed moisture. Repair a small, stable, dry defect only with compatible materials. Get professional help for movement, delamination, concealed damage, flashing or WRB repairs, mold, or unsafe access.
FAQ
What’s really causing stucco cracks, and is moisture always to blame?
No. Cracks can result from shrinkage, curing or installation problems, impact, settlement, thermal movement, corrosion, or movement in the wall. Moisture becomes more likely when cracks occur with staining, efflorescence, hollow areas, bulging, interior dampness, or defects at openings and drainage details.
How can I tell if moisture is getting behind the stucco?
Look for a pattern: wet-weather changes, staining, peeling or blistering finishes, musty interior odors, soft areas, rust staining, or damage near windows, roof transitions, penetrations, and the wall base. Use meters and thermal imaging only to compare suspect areas with known-dry areas; arrange controlled professional testing when the source is uncertain.
What quick fixes should I avoid?
Avoid filling every crack with caulk, coating over stains, burying the weep screed, and soaking the wall with a hose to “test” it. These steps can trap evidence, block drainage, or introduce more water without fixing the defect.
When is DIY stucco repair reasonable?
DIY is reasonable only for a narrow, localized crack that stays stable over documented observations and is dry, not displaced or stepped, and surrounded by firm, bonded material. There must be no staining, bulging, hollow areas, rust, soft material, interior symptoms, or recurring wet-weather change. Hire a qualified professional when any of those conditions is absent or uncertain, or when repair requires stucco removal or reconstruction of flashing or WRB.