
Introduction
Efflorescence on stucco can be removed gently and kept from returning with careful cleaning and moisture management.
You’ll learn practical steps for identifying efflorescence, selecting safe cleaners, washing without damaging the surface, and applying simple prevention techniques to minimize future moisture-related appearances.
Key takeaways
- Identify efflorescence as mineral salts migrating to the surface after moisture.
- Careful cleaning uses gentle methods to avoid etching or stucco damage.
- Address moisture sources first, then clean to prevent quick reoccurrence.
- Test cleaning on a small area before full application practice.
- Use mild cleaners and soft brushes; avoid high-pressure washing on stucco.
- Consult pros for extensive staining or structural concerns beyond DIY scope.
Table of Contents
- Introduction
- Key takeaways
- What is efflorescence?
- How efflorescence forms on stucco (causes)
- Safety and prep before cleaning stucco
- Gentle, step-by-step methods to remove efflorescence
- Preventing efflorescence from returning
- Common mistakes and pitfalls to avoid
- Costs, timelines, and deciding between DIY and pro services
- Conclusion
- FAQ
What is efflorescence?
Efflorescence is a powdery or crystalline white deposit that shows up on stucco when salts are carried to the surface by moisture moving through the wall. For homeowners, it looks like chalk or a crusty coating rather than mold or paint, and it tends to appear near joints, flashings, or other high-moisture spots on exterior surfaces. The salts are usually calcium, magnesium, sulfate, or carbonate compounds that dissolve in water and migrate to the surface as the water evaporates; this is a chemical process rather than a biological one, which helps distinguish it from organic growth or simple staining.
Understanding the difference between efflorescence and stucco deterioration is crucial for deciding on repair steps, because true damage like cracking or spalling requires a different approach than surface salt deposits. Common signs include recent rain, high humidity, or poor drainage, as well as roof line leaks or vapor movement through the wall that bring moisture behind the finish. This quick framing helps you decide whether cleaning is enough or if you should arrange a professional assessment to identify underlying moisture sources before any repair work begins.
Visual checkpoints to identify efflorescence
Before you start any treatment, confirm it’s indeed efflorescence. Use these simple tests and visual signs.
- Water dab test: Dab a small area with water. If the deposit disappears, it’s likely efflorescence.
- Scratch test: Gently scratch the surface. Efflorescence should flake off easily; if not, it might be paint or other residue.
- Appearance: Look for chalky white spots, powder, or crusts.
- Location: Check near joints, flashings, or high-moisture areas like gutters and downspouts.
- Moisture history: Consider recent rain or high humidity. Efflorescence often appears after wet periods.
- Avoid skipping: If you miss efflorescence, it’ll keep reappearing, and you might face deeper moisture issues.
Quick rule: If in doubt, consult a professional. They can confirm if it’s efflorescence and advise on next steps.
Why it’s usually cosmetic — and when it isn’t
Efflorescence is primarily a cosmetic issue. It doesn’t structurally harm your stucco but can indicate underlying moisture problems.
Cosmetic: Efflorescence is just salt deposits on the surface. It’s unsightly but doesn’t affect your home’s integrity.
However, it might hint at moisture issues that could lead to bigger problems if left unaddressed.
Moisture issues: Persistent efflorescence could signal poor drainage, leaks, or vapor drive through the wall. These can cause rot, mold, or structural damage over time.
If you notice efflorescence along with other signs of moisture damage, don’t ignore it. Get a professional inspection to rule out any hidden issues.
How efflorescence forms on stucco (causes)
Efflorescence on stucco requires three essentials: soluble salts, moisture, and a migration pathway that carries the salts to the surface, typically through capillary action within the wall assembly. Salts originate from cementitious materials in the stucco or mortar, groundwater or soil minerals, and external sources like de-icing salts or lime-based finishes that interact with water. Moisture behavior starts with rainfall, humidity, or leaks, which dissolve salts and create a brine that moves toward the surface as it dries.
Mapping typical migration pathways helps with diagnosis, including cracks, joints, porous render, or damaged substrate that allow water to travel inward; more permeable textures tend to show efflorescence more visibly. Distinguishing efflorescence from mold, mineral staining, or paint defects is important, and you should assess moisture sources, damage extent, and location as you plan remediation. Practical checks include testing moisture levels, inspecting drainage and flashing, reviewing recent material changes, and planning to address both salts and moisture to prevent recurrence.
Common entry points and pathways for moisture
Moisture finds its way into stucco through various routes, carrying soluble salts to the surface. Here are common entry points:
Poor Flashing: Inadequate or damaged flashing around windows, doors, and roof edges allows water to seep behind stucco.
Cracks and Gaps: Cracks in the substrate or render, as well as gaps at joints, provide direct pathways for moisture and salts.
Grading and Roof/Runoff Issues: Improper grading or insufficient roof drainage can cause water to pond against the walls, increasing the risk of efflorescence.
Salt Splash: De-icing salts or other external sources can splash onto stucco, leaving behind salt deposits that later react with moisture.
Environmental and climate factors that increase risk
Certain weather conditions and local practices can exacerbate efflorescence issues:
Rain: Prolonged or heavy rain increases the likelihood of moisture penetration, dissolving salts and carrying them to the surface.
Snow and Freeze-Thaw Cycles: Snow melt and freeze-thaw cycles can cause water to infiltrate stucco, while also damaging the substrate and creating new pathways for salt migration.
Humidity: High humidity levels allow moisture to remain in the air longer, increasing the chances of efflorescence formation.
Local Practices (De-icing Salts): The use of de-icing salts on nearby surfaces can lead to increased salt concentrations in the surrounding environment, raising the risk of efflorescence on stucco.
Safety and prep before cleaning stucco
Before any cleaning, wear appropriate PPE and work with proper posture; goggles or a face shield, a respirator or mask if dust is possible, chemical-resistant gloves, long sleeves, and non-slip footwear are baseline, and you should also consider ladder safety and safe lifting if access is elevated. Protect nearby landscaping and finishes with plastic sheeting, tarps, and masking; shield plants, mulch beds, windows, doors, and painted surfaces from cleaners and splatter, while accounting for wind and having a cleanup plan. Keep in mind weather constraints that affect stance and footing to reduce slips and trips on wet surfaces.
Prep basics include removing loose debris from the stucco, covering adjacent surfaces, and setting up containment to keep runoff out of storm drains or garden beds. Always start with a discreet test area, apply cleaners at low strength, and monitor for color change, etching, or damage over a day or two before proceeding. Check the stucco type, age, and condition to ensure the substrate is stable enough for cleaning, and beware of signs of active water intrusion that could worsen if disturbed during cleaning.
Tools and materials checklist
Before you start, gather these tools and materials to ensure a gentle yet effective cleaning process.
- Soft-bristle brush: For scrubbing without damaging the stucco surface. A stiff-bristle brush can cause etching.
- Mild cleaner or masonry-safe cleaner: Choose one that’s specifically designed for stucco and doesn’t contain harsh chemicals like bleach or acid.
- Water source: You’ll need a steady supply of water, either from a hose or a bucket.
- Sprayer or spray bottle: To apply the cleaner evenly. A sprayer can help prevent over-wetting and runoff.
- Protective covers (gloves, goggles): See our PPE section for details on what to wear to protect yourself from cleaners and dust.
- Drop cloths or tarps: To shield plants, mulch beds, windows, doors, and painted surfaces from cleaner splatter.
- Masking tape: To secure drop cloths in place and prevent them from blowing away in wind.
- Plastic sheeting or painter’s tape: For protecting door handles, light switches, and other sensitive areas.
Quick rule: Always check your tools and materials before starting to avoid mid-job trips to the hardware store.
When to call a professional
While efflorescence is usually cosmetic, there are times when it’s best to leave cleaning and assessment to the professionals. Here’s when to pick up the phone.
Extensive efflorescence: If more than 50% of your stucco surface is affected, it might be a sign of a larger underlying issue that requires professional diagnosis.
Recurring deposits after cleaning: If you’ve cleaned the efflorescence before and it keeps coming back, there may be a moisture source that needs to be addressed by a pro.
Large cracks or suspected structural moisture: Cracks wider than 1/8 inch or signs of water intrusion could indicate structural damage. Don’t attempt repairs yourself; call a professional immediately.
Gentle, step-by-step methods to remove efflorescence
Start with dry brushing to lift loose salts and inspect for cracks or damage that may need repair before any washing; this helps prevent driving salts deeper if the substrate is compromised. Follow with a careful water rinse using a low-pressure spray, testing a small inconspicuous area first and rinsing between steps to avoid residue buildup that can reappear after drying. If spots persist, apply a mild, pH-neutral detergent solution, scrub with a soft brush, and rinse thoroughly, repeating tests as needed to confirm progress without harming the surface.
When necessary, use a masonry-safe cleaner formulated for efflorescence, strictly following label directions, testing first, scrubbing lightly, and ensuring a complete rinse before re-testing. Conclude with a final inspection and a moisture management plan to reduce recurrence, documenting results and noting any follow-up steps for ongoing maintenance. Remember that patience and thorough rinsing between steps are essential to prevent re-depositing salts.
Step-by-Step Cleaning Process
Follow these practical steps to gently remove efflorescence from your stucco, ensuring safety and effectiveness.
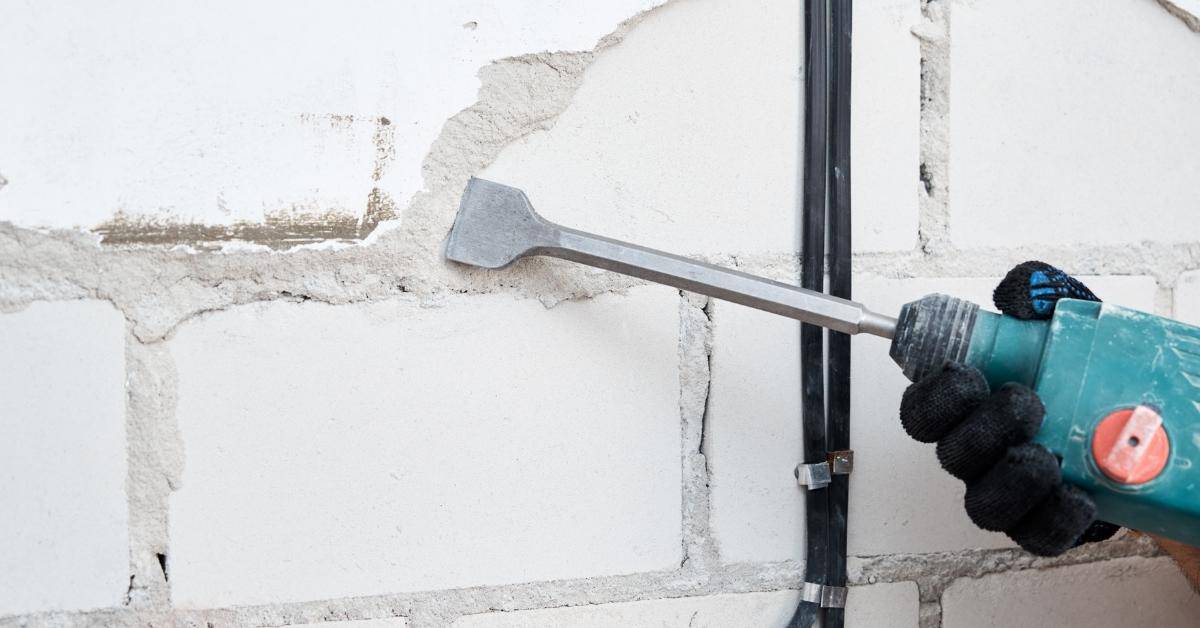
- Inspect the area for cracks or damaged spots. Repair any issues before cleaning.
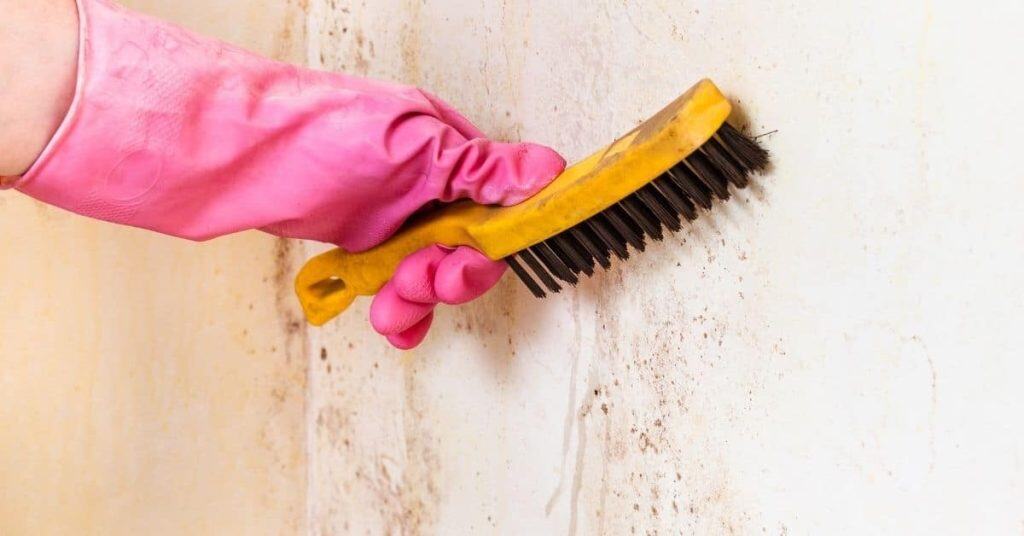
- Dry brush the surface using a stiff-bristled broom to lift loose salts. Work in small sections.
- Test a low-pressure water rinse on an inconspicuous spot. Rinse between steps to prevent residue buildup.
- If spots persist, mix a mild, pH-neutral detergent solution. Scrub gently with a soft brush and rinse thoroughly.
- Inspect the cleaned area. If necessary, use a masonry-safe cleaner following label directions. Re-test and re-rinse.
DIY gentle techniques (dry brush, water, mild soap)
Start with dry brushing to lift loose salts. Use a stiff-bristled broom and work in small sections from top to bottom.
Next, rinse the area using a low-pressure spray. Test on an inconspicuous spot first. Rinse thoroughly to prevent residue buildup.
For persistent spots, mix a mild, pH-neutral detergent with warm water. Apply the solution, let it sit for 15-30 minutes, then scrub gently with a soft brush. Rinse thoroughly.
When and how to use commercial masonry cleaners safely
Choose an acid or non-acid cleaner based on the severity of efflorescence. Always follow label directions.
Dilute the cleaner as instructed, then apply it to the surface using a sprayer or brush. Work in small sections and avoid over-saturating the stucco.
After scrubbing lightly, rinse thoroughly with clean water. Neutralize any remaining cleaner with a solution of baking soda and water (1 cup per gallon). Wear protective gear including gloves, goggles, and a respirator during application and neutralization.

Preventing efflorescence from returning
Focus on moisture control by improving drainage and grading to direct water away from stucco, which may involve regrading soil, adding swales, or installing permeability-friendly features to minimize pooling near foundations. Inspect and repair flashing, caulking, and sealants around windows and transitions, replacing deteriorated materials and ensuring proper water redirection away from the substrate to prevent infiltration. Promptly repairing cracks and selecting compatible fillers helps maintain breathability and reduces new chances for salts to travel to the surface.
Reduce water exposure from gutters and rooflines by extending downspouts away from walls, keeping gutters clear, and addressing roofline leaks that can drive moisture into the wall cavity. Manage surrounding landscape by keeping soil away from the stucco and providing adequate clearance, and consider permeable ground cover to prevent runoff pooling near walls. Establish a routine inspection plan to monitor moisture signs, re-seal as needed, and track weather-related triggers that could trigger new efflorescence events.
Products and treatments that help
Breathable masonry water repellents are your friends here. They let moisture escape while keeping out water from the outside. Use them on new or cleaned stucco, following manufacturer’s instructions.
Caution: Non-breathable coatings can trap moisture inside, causing more problems than they solve. Avoid them.
Sealants and caulks are also crucial. Use compatible, high-quality products to fill gaps around windows, doors, and transitions. Keep them in good shape with regular checks.
Maintenance routine and seasonal checks
Establish a yearly maintenance plan. Inspect your stucco every spring, looking for new cracks or signs of moisture. Clean off any efflorescence that’s formed.
Reapply breathable water repellents every 2-5 years, depending on weather and wear. Check manufacturer’s recommendations.
After storms or freeze-thaw cycles: Inspect your stucco for new damage. Repair cracks promptly to prevent water entry.
Regular gutter cleaning and downspout extension checks should also be part of your routine. Keep that water away from your walls.
Common mistakes and pitfalls to avoid
Identify and avoid common homeowner mistakes, such as using wire brushes or metal scrubbers and selecting harsh acids or overly aggressive cleaners that can damage the substrate and invite more moisture into the wall. Painting over efflorescence is a temporary fix that can trap moisture and lead to bubbling or peeling paint later; this is a frequent, costly misstep that obscures the underlying problem. Neglecting drainage, moisture sources, and stucco cracks allows recurring salts to migrate to the surface despite cleaning efforts.
Be cautious with cleaning agents and methods that push salts deeper, including high-pressure washing or cleaners with high pH or chlorides, and avoid improper sealing or coatings that trap moisture or reduce breathability. Consider safer alternatives like neutral cleaners and low-pressure washing, and always test moisture and substrate condition before proceeding. Plan long-term moisture management, including drainage, flashing, and grading, to prevent future efflorescence from returning.
Why Superficial Fixes Fail
Removing surface salts without addressing moisture sources is like mowing your lawn while it’s still raining. It might look better for a moment, but the problem will return.
Efflorescence is a symptom of excess moisture, not the cause. If you don’t fix the moisture issue, those white salts will keep coming back.
Masking efflorescence with paint or other cover-ups hides the problem, not solves it. Moisture gets trapped under these coatings, leading to bubbling or peeling paint and further damage.
How Incorrect Products Damage Stucco
Using the wrong products can do more harm than good. Non-breathable sealers trap moisture inside your stucco, creating a perfect environment for efflorescence and mold to grow.
Strong muriatic acid or other harsh chemicals can erode your stucco’s surface, weakening it and making it more susceptible to damage. High-pressure washing can also push salts deeper into the pores of your stucco, causing further issues.
Remember, stucco is a porous material that needs to breathe. Using products that seal in moisture or are too harsh can cause long-term damage.
Costs, timelines, and deciding between DIY and pro services
Evaluate typical cost factors such as the size of the affected area, severity of efflorescence, needed repairs, and chosen cleaners or coatings, while factoring in whether you will do it yourself or hire help. Create a practical timeline starting from site prep through cleaning, drying, any required repairs, and follow-up treatments, translating this plan into a realistic daily or weekly schedule. When deciding between DIY and professional help, weigh safety concerns like height, scaffolding, and chemical exposure, along with the accuracy of moisture source diagnosis and the potential impact on warranties and codes.
Prepare a pre-hire checklist with questions about credentials, insurance, references, scope of work, and a written, itemized estimate that includes moisture testing and post-work guarantees. Use a rough framework for costs, noting that prices can vary with area size and remediation needs, and consider whether additional repairs or coatings will be necessary after cleaning. Keep a simple planning tool on hand, such as a checklist or timeline template, to compare DIY practicality against pro quotes and ensure clear expectations before starting work.
When professional diagnostics are justified
If you’re dealing with persistent efflorescence, it might be time to call in the pros for a thorough diagnostic. Here’s when to consider it:
Interior damp spots: If you notice moisture inside your home near the affected stucco, it could indicate a more serious issue like a leak or water intrusion. A professional can pinpoint the source and extent of the problem.
Large stucco delamination: If chunks of stucco are peeling off, there’s likely underlying damage that needs to be addressed before you start cleaning. A structural inspection can ensure your home’s safety.
Quick checklist to vet contractors
Before hiring a pro, use this checklist to ensure you’re getting the best service for your money. Use it after you’ve gathered quotes and before signing any contracts.
- Stucco experience: Ask about their experience with stucco specifically. Not all masonry or exterior contractors are experts in stucco.
- References: Check at least three references from similar jobs. A good contractor should have no problem providing them.
- Moisture diagnostics: Ensure they’ll perform a thorough moisture test and provide a written report detailing their findings.
- Warranty: Ask about warranties on labor and materials. This protects you if issues arise after the job is done.
- Avoid surface fixes: Be wary of contractors who only suggest cosmetic fixes without addressing underlying causes.
- License and insurance: Verify they have the necessary licenses and insurance to operate in your area.
- Scope of work: Ensure their proposal clearly outlines what they’ll do, including any repairs or follow-up treatments.
- Itemized estimate: Make sure their quote is detailed and itemized, so you know exactly what you’re paying for.
Quick rule: If a contractor can’t provide satisfactory answers to these points, keep looking. It’s your home – don’t settle for second best.

Conclusion
Efflorescence on stucco is stubborn but manageable if you treat safety and material care as nonnegotiables. Tackle it now, and you protect the look of your home and the integrity of the wall for years to come.
Check the area with a small test patch, then proceed in a steady sequence: verify moisture sources and prep the surface, choose a gentle cleaning method, rinse thoroughly, let it dry, and recheck spots. If you see bright salts reappearing after a clean, address underlying moisture first; if the stain returns after a dry period, re-clean and seal or repaint as needed. Start with the least invasive method and move up only if the first attempt doesn’t hold.
Common mistakes to avoid are scrubbing too hard, using high-pressure tools on soft stucco, and skipping a test area or drying time. Always wear eye protection and gloves, work in good light, and test a small patch before a full clean. Don’t mix cleaners without reading labels, and never apply acidic cleaners on damaged or painted surfaces. If moisture problems persist, or you’re uncertain about repairs or sealing, call a pro—getting it right saves you time and avoids costly mistakes.
If you decide to push ahead, plan a measured timeline and keep safety as your guide. When in doubt, professional help is a smart, cost-efficient choice that protects your investment and keeps the project moving. You can handle the basics; stay deliberate, stay safe, and you’ll keep stucco looking good and lasting longer.
FAQ
What is efflorescence and why does it show up on stucco?
Efflorescence is salt that comes from the water moving minerals to the surface. It looks like white, powdery streaks or crusts on the stucco. It usually isn’t a sign of big structural trouble, but it means moisture is driving minerals out of the wall.
How do I remove efflorescence without wrecking the finish?
Let the wall dry first if you can. Scrub with a stiff brush and clean water, and use a mild cleaner like white vinegar or a gentle detergent if needed. Rinse well and let it dry completely before repainting or sealing.
Why shouldn’t I power wash the stucco to fix this?
Power washing can push water behind the surface and loosen the finish. It can break the texture and force moisture into cracks. If you must use a hose, use a light spray from a distance and keep it off the same spot for a while.
How can I stop efflorescence from coming back?
Fix the moisture source first. Check drainage, roof lines, and any leaks. After it dries, apply a breathable coating or sealer and keep moisture away from the wall.