

Introduction
Efflorescence on stucco is a white, powdery salt deposit that leaches to the surface. It happens when moisture moves salts from the wall to the exterior. You can usually see it as a chalky bloom on the plaster, often after wet spells.
Gentle cleaning is the first step to restore the look without harming the stucco. Use a soft brush or sponge and a mild cleaning solution, and avoid harsh chemicals that can damage the surface. After cleaning, consider sealing or repainting as needed and follow product labels and local rules for safe use and dwell times.
Key takeaways
- Identify moisture sources before cleaning to prevent rapid efflorescence return.
- Wear eye protection and gloves; avoid acid cleaners on uncoated stucco.
- Use a soft brush and mild detergent, rinsing thoroughly between passes.
- Check for cracking or crumbling stucco and address damage before drying.
- Seal exterior joints after cleaning to slow new salt migration.
- Maintain proper drainage and fix leaks to minimize future moisture intrusion.
Table of Contents
- Introduction
- Key takeaways
- What Is Efflorescence and Why It Forms on Stucco
- Identify and Assess the Problem Before Cleaning
- When to Clean Vs When to Investigate Moisture Sources First
- Gentle, Step-by-Step Cleaning Methods for Stucco
- Tools and Materials Checklist
- Drying, Monitoring, and Post-Cleaning Inspection
- Preventing Efflorescence from Returning: Fixes and Maintenance
- Repairing Stucco Damage and When to Hire a Professional
- Conclusion
- FAQ
What Is Efflorescence and Why It Forms on Stucco
Efflorescence is the white, powdery look you see on stucco. It happens when water moves salts from inside the wall to the surface and leaves them behind as it dries. It is a sign of moisture movement, not a problem with paint or color choice.
Think of it as evidence that water is traveling through the wall. The salts come from the material itself or from foundations and soils nearby. Understanding this helps you address the moisture, not just the surface stain.
How efflorescence differs from mold, dirt, and paint failure
Efflorescence isn’t like your everyday dirt or mold. It’s a white, powdery deposit that forms on the surface of stucco. Unlike paint failure, it doesn’t flake off.
Touch efflorescence. It feels like fine salt or chalk. Mold is usually green or black and has a musty smell. Dirt just looks… dirty.
Each problem needs different treatment. Efflorescence is a sign of moisture, not dirt or paint issues. So, scrubbing won’t help much.
Common moisture sources that drive efflorescence
Moisture gets into your stucco from various places. Here are the usual suspects:
Roof leaks, faulty flashing, or clogged gutters can all let water in. Improper grading around your home’s foundation can also cause problems.
Plumbing issues – like a leaky pipe – can seep moisture into walls and eventually show up on the surface. Capillary rise happens when moisture travels up from the ground through tiny pores in the stucco.
To prevent efflorescence, you’ve got to find where the water’s coming from and stop it at the source.
Identify and Assess the Problem Before Cleaning
Start with a quick walk around the area to map out the affected spots. Note whether efflorescence is active or dormant by checking if new white growth appears after rain or cleaning. Look for any cracks, peeling coatings, or staining that could signal a moisture path.
Document locations and severity with photos or sketches. Consider potential underlying issues like leaks, drainage problems, or improper flashing. Decide if you should proceed to cleaning or investigate moisture first.
Visual checkpoints for a reliable assessment
Use this checklist when you first notice efflorescence on your stucco. It helps map the issue and understand its extent.
- Powdery white residue: Look for a fine, white powder on the surface. This is typical efflorescence.
- Patterns near joints or ground level: Check around windows, doors, and where the stucco meets the ground. Moisture often travels along these paths.
- Efflorescence that reappears after rain: If it keeps coming back after cleaning, there’s likely an ongoing moisture issue.
Quick rule: Don’t skip any of these checks. Each one tells you something about the problem and where to focus your efforts.
Simple on-site tests and safe trial spots
Before you start cleaning, do some simple tests to confirm it’s efflorescence and check how your chosen cleaner works.
Dry brushing: Gently brush the affected area with a soft-bristled brush. If it turns white, it’s likely efflorescence.
Next, try spot wiping. Apply your chosen cleaner to a small, inconspicuous area and see if it removes the efflorescence without damaging the stucco.
When to Clean Vs When to Investigate Moisture Sources First
If the surface shows light, historic staining with no active moisture, gentle cleaning may be reasonable. If you detect ongoing dampness or new salt deposits after weather events, pause and locate the moisture source. Cleaning alone won’t stop the cycle if water keeps entering the wall.
Prioritize identifying leaks, drainage issues, or rising damp before aggressive cleaning. Use the findings to guide your next steps and set realistic expectations for results. Verify any recommendations against manufacturer guidance or local codes.
Signs that indicate a professional inspection is needed
Before you grab your cleaning supplies, take a step back and assess the situation. Some signs point to underlying issues that need professional attention.
- Large-scale stucco delamination: If chunks of stucco are falling off or peeling away, it’s more than just efflorescence.
- Interior water stains: Water spots on ceilings or walls could mean a leaky roof or plumbing issue.
- Persistent recurring efflorescence: If you’ve cleaned the same area multiple times in a short period, there’s likely an ongoing moisture source.
- Mold growth: Efflorescence is one thing, but mold can indicate serious water intrusion and health risks.
- Cracking or warping of stucco: These signs could point to structural issues or improper installation.
- Wet or damp areas around the foundation: Standing water or high moisture levels near the base of your home can drive efflorescence.
- Gutters and downspouts in disrepair: Improper drainage can lead to water buildup against your stucco, promoting efflorescence.
- Plumbing leaks: Leaky pipes or fixtures can cause moisture problems behind the stucco.
Quick rule: If you spot any of these signs, it’s time to call a professional. Cleaning without addressing the root cause is just a temporary fix.
Prioritizing repairs to stop recurrence
Efflorescence is like a weed – if you don’t address the roots, it’ll keep coming back. Here’s how to tackle the problem in the right order.
Step 1: Identify and fix active leaks. This could be anything from a leaky pipe to a damaged roof. Until these are fixed, cleaning is just putting a band-aid on the problem.
Step 2: Improve drainage. Make sure water isn’t pooling around your foundation or against your stucco. This might involve fixing gutters, installing downspout extensions, or even grading your yard to encourage water runoff.
Step 3: Once leaks are fixed and drainage is improved, then it’s time to clean the efflorescence. By following this order, you’ll minimize the chances of it coming back.
Gentle, Step-by-Step Cleaning Methods for Stucco
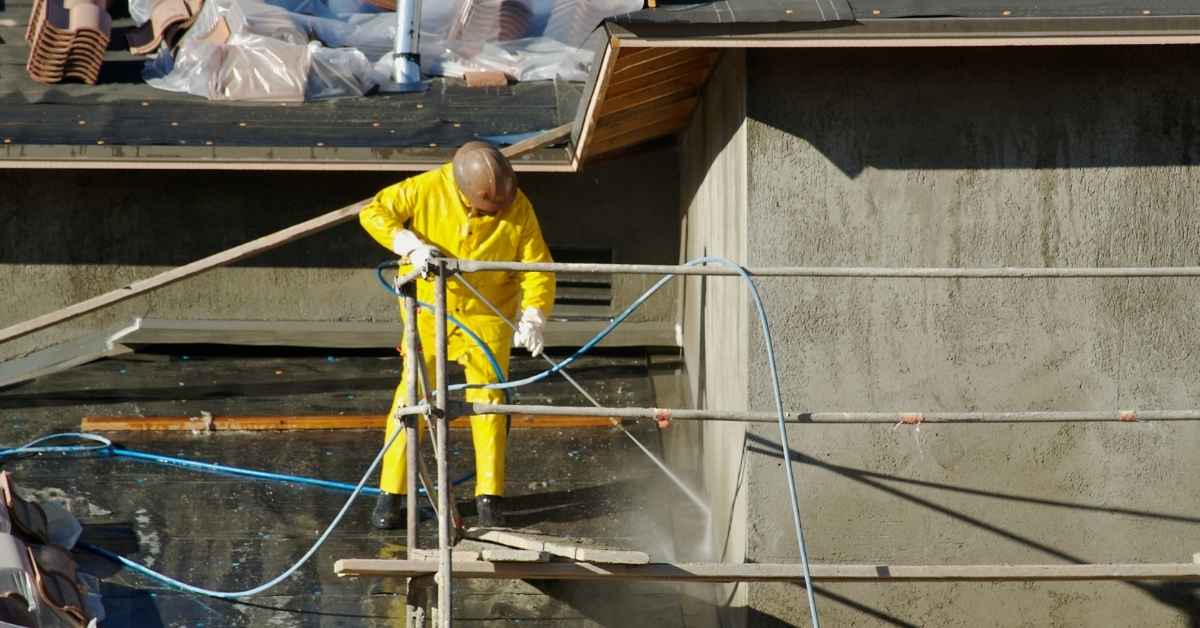
Begin with dry brushing or light dusting to remove loose deposits. Then use a soft brush and plain water or a mild, non-alkaline cleaner and rinse thoroughly. Avoid high-pressure methods that can damage the texture.
When you need more cleaning power, proceed gradually with diluted cleaners as directed by product labels. Always allow the wall to dry completely between steps and document any changes in appearance. Include a post-cleaning inspection to confirm results.
Step-by-Step Cleaning Process
Follow these clear steps to gently clean your stucco, preserving its texture and coatings.
- Inspect the area: Check for any damaged or loose parts before starting. Safety first!
- Gather tools: You’ll need a soft-bristle brush, low-pressure spray nozzle, mild cleaner, and protective gear like gloves.
- Wet the surface: Lightly mist the area with water to dampen it, not soak it. This helps prevent dust from spreading.
- Brush gently: Using your soft-bristle brush, work in small sections, brushing from top to bottom. Be gentle; you’re just removing loose salts, not scrubbing paint off.
- Rinse carefully: Use a low-pressure spray nozzle to rinse the area thoroughly. Check for any remaining deposits and repeat if necessary.
- Let it dry: Allow the stucco to air-dry completely before inspecting or applying any sealants. This could take a few days, depending on weather conditions.
- Inspect and touch up: Once dry, check for any missed spots or damage. Touch up as needed.
Dry brushing and low-pressure rinsing technique
Start by choosing the right brush – soft, stiff bristles are best for stucco. A natural fiber brush works well.
Begin at the top of the wall, working your way down in small sections. Brush gently but firmly, using short strokes to dislodge salts. Be careful not to scrub too hard and damage the surface.
After brushing each section, use a low-pressure spray nozzle to rinse thoroughly. Hold the nozzle at least 12 inches away from the wall and keep the water flow steady and gentle. This helps prevent driving water into the stucco.
Mild detergent and vinegar alternatives (DIY and commercial options)
For tougher efflorescence, use a mild, pH-neutral cleaner. These are gentler on stucco coatings.
DIY option: Mix equal parts white vinegar and water in a spray bottle. Apply, let it sit for 15 minutes, then rinse off thoroughly. Caution: Vinegar is acidic; test first on a small area to ensure it doesn’t damage your finish.
Commercial options: Look for cleaners labeled ‘mild’, ‘gentle’, or ‘pH-neutral’. Always follow the manufacturer’s instructions. Test first in an inconspicuous spot before applying to the entire area.
Poultice or soft scrub for stubborn deposits
A poultice can help draw out tough efflorescence. Mix a thick paste using baking soda and water, or use a commercial poultice product.
Apply the poultice to the affected area, covering it with plastic wrap to keep it moist. Let it sit for 24-48 hours, then gently remove it and rinse thoroughly.
Important: Ensure no residue remains after rinsing. Leftover poultice can trap moisture, leading to further efflorescence or mold growth.
Tools and Materials Checklist
Gather brushes with soft bristles, a spray bottle or low-pressure sprayer, and a breathable cleaner labeled safe for stucco. Use a long-handled tool to reach higher areas without overreaching. Have a clean, dry rags or towels for blotting and drying as needed.
Avoid high-pressure washers, acidic cleaners, and harsh solvents that can erode texture or coatings. Prioritize quality, durable items and follow label directions for safety and effectiveness. Verify any product choices against manufacturer instructions and local requirements.
What to Avoid to Prevent Damage
Before you start cleaning, know what’s off-limits. These tools and methods can harm your stucco.
- Avoid high-pressure washers: They can damage the stucco surface.
- Skip harsh acids: Like muriatic acid, they can eat away at stucco.
- No wire brushes or abrasive pads: These can scratch and wear down the stucco finish.
- Don’t use metal ladders on stucco: They can leave marks or damage the surface.
- Stay clear of power tools with rotating bristles: They can create swirl marks.
- No dry brushing without testing first: It can dislodge loose material, causing more mess.
- Don’t use undiluted cleaners: They can penetrate too deeply and cause damage.
- No scrubbing with hard-bristled brooms: They can wear down the stucco finish.
Quick rule: Always test methods on a small, hidden area first.
Personal Protective Equipment and Safe Work Practices
Safety first! Here’s what you need to protect yourself and your surroundings while cleaning.
- Wear gloves: To protect your hands from cleaners and debris.
- Use eye protection: Goggles or safety glasses to keep chemicals out of your eyes.
- Secure ladders safely: Use stabilizers or have someone hold the ladder for you.
- Protect landscaping and neighbors: Lay down drop cloths or tarps to catch runoff.
- Wear long sleeves and pants: To protect your skin from cleaners and sunlight.
- Work in manageable sections: To avoid fatigue and mistakes.
- Clean up spills immediately: To prevent slipping hazards.
- Dispose of chemicals properly: Follow local guidelines to protect the environment.
Quick rule: Always prioritize safety over speed. Take your time and follow these practices.
Drying, Monitoring, and Post-Cleaning Inspection
After cleaning, allow the wall to dry fully before assessing any remaining deposits. Use gentle airflow or natural drying conditions and watch for new salt growth during the drying period. Check after a few days of warm, dry weather and again after a rain event.
Keep an eye on the affected areas over the following weeks and months. Document any reappearance and note seasonal timing that correlates with moisture. Reference your local guidelines for best timing on routine checks.
Visual and moisture checkpoints after cleaning
Once you’ve completed the cleaning process, it’s crucial to re-check your stucco for any remaining issues. Here’s a simple checklist to ensure everything is in order.
- Inspect cleaned areas: Look for any residual salts or efflorescence that may have been missed during the initial cleaning.
- Check for damp spots: Moisture can hide beneath the surface, causing efflorescence to reappear. Use a moisture meter to detect any dampness.
- Re-test for source issues: If you found moisture during your initial inspection, re-test after cleaning to ensure the source has been addressed.
- Examine corners and joints: These areas are prone to efflorescence due to trapped moisture. Ensure they’re clean and dry.
- Inspect under eaves and overhangs: Moisture can collect here, leading to efflorescence. Make sure these areas are clear.
- Check around downspouts and gutters: Clogged or improperly installed drainage can cause moisture buildup. Ensure water is draining correctly.
- Examine any cracks or holes: These can allow moisture to penetrate, leading to efflorescence. Seal any gaps you find.
- Re-evaluate your repairs: If you made repairs prior to cleaning, ensure they’re still intact and effective.
Quick rule: Always re-check your work after cleaning to ensure no issues remain. It’s better to catch problems early than to let them worsen over time.
When to repeat cleaning and how often to inspect
Efflorescence can reappear if not addressed properly or if conditions change. Here’s a guide to help you set a monitoring cadence based on severity and risk factors.
- Light efflorescence: Inspect annually, clean every 2-3 years. Keep an eye on weather patterns that may exacerbate the issue.
- Moderate efflorescence: Inspect semi-annually, clean every 1-2 years. Address any moisture sources promptly to prevent worsening.
- Severe efflorescence: Inspect quarterly, clean as needed. Keep detailed records of changes to detect trends and adjust your maintenance plan accordingly.
- After major weather events: Inspect immediately after heavy rain, snow melt, or other significant weather events that may cause moisture buildup.
- After structural changes: If you’ve made repairs or alterations to your home, inspect the affected areas to ensure no new efflorescence has formed.
- Document changes: Keep a record of when and what you cleaned, any repairs made, and the results of your inspections. This will help you track trends over time.
Quick rule: Regular monitoring and cleaning are key to preventing efflorescence from returning. Set a schedule based on severity and adjust as needed.
Preventing Efflorescence from Returning: Fixes and Maintenance
Address moisture entry with practical, breathable fixes such as proper grading, clean drainage paths, and effective flashing details. Ensure gutters and downspouts direct water away from the wall base. Consider landscaping adjustments to reduce soil moisture near the stucco.
Use breathable sealants or coatings only as appropriate and follow manufacturer guidance. Regularly inspect joints, penetrations, and sealants for signs of moisture movement. Note that these steps aim to limit water reaching the inner wall rather than fully sealing moisture.
Flashing, gutters, and drainage fixes that matter
Proper flashing around windows, doors, and roof intersections is crucial to keep water from seeping behind your stucco. Inspect these areas regularly for damage or gaps.
Gutters should be clean and securely attached, directing water away from the foundation. Check they’re not overflowing near the house, as this can lead to efflorescence.
The ground around your home should slope away from the walls. If it slopes towards the house, water will pool against the stucco and encourage efflorescence. Regrade if necessary.
Breathable sealers and coatings—when and what to consider
Breathable sealers allow moisture to escape while preventing water intrusion. They’re ideal for stucco, which needs to ‘breathe’ to prevent trapped moisture from causing efflorescence.
Impermeable coatings can trap moisture, leading to problems. But breathable sealers may not be suitable for areas prone to heavy rain or flooding.
Before applying any sealer, check the product’s technical data. It should specify that it’s compatible with stucco and provides adequate protection in your climate. Always follow manufacturer guidance.
Repairing Stucco Damage and When to Hire a Professional
Common repairs include addressing cracks, delamination, or damaged coatings that can allow moisture behind the siding. Choose repair methods that restore the wall’s ability to shed water and maintain breathability. Avoid quick fixes that seal in moisture.
Some repairs require specialized skills and tools, so consider professional assessment when you encounter structural concerns or extensive damage. Use trusted guidance from permit and code sources if a repair triggers local requirements. Verify scope and expectations before proceeding.
Simple Patching vs Full-Section Repair
For minor cracks and holes, simple patching is usually sufficient. But for larger damage or delamination, a full-section repair might be needed.
Patching: Suitable for small damages (less than 1/4 inch). Use a flexible stucco patching compound to fill cracks and holes. Match texture with surrounding stucco using a trowel or brush.
Full-section repair: Necessary when stucco is delaminating, has large gaps, or shows signs of moisture intrusion. This involves removing damaged stucco, repairing the substrate, and applying new stucco to match existing texture and breathability.
Choosing a Qualified Contractor and What to Ask
When damage is beyond DIY repair, hire a professional. Here’s how to choose the right one.
Experience: Look for contractors with proven experience in stucco repair. Ask about their history with similar projects.
References and Warranty: Request references from past clients. Check if they offer warranties on their work, which can indicate confidence in their craftsmanship.
Moisture Diagnosis: Ensure they understand moisture diagnosis to prevent future efflorescence. Ask about their process for identifying and addressing moisture sources.
Scopes and Estimates: Get written scopes of work and detailed estimates from at least three contractors. This helps compare services and costs accurately.
Conclusion
Efflorescence is a sign of moisture in the wall system, not a permanent stain. Handle it with care, follow the low-risk methods, and you’ll protect the stucco and keep your home looking right.
Start by checking moisture sources, then move through a gentle cleaning plan in proper order: test a small hidden area, wear eye protection and gloves, choose a mild cleaner and apply softly, rinse with a gentle stream, then dry thoroughly and monitor for a few days. If you see water intrusion, cracks, or new bloom after cleaning, pause and address the moisture first—prevention matters as much as cleaning.
Common mistakes to avoid are blasting with high-pressure water or harsh chemicals, scrubbing aggressively, and skipping the drying or monitoring steps. Always test in a small area first, keep the surface damp while cleaning as directed, and document any damage you see. If the problem repeats or you uncover cracks, dai
ly or large-scale stucco damage, or persistent moisture, call a professional—don’t push past the point where safe, simple fixes stop working. With care, you can keep stucco looking clean and ready for long-term protection. Strong finish starts with smart checks, slow cleaning, and thorough drying.
FAQ
How can I tell if the efflorescence is still active or just a surface stain?
If you see a powdery white deposit, it’s likely efflorescence. If rain or humidity returns new white deposits after cleaning, moisture is still moving through the wall. Check for ongoing moisture sources and follow the manufacturer’s guidance for cleaners and sealers.
Can I use a stiff brush on painted stucco to remove efflorescence?
Avoid aggressive scrubbing on painted surfaces. Use a gentle cleaner per label instructions and test in an inconspicuous spot first. If the paint is old or peeling, consider touching up or repainting after the wall dries.
What should I do if I uncover cracks or moisture behind the stucco during cleaning?
Stop and assess. Look for gaps, cracks, or failed flashing and check for standing water behind the wall. Follow local rules and product instructions, and consider professional help if you see structural damage or persistent moisture.
How do I prevent the efflorescence from coming back after cleaning?
Let the surface dry completely before sealing. Fix any moisture sources, improve drainage, and use a breathable, compatible seal or coating per product instructions. Do routine inspections after wet weather to catch problems early.