

Introduction
Sleeve + flange is a method to seal vents, linesets, or pipes where they pass through stucco.
You install a sleeve through the opening, then attach a flange to seal against the wall and weather. This approach helps keep water out and makes future maintenance easier.
Start by choosing a sleeve size that fits the pipe and a flange compatible with stucco surfaces. Check manufacturer instructions and local rules for sealing materials. Apply sealant as directed on the product label and secure the flange flush against the wall, with a plan for finish coatings.
Key takeaways
- Choose sleeve + flange for irregular or high-traffic penetrations through stucco.
- Verify building science goals—air, water, and vapor control must align.
- Check local code and inspector expectations before ordering sleeves and flanges.
- Prepare clean, dry surfaces; remove loose stucco around the penetration.
- Detail flange sealants and gaskets compatible with stucco substrates.
- Plan inspection checkpoints during installation to avoid hidden moisture pathways.
Table of Contents
- Introduction
- Key takeaways
- Method Overview and When to Choose Sleeve + Flange
- Building Science and Performance Goals
- Code, Inspection, and Project-Prep Checklist
- Tools and Materials Checklist
- Material Specs and Standards Explained
- Step-by-Step Installation Procedure
- Integration Details for Common Penetration Types
- Visual Checkpoints, Inspection Checklist, and Maintenance
- Conclusion
- FAQ
Method Overview and When to Choose Sleeve + Flange
The sleeve + flange method uses a cylindrical sleeve inserted through the stucco opening, with a flush flange that seals to the surface. This creates a continuous barrier around the penetrant and provides a stable mounting point for the exterior finish. It is often preferred when there are multiple penetrations or movement concerns, or when a neater, more manufacturer-friendly seal is desired over basic caulk or boot methods.
Consider this approach for new construction where you can install sleeves during the wall assembly, or for retrofit jobs where a solid anchor is needed. It is especially useful for vents, linesets, and pipes that pass through irregular stucco applications or WRB layers, reducing crack propagation and moisture pathways compared to simpler plugs. Always verify compatibility with existing assemblies and local rules before choosing this method.
What the sleeve and the flange each do
The ‘sleeve + flange’ method is a two-part system designed to seal penetrations through stucco effectively. Let’s break down what each component does:
Sleeve: This is your through-wall barrier. It’s a rigid, usually plastic or metal, tube that goes right through the stud cavity, from the interior wall to the exterior. The sleeve keeps moisture out and maintains the building’s air barrier.
Flange: While the sleeve handles the inside, the flange takes care of the outside. It’s a wide, flat ring that sits on top of the stucco (cladding) and under the weather-resistive barrier (WRB). The flange creates a tight seal against the wall, preventing water from getting in at the penetration point.
Typical applications (vents, refrigerant linesets, plumbing, electrical)
The sleeve + flange method is versatile and can be used for various penetrations. Here are some typical applications:
Vents: Chimneys, bathroom fans, or dryer vents all need proper sealing at the wall penetration to prevent moisture intrusion and maintain energy efficiency.
Refrigerant linesets: For HVAC systems, using sleeves and flanges ensures a tight seal around the refrigerant lines that pass through the exterior walls. This helps maintain system pressure and prevents air leaks.
Plumbing and electrical penetrations: Pipes and wires also need protection from the elements. The sleeve + flange method can be used for both, ensuring waterproofing and maintaining the integrity of your wall’s electrical insulation.
Building Science and Performance Goals
Focus on keeping moisture out of the wall cavity while maintaining an effective air barrier around the opening. The sleeve should allow drainage away from the substrate and reduce capillary action into the wall assembly. A properly installed flange helps avoid pinholes and gaps that can trap water or permit air leaks.
Thermal performance matters too, so ensure there is proper insulation continuity around the penetration and that cold bridging is minimized. Pest-control considerations require smooth, sealed edges and compatible materials that resist insect ingress. Check product labels and instructions for any specific performance claims before proceeding.
Moisture management and flashing integration
The flange plays a crucial role in managing moisture. It must tie into the water-resistive barrier (WRB) to prevent bulk water from getting behind your stucco.
First, ensure the WRB is continuous and undamaged around the penetration. Then, seat the flange on top of it, creating a tight seal with flashing tape or caulk.
Pro tip: Use a wide, flexible flashing membrane to bridge any gaps between the WRB and the stucco. This helps shed water effectively.
Thermal and condensation considerations for linesets and pipes
Linesets and pipes can cause thermal bridging, leading to cold spots where condensation forms. This can lead to mold growth or damage over time.
To prevent this, ensure all linesets and pipes are properly insulated. The sleeve + flange method helps by providing a tight seal around the penetration, minimizing heat transfer.
Also, make sure there’s adequate drainage. Condensation should be able to drain away freely, not get trapped behind your stucco.
Check: Insulation is in good condition and covers the entire length of the line or pipe within the wall cavity. Drainage paths are clear and unobstructed.
Code, Inspection, and Project-Prep Checklist
Review local building code requirements for through-wall penetrations, fire-stopping, and facade finishes. Gather manufacturer instructions for sleeves, flanges, sealants, and backing materials to confirm installation steps. Document any required inspections or approvals before work begins.
Pre-install inspections should include checking the stucco substrate integrity and the WRB condition. Confirm that the opening is appropriately sized and free of loose material. Prepare a site plan for flashing, sealant joints, and drainage directions according to the project specs.
Fire, smoke and pest-stopping requirements
Before you start any work that involves penetrations in your walls or floors, use this checklist to ensure you’re meeting fire, smoke, and pest-stopping requirements. This will help prevent costly rework and keep your project up to code.
- Check wall/floor assembly ratings: Ensure the assemblies you’re penetrating are rated for fire resistance and smoke control. Check local codes and system labels to confirm.
- Inspect penetration firestops: Verify that existing firestops around pipes, wires, etc., are intact and meet code requirements. Look for any damage or missing material.
- Check sealant type: Use intumescent or similar fire-resistant sealants around penetrations. Do not use regular caulk or silicone.
- Measure penetration size: Ensure the penetration is no larger than necessary for the pipe, wire, etc., to pass through. Excessive gaps can compromise fire resistance.
- Inspect rated collars and sleeves: If using collars or sleeves, ensure they are rated for your specific application and are installed correctly according to manufacturer instructions.
- Check pest barriers: Ensure any added pest barriers (like steel wool or copper mesh) do not compromise fire resistance. Check local codes for acceptable materials.
- Verify smoke seal integrity: For smoke-rated assemblies, ensure the smoke seal is intact and functioning properly. Test it by closing the door or damper and checking for any gaps.
- Check for voids around penetrations: Ensure there are no voids or empty spaces around your penetration that could allow fire or smoke to bypass the firestop.
Quick rule: Always err on the side of caution when it comes to fire and smoke resistance. If you’re unsure about any aspect, consult with a local building inspector or certified fire protection specialist before proceeding.
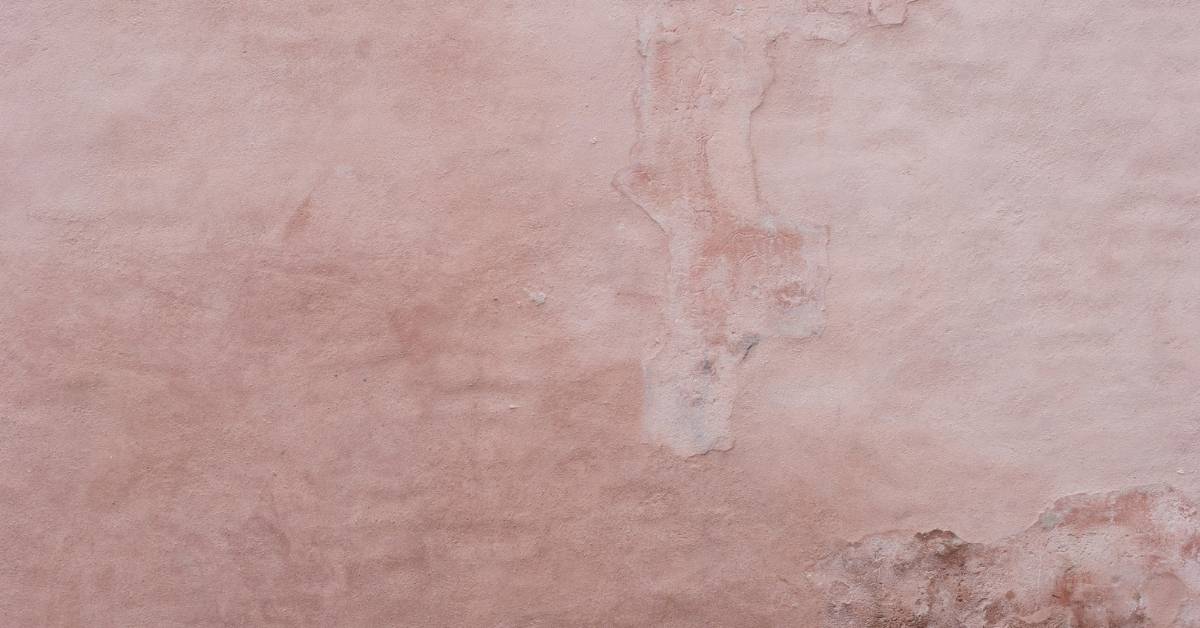
Substrate and Stucco Condition Assessment
Before installing a stucco sleeve, it’s crucial to assess the existing substrate and stucco condition. This checklist helps ensure your wall can safely accept the sleeve without fracturing.
- Stucco Thickness: Measure stucco thickness at multiple locations using a screwdriver or a small hole saw. Confirm it’s at least 3/4″ to 1″ (20mm to 25mm) thick.
- Lath Integrity: Gently tap the wall with a hammer or use a stud finder to locate laths. Check for any loose, damaged, or missing pieces. What goes wrong if you skip this: Inadequate support for the sleeve, leading to cracking.
- Backing Material: Ensure the backing material is solid and stable. It should not be crumbly or give way when pressed gently with a trowel or screwdriver.
- Cracks: Inspect for any cracks in the stucco. If present, they should be less than 1/8″ (3mm) wide and stable (not growing).
- Moisture Content: Check for signs of moisture or dampness behind the stucco. High moisture can cause problems with adhesion and sleeve integrity.
- Slope: Verify that the wall has a slight outward slope (at least 1/8″ per foot) to facilitate water drainage.
- Existing Sleeves: If there are existing sleeves, check their condition. Any damaged or loose sleeves should be replaced before installing new ones.
- Fire Stopping: Ensure that any fire-stopping materials around pipes or wires are intact and in good condition. Refer to the earlier section on ‘Fire, smoke and pest-stopping requirements’.
Quick rule: If you’re unsure about any aspect of your wall’s condition, consult a local stucco specialist or building inspector before proceeding.
Tools and Materials Checklist
Keep a practical, DIY-friendly toolkit: measuring tools, a suitable cutting tool for the opening, and a penetrating sleeve that fits the chosen flange. Include mounting hardware, sealants compatible with stucco, and a backer material or foam if required by the sleeve design. Don’t forget a caulk gun and cleaning supplies for a tidy finish.
Have personal protective gear, marking tools for accurate placement, and a level or straightedge for alignment. Stock extra sleeves and flanges in case of rework, plus moisture- and UV-resistant components rated for exterior exposure. Always verify product compatibility with the actual wall system and finishes prior to purchase.
Recommended materials and compatibility notes
Before you start, ensure your materials play nice together. Here’s a quick checklist.
- Sleeve material: PVC or metal? Check if it’s compatible with your stucco finish.
- Flange material: Same as above. Compatibility is key.
- Sealant type: Elastomeric, polyurethane, or silicone? Each has its pros and cons.
- Primer: Always use a primer to ensure sealant adhesion. Check your sealant’s data sheet for recommendations.
- Backer material: Fiberglass mesh or foam? Both work, but they have different installation methods.
- Flashing type: Galvanized metal or plastic? Choose based on your pipe/line size and location.
- Fasteners: Stainless steel screws are best for stucco. Avoid galvanized as they can corrode.
- Tape: Butyl or polyethylene? Both work, but butyl is more flexible.
Quick rule: Always check manufacturer data sheets to ensure compatibility and correct installation methods.
Sealants, backer, and flashing products to have on hand
Here’s a list of products you’ll need. Check your specific project for any additional requirements.
- Elastomeric sealant: Good for larger gaps and movement. Great for stucco.
- Polyurethane sealant: Tough and durable. Ideal for high-movement areas like vents.
- Silicone sealant: Flexible and great for small gaps. Not ideal for large movements or behind the flange.
- Fiberglass mesh backer: Easy to install, but can be messy. Great for larger penetrations.
- Foam backer: Preformed shapes make installation a breeze. Ideal for smaller penetrations.
- Galvanized metal flashing: Durable and long-lasting. Good for larger pipes and linesets.
- Plastic flashing: Inexpensive and easy to install. Suitable for smaller penetrations.
- Butyl tape: Flexible and great for sealing small gaps around the sleeve before installing the flange.
Quick rule: Always check product data sheets for solvent compatibility when using multiple sealants or backers.
Material Specs and Standards Explained
Look for sleeve wall thickness that suits the wall cavity and supports the flange without excessive compression. Verify flange material compatibility with exterior finishes and exposure to weather. Check UV resistance and long-term durability expectations on the product data sheet.
Reference applicable standards or manufacturer instructions for acceptable adhesives, sealants, and flashing details. If in doubt, consult the data sheet or contact the manufacturer to confirm installation limits and performance criteria. Do not rely on memory for critical spec values.
Choosing sleeve material and size — what to verify
The right sleeve material and size ensure a durable, watertight seal that won’t crack or leak. It’s crucial for protecting your pipes and ducts from moisture damage.
- Corrugated Metal Sleeve: Used for larger pipes (4″ and up), provides good strength and durability. Look for galvanized steel with a thickness of at least 26-gauge. Avoid thinner sleeves to prevent early rusting. Price range: $10 – $30 per sleeve.
- Rubber Sleeve: Ideal for smaller pipes (up to 3″), offers flexibility and good resistance to abrasion and chemicals. Check the durometer hardness, aiming for a balance between flexibility and durability (around 60-70 Shore A). Price range: $5 – $15 per sleeve.
- PVC Sleeve: Suitable for non-pressure applications, provides good chemical resistance. Ensure it’s rated for the intended use and temperature. Avoid using in high heat or pressure situations. Price range: $3 – $8 per sleeve.
- Fiberglass Reinforced Plastic (FRP) Sleeve: Offers excellent corrosion resistance, suitable for harsh environments. Check the glass fiber content, aiming for at least 30% for better strength. Price range: $15 – $40 per sleeve.
- Intumescent Sleeve: Used in fire-rated applications, expands when exposed to heat to protect pipes and ducts. Ensure it’s rated for the required fire resistance time (e.g., 2-hour, 4-hour). Price range: $25 – $60 per sleeve.
Using cheaper, thinner, or wrongly sized sleeves can lead to early failures, leaks, and even fires in case of intumescent sleeves. Always check the manufacturer’s guidelines for the specific pipe/duct size and annular gap requirements. The sleeve length should extend at least 12″ through the wall for proper support.
Pro tip: When buying sleeves, consider purchasing a few extra to account for any damages or mistakes during installation. Store them in a dry place to prevent moisture damage before use.
Flange and flashing options (integral, separate, flexible)
When it comes to flanges and flashings, you’ve got three main types to choose from. Each has its own strengths, so pick the one that fits your job best.
Rigid Flanges – These are solid pieces attached to the sleeve. They’re great for providing extra support where you need it, like at the top of a pier. But they can be a pain if you’ve got movement in your slab, as they won’t flex with it.
Flexible Membranes – These are like rubber sheets that stick to the sleeve and extend out. They’re fantastic for areas where there’s gonna be some give, like at expansion joints. But they can be a hassle to install if you’re not careful, as they need to be sealed properly.
Integrated Flashing Flanges – These are built into the sleeve itself. They’re easy to install and provide good protection against water intrusion. But they might not be the best choice if you’ve got a lot of movement in your slab, as they won’t flex like the membranes can.
Step-by-Step Installation Procedure
Start by marking the opening and cutting it true, ensuring clean edges. Insert the sleeve so it seats flush against the interior wall surface and attaches per the sleeve design. Affix the flange so it lies flat and aligned with the stucco plane.
Next, apply the appropriate sealant around the sleeve-flange interface and integrate any required backer material. Finish by repairing the stucco around the flange, ensuring a neat edge and proper drainage. Perform quick checks for gaps, movement, or misalignment before the seal cures.
Step-by-Step Installation Process
This section guides you through the practical steps to install a sleeve and flange through your stucco wall, ensuring a secure, weather-tight seal.
- Preparation: Inspect the area, gather tools, and ensure safety. Check local codes and project requirements.
- Marking and Cutting: Mark the centerline, score the stucco, and cut the opening using a reciprocating saw or jigsaw.
- Insert Sleeve: Insert the sleeve into the opening, ensuring it’s level and properly seated.
- Anchor Sleeve: Secure the sleeve with mechanical fasteners, following manufacturer’s guidelines to avoid compromising the WRB.
- Lap Flange: Lap the flange onto the WRB or flashing, ensuring proper overlap and adhesion. Seal any exposed edges.
- Final Checks: Inspect your work, ensure all components are secure, and check for any gaps or cracks.
- Cleanup: Remove debris, dispose of materials properly, and store tools safely.
Cutting and preparing the opening without cracking stucco
Scoring and carefully cutting the stucco opening prevents cracks and maintains the wall’s integrity.
First, mark the centerline using a pencil or chalk line. This ensures your cut is straight and accurate.
Next, use a utility knife to score the stucco. Apply firm, steady pressure along the marked line. Scoring helps control cracking by creating a weak point that will break cleanly.
Before cutting, support the stucco with a 2×4 or other backing material to distribute stress evenly and prevent cracks from forming. Use a reciprocating saw or jigsaw with a fine-tooth blade to cut along the scored line.
Installing the sleeve, anchoring, and tying the flange into WRB
Properly installing the sleeve and securing it to the wall ensures a durable, weather-tight seal.
First, set the sleeve depth. Ensure the sleeve is level and extends the correct distance beyond the stucco surface. Use shims or spacers if needed.
Next, mechanically fasten the sleeve. Drill pilot holes through the sleeve into the studs behind the stucco. Use screws that are long enough to penetrate the stud but not so long they compromise the WRB.
Finally, lap the flange onto the WRB or flashing. Ensure proper overlap (usually 4-6 inches) and apply a bead of sealant along the lap joint before adhering. Press firmly to ensure good adhesion.
Sealing, finishing, and restoring stucco surface
Proper sealing and finishing ensures a weather-tight, cosmetically acceptable result that blends with the existing stucco.
First, seal the annular gap. Apply a bead of sealant around the sleeve, filling any voids between the sleeve and the stucco. Ensure the sealant is compatible with your stucco and follows manufacturer guidelines.
Next, apply finishing coats or patching material. Use a high-quality, color-matched stucco mix to repair any damaged areas and blend with the existing surface. Apply in thin layers, allowing each to cure before applying the next.
Finally, inspect your work. Ensure all gaps are sealed, the stucco is properly finished, and there are no signs of moisture intrusion or cracking. If unsure, consult a professional.
Integration Details for Common Penetration Types
For HVAC linesets, ensure clearance to allow condensate drainage and maintain a straight path through the sleeve. Vent penetrations should be sized to avoid restriction and use non-restrictive seals that won’t degrade with heat. Plumbing stacks require airtight seals and proper venting considerations at the exterior opening.
Electrical conduits need protective sleeves for abrasion resistance and compatibility with outdoor enclosures. Each type should be evaluated for potential moisture ingress, heat generation, and compatibility with the stucco finish. Always match the sleeve and flange components to the specific penetration profile.
Refrigerant Linesets and Condensation Control
When dealing with refrigerant linesets, it’s crucial to ensure proper insulation and drainage to prevent condensation buildup behind the sleeve.
Insulate the lines before installing the sleeve. This helps maintain a consistent temperature and reduces condensation risk.
Ensure the sleeve is long enough to accommodate any bends or offsets in the lineset, avoiding voids where water could collect.
Maintain proper drainage. Slope the sleeve slightly downwards towards the penetration point to encourage any condensation to drain out.
Vents and Backdraft/Security Screening
Installing vents through stucco requires careful consideration of clearances, louvers, and screens to maintain a proper seal and prevent pest entry.
First, ensure the sleeve is wide enough to accommodate any required louvers or baffles in the vent. You don’t want to restrict airflow.
Install a screen or filter at the exterior opening of the sleeve to prevent pests from entering. Make sure it’s securely fastened and doesn’t interfere with the vent’s operation.
Preserve the weather seal by using an integral or flexible flashing that seals tightly around the vent and ties into the water-resistive barrier (WRB). This prevents moisture intrusion and maintains the vent’s efficiency.
Visual Checkpoints, Inspection Checklist, and Maintenance
Inspect the flange seating for a flat, gap-free interface with the stucco surface. Check sealant continuity and ensure there are no cracks or pulled edges around the opening. Confirm drainage direction is unobstructed and that there are no visible signs of moisture intrusion.
Schedule routine maintenance to recheck sealants and flashing after weather events or concrete curing shifts. Look for discoloration, cracking, or surface movement that could indicate seal degradation. Document inspections and follow the manufacturer’s maintenance guidance for longevity.
Pre- and post-install QC visual checkpoints
Use this checklist before closing the wall and after completion to ensure a solid, airtight seal.
- Sealant bead: Check for continuous, even bead around the sleeve. Incomplete or inconsistent beads can lead to air leaks.
- Flange laps: Ensure flanges are properly lapped and sealed at overlaps. Improper laps can cause water intrusion.
- Fastener placement: Verify fasteners are evenly spaced, secure, and not pulling on the stucco. Loose or misplaced fasteners can compromise the seal.
- Sleeve alignment: Check that the sleeve is plumb, level, and centered in the opening. Misaligned sleeves can cause stress fractures in the stucco.
- Stucco cracks: Inspect for any hairline cracks around the penetration before closing the wall. Cracks can compromise the seal and allow air/water intrusion.
- Flashing integrity: Ensure flashing is intact, properly installed, and not damaged or missing. Damaged flashing can lead to water intrusion and stucco damage.
- Backer board installation: Verify backer board is securely fastened, level, and free of defects. Defective backer board can cause sealant failure.
- WRB laps: Check that the weather-resistant barrier (WRB) laps are properly sealed at overlaps. Improper laps can lead to water intrusion behind the stucco.
Quick rule: Always double-check your work and inspect from multiple angles to ensure a thorough, airtight seal.
Long-term maintenance and when to reseal
Regularly inspect your penetrations for signs of wear or failure. Catching issues early prevents costly repairs.
- Sealant condition: Check sealant for cracks, bubbles, or discoloration. These are signs of sealant failure and indicate it’s time to reseal.
- Substrate cracking: Inspect stucco around the penetration for hairline cracks. Cracks can allow water intrusion and compromise the seal.
- Flange delamination: Check that the flange is still securely attached to the stucco. Delamination can cause water intrusion and stucco damage.
- Mold or mildew: Look for signs of mold or mildew growth around the penetration. This indicates moisture intrusion and a potential seal failure.
- Fastener condition: Verify that fasteners are still secure and not pulling on the stucco. Loose fasteners can compromise the seal.
- Flashing integrity: Ensure flashing is still intact, properly installed, and not damaged or missing. Damaged flashing can lead to water intrusion and stucco damage.
- Backer board condition: Inspect backer board for signs of damage or defects. Defective backer board can cause sealant failure.
- WRB laps: Check that the WRB laps are still properly sealed at overlaps. Improper laps can lead to water intrusion behind the stucco.
Quick rule: Inspect your penetrations annually, and address any issues promptly to prolong seal life and prevent costly repairs.
Conclusion
Protecting penetrations through stucco with the sleeve and flange method keeps water out, preserves your structure, and keeps the exterior looking clean. Done right, it’s durable, affordable, and safer for long-term performance than quick patches.
Ensure you follow a simple, real-world flow: check the project requirements and local codes, prep the area and materials, install the sleeve and flange, seal with the approved material, and then test for tightness and drainage before finishing. If in doubt, verify every step against the project prep and inspection requirements, and never skip a step in the sequence. Do a small-area test first to confirm fit, seal, and curing according to the product specs, then repeat in the remaining penetrations.
Common missteps to avoid include skipping proper surface prep or letting dust and old sealant contaminate the joint, using the wrong sealant or over-tightening hardware, and neglecting proper drainage or backer support. Always wear PPE, shut off nearby utilities when working near pipes or lines, and allow the sealant and any adhesives to cure fully before exposure to weather. If something feels off or you’re unsure about code compliance, stop and reassess rather than forcing a fit.
If the project involves high-stakes penetrations, unusual configurations, hidden utilities, or structural concerns, don’t push through alone—call a professional. With a solid plan, careful prep, and disciplined execution, you’ll have a reliable seal that lasts. Stay methodical, stay safe, and you’ll finish with a job that looks good and performs well.
FAQ
Is the sleeve + flange method right for my stucco penetrations (vents, linesets, pipes)?
It’s a good fit when you need a clean, adjustable passage that stays weather-tight. If the penetration is irregular or requires movement, this method helps accommodate it. Check manufacturer guidance and local rules to be sure.
What should I check on the sleeve and flange assembly before sealing?
Inspect for cracks, warping, or corrosion. Make sure the flange sits flat against the stucco and that the sleeve fits snugly without gaps. Read the product label for compatible sealants and installation notes.
How do I ensure proper sealing and flashing around the sleeve in stucco?
Clean the opening and roughen the surface where needed. Install any flashing per the manufacturer instructions, then apply the approved sealant around the flange and sleeve. Use manufacturer guidance or local rules to confirm silicone or polyurethane sealants are appropriate for your climate.
What common mistakes should I avoid with sleeve + flange installations?
Avoid over-tightening fasteners, which can crack stucco. Don’t rely on thin sealant beads alone; use the correct backing material and follow the product directions. If in doubt, verify steps with the label or installer instructions.